Homemade Ice Cream? Tested Maker Recipes
There’s nothing quite like the satisfaction of making ice cream from scratch in your own kitchen. The process is simpler than you might think, and the results are infinitely better than store-bought alternatives. When you invest in an ice cream maker, you unlock a world of creamy, customizable frozen desserts that reflect your personal taste preferences and dietary needs. Whether you’re craving classic vanilla or adventurous flavor combinations, tested ice cream maker recipes deliver consistent results every time.
The beauty of homemade ice cream lies in its simplicity and versatility. You control the sugar content, ingredient quality, and flavor intensity. No artificial stabilizers or excessive air whipping—just pure, honest ice cream made with love. This guide walks you through everything you need to know about using your ice cream maker effectively, from choosing the right recipe to troubleshooting common issues.
Understanding Your Ice Cream Maker
Before diving into recipes, it’s crucial to understand how your ice cream maker works. Most modern machines fall into three categories: the bowl-freezer type (where you pre-freeze the bowl), the salt-and-ice variety (manual or electric), and the self-refrigerating machines with built-in compressors. Each type has distinct advantages and requires different preparation approaches.
The bowl-freezer method is the most popular among home cooks because it’s affordable and straightforward. You simply place the bowl in your freezer for at least 24 hours before churning. The machine’s paddle then continuously agitates your mixture while the frozen bowl absorbs heat, creating that signature creamy texture. This method works beautifully with all our healthy dessert recipes that incorporate ice cream components.
Temperature control is absolutely critical. Your ice cream mixture should be thoroughly chilled—ideally between 35-40°F—before it enters the maker. Warm mixtures take longer to freeze and often result in icy textures rather than smooth, creamy consistency. Most recipes require an overnight refrigeration period after mixing but before churning. Additionally, understanding your machine’s capacity prevents overflow disasters; never fill beyond the manufacturer’s recommended level, as the mixture expands during the freezing process.
Essential Base Recipe Technique
Every successful ice cream starts with a solid base recipe. The fundamental ratio involves cream, milk, sugar, and egg yolks, though variations exist depending on your machine type and desired richness. The classic French approach uses a custard base—cooked egg yolks create a silkier, denser ice cream. The Philadelphia method skips eggs entirely, relying on fat content and proper freezing technique.
Here’s the universal technique that works with virtually any flavor profile: Start by combining heavy cream and whole milk in a saucepan. Heat gently to about 170°F, which pasteurizes the mixture without creating a curdled texture. Meanwhile, whisk together egg yolks (if using) with sugar until the mixture becomes pale and thick. Slowly temper the yolks by adding hot cream mixture one tablespoon at a time while whisking constantly. This prevents scrambled eggs and ensures smooth integration.
Once tempered, return everything to the saucepan and continue heating to 160°F, stirring constantly. This temperature kills potential pathogens while developing flavor. Pour through a fine-mesh strainer into a clean bowl to remove any cooked egg bits. Stir in vanilla extract or other flavorings at this point—heat hasn’t damaged delicate flavors yet. Cover and refrigerate overnight, allowing flavors to fully develop and the mixture to reach optimal freezing temperature.
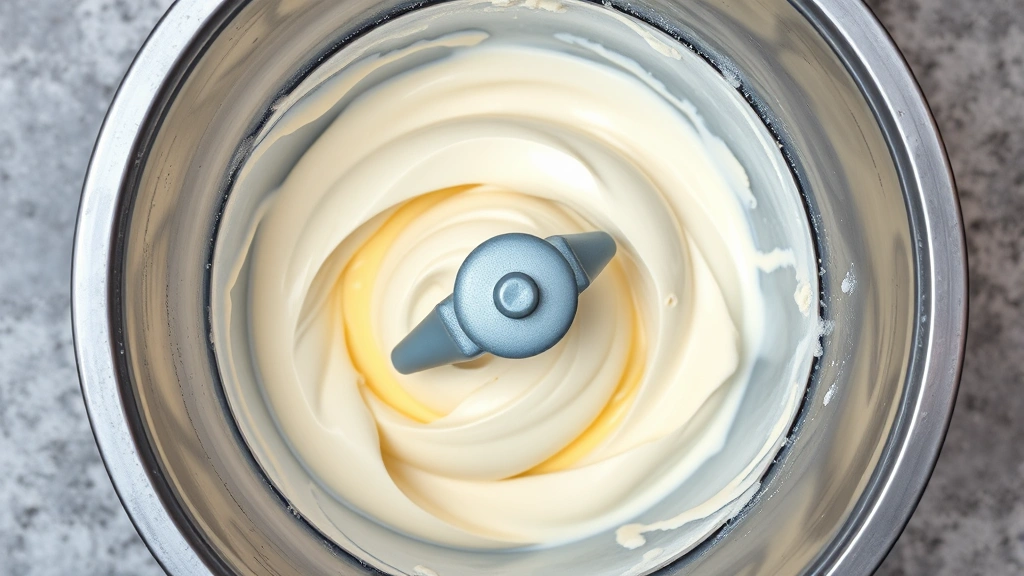
The next day, give the mixture a final stir and transfer to your ice cream maker according to manufacturer instructions. Most machines require 20-30 minutes of churning. The mixture should look like soft-serve consistency when done. Transfer to a freezer-safe container and freeze for at least 4 hours before serving. This final freezing step allows ice crystals to fully set while the mixture hardens to perfect scooping consistency.
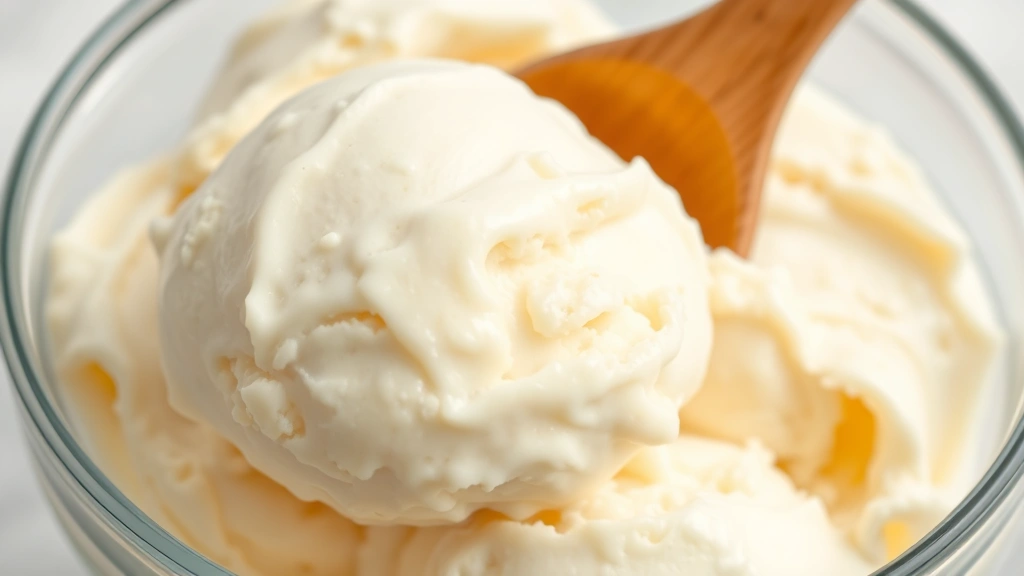
Classic Vanilla Ice Cream
Vanilla ice cream represents the foundation of ice cream making. Despite its simplicity, quality matters tremendously. Use pure vanilla extract—not imitation—and consider adding a vanilla bean pod for authentic depth. This recipe yields approximately one quart of ice cream.
Ingredients:
- 2 cups heavy whipping cream
- 1 cup whole milk
- 3/4 cup granulated sugar
- 5 large egg yolks
- 2 teaspoons pure vanilla extract
- 1/4 teaspoon sea salt
Instructions:
- Combine cream and milk in a heavy saucepan. Heat gently to 170°F, stirring occasionally to ensure even heating.
- Whisk egg yolks with sugar in a separate bowl until pale and ribbony, approximately 2-3 minutes of vigorous whisking.
- Slowly add hot cream mixture to yolks while whisking constantly—add about one tablespoon at a time initially.
- Return tempered mixture to saucepan and heat to 160°F while stirring continuously with a wooden spoon.
- Strain through fine-mesh sieve into a clean bowl, pressing gently to remove any cooked egg particles.
- Stir in vanilla extract and salt. Cool completely, then cover and refrigerate overnight.
- Churn in ice cream maker according to manufacturer specifications, typically 20-30 minutes.
- Transfer to freezer-safe container and freeze at least 4 hours before serving.
The beauty of this base recipe is its versatility. You can replace half the vanilla extract with almond extract, add coffee concentrate, or incorporate crushed cookies. The technique remains identical; only the flavorings change. This approach works wonderfully when paired with vintage grandma recipes that celebrate traditional dessert-making techniques.
Rich Chocolate Varieties
Chocolate ice cream demands quality cocoa products and proper technique to prevent graininess. The chocolate flavor should be bold without bitterness, and the texture should remain silky smooth regardless of chocolate percentage.
Dark Chocolate Ice Cream Recipe:
Start with the classic vanilla base but reduce sugar to 1/2 cup and add 6 ounces of chopped dark chocolate (70% cacao). After heating the cream mixture to 170°F, immediately pour it over the chopped chocolate and let sit undisturbed for 2 minutes. Whisk until completely smooth—the residual heat melts the chocolate perfectly. Then proceed with tempering the yolks and heating to 160°F. The chocolate creates natural richness, so you can reduce egg yolks to 4 if desired.
For chocolate swirl variations, prepare the vanilla base as written, then churn separately. While churning, drizzle in melted chocolate (tempered so it hardens immediately into ribbons rather than clumping). The key is using chocolate just slightly warmer than room temperature—too hot and it melts into the mixture; too cold and it becomes impossible to drizzle.
Mexican hot chocolate ice cream takes this further by adding 1/2 teaspoon ground cinnamon, 1/4 teaspoon cayenne pepper, and 1/4 teaspoon vanilla to the chocolate base. The spices create unexpected complexity that elevates simple chocolate into something memorable. This recipe pairs beautifully with comfort food recipes that celebrate warming spices and deep flavors.
Fruit-Based Frozen Creations
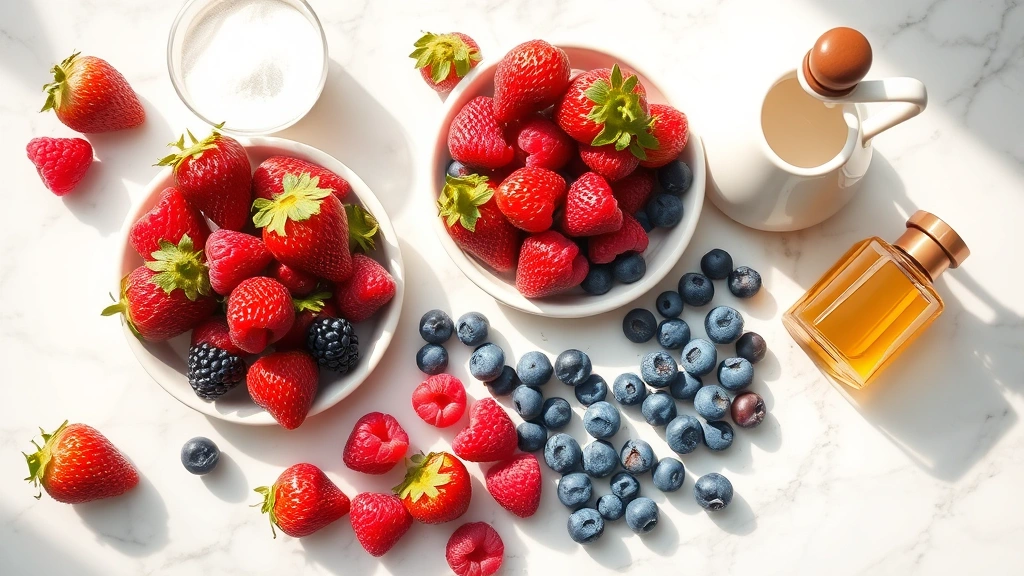
Fresh fruit ice creams showcase seasonal produce at peak flavor. The challenge with fruit is balancing sweetness—fruit contains natural sugars that can make ice cream cloyingly sweet—while maintaining the fruit’s bright character.
Strawberry Ice Cream (Fresh Berry Method):
Puree 1.5 pounds of fresh strawberries with 2 tablespoons lemon juice and 1/4 cup sugar. Let this macerate for 2 hours, allowing the berries to release additional juice. Strain through a fine sieve, pressing gently to extract maximum flavor while leaving seeds behind. Prepare the classic vanilla base but reduce sugar to 1/2 cup. After chilling, fold the strawberry puree into the cream mixture before churning. The berry acidity brightens the cream’s richness while the fruit provides natural color and flavor.
For frozen peach ice cream, use ripe summer peaches—they’re essential. Blanch peaches briefly in boiling water, then peel and pit them. Puree with 2 tablespoons honey and 1 tablespoon fresh lemon juice. Again, prepare the base with reduced sugar (1/2 cup), chill overnight, then fold in peach puree before churning. The honey adds smoothness while preventing icy texture.
Raspberry ice cream works similarly but demands slightly different handling. Fresh raspberries bruise easily, so handle gently. Puree only 1 pound of raspberries with 3 tablespoons sugar and 1 tablespoon lemon juice. The reduced quantity prevents excessive tartness. Fold into the base right before churning for maximum berry flavor preservation.
These fruit variations complement our collection of summer salad recipes beautifully, providing refreshing dessert options for warm-weather entertaining.
Advanced Flavor Combinations
Once you master basic recipes, experimentation becomes incredibly rewarding. Advanced flavor combinations require understanding how different ingredients interact and when to add them during the ice cream-making process.
Brown Butter Sage Ice Cream:
Melt 4 ounces unsalted butter in a saucepan over medium heat. Once it foams and the milk solids turn golden-brown, add 8-10 fresh sage leaves. Remove from heat and let infuse for 15 minutes. Strain out the sage, discarding the solids. Use this brown butter to replace half the cream in your base recipe. The nutty, caramelized butter pairs unexpectedly well with sage’s herbal notes. Proceed with the standard technique, and you’ll create an ice cream that surprises and delights.
Honey Lavender Combination:
Replace half the granulated sugar with lavender honey (or regular honey infused with dried lavender flowers). Heat the cream mixture as usual, then add 1/2 teaspoon dried culinary lavender buds. Let infuse for 10 minutes while heating to 170°F, then strain. The floral notes remain subtle—just enough to intrigue without overwhelming. This recipe works wonderfully for elegant dinner parties and sophisticated palates.
Salted Caramel Swirl:
Prepare a separate salted caramel sauce by cooking 1 cup sugar with 6 tablespoons butter until amber-colored, then adding 1/2 cup heavy cream and 1 teaspoon sea salt. Cool completely. Churn your vanilla base, then drizzle the cooled caramel during the final minutes of churning, creating ribbons throughout. The contrast between sweet caramel and the ice cream’s subtle vanilla creates perfect balance.
Coffee Espresso:
Brew strong espresso—about 1/2 cup—and let cool. Whisk it into your cream mixture before the overnight refrigeration. The coffee flavor deepens during chilling. For added complexity, add 1 tablespoon of coffee liqueur (like Kahlúa) after cooking but before chilling. This recipe appeals to coffee enthusiasts and pairs beautifully with healthy dessert recipes that incorporate chocolate or nuts.
Troubleshooting Your Results
Even experienced ice cream makers encounter occasional problems. Understanding common issues and their solutions ensures consistently excellent results.
Grainy or Icy Texture: This occurs when ice crystals become too large, usually from freezing too slowly or using insufficient fat content. Solutions include ensuring your bowl is fully frozen (24+ hours), chilling your mixture thoroughly before churning, and verifying you’re using full-fat dairy products. If your machine takes longer than 30 minutes to reach soft-serve consistency, the bowl may not be cold enough.
Too Soft or Won’t Freeze: If your ice cream never hardens properly, the mixture likely contains too much sugar or alcohol (which lowers freezing point). Reduce sugar by 1-2 tablespoons per quart, or use less alcohol-based flavorings. Alternatively, your final freezer may not be cold enough—ensure it’s set to 0°F or below.
Curdled Custard Base: This happens when eggs cook too quickly due to excessive heat. Always temper yolks slowly, adding hot cream one tablespoon at a time. If curdling occurs, strain the mixture through cheesecloth and continue with the recipe—the texture may be slightly less smooth but still enjoyable.
Lack of Flavor: Cold temperatures mute flavors, so ice cream base should taste slightly too sweet and intensely flavored before churning. Trust this instinct. Additionally, certain flavors like vanilla and coffee intensify during overnight refrigeration, so resist the urge to add extra vanilla extract immediately after cooking.
Separation or Weeping: When ice cream becomes icy and separates from cream, it indicates too much water content or inadequate emulsification. Ensure you’re using the proper ratio of cream to milk (typically 2:1), and never skip the tempering step. Some recipes benefit from adding 1 tablespoon of corn syrup per quart, which helps prevent large ice crystal formation.
For detailed troubleshooting guidance, consult Serious Eats’ ice cream science section, which explains the chemistry behind every step of the process.
FAQ
How long does homemade ice cream last in the freezer?
Properly stored homemade ice cream lasts 2-3 weeks in an airtight container. After this point, ice crystals gradually enlarge and flavor begins fading. Cover the surface with plastic wrap before sealing the lid to minimize freezer burn. Unlike commercial ice cream with stabilizers, homemade versions don’t maintain quality as long, so plan accordingly.
Can I make ice cream without an ice cream maker?
Yes, though results are less smooth. The no-churn method involves whipping heavy cream to soft peaks, folding in sweetened condensed milk and flavorings, then freezing. While simpler, this produces denser texture with larger ice crystals. For best results, an ice cream maker is genuinely worth the investment—quality machines cost $25-50 and deliver years of use.
What’s the difference between ice cream and gelato?
Gelato contains less fat (around 4-9% versus ice cream’s 12-16%) and is churned slower, creating denser texture with less air incorporation. Gelato also typically uses less sugar and relies on temperature for texture rather than egg custards. The recipes and techniques differ slightly, but many home machines can produce both with adjusted ratios.
Should I use pasteurized eggs?
If you prefer avoiding raw eggs, pasteurized eggs work perfectly in ice cream recipes. Alternatively, heat your custard to 160°F as directed in our recipes—this temperature pasteurizes the mixture. Many home cooks successfully use regular eggs without issue, but pasteurized versions offer peace of mind, especially for pregnant women, young children, or immunocompromised individuals.
Why is my ice cream maker taking too long to churn?
The most common cause is an insufficiently frozen bowl. Ensure your bowl freezes for a full 24 hours, and verify your freezer maintains 0°F or below. Additionally, warm mixture slows the process—always chill your base overnight. If your machine is old, the bowl’s insulation may have degraded; newer models generally perform faster.
Can I substitute ingredients in these recipes?
Absolutely. Replace half-and-half with evaporated milk, use honey instead of sugar, or substitute Greek yogurt for some cream to add tang and reduce fat. Each substitution affects texture and flavor, so keep notes on what works best for your preferences. This experimentation is where homemade ice cream truly shines—you’re creating something uniquely yours.
Making ice cream at home transforms simple ingredients into memorable desserts. Whether you’re preparing grandma’s recipe box summer potluck treats or creating new family traditions, these tested ice cream maker recipes deliver consistent, delicious results. Start with classic vanilla, master the fundamental technique, then explore endless flavor possibilities. Your ice cream maker will become one of your most beloved kitchen companions.


