Magnolia Bakery Banana Pudding Recipe: Authentic Copycat Version
Magnolia Bakery’s banana pudding has become legendary in New York City and beyond, earning a devoted following for its simple yet irresistible charm. This iconic dessert combines creamy custard, fresh bananas, and vanilla wafers in a way that feels both nostalgic and indulgent. If you’ve ever stood in line at their Bleecker Street location or tried their dessert at specialty retailers, you know exactly why this pudding deserves its cult status. The magic lies not in exotic ingredients or complicated techniques, but in quality components treated with respect and precision.
Creating an authentic Magnolia Bakery banana pudding at home is entirely achievable. The recipe relies on classic baking fundamentals: proper custard technique, strategic layering, and the discipline to let flavors develop through proper chilling. Whether you’re planning a dinner party, holiday gathering, or simply craving this iconic dessert, this comprehensive guide will walk you through every step to achieve bakery-quality results in your own kitchen.
Essential Ingredients
The beauty of authentic Magnolia Bakery banana pudding lies in its ingredient list—there are no shortcuts or unusual items to hunt down. Every component serves a purpose and contributes to the final texture and flavor profile.
For the Custard: You’ll need 2 cups whole milk, 1 cup heavy cream, 5 egg yolks, 3/4 cup granulated sugar, 3 tablespoons cornstarch, 1 tablespoon vanilla extract, and a pinch of salt. The egg yolks create a rich, silky custard base, while cornstarch prevents graininess and provides structure. Whole milk combined with heavy cream achieves the perfect balance between richness and lightness.
For Assembly: You’ll need 3-4 ripe but firm bananas (about 1 pound total), one 11-ounce box of Nilla Wafers (the original vanilla wafers are essential—don’t substitute), and 1 cup heavy whipping cream, 2 tablespoons powdered sugar, and 1/2 teaspoon vanilla extract for the topping whipped cream.
The quality of your vanilla extract matters significantly. Real vanilla extract delivers complex flavor notes that imitation versions cannot match. Similarly, selecting bananas that are ripe enough to be flavorful but firm enough to hold their shape during layering ensures textural contrast throughout the pudding.
Equipment You’ll Need
Proper equipment ensures smooth custard preparation and accurate temperature control. A heavy-bottomed saucepan (at least 3 quarts) distributes heat evenly and prevents scorching. A reliable instant-read thermometer lets you monitor custard temperature precisely—this is crucial for food safety and optimal texture.
A whisk is essential for combining ingredients smoothly and preventing lumps. A fine-mesh strainer helps eliminate any cooked egg particles or lumps that might form despite your best efforts. For assembly, you’ll want a 9×13-inch baking dish or similar container (approximately 3-quart capacity). A stand mixer or hand mixer makes whipping cream effortless and ensures proper volume and texture.
A sharp paring knife cleanly cuts bananas without bruising them. Parchment paper lining your baking dish makes serving and cleanup easier. If you’re serious about achieving bakery-quality results, invest in a candy thermometer as backup to your instant-read thermometer.
Making the Perfect Custard
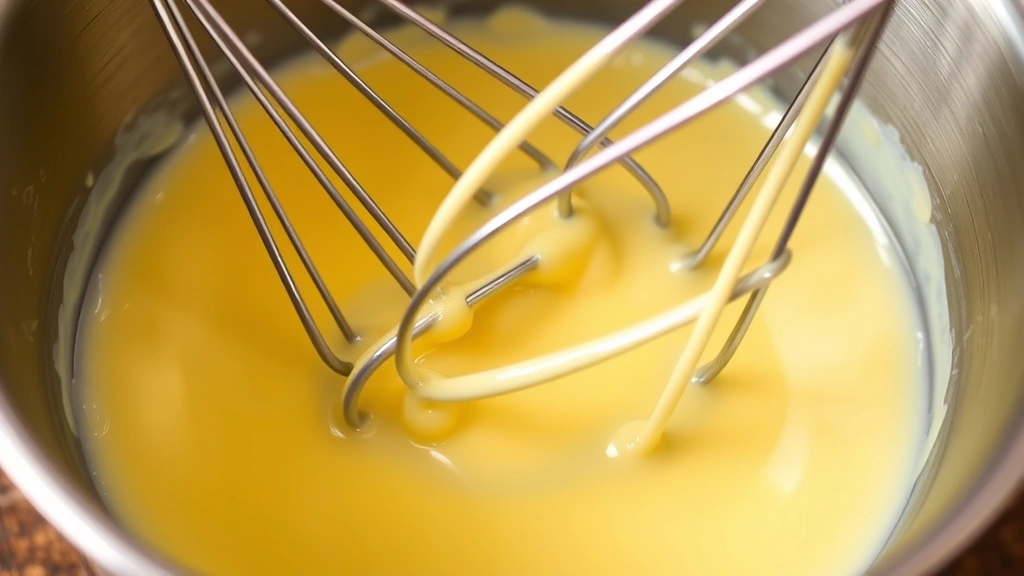
The custard is the foundation of your banana pudding, so this step deserves your full attention and focus. Combine 2 cups whole milk and 1 cup heavy cream in your heavy-bottomed saucepan. Place over medium heat and bring to a gentle simmer, stirring occasionally. You want small bubbles forming around the edges, not a rolling boil. This process takes about 8-10 minutes.
While the milk mixture heats, prepare your egg mixture. In a medium bowl, whisk together 5 egg yolks and 3/4 cup granulated sugar. Whisk continuously for about 2-3 minutes until the mixture becomes pale yellow and slightly thick. This process, called “ribboning,” incorporates air and helps prevent lumps when you combine with hot milk. Add 3 tablespoons cornstarch and a pinch of salt, whisking to combine thoroughly.
Once your milk mixture reaches a simmer, slowly pour it into the egg mixture while whisking constantly. This tempering process prevents scrambled eggs and ensures a smooth custard. Pour slowly—this is not a race. Continue whisking as you add the milk to distribute heat evenly. Once combined, pour the entire mixture back into the saucepan through your fine-mesh strainer.
Place the saucepan over medium heat and cook, stirring constantly with your whisk. After about 2-3 minutes, the mixture will begin to thicken noticeably. Continue cooking and stirring until it reaches 170°F on your instant-read thermometer, which ensures food safety by pasteurizing the eggs. The custard should coat the back of a spoon and leave a clear trail when you run your finger across it.
Remove from heat and stir in 1 tablespoon vanilla extract. Strain the custard through your fine-mesh strainer into a clean bowl to remove any cooked egg particles or lumps. Press plastic wrap directly onto the surface of the custard to prevent a skin from forming. Let cool to room temperature (about 30 minutes), then refrigerate for at least 2 hours or until thoroughly chilled. Cold custard is essential for proper assembly and texture.
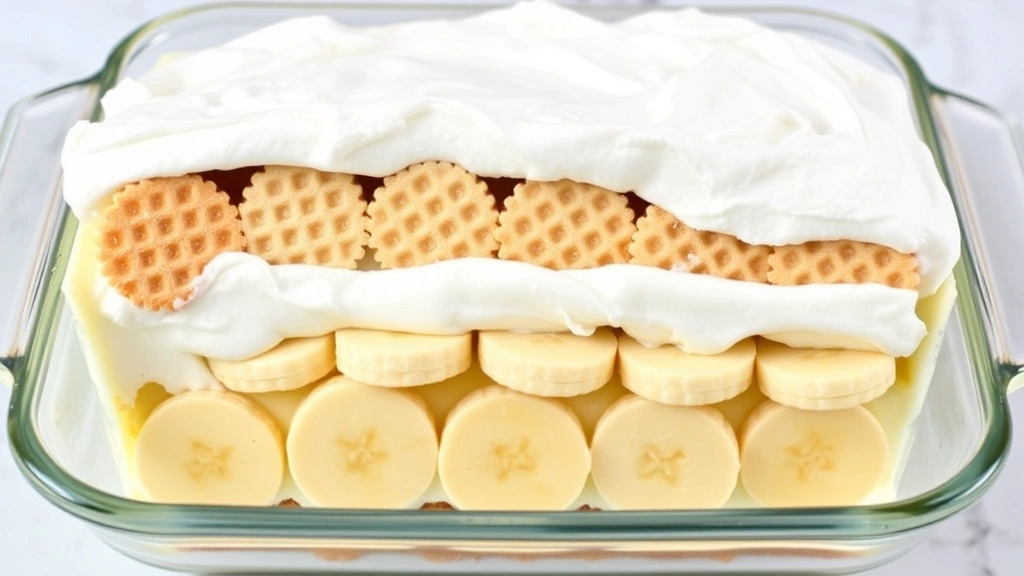
Layering and Assembly
Successful assembly requires organization and speed. Remove your chilled custard from the refrigerator about 15 minutes before assembling to allow it to soften slightly for easier spreading. Line your 9×13-inch baking dish with parchment paper for easy serving later.
First Layer: Spread approximately 1 cup of custard evenly across the bottom of your prepared dish. This base layer prevents the vanilla wafers from settling directly on the dish bottom and becoming soggy too quickly. Create a thin, even layer using an offset spatula or the back of a spoon.
Second Layer: Arrange vanilla wafers in a single layer over the custard, breaking them as needed to fit snugly. You’ll use approximately 30-35 wafers for this layer. The wafers will absorb moisture from the custard and soften slightly during chilling, creating the ideal texture.
Third Layer: Slice 1-2 bananas into 1/4-inch thick rounds. Arrange banana slices in a single layer over the wafers. Work efficiently to prevent browning, though a slight darkening is natural and won’t affect flavor.
Fourth Layer: Spread another 1 cup of custard over the banana layer, again creating an even coverage. Repeat the wafer layer (30-35 wafers), another banana layer, and another custard layer. You should have room for one final layer.
Final Layer: Top with remaining vanilla wafers and your last banana layer. Finish with the remaining custard spread smoothly across the top. The pudding should be filled nearly to the rim of the baking dish.
Cover with plastic wrap and refrigerate for at least 8 hours, preferably overnight. This resting period allows the flavors to meld, the wafers to soften to the perfect texture, and the pudding to set properly. The overnight rest is not optional—it’s essential for achieving authentic Magnolia Bakery texture and flavor integration.
Chilling and Storage
Proper chilling transforms individual components into a cohesive dessert. The cold temperature helps custard set while the wafers gradually absorb moisture without becoming mushy. After your overnight rest, the pudding will have a consistent, spoonable texture throughout.
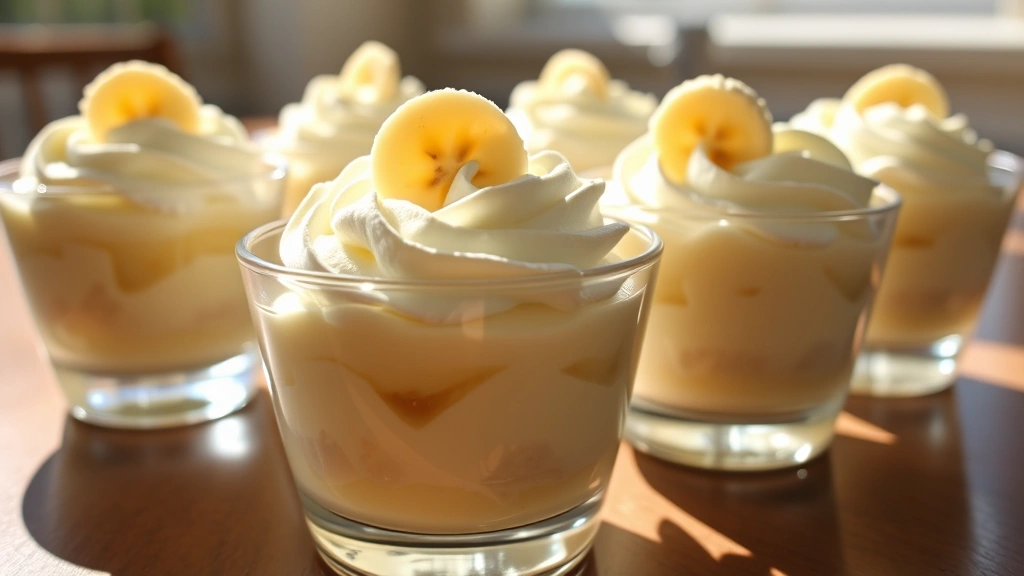
Just before serving, prepare your whipped cream topping. In a chilled bowl, combine 1 cup heavy whipping cream, 2 tablespoons powdered sugar, and 1/2 teaspoon vanilla extract. Using a stand mixer or hand mixer, whip on medium-high speed until stiff peaks form (about 2-3 minutes). Dollop or spread whipped cream over individual servings rather than covering the entire pudding, as this prevents it from becoming soggy during storage.
Store your banana pudding covered in the refrigerator for up to 3 days. The pudding actually improves during the first 24 hours as flavors meld and textures develop. After 3 days, the vanilla wafers begin to soften excessively and bananas may darken, though the pudding remains safe to eat. For best results, consume within 48 hours of assembly.
Do not freeze banana pudding. The custard and bananas don’t freeze well, and thawing creates a watery, separated texture. If you want to prepare components ahead, you can make and refrigerate the custard for up to 3 days separately, then assemble the pudding 24 hours before serving.
Pro Tips for Success
Temperature Control is Critical: Ensure your custard reaches 170°F for food safety and proper thickening. Use an instant-read thermometer rather than guessing. Undercooking risks foodborne illness, while overcooking creates a grainy texture. Aim for 170-175°F for perfect results.
Don’t Skip the Straining Step: Straining your custard through a fine-mesh strainer removes cooked egg particles and ensures silky smoothness. This small step makes a significant difference in final texture. Even if your custard looks smooth, straining guarantees professional results.
Choose the Right Bananas: Bananas should be ripe enough to slice cleanly and have developed flavor, but firm enough to hold their shape. Slightly yellow bananas with minimal brown spots are ideal. Overly ripe bananas become mushy and develop off-flavors, while underripe bananas lack sweetness and don’t slice cleanly.
Use Authentic Vanilla Wafers: Nilla Wafers are essential—their specific texture, size, and vanilla flavor are calibrated for this recipe. Store-brand vanilla wafers or other cookies produce different results. The wafer’s ability to soften gradually while maintaining structural integrity is crucial.
Assemble Quickly: Work efficiently when layering to minimize banana browning. You can slice all bananas ahead of time and store them in a bowl with a squeeze of lemon juice to prevent oxidation, then pat dry before using.
Make Ahead Strategy: Prepare custard up to 3 days ahead. Assemble the pudding 24 hours before serving. This approach reduces day-of stress while ensuring optimal flavor and texture development.
Variations and Adaptations
While the classic recipe deserves respect, thoughtful variations can personalize your pudding. Consider these adaptations:
Bourbon or Rum Vanilla Pudding: Add 2 tablespoons bourbon or dark rum to your finished custard for sophisticated depth. This addition complements the vanilla beautifully without overpowering.
Brown Butter Enhancement: Brown 2 tablespoons butter separately, let cool slightly, then whisk into your finished custard for nutty complexity. This technique adds dimension to the vanilla base.
Spiced Variation: Add 1/4 teaspoon nutmeg and a pinch of cinnamon to your egg-sugar mixture before tempering. These warm spices complement bananas and vanilla wafers beautifully.
Salted Caramel Layer: Drizzle a thin layer of salted caramel between custard and wafer layers for sweet-salty contrast. This works particularly well with Fresh Plate Daily’s dessert collection.
Chocolate Version: Substitute 2 tablespoons of cornstarch with 2 tablespoons cocoa powder for a chocolate custard version. Reduce vanilla to 1/2 teaspoon and add 1/2 teaspoon chocolate extract.
When making variations, maintain the core structure and proportions. Changes should enhance rather than fundamentally alter the classic formula. Test variations in small batches before preparing for guests.
FAQ
Can I use egg substitute instead of raw eggs?
No. Pasteurized egg products or egg substitutes won’t achieve the same custard texture and richness. Since you’re heating the custard to 170°F, you’re pasteurizing the eggs naturally. This process is safe and essential for proper texture.
What if my custard becomes lumpy?
Lumpy custard usually results from insufficient tempering or cooking at too high a temperature. If this happens, strain through a fine-mesh strainer immediately. For future attempts, whisk constantly throughout cooking and monitor temperature with a thermometer. Straining catches lumps even if they form.
Can I make this dessert ahead for a large gathering?
Yes, but assemble no more than 24 hours ahead. The pudding improves during the first 12-18 hours as flavors meld. After 24 hours, wafers begin deteriorating. You can prepare custard 3 days ahead separately, then assemble the day before serving.
Why is my pudding watery after refrigeration?
This typically indicates insufficient cooking time or temperature. The custard must reach 170°F and cook until it coats the back of a spoon. Watery pudding also results from using low-quality vanilla wafers that dissolve rather than soften gradually. Ensure you’re using authentic Nilla Wafers.
How do I prevent the whipped cream from separating?
Don’t over-whip the cream—stop when stiff peaks form. Use cold equipment and cold cream. If making ahead, whip cream just before serving rather than storing it for hours. For stability, you can add 1 tablespoon powdered sugar and 1/4 teaspoon gelatin (bloomed in cold water, then warmed and cooled) to the cream before whipping.
Can I substitute the heavy cream with something lighter?
Not recommended. The combination of whole milk and heavy cream creates the specific richness and texture Magnolia Bakery is known for. Using only milk or lower-fat cream produces a thinner, less satisfying custard.
What’s the best way to serve this pudding?
Serve directly from the baking dish with a sturdy spoon, ensuring each serving includes layers of custard, wafers, and bananas. Individual bowls showcase the beautiful layers. Top each serving with freshly whipped cream just before eating to maintain optimal texture.
How does this compare to store-bought versions?
Homemade banana pudding surpasses store-bought versions in every way. Fresh custard, high-quality ingredients, and proper assembly create superior texture and flavor. The pudding tastes noticeably fresher and creamier than shelf-stable versions. Making it yourself also costs less than purchasing from specialty bakeries while delivering bakery-quality results.
Can I double this recipe?
Yes, but double all ingredients proportionally. You’ll need two 9×13-inch dishes or one very large container. The cooking time for custard remains similar—monitor temperature rather than time. Assembly takes longer with doubled ingredients, so allow extra time.
What about dietary restrictions?
For dairy-free versions, substitute with coconut cream and non-dairy milk, though results won’t match the original. Gluten-free vanilla wafers work well if you avoid regular wafers. Unfortunately, egg-free versions cannot replicate the custard’s texture and richness, so this recipe doesn’t adapt well to egg allergies.


