Mochi donuts have taken the dessert world by storm, and for good reason. These pillowy, chewy treats combine the delicate texture of mochi with the indulgent appeal of a classic donut. Unlike traditional cake or yeast donuts, mochi donuts offer a unique mouthfeel that’s simultaneously crispy on the outside and wonderfully chewy on the inside. If you’ve been searching for an authentic mochi donut recipe that actually works, you’ve found it. This tried-and-true method has been perfected through countless batches, and I’m excited to share every secret with you.
What makes this recipe special is its simplicity combined with precision. You don’t need fancy equipment or hard-to-find ingredients—just quality staples and a bit of patience. Whether you’re a seasoned baker or someone who’s intimidated by frying, this guide will walk you through each step. The result? Homemade mochi donuts that rival any bakery, with the satisfaction of knowing exactly what went into them.
The beauty of making mochi donuts at home is the freedom to customize flavors and toppings. From classic glazes to creative fillings, your options are virtually limitless. Let’s dive into the complete method that will have you creating these addictive treats like a pro.
Essential Ingredients for Mochi Donuts
The foundation of exceptional mochi donuts starts with understanding your ingredients. Unlike regular donuts that rely heavily on wheat flour, mochi donuts use mochiko flour (sweet rice flour) as the star ingredient. This glutinous flour contains no gluten and creates that signature chewy texture everyone craves. You’ll want to source high-quality mochiko flour from Asian markets or online retailers for the best results.
Here’s what you’ll need for a basic batch of twelve donuts:
- Mochiko flour (sweet rice flour): 1 cup—this is non-negotiable for authentic texture
- All-purpose flour: ½ cup—provides structure and helps with frying
- Granulated sugar: ¼ cup—sweetens the dough
- Baking powder: 1½ teaspoons—creates lift and airy crumb
- Salt: ¼ teaspoon—balances sweetness
- Egg: 1 large—binds ingredients together
- Whole milk: ⅓ cup—adds richness and moisture
- Vanilla extract: ½ teaspoon—enhances flavor complexity
- Vegetable oil for frying: approximately 2 quarts—neutral flavor is essential
The ratio between mochiko and all-purpose flour is crucial. Too much mochiko creates an overly dense donut, while too much all-purpose flour compromises that signature chewiness. This balanced approach gives you the perfect texture every time.
Equipment You’ll Need
While mochi donuts don’t require specialized equipment, having the right tools makes the process significantly easier. A donut mold is practically essential—these silicone or metal molds come in various sizes, but a standard donut mold with six cavities works perfectly. The ring-shaped design ensures uniform donuts that cook evenly.
Beyond the mold, gather these items:
- Large mixing bowls: at least two for separating wet and dry ingredients
- Whisk: for combining dry ingredients thoroughly
- Electric mixer or hand mixer: optional but helpful for smooth batter
- Thermometer: a candy or deep-fry thermometer maintains proper oil temperature
- Deep saucepan or Dutch oven: for frying—at least 4 inches deep
- Slotted spoon or spider strainer: for safely removing donuts from hot oil
- Paper towels and wire rack: for draining excess oil
- Piping bag: optional, for glazes and fillings
Investing in a quality thermometer cannot be overstated. Temperature control is absolutely critical when frying—too cool and your donuts absorb oil; too hot and they burn outside while staying raw inside.
Dough Preparation Steps
Success with mochi donuts begins with meticulous dough preparation. This isn’t a recipe where you can rush or eyeball measurements. Follow these steps precisely:
Step 1: Combine Dry Ingredients
In a medium bowl, whisk together mochiko flour, all-purpose flour, granulated sugar, baking powder, and salt. Whisking incorporates air and ensures the leavening agent distributes evenly. This prevents any pockets of unmixed baking powder that could create unpleasant bitter flavors. Whisk for about one minute—you should see the mixture become noticeably lighter and airier.
Step 2: Prepare Wet Ingredients
In a separate bowl, crack your egg and beat it lightly with a fork. Add the whole milk and vanilla extract, stirring until well combined. The egg acts as a binder, while milk adds moisture and richness that elevates the final texture. Some bakers add a tablespoon of melted butter here for extra flavor—optional but recommended.
Step 3: Create the Batter
Pour the wet ingredients into the dry ingredients and stir gently with a spatula. Mix until just combined—this is important. Overmixing develops gluten in the all-purpose flour, leading to tough, dense donuts rather than light, pillowy ones. Your batter should look slightly lumpy, almost like pancake batter. A few small flour streaks are perfectly acceptable.
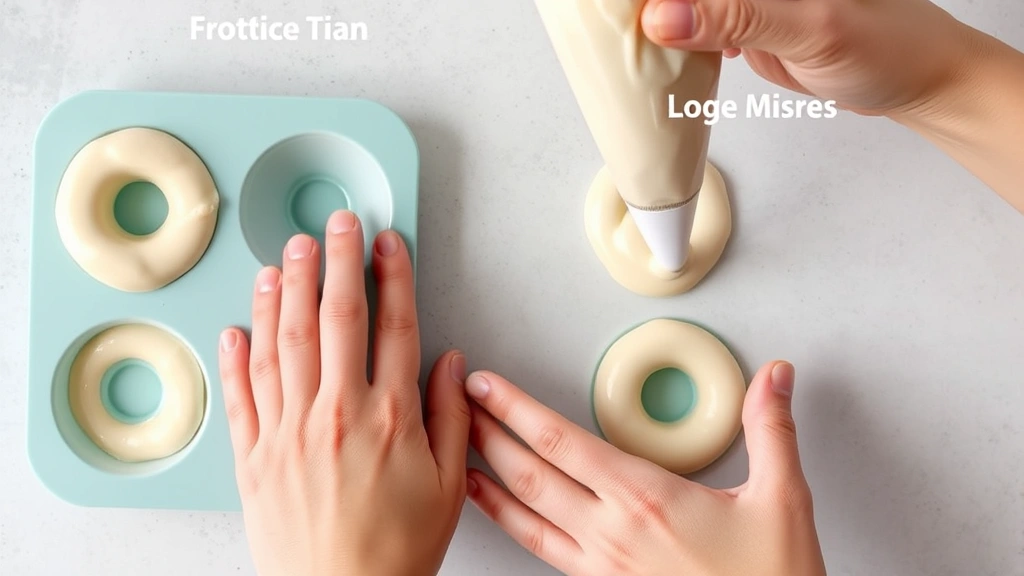
Step 4: Prepare Your Mold
Lightly grease your donut mold with cooking spray or a pastry brush dipped in oil. This prevents sticking and makes removal easier. If using a silicone mold, you can skip this step as silicone is naturally non-stick. Let the batter rest for five minutes—this allows the mochiko flour to fully hydrate, resulting in better texture.
Step 5: Fill the Mold
Transfer batter to a piping bag fitted with a large round tip, or use a squeeze bottle designed for batter. This gives you precision and control. Pipe batter into each cavity, filling them about three-quarters full. Leave some space because the donuts will expand slightly during frying. If you overfill, the batter may overflow and create a mess.
Perfect Frying Technique
This is where amateur bakers often stumble. Frying mochi donuts requires attention and technique, but nothing that should intimidate you. The goal is achieving that perfect golden-brown exterior while maintaining a tender, chewy interior.
Oil Temperature Control
Heat your oil to exactly 350°F (175°C). Use your thermometer to verify this temperature before adding any donuts. This temperature is the sweet spot—hot enough to cook the donut through and create a crispy exterior, yet not so hot that it burns the outside before the inside cooks. Maintain this temperature throughout frying by adjusting your heat as needed. Most home cooks find medium heat works well once the oil reaches temperature.
Transferring Donuts to Oil
Carefully invert your mold over the hot oil, holding it steady. Give it a gentle wiggle—the donuts should slide right out. If they stick, run a thin knife around the edges first. Work quickly so the oil temperature doesn’t drop significantly. You can typically fry 2-3 donuts at once depending on your pan size, but avoid crowding. Donuts need space to cook evenly and flip easily.
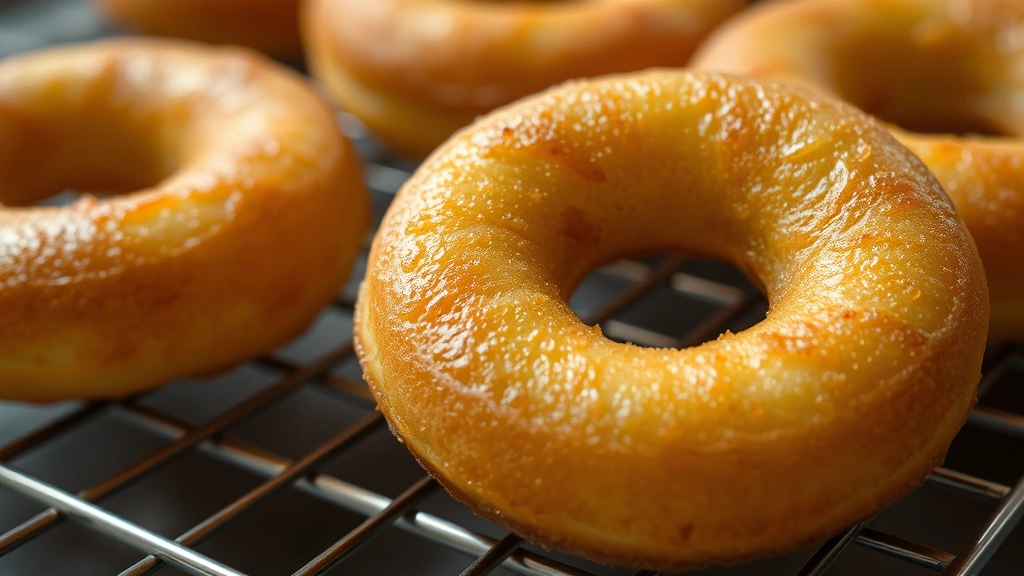
Cooking Time and Flipping
Let each donut cook for approximately 90 seconds on the first side. They’ll float to the surface and gradually turn golden brown. Use your slotted spoon to gently flip each donut, then cook for another 60-90 seconds on the second side. The total cooking time is usually 2.5 to 3 minutes. You’re looking for a light golden-brown color, not deep brown. Remember that donuts continue cooking slightly after removal due to residual heat.
Draining and Cooling
Transfer cooked donuts to a wire rack set over paper towels. This allows air to circulate underneath, preventing them from getting soggy. Let them cool for at least 10 minutes before glazing or decorating. This cooling period is crucial—the exterior sets properly, and the interior continues to set up, achieving that perfect chewiness.
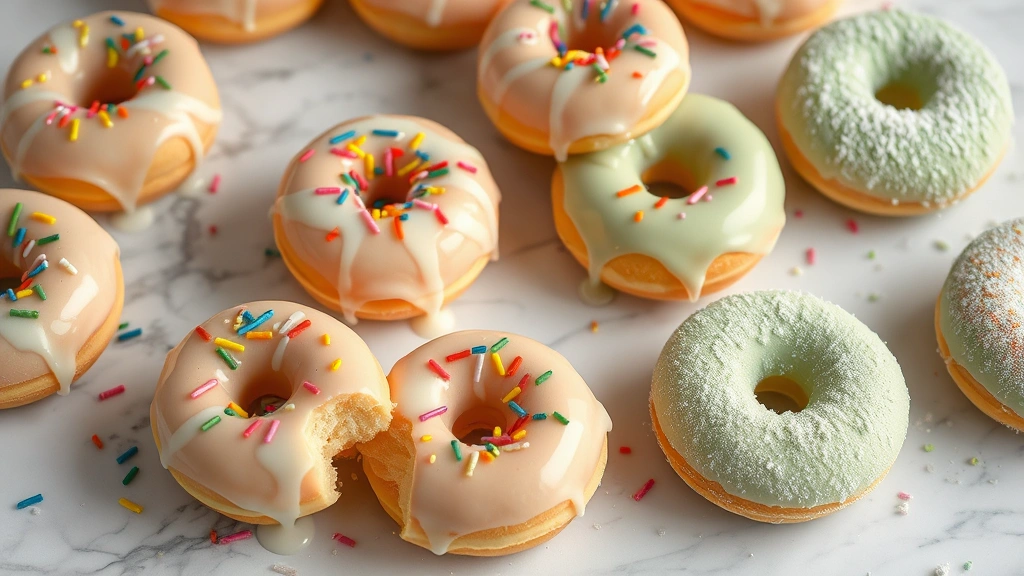
Glazes and Toppings
Plain mochi donuts are delicious, but glazes and toppings elevate them to something special. Here are several options to try:
Classic Vanilla Glaze
Whisk together 1 cup powdered sugar, 2 tablespoons whole milk, and ½ teaspoon vanilla extract until smooth. Dip the top of each cooled donut into the glaze, allowing excess to drip off. Set on a wire rack to dry for 15 minutes. This simple glaze is timeless and lets the mochi texture shine through.
Matcha Glaze
Combine 1 tablespoon matcha powder with 2 tablespoons hot water, whisking until smooth. Add 1 cup powdered sugar and whisk until you achieve a pourable consistency. The earthy matcha flavor complements the subtle sweetness of mochi beautifully. For extra appeal, try pairing this with a pistachio cream recipe as a filling.
Chocolate Glaze
Melt ⅓ cup semi-sweet chocolate chips with 2 tablespoons butter over low heat. Stir in ½ cup powdered sugar and 3 tablespoons milk until smooth. This rich glaze pairs wonderfully with toppings like crushed cookies or sprinkles.
Creative Toppings
While glaze is still wet, add toppings immediately so they adhere properly. Consider:
- Rainbow sprinkles for festive appeal
- Crushed freeze-dried strawberries for tartness
- Toasted coconut flakes for tropical flavor
- Crushed pistachios for nutty richness
- White chocolate shavings for elegance
- Sesame seeds for subtle nuttiness
You can also fill mochi donuts with creams and curds. A cherry cheesecake recipe adapted as a filling works surprisingly well, as does pastry cream or Nutella.
Storage and Shelf Life
Fresh mochi donuts are best enjoyed within 24 hours of making them, when the texture is at its peak. However, with proper storage, they maintain quality for several days.
Room Temperature Storage
Place cooled donuts in an airtight container at room temperature. They’ll stay fresh for up to two days. Avoid storing them in the refrigerator, as cold temperatures can make them harder and less chewy.
Freezing for Later
Mochi donuts freeze beautifully for up to three weeks. Place cooled, unglazed donuts in a freezer-safe container with parchment paper between layers. Thaw at room temperature for about an hour before glazing. Alternatively, you can freeze glazed donuts and enjoy them straight from the freezer—they thaw within minutes and taste nearly as good as fresh.
Reheating
If your donuts have lost some chewiness, a quick 10-second microwave blast revives them beautifully. This warms the interior without making them greasy.
FAQ
What’s the difference between mochiko flour and regular mochi?
Mochiko flour is ground sweet rice (glutinous rice) flour, while mochi is the finished chewy product made from pounding sweet rice. For this recipe, you specifically need mochiko flour, not prepared mochi. They’re completely different products with different applications.
Can I bake mochi donuts instead of frying them?
Baking produces a different texture—more cake-like and less chewy. While baked mochi donuts are good, they don’t achieve that signature crispy-outside, chewy-inside quality that makes fried versions special. If you must bake, try 350°F for 12-15 minutes, but expect different results.
Why are my donuts greasy?
Greasiness typically indicates your oil temperature was too low. When oil isn’t hot enough, the donut absorbs more oil rather than frying. Always use a thermometer and maintain 350°F. Additionally, ensure donuts drain properly on a wire rack rather than sitting on paper towels.
Can I make mochi donut dough ahead of time?
Yes, you can prepare the batter up to four hours in advance and refrigerate it. The batter may thicken slightly, so add a tablespoon of milk if needed before piping. Don’t prepare the batter more than four hours ahead, as the baking powder will lose its leavening power.
What oil is best for frying?
Neutral oils with high smoke points work best: vegetable oil, canola oil, or peanut oil. Avoid olive oil and butter, which have lower smoke points and will burn at frying temperatures. Choose an oil with minimal flavor so it doesn’t overpower the donuts.
How do I get the hole in the middle?
The donut mold creates the ring shape naturally. When you invert the mold over hot oil, the donut slides out already shaped with a hole in the center. Some molds have removable centers for easier release.
Can I add flavoring to the dough itself?
Absolutely! Try adding 1 teaspoon of matcha powder, ½ teaspoon of almond extract, or even a pinch of cardamom to the dry ingredients. Keep in mind that strong flavors can overpower the delicate mochi texture, so use a light hand with additions.


