Flawless Neapolitan Pizza Dough? Expert Tips for Authentic Results
Achieving the perfect Neapolitan pizza dough is both an art and a science. This traditional Italian dough, with its characteristic soft crust, airy crumb structure, and delicate charred spots, requires precision, patience, and understanding of fundamental baking principles. Whether you’re a home baker or aspiring pizzaiolo, mastering this craft opens doors to creating restaurant-quality pizzas in your own kitchen.
The beauty of Neapolitan pizza lies in its simplicity: just four ingredients—flour, water, salt, and yeast—transform into something extraordinary through proper technique and timing. However, this simplicity is deceptive. The difference between mediocre and flawless dough often comes down to hydration ratios, fermentation timing, temperature control, and handling methods that many bakers overlook.
Understanding Neapolitan Pizza Dough Fundamentals
Neapolitan pizza, or pizza napoletana, is protected by a European Union traditional speciality guaranteed (TSG) designation, meaning it must follow specific standards. The dough must be made without oil or fat, fermented for at least 12 hours, and baked in a wood-fired oven reaching approximately 900°F (480°C).
The foundation of excellent Neapolitan dough rests on understanding gluten development and fermentation. Unlike pan pizzas or New York-style dough, Neapolitan dough requires a longer, cooler fermentation period that develops complex flavors through wild yeast and bacterial activity. This extended process creates organic acids that enhance digestibility and taste.
Temperature control throughout the entire process—from mixing to final proofing—directly impacts your results. Warm environments accelerate fermentation, while cooler temperatures slow it down, allowing flavor compounds to develop more fully. Most professional pizzaiolos work in environments between 70-75°F (21-24°C) for optimal control.
Essential Ingredients and Their Roles
Flour Selection is paramount. Neapolitan pizza traditionally uses soft wheat flour with moderate protein content (around 11-12.5%), typically labeled as “00” flour (doppio zero). This finely milled flour hydrates differently than bread flour, creating a more tender, extensible dough that stretches without tearing.
The protein content matters significantly. Lower protein flours (9-11%) produce softer, more delicate crusts but may lack structure for proper fermentation. Higher protein flours (13%+) create chewier textures that deviate from authentic Neapolitan style. Seek out Italian imports like Caputo Pizzeria or Antimo Caputo for consistent results.
Water comprises about 65% of your dough by weight, making it the second-most important ingredient. The mineral content in your water affects gluten development and fermentation rates. Filtered water without chlorine works best, as chlorine can inhibit yeast activity. Room temperature water (around 65-70°F) is standard, though adjustments depend on ambient kitchen temperature.
Salt strengthens gluten networks, controls fermentation speed, and enhances flavor. Use fine sea salt, adding it during mixing but never directly with yeast, as salt kills yeast cells. Typically, 2-2.5% of flour weight is standard.
Yeast drives fermentation. Fresh compressed yeast (0.5% of flour weight) is traditional, though instant dry yeast works well at slightly lower percentages. The small quantity of yeast combined with long fermentation creates the signature Neapolitan flavor profile—complex, slightly tangy, with subtle sweetness.
Hydration Ratios and Water Temperature
Hydration percentage (water weight divided by flour weight) typically ranges from 60-65% for authentic Neapolitan dough. This relatively high hydration creates an open crumb structure with irregular holes—the hallmark of quality pizza.
Calculating your hydration precisely is crucial. If using 500g flour, 60% hydration means 300g water. Higher hydration (65%+) creates more extensible, wetter dough that’s harder to shape but yields airier results. Lower hydration (55-59%) produces tighter, easier-to-handle dough with denser crumb.
Water temperature directly affects fermentation speed through what bakers call desired dough temperature (DDT). The formula is: (Target DDT × 3) – Room Temp – Flour Temp = Water Temp. If your target is 75°F and room temperature is 72°F with 70°F flour, use approximately 71°F water.
Cold water slows fermentation, allowing extended bulk fermentation (16-24 hours) that develops superior flavor. Warm water accelerates fermentation, useful when time is limited but sacrificing some flavor development. Most pizzaiolos prefer cooler water for better control and complexity.
The Mixing and Kneading Process
Autolyse, a 20-30 minute rest period where flour and water mix without salt or yeast, is optional but highly recommended. This allows flour to fully hydrate, reducing mixing time and improving gluten development naturally.
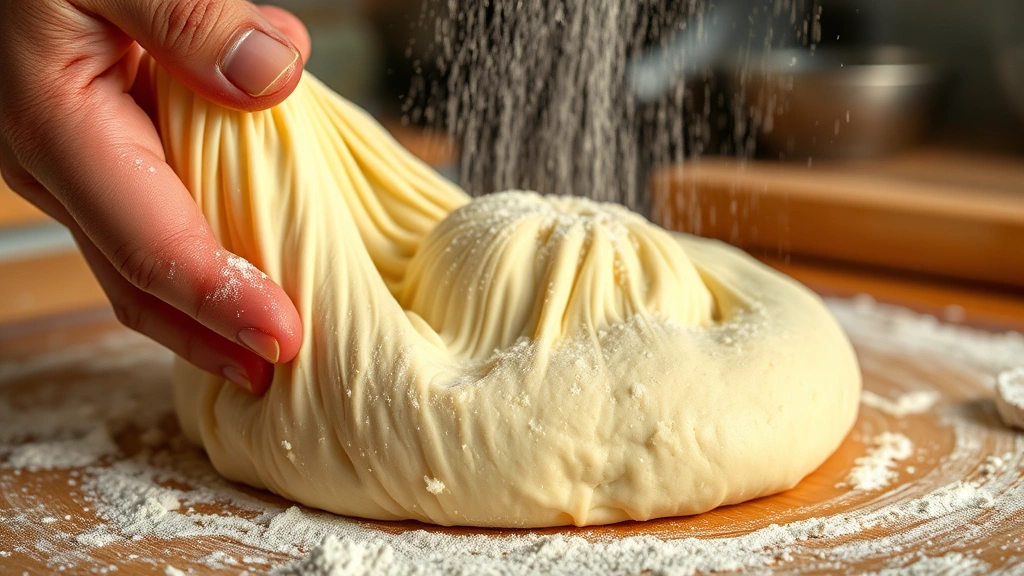
After autolyse, add yeast and salt separately. Mix by hand or with a stand mixer on low speed for 8-10 minutes until a shaggy, cohesive mass forms. Neapolitan dough should feel slightly sticky—this isn’t a tight, stiff dough like traditional bread dough.
Mixing method matters. Hand mixing develops gluten through gentle stretching, creating a more open crumb. Spiral mixers (common in pizzerias) are gentler than planetary mixers, which can overwork dough. If using a stand mixer, use the dough hook on medium-low speed, stopping when gluten is developed but dough remains soft and slightly sticky.
The dough should pass the windowpane test: stretch a small piece between your fingers. If it stretches thin enough to see light through without tearing, gluten is adequately developed. Avoid over-mixing, which creates dense, tough crust.
After mixing, perform stretch-and-fold movements every 30 minutes during the first 2 hours of bulk fermentation. Wet your hand, grab one side of the dough, stretch it up and fold over itself. Rotate the bowl and repeat from four directions. This builds strength without aggressive kneading.
Fermentation: The Secret to Flavor
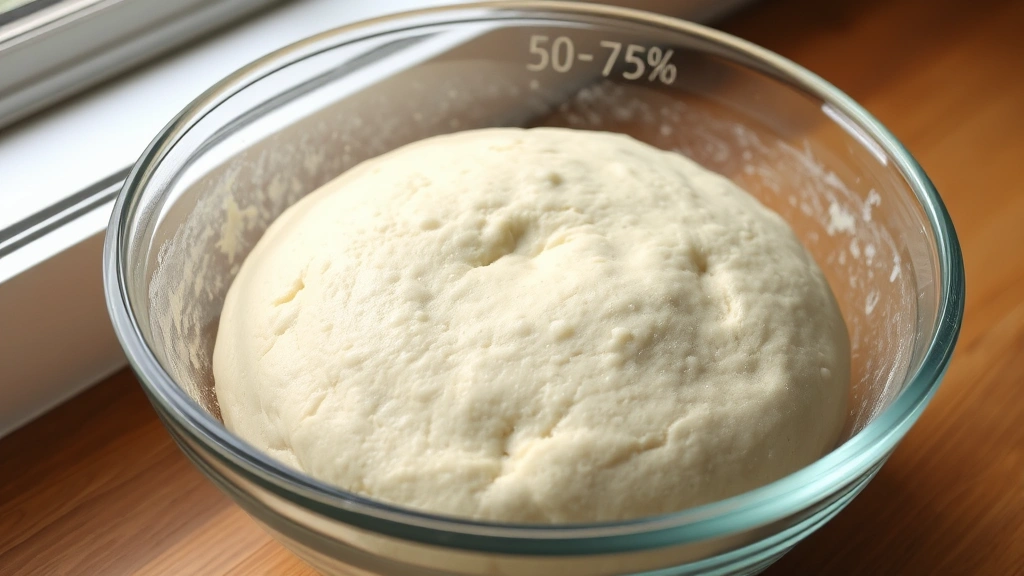
Bulk fermentation is where magic happens. This phase, lasting 12-24 hours at cool temperatures, develops the complex flavors that distinguish authentic Neapolitan pizza from quick, same-day doughs.
Temperature control is critical. At 75°F (24°C), bulk fermentation typically takes 16-18 hours. At 70°F (21°C), expect 18-24 hours. Cooler fermentation produces more acidity and flavor complexity. Warmer fermentation develops faster but with less nuance.
Monitor bulk fermentation visually, not by clock. The dough should increase by about 50-75% in volume, develop visible bubbles on the surface, and smell pleasantly yeasty with subtle sourness. Slight overproofing is preferable to underproofing—overproofed dough is forgiving, while underproofed dough won’t open properly during baking.
Environmental factors influence fermentation. Humidity, air circulation, and even barometric pressure affect fermentation rates. In summer, fermentation accelerates; in winter, it slows. Adjust water temperature accordingly to maintain consistent DDT.
Cold fermentation extends flavor development further. After bulk fermentation, divide dough into portions, shape into tight rounds, and refrigerate at 38-40°F for 24-72 hours. This extended cold fermentation develops even more complex flavors and makes dough easier to stretch due to reduced gluten elasticity.
Shaping and Final Proofing Techniques
Proper shaping sets the stage for successful baking. Using a bench scraper, divide bulk-fermented dough into 250-280g portions for 12-inch pizzas. Shape each portion into a tight round by rolling the dough toward you, creating surface tension.
Place shaped dough on a floured work surface, seam-side down. Cover with plastic or a kitchen towel and let rest for 30-60 minutes at room temperature—this is your pre-shape rest, allowing dough to relax before final shaping.
For final shaping, use gentle hands. Pick up the dough round, support it with both hands, and gently stretch it into an 8-10 inch circle. Work from the center outward, being careful not to tear the dough. Never use a rolling pin, which crushes air bubbles and creates a dense crust.
After shaping, perform final proof for 30-60 minutes at room temperature, or 4-24 hours in the refrigerator. Room temperature proofing creates a lighter, airier crust; cold proofing develops more flavor. Many pizzaiolos prefer cold final proofing, pulling dough from the fridge 30 minutes before baking to take off the chill.
Test proofing readiness with the poke test: gently poke the dough with your finger. If the indentation slowly springs back halfway, it’s perfectly proofed. If it springs back completely, it needs more time. If it doesn’t spring back, it’s overproofed.
Stretching and Launching Your Pizza
Launching is where many home bakers struggle. Proper technique prevents sticking and tearing while maintaining the airy structure you’ve developed.
Use a well-floured pizza peel (wooden is traditional). Place your proofed dough round on the peel, then gently stretch it to your desired size—typically 12-14 inches for Neapolitan style. Work quickly but gently, always supporting the dough with your hands.
The key to successful launching is momentum and confidence. A hesitant launch causes dough to stick. Flour your peel generously, position it at the oven opening, and with one smooth motion, jerk the peel back while the pizza slides forward onto the oven floor or stone. Practice this motion without hot ovens first.
If using a home oven instead of a wood-fired oven, preheat a pizza steel or stone at the highest temperature (typically 500-550°F) for at least 45 minutes. This mimics the radiant heat of a traditional oven, creating better crust texture and browning.
Baking at the Perfect Temperature
Temperature makes an enormous difference in final results. Traditional Neapolitan ovens reach 900°F (480°C), baking pizzas in 60-90 seconds. Home ovens rarely exceed 500°F, requiring 12-15 minutes.
At 500°F on a preheated steel, watch your pizza carefully. The crust should puff within 2-3 minutes, developing light browning. Rotate the pizza halfway through baking for even browning. Total baking time is typically 12-15 minutes until the crust is golden with slight charring on the edges.
For superior results in a home oven, position your oven rack in the upper-middle position and place your pizza steel on it. This positions the pizza closer to the heating element, creating more intense heat from above and below.
Some home bakers use a broiler-style technique: bake at 500°F for 10 minutes, then switch to broil for 2-3 minutes to brown the top. This requires careful monitoring to prevent burning.
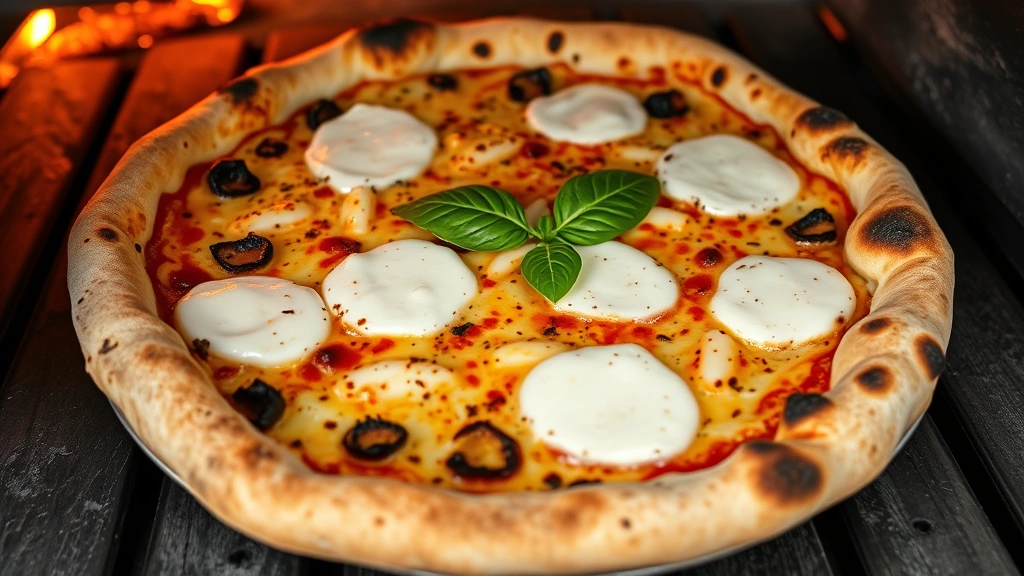
If you have access to a wood-fired oven or outdoor pizza oven, you’re in an ideal situation. The combination of radiant heat, direct flame, and the oven’s thermal mass creates authentic results impossible to replicate in conventional ovens. At 800-900°F, pizzas bake in 60-90 seconds, developing the characteristic leopard-spotted crust and soft, airy interior.
After baking, let your pizza rest for 1-2 minutes before slicing. This allows the crumb structure to set, preventing the crust from compressing when cut.
FAQ
Can I use all-purpose flour instead of 00 flour?
All-purpose flour (11-12% protein) can work, though results won’t be identical to traditional 00 flour. The higher protein content creates slightly chewier texture. If using all-purpose, reduce hydration by 2-3% and extend fermentation slightly. However, investing in quality 00 flour yields noticeably better results.
How long can I refrigerate shaped dough?
Shaped dough keeps well for 24-72 hours in the refrigerator. Beyond 72 hours, flavor continues developing but texture may suffer as gluten over-relaxes. For best results, use within 48 hours. Always pull dough from the fridge 30-45 minutes before baking to allow it to warm slightly.
What if my dough tears during stretching?
Torn dough usually indicates underproofing or insufficient gluten development. Ensure bulk fermentation is adequate (dough should increase 50-75% in volume) and that you’ve performed stretch-and-fold movements during bulk fermentation. If dough tears during stretching, gently press it back together or allow it more resting time before attempting to stretch again.
Can I make Neapolitan dough without a stand mixer?
Absolutely. Hand mixing develops excellent gluten and gives you better dough feedback. Mix flour and water first (autolyse for 20-30 minutes), then add yeast and salt. Mix by hand for 8-10 minutes until cohesive. Perform stretch-and-fold movements every 30 minutes during bulk fermentation instead of relying on a mixer.
Why does my crust come out dense?
Dense crust typically results from underproofing, over-kneading, or insufficient fermentation. Ensure bulk fermentation lasts at least 16 hours at cool temperatures. Avoid over-mixing, which develops gluten too aggressively. Test proofing readiness with the poke test rather than relying on time alone.
Is it necessary to cold ferment?
Cold fermentation isn’t strictly necessary but produces superior flavor and makes dough easier to stretch. If time is limited, room-temperature bulk fermentation (16-18 hours at 75°F) followed by 30-60 minute final proof works well. However, cold final proofing (4-24 hours at 38-40°F) significantly enhances flavor complexity.


