Homemade Pumpernickel Bread? Baker’s Secret Recipe
Pumpernickel bread is one of the most distinctive and flavorful breads you can bake at home. With its deep brown color, rich molasses undertones, and dense, moist crumb structure, this German classic has captivated bread lovers for centuries. The word “pumpernickel” itself comes from German folklore, allegedly derived from “Pumpern” (to break wind) and “Nickel” (devil), a humorous reference to the bread’s notorious digestive effects. But beyond the etymology, what makes pumpernickel truly special is the combination of rye flour, whole grains, and carefully balanced fermentation that creates its signature taste and texture.
Making pumpernickel bread at home might seem intimidating, but with the right techniques and ingredients, you’ll discover it’s far more achievable than you’d imagine. This baker’s secret recipe breaks down the process into manageable steps, revealing how professional bakers achieve that perfect dark crust and tender interior. Whether you’re a seasoned home baker or just beginning your bread-making journey, this comprehensive guide will transform your kitchen into an artisanal bakery.
Understanding Pumpernickel: History and Characteristics
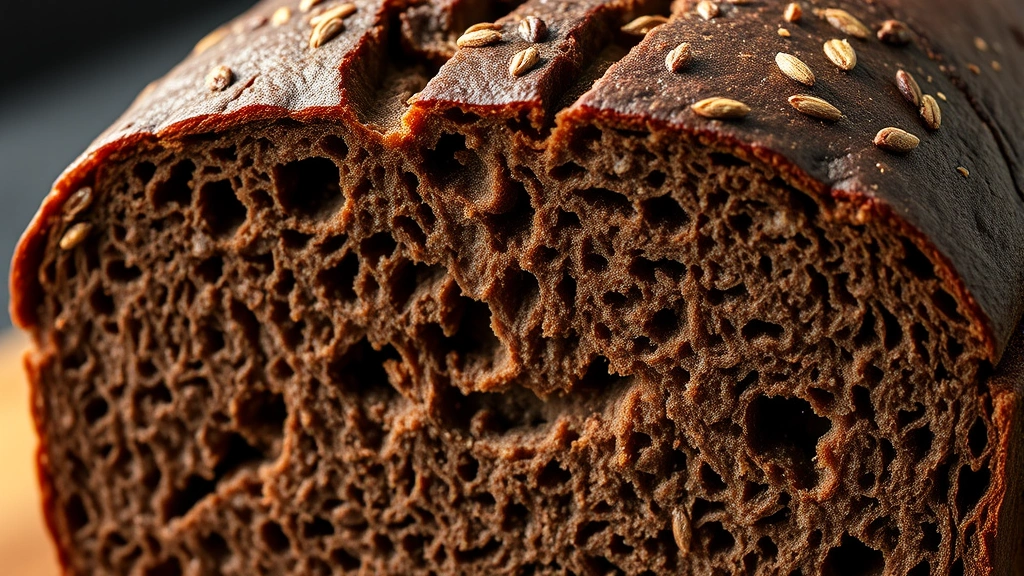
Pumpernickel bread originated in Westphalia, Germany, where it has been baked for over five hundred years. Unlike lighter rye breads, pumpernickel uses the entire rye grain, including the bran and germ, which contributes to its dark color and complex flavor profile. Traditional German pumpernickel is often baked for up to twenty-four hours at low temperatures, creating an exceptionally dense and moist loaf that can last for weeks.
The characteristic dark brown or nearly black color comes from the Maillard reaction—a chemical process where amino acids and reducing sugars react under heat, creating hundreds of new flavor compounds. This is why pumpernickel tastes so different from whole wheat or regular rye bread. The addition of molasses, cocoa powder, and coffee enhances this depth, creating layers of flavor that professional bakers have perfected over generations.
What makes pumpernickel unique compared to lighter rye breads is its density and moisture content. The gluten network in rye flour is weaker than in wheat flour, resulting in a tighter crumb structure. Combined with a long, cool fermentation, this creates the signature dense texture that makes pumpernickel perfect for pairing with rich sauces and proteins. The bread’s natural acidity also makes it an excellent companion to cured meats, cheeses, and pickled vegetables.
Essential Ingredients for Authentic Pumpernickel
Creating authentic pumpernickel requires specific ingredients that work together to develop flavor and texture. Here’s what you’ll need:
- Rye flour: Use medium or dark rye flour for the most authentic taste. This flour contains more bran than light rye and is essential for pumpernickel’s characteristic flavor.
- Bread flour or all-purpose flour: This provides structure and gluten development, since rye flour alone cannot create sufficient gluten.
- Whole grain rye: Rye berries or cracked rye add texture and nutty flavor. Soak these before adding to the dough.
- Molasses: Unsulfured molasses provides sweetness and contributes to the dark color. Avoid blackstrap molasses, which can be too bitter.
- Cocoa powder: Use unsweetened cocoa powder to deepen the color and add subtle chocolate notes without sweetness.
- Coffee: Strong brewed coffee or instant espresso powder enhances the bread’s complexity and darkens the crumb.
- Caraway seeds: Traditional pumpernickel includes these distinctive seeds, though you can omit them if preferred.
- Salt: Sea salt strengthens gluten and controls fermentation speed.
- Water: Use filtered water at the correct temperature to control fermentation timing.
- Sourdough starter or commercial yeast: Traditional pumpernickel uses long fermentation with minimal yeast, creating a tangy flavor.
The ratio of rye flour to wheat flour is crucial. Most authentic pumpernickel recipes use 60-80% rye flour, which creates the dense texture and earthy flavor. Too much wheat flour will make the bread lighter and less authentic, while too much rye flour may result in a loaf that doesn’t rise properly.
Equipment You’ll Need
Proper equipment makes the bread-making process significantly easier and more successful. Here’s what professional bakers recommend:
- Kitchen scale: Precision is essential in bread baking. A digital scale accurate to 1 gram ensures consistent results.
- Large mixing bowls: You’ll need at least two bowls for mixing dough and building flavor through multiple autolyse periods.
- Dutch oven: This creates steam during baking, which is crucial for developing a crispy crust and proper oven spring.
- Banneton or proofing basket: This helps shape the dough and supports it during final proofing.
- Bench scraper: Essential for handling sticky rye dough and dividing portions.
- Thermometer: Both a dough thermometer and oven thermometer ensure accurate temperatures.
- Scoring lame or sharp knife: A clean cut on the dough’s surface controls expansion and creates an attractive appearance.
- Spray bottle: This adds humidity during the first minutes of baking.
Step-by-Step Pumpernickel Bread Recipe
Ingredients:
- 400g medium rye flour
- 200g bread flour
- 100g whole rye berries (soaked 12 hours)
- 320ml water (90°F/32°C)
- 60ml strong coffee, cooled
- 30ml unsulfured molasses
- 10g cocoa powder
- 10g caraway seeds
- 10g sea salt
- 5g instant yeast (or 100g active sourdough starter)
Step 1: Prepare Your Ingredients
Begin by soaking your rye berries in water for at least twelve hours. This softens the grain and makes it easier to digest. Brew strong coffee and let it cool to room temperature. This step is non-negotiable—temperature control is what separates successful bread from dense, gummy loaves.
Step 2: Mix the Dough
Combine rye flour, bread flour, cocoa powder, and salt in a large bowl. In a separate container, mix water, cooled coffee, molasses, and yeast. If using sourdough starter, ensure it’s active and bubbly before adding. Pour the wet ingredients into the dry ingredients and mix until a shaggy dough forms. This initial mixing should take about three minutes with a wooden spoon.
Step 3: Autolyse Period
Let the dough rest for thirty minutes without mixing. This allows the rye flour to fully hydrate and begins gluten development. Rye flour hydrates more slowly than wheat flour, so this rest period is essential for proper dough structure.
Step 4: Incorporate Soaked Grains
After the autolyse period, drain your soaked rye berries thoroughly and add them to the dough along with caraway seeds. Mix these in using the stretch-and-fold method: grab one side of the dough, stretch it up, and fold it over the center. Rotate the bowl and repeat from all four sides. Perform four sets of stretch-and-folds, with thirty minutes of rest between each set.
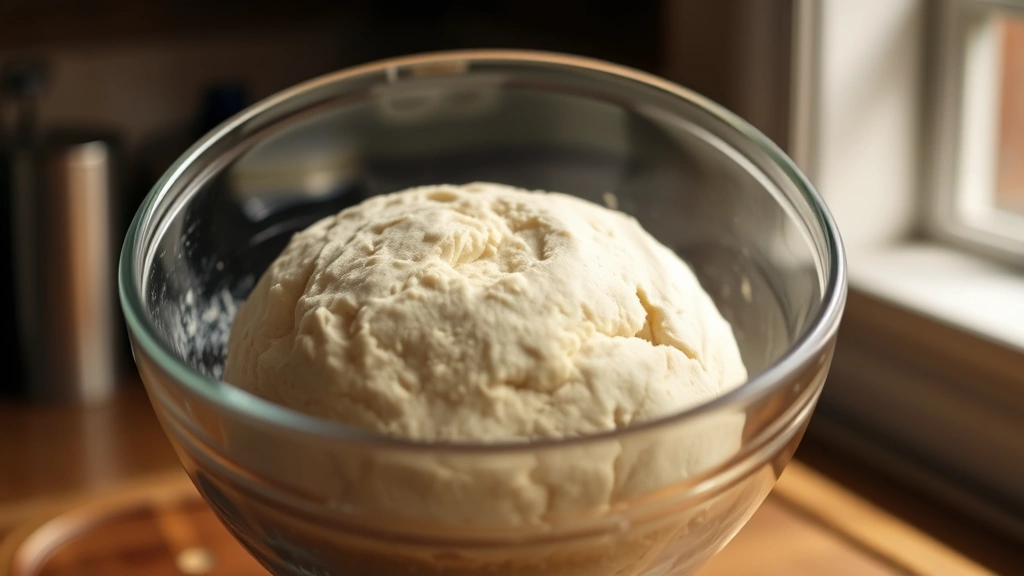
Step 5: Bulk Fermentation
After your final stretch-and-fold, allow the dough to ferment at room temperature (70-75°F/21-24°C) for eight to twelve hours. Pumpernickel benefits from a long, cool fermentation that develops complex flavors and improves digestibility. You’ll notice the dough gradually increasing in volume, becoming slightly domed but not doubling in size—this is normal for rye dough.
Mastering the Fermentation Process
Fermentation is where pumpernickel develops its distinctive flavor and character. Understanding the science behind fermentation helps you achieve professional results consistently.
During fermentation, wild yeast and bacteria consume sugars and produce carbon dioxide (which leavens the bread) and organic acids (which develop flavor). Rye dough ferments more quickly than wheat dough because rye contains more pentosans—sugars that are readily available to microorganisms. This is why pumpernickel recipes often use less yeast and longer fermentation times than wheat bread recipes.
Temperature control is absolutely critical. Warmer temperatures (75-80°F/24-27°C) speed fermentation but can produce less complex flavors and a less stable dough. Cooler temperatures (65-70°F/18-21°C) slow fermentation, allowing more flavor development and better dough structure. Professional bakers often use retardation—cold fermentation in the refrigerator for twelve to forty-eight hours—to deepen flavor and improve handling characteristics.
The long fermentation also increases the bioavailability of nutrients. Rye contains high levels of phytic acid, which binds minerals like zinc, iron, and magnesium. Extended fermentation breaks down phytic acid, making these minerals more available for your body to absorb. This is why traditionally fermented pumpernickel is significantly more nutritious than quickly-made rye bread.
Watch for these fermentation indicators: the dough should increase slightly in volume (usually 30-50% for rye), develop a pleasant sour aroma, and feel slightly sticky when touched. If your dough hasn’t shown these signs after twelve hours, it may be too cold—consider moving it to a warmer location.
Shaping and Final Proofing Techniques
Once bulk fermentation is complete, it’s time to shape your pumpernickel. This step requires a gentle touch since rye dough is more delicate than wheat dough.
Pre-shaping: Turn your fermented dough onto a lightly floured surface. Gently shape it into a round by folding the edges toward the center, working your way around the dough. This creates surface tension that helps the dough rise upward rather than spreading outward. Let this pre-shaped dough rest for twenty minutes—this is called the bench rest.
Final shaping: After the bench rest, flip your dough seam-side up and gently shape it into a boule (round) or batard (oval) by folding the top third down toward you, then rolling the dough away from you with gentle pressure. The goal is to create enough surface tension to support the dough during baking without degassing it completely.
Proofing: Place your shaped dough seam-side up in a floured banneton or a bowl lined with a kitchen towel. Cover with plastic wrap and proof at room temperature for four to six hours, or in the refrigerator for twelve to forty-eight hours. The cold retard is preferred by professional bakers because it improves flavor and makes scoring easier.
To test if your dough is ready for baking, perform the poke test: gently press your finger into the dough about half an inch deep. If the indentation springs back slowly and doesn’t completely disappear, the dough is perfectly proofed. If it springs back quickly, it needs more time. If it doesn’t spring back at all, it may be overproofed.
Baking Your Perfect Loaf
Baking is where all your preparation comes together. The oven environment dramatically affects your final loaf’s appearance and texture.
Preparation: Place your Dutch oven in the oven and preheat to 500°F (260°C) for at least forty-five minutes. This ensures the Dutch oven is thoroughly heated and will create the steam necessary for proper crust development. If your dough came from the refrigerator, you can bake it directly from cold—no need to bring it to room temperature.
Scoring: Turn your proofed dough onto parchment paper and score the top with a sharp blade or lame. A single long slash or several shorter cuts are traditional. Score at a 45-degree angle, about quarter-inch deep. This controls where the bread expands and creates an attractive appearance.
Baking: Carefully remove the hot Dutch oven and transfer your dough (on parchment) into it. Cover with the lid and reduce heat to 450°F (232°C). Bake covered for thirty minutes—this traps steam and promotes oven spring. Remove the lid and continue baking for twenty-five to thirty-five minutes until the crust is deep brown, nearly black in places. The internal temperature should reach 205-210°F (96-99°C).
Cooling: Remove the bread from the oven and transfer it to a wire rack. This is crucial—if you skip cooling, steam will condense inside the loaf, making it gummy. Let your pumpernickel cool completely (at least two hours) before slicing. This allows the crumb structure to set properly.
Troubleshooting Common Issues
Even experienced bakers encounter challenges. Here’s how to solve the most common pumpernickel problems:
- Dense, gummy crumb: This usually indicates underbaking or insufficient cooling time. Ensure your oven temperature is accurate and your bread reaches 205-210°F internally. Always cool completely before slicing.
- Flat loaf with no oven spring: This suggests overproofing. Reduce your final proof time or use colder temperatures. Alternatively, your yeast may be expired—always check the date.
- Pale crust: Increase oven temperature by 25°F or extend baking time. Ensure your Dutch oven is fully preheated. The molasses and cocoa powder should create a dark crust naturally.
- Cracks in the crust: Excessive moisture or too much fermentation can cause this. Reduce your hydration slightly or shorten bulk fermentation. Score more deeply to control where the bread expands.
- Sour taste: Long fermentation naturally creates sourness, but excessive sourness suggests too much fermentation time. Reduce bulk fermentation by two to four hours or use cooler temperatures.
- Dry crumb: Rye bread is naturally moist, so dryness indicates overbaking or insufficient water. Check your hydration percentage and reduce baking time slightly.
Serving and Storage Tips
Pumpernickel’s dense texture and rich flavor make it exceptional for various applications. Slice it thin and serve with creamy cheeses, smoked salmon, or cured meats. It also pairs beautifully with homemade spreads and sauces that complement its earthy character.
For storage, keep your pumpernickel in a paper bag at room temperature for up to five days. The bread actually improves slightly after the first day as flavors continue to develop. For longer storage, wrap cooled bread tightly in plastic wrap and freeze for up to three months. Thaw at room temperature before serving.
Unlike wheat bread, pumpernickel’s density means it slices more cleanly with a serrated knife. Some bakers prefer to slice pumpernickel the day after baking when the crumb has fully set. This also makes it easier to achieve thin, even slices.
If you want to explore more bread-making techniques, consider learning about other artisanal fermented foods that use similar long-fermentation principles. You might also enjoy exploring protein-based dishes that pair wonderfully with homemade pumpernickel.
FAQ
Can I make pumpernickel without a Dutch oven?
While a Dutch oven is ideal for steam creation, you can use alternative methods. Place a baking stone on the middle rack, preheat the oven to 500°F, and place a pan of boiling water on the lower rack to create steam. Transfer your scored dough to the preheated baking stone and bake as directed. The crust may be slightly less crispy, but the bread will still bake successfully. You can also place a metal bowl over the dough for the first thirty minutes to trap steam.
What’s the difference between pumpernickel and regular rye bread?
Pumpernickel uses a much higher percentage of rye flour (60-80%) compared to regular rye bread (30-50%), and includes darker ingredients like molasses and cocoa powder. Pumpernickel is fermented longer, creating a denser, more complex-flavored loaf. Regular rye bread is lighter in color and flavor, with a less dense crumb structure. Traditional German pumpernickel is often baked for twelve to twenty-four hours at very low temperatures, creating an exceptionally moist loaf.
Can I use sourdough starter instead of commercial yeast?
Absolutely. Sourdough starter adds complexity and develops more flavor than commercial yeast. Use 100-150g of active, bubbly sourdough starter instead of the 5g instant yeast. This will extend your fermentation time to twelve to eighteen hours, but the flavor will be superior. Ensure your starter is fed and active before using—it should double within four to eight hours of feeding.
How long does pumpernickel last?
Properly stored pumpernickel lasts five to seven days at room temperature in a paper bag. The dense crumb and natural acidity actually improve the bread’s shelf life compared to wheat bread. Frozen pumpernickel maintains quality for up to three months. Once thawed, consume within two days.
Why is my pumpernickel so dense?
Density is actually characteristic of authentic pumpernickel. However, excessive density suggests either overproofing or insufficient yeast activity. Ensure your dough reaches 205-210°F internally before removing from the oven. If your bread is gummy despite proper temperature, allow it to cool for at least three hours before slicing—rye crumb takes longer to set than wheat crumb.
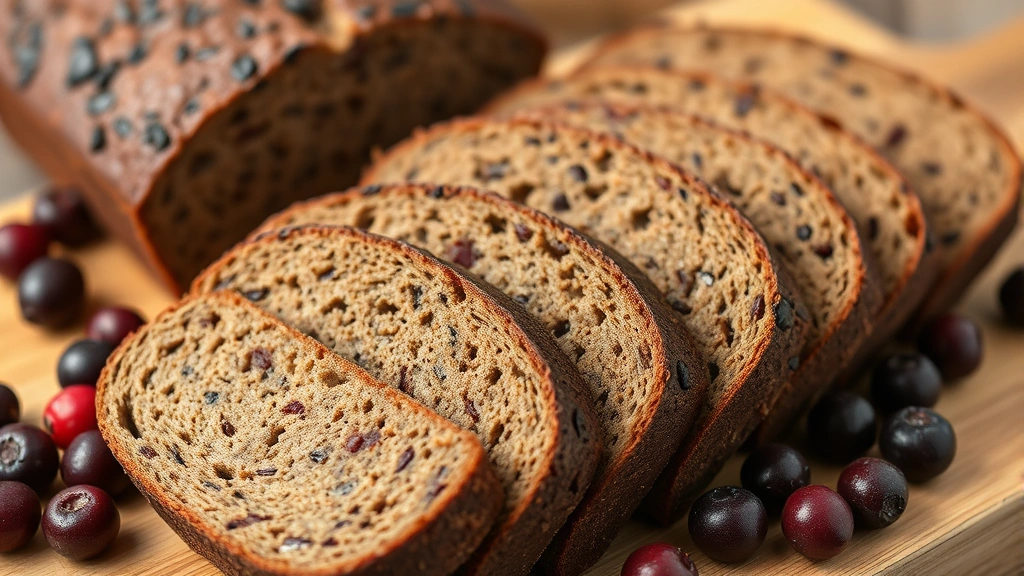
Can I add seeds or nuts to pumpernickel?
Yes, though caraway seeds are traditional. You can add sunflower seeds, flax seeds, or chopped walnuts during the final stretch-and-fold. Add these ingredients during bulk fermentation so they distribute evenly. Use up to 100g additional ingredients to avoid making the dough too heavy.


