
Easy Pumpkin Dump Cake: Family Favorite Recipe
When autumn arrives, nothing says cozy comfort quite like a warm slice of pumpkin cake fresh from the oven. But here’s the secret that busy home cooks have discovered: you don’t need hours in the kitchen or complicated techniques to create an impressive dessert. The pumpkin dump cake recipe is a game-changer for anyone seeking that perfect balance between ease and deliciousness.
This beloved dessert gets its name from its wonderfully simple preparation method—you literally dump ingredients into a baking dish and let the oven do the heavy lifting. No mixing bowls cluttering your counter, no complicated layering techniques, and no advanced baking skills required. Whether you’re preparing for a holiday gathering, a potluck dinner, or simply craving something sweet on a chilly evening, this pumpkin dump cake delivers restaurant-quality results with minimal effort.
What makes this recipe truly special is how it transforms basic pantry staples into a moist, flavorful cake with the perfect tender crumb. The magic happens as the ingredients meld together during baking, creating distinct layers that taste like you spent all day preparing them. Let’s explore everything you need to know about making this family favorite.
What Is Pumpkin Dump Cake?
A pumpkin dump cake is a deceptively simple dessert that defies its humble preparation method. Unlike traditional layer cakes that require creaming butter and sugar, whipping eggs, and carefully folding in dry ingredients, this recipe embraces a more casual approach. You combine a pumpkin puree base with spices, then top it with a dry cake mix and butter, allowing everything to bake together into something spectacular.
The beauty of this dessert lies in its chemistry. As the cake bakes, the moisture from the pumpkin layer rises through the dry cake mix above it, creating a tender, moist cake with subtle texture variations. The top becomes slightly crispy while the interior remains wonderfully soft. It’s the kind of dessert that looks far more complicated than it actually is, making you look like a baking superstar without the stress.
This recipe has earned its place at countless family tables because it delivers consistent results every single time. Whether you’re a seasoned baker or someone who rarely ventures into the kitchen, you’ll find success with this straightforward approach. The minimal ingredient list means fewer opportunities for things to go wrong, and the short preparation time means you can have dessert ready in under an hour from start to finish.
Essential Ingredients You’ll Need
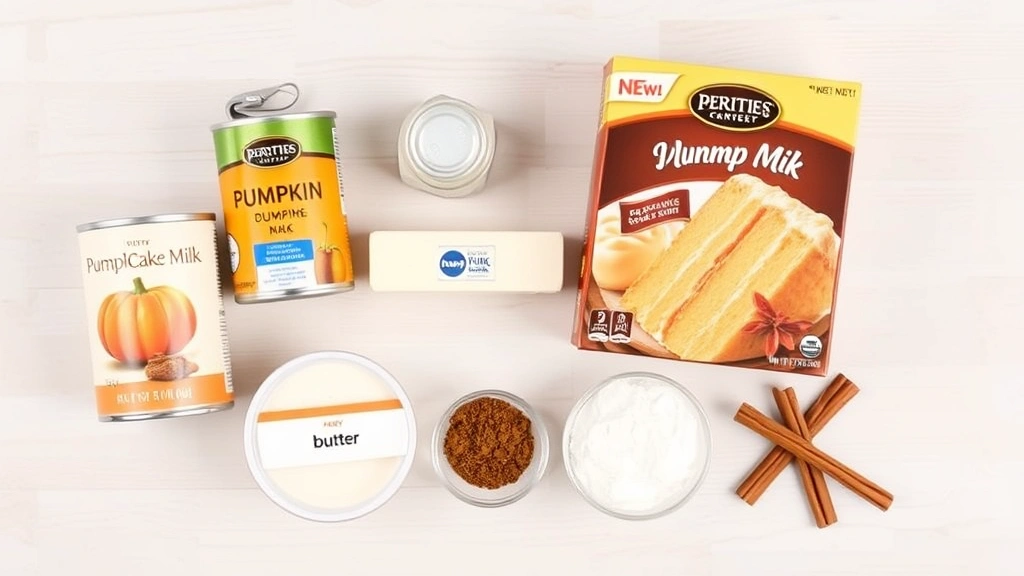
The foundation of an excellent pumpkin dump cake starts with quality ingredients. Here’s what you’ll gather before you begin:
- Pumpkin puree (15-ounce can or fresh pumpkin puree): This is your star ingredient. Make sure you’re using pure pumpkin puree, not pumpkin pie filling, which contains added sugars and spices that would throw off the flavor balance.
- Evaporated milk (12-ounce can): This concentrated milk creates a rich, creamy texture throughout the cake. Regular milk won’t work as effectively because it lacks the density needed for proper hydration.
- Granulated sugar (1 and 1/2 cups): This sweetens the pumpkin base layer and works with the spices to develop complex flavor.
- Pumpkin pie spice (2-3 teaspoons): This blend typically includes cinnamon, nutmeg, ginger, and cloves—the classic autumn flavors that make pumpkin desserts so beloved.
- Vanilla extract (1 teaspoon): A small amount adds depth and rounds out the spice profile beautifully.
- Yellow cake mix (18.25-ounce box): This forms your topping layer and creates that perfect tender crumb texture.
- Unsalted butter (1/2 cup or one stick, melted): This distributes evenly over the dry cake mix and creates richness as it bakes.
- Ground cinnamon (optional, for topping): A light sprinkle adds visual appeal and intensifies the warm spice flavor.
- Chopped pecans or walnuts (optional): These add delightful crunch and nutty complexity to the topping.
The ingredient list is intentionally short, allowing each component to shine while keeping preparation minimal. You’ll notice there are no eggs to crack, no oil to measure precisely, and no flour to sift. This is where the dump cake method truly excels—simplicity without sacrificing flavor.
Step-by-Step Instructions
Now that you’ve gathered your ingredients, let’s walk through the baking process. Follow these steps for consistent, delicious results:
- Preheat your oven to 350°F (175°C). Give it about 10-15 minutes to reach temperature. This ensures even baking throughout your cake.
- Prepare your baking dish. Use a 9×13-inch rectangular baking dish, which is the standard size for this recipe. Lightly grease it with butter or cooking spray to prevent sticking. Some bakers line it with parchment paper for even easier removal.
- Combine the pumpkin base. In your prepared dish, stir together the pumpkin puree, evaporated milk, granulated sugar, pumpkin pie spice, and vanilla extract. Mix thoroughly until you achieve a smooth, consistent mixture with no lumps. This becomes your foundation layer.
- Sprinkle the dry cake mix. Evenly distribute the dry yellow cake mix over the pumpkin mixture. Don’t stir—this is the key to the dump cake method. The dry mix stays on top and will gradually hydrate as the cake bakes. If desired, sprinkle chopped nuts over the cake mix at this point.
- Drizzle with melted butter. Pour the melted butter evenly over the entire surface of the dry cake mix. Use a fork or spatula to gently spread it so it covers as much area as possible. This butter will help the top layer bake into a golden, tender cake.
- Optional cinnamon finish. If you like, sprinkle a light coating of ground cinnamon over the buttered top for extra warmth and visual appeal.
- Bake for 45-50 minutes. Place your prepared dish in the preheated oven. The cake is done when the top is golden brown and a toothpick inserted into the center comes out clean or with just a few moist crumbs. Don’t overbake, as this can dry out the cake.
- Cool before serving. Remove from the oven and let cool for at least 15-20 minutes before cutting. This allows the layers to set slightly and makes serving much easier. The cake will be warm and perfect for serving with whipped cream or vanilla ice cream.
The entire process from prep to oven takes just 10-15 minutes, making this an ideal choice when you need dessert without the time commitment. The actual baking does all the work for you while you attend to other preparations or simply relax.
Pro Tips for Perfect Results
While this recipe is forgiving, a few insider tips will help you achieve absolutely stellar results every time:
Don’t skip the cooling time. I know the aroma is tempting, but allowing the cake to cool slightly helps the layers set. You’ll get cleaner slices and better texture when you wait those 15-20 minutes.
Use fresh spices. Pumpkin pie spice loses potency over time. If your spice container has been sitting in your cabinet for over a year, consider replacing it. Fresh spices create more vibrant, complex flavor that really elevates the final product.
Measure your dry cake mix accurately. While it might be tempting to just dump the entire box in, measuring ensures consistent results. A standard box usually contains about 2 and 3/4 cups, which is perfect for this recipe.
Bring ingredients to room temperature. If your evaporated milk and pumpkin puree have been in the refrigerator, let them sit out for 10 minutes. Room temperature ingredients mix more smoothly and bake more evenly.
Watch for doneness carefully. Ovens vary significantly, so start checking at 40 minutes. The top should be golden brown, and the cake should feel set when you touch it gently. If the center still feels too soft, give it another 5 minutes.
Invest in an oven thermometer. Many home ovens run hot or cold, which affects baking time. An inexpensive oven thermometer ensures your oven is actually at 350°F, preventing under or overbaking.
Serving and Storage Guide
Your pumpkin dump cake is best enjoyed fresh from the oven, but proper storage extends its deliciousness for days. Here’s how to serve and store your creation:
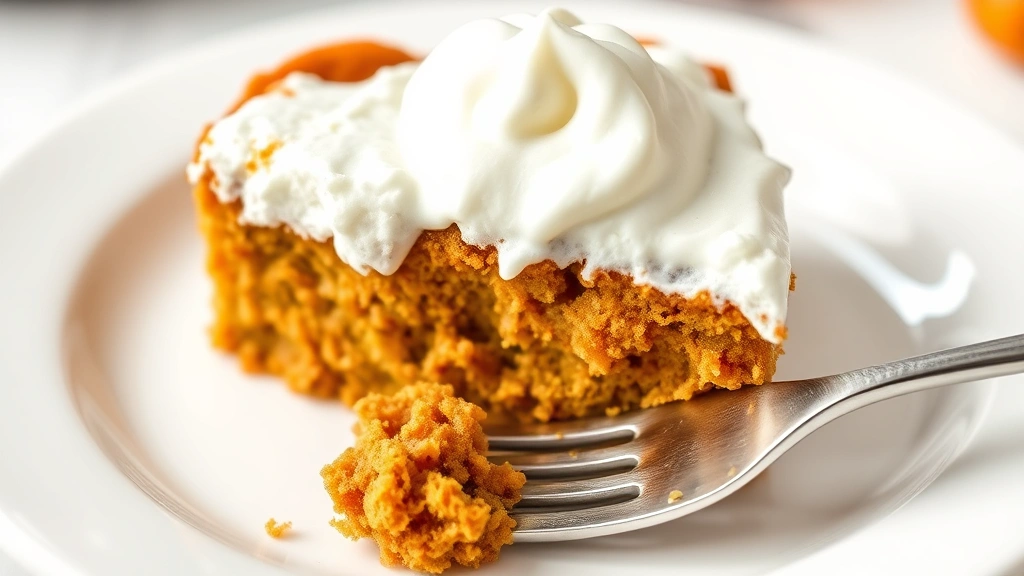
Serving suggestions: This cake shines when served warm with a generous dollop of whipped cream, a scoop of vanilla ice cream, or a drizzle of caramel sauce. The contrast between the warm cake and cold topping is absolutely divine. You can also dust individual servings with a pinch of cinnamon or nutmeg for extra elegance.
Room temperature storage: Keep your covered cake at room temperature for up to two days. Cover it loosely with aluminum foil or store it in an airtight container to prevent it from drying out.
Refrigerator storage: For longer storage, keep the cake in an airtight container in the refrigerator for up to five days. The cake will firm up slightly when cold, which some people prefer as it makes slicing cleaner.
Freezing for later: Pumpkin dump cake freezes beautifully for up to three months. Allow it to cool completely, then wrap it tightly in plastic wrap and aluminum foil before freezing. Thaw overnight in the refrigerator before serving. You can reheat individual slices in the microwave for 20-30 seconds if you prefer warm cake.
Reheating tips: To restore that fresh-from-the-oven warmth, cover the cake loosely with foil and heat in a 300°F oven for 10-15 minutes. This prevents the top from becoming too crispy while gently warming the entire cake throughout.
Creative Variations to Try
Once you’ve mastered the basic pumpkin dump cake recipe, experiment with these delicious variations to keep things interesting:
Spiced-up version: Add 1/2 teaspoon of ground ginger, 1/4 teaspoon of ground cloves, and a pinch of nutmeg to your pumpkin base for even more complex autumn flavor. These additions complement the pumpkin beautifully without overwhelming it.
Pecan streusel topping: Instead of just nuts sprinkled over the dry cake mix, make a quick streusel by combining 1 cup chopped pecans with 1/4 cup brown sugar and 2 tablespoons melted butter. Sprinkle this over the cake mix before adding the final butter drizzle.
Cream cheese swirl: Before baking, drop dollops of softened cream cheese over the pumpkin layer and gently swirl with a knife. This creates beautiful marbling and adds tangy richness.
Brown butter enhancement: Instead of regular melted butter, brown your butter by cooking it in a saucepan over medium heat until it turns golden and develops a nutty aroma. This adds incredible depth to the cake’s flavor profile.
Spiced cake mix alternative: Substitute the yellow cake mix with spice cake mix for an even more pronounced autumn flavor. This variation requires no additional spice additions and creates a more cohesive taste.
Maple syrup drizzle: After the cake cools slightly, drizzle pure maple syrup over the top. The warm cake will absorb it beautifully, adding natural sweetness and authentic maple flavor.
These variations keep your pumpkin dump cake exciting while maintaining the recipe’s fundamental simplicity. Each one can be made with the same straightforward dump-and-bake method that makes this dessert so appealing.
If you’re looking for more easy desserts to add to your rotation, consider exploring other quick and easy recipes that deliver impressive results with minimal fuss. You might also enjoy learning about complementary flavors by checking out pickled onion recipes for savory-sweet balance at your table.
FAQ
Can I use fresh pumpkin puree instead of canned?
Absolutely! Fresh pumpkin puree works wonderfully in this recipe. Make sure to cook and puree fresh pumpkin until smooth, then measure out 15 ounces. Fresh puree may contain slightly more moisture than canned, so if your batter seems too wet, reduce the evaporated milk by a few tablespoons. The flavor will be slightly more delicate but equally delicious.
What if I don’t have pumpkin pie spice?
You can easily make your own by combining 2 teaspoons ground cinnamon, 1/2 teaspoon ground ginger, 1/4 teaspoon ground nutmeg, and a pinch of ground cloves. This blend matches commercial pumpkin pie spice perfectly and allows you to adjust spice levels to your preference.
Can I make this recipe in a different size baking dish?
Yes, though it affects baking time. An 8×8-inch dish will be thicker and require 50-55 minutes. A 9×13-inch dish spreads the cake thinner and bakes in 40-45 minutes. Adjust your baking time accordingly, checking for doneness with a toothpick.
Is this recipe gluten-free?
The standard recipe isn’t gluten-free due to the cake mix, but you can substitute gluten-free cake mix without changing any other ingredients. The results are nearly identical, making this an excellent option for those with gluten sensitivities.
Can I double this recipe?
Yes! Simply double all ingredients and use two 9×13-inch baking dishes. Bake simultaneously at 350°F for about 45-50 minutes. You can also use a larger roasting pan, though you may need to add a few extra minutes to the baking time since the cake will be thicker.
Why is my cake too wet in the middle?
This usually indicates underbaking. The center should feel set when gently touched, and a toothpick should come out mostly clean. If your oven runs cool, bake for an additional 5-10 minutes. You can also check that you’re using the correct oven temperature with an oven thermometer.
Can I prepare this ahead of time?
You can assemble the cake up to 4 hours ahead—combine the pumpkin base in the baking dish, sprinkle the cake mix, and cover with plastic wrap. When ready to bake, simply drizzle with butter and bake as directed. This makes it perfect for busy holiday schedules.


