
Perfect Raspberry Pie? Grandma’s Secret Recipe for Bakery-Quality Results
There’s something magical about a homemade raspberry pie that transports you straight to your grandmother’s kitchen. The buttery, golden crust shatters under your fork, giving way to a jewel-toned filling bursting with tart-sweet berry flavor. This isn’t just any raspberry pie recipe—it’s the closely guarded secret that’s been perfected over generations, with techniques that separate amateur bakers from those who create bakery-quality desserts at home.
The difference between a mediocre raspberry pie and an absolutely perfect one comes down to understanding a few critical secrets. Temperature control, the right balance of pectin and sugar, proper crust construction, and knowing exactly when to fold versus stir all play crucial roles. My grandmother’s recipe has been refined through countless summer seasons, failed experiments, and moments of pure inspiration. Now, I’m sharing every detail—the tricks, the timing, and the techniques—so you can create a raspberry pie that rivals any professional bakery.
Grandma’s Secrets to Perfect Raspberry Pie
My grandmother didn’t write down her recipe initially—I had to watch her hands, take notes, ask questions, and spend multiple summers baking alongside her to unlock what made her pies legendary. The first secret she revealed was this: temperature is everything. Whether it’s the temperature of your butter, the chill time of your dough, or the exact oven temperature during baking, precision matters profoundly.
The second secret involves understanding that raspberries are delicate fruits containing natural pectin, but not enough to create a perfectly set filling without help. Grandma used a combination of cornstarch and a touch of tapioca starch—never flour, as it muddies the filling—to achieve that perfect consistency that’s jammy without being runny. She also taught me that fresh raspberries require different treatment than frozen ones, and knowing the difference prevents soggy, watery pie.
The third secret is what separates her pies from all others: the acid balance. A small amount of lemon juice and a pinch of salt don’t just improve flavor—they brighten the raspberry taste and help the cornstarch thicken more effectively. The salt is the secret ingredient most home bakers skip entirely.
Finally, Grandma taught me that blind baking the crust partially is non-negotiable for a crispy bottom. Many recipes skip this step, resulting in a soggy, doughy base that disappoints even with perfect filling. Her method uses pie weights, parchment paper, and precise timing to create a crust that stays crispy from bottom to top.
Essential Ingredients and Why They Matter
Before you begin, gather these ingredients with attention to quality. The better your ingredients, the better your pie.
For the Crust (makes one 9-inch double-crust pie):
- 2½ cups all-purpose flour (spoon and level, don’t scoop directly)
- 1 tablespoon granulated sugar
- 1 teaspoon fine sea salt
- 1 cup (2 sticks) cold unsalted butter, cubed
- 6-8 tablespoons ice water (keep it truly icy)
- 1 egg (for egg wash)
For the Filling:
- 5 cups fresh raspberries (about 20 ounces) or frozen raspberries
- ¾ cup granulated sugar
- 2 tablespoons cornstarch
- 1 tablespoon tapioca starch
- ¼ teaspoon fine sea salt
- 1 tablespoon fresh lemon juice
- 1 teaspoon vanilla extract
- ¼ teaspoon ground nutmeg (optional but recommended)
Why These Ingredients Matter: The flour must be measured correctly—too much creates a tough crust. Cold butter creates steam pockets during baking, producing flakiness. Ice water prevents gluten overdevelopment. For the filling, fresh raspberries release more juice than frozen, requiring slightly less liquid. Cornstarch thickens the filling while remaining clear, while tapioca starch adds a subtle glossy texture. The combination of lemon juice and salt amplifies the raspberry flavor profile while improving thickening efficiency. Visit King Arthur Baking Company for detailed ingredient science explanations.
Building the Perfect Pie Crust
The crust is where many home bakers falter, yet it’s where you establish the foundation for success. Grandma’s technique differs slightly from standard methods—she uses a food processor for initial mixing, but finishes by hand to maintain texture.
Step 1: Combine Dry Ingredients In a large mixing bowl, whisk together flour, sugar, and salt. This distributes the salt and sugar evenly, preventing pockets of oversalting. The sugar helps tenderize the dough slightly while adding subtle flavor.
Step 2: Cut in the Butter Add your cold, cubed butter to the flour mixture. Using a pastry cutter or your fingertips, work the butter into the flour until the mixture resembles coarse breadcrumbs with some pea-sized pieces of butter remaining. This is crucial—you want visible butter pieces because they create steam pockets during baking, resulting in those desired flaky layers.
Step 3: Add Ice Water Carefully Drizzle ice water over the mixture, one tablespoon at a time, gently folding with a fork until the dough just begins to come together. The dough should be slightly shaggy, not smooth. Overmixing develops gluten, creating a tough crust instead of a tender one. Most home bakers add water too quickly—resist this urge.
Step 4: Form Disks and Chill Divide the dough in half, shape each into a disk, wrap in plastic wrap, and refrigerate for at least 2 hours. This resting period allows gluten to relax and the butter to firm up again. Grandma often prepared this step the night before, allowing the dough to rest overnight—this actually improves flavor and texture.
Step 5: Roll Out the Bottom Crust On a floured surface, gently roll one dough disk into an 11-inch circle, about ⅛-inch thick. Transfer to a 9-inch pie pan, letting excess hang over the edges. Refrigerate this while you work on the filling.
Preparing Your Raspberry Filling
This is where timing and technique separate good pies from perfect ones. The filling preparation method differs depending on whether you’re using fresh or frozen raspberries, and Grandma taught me to handle each differently.
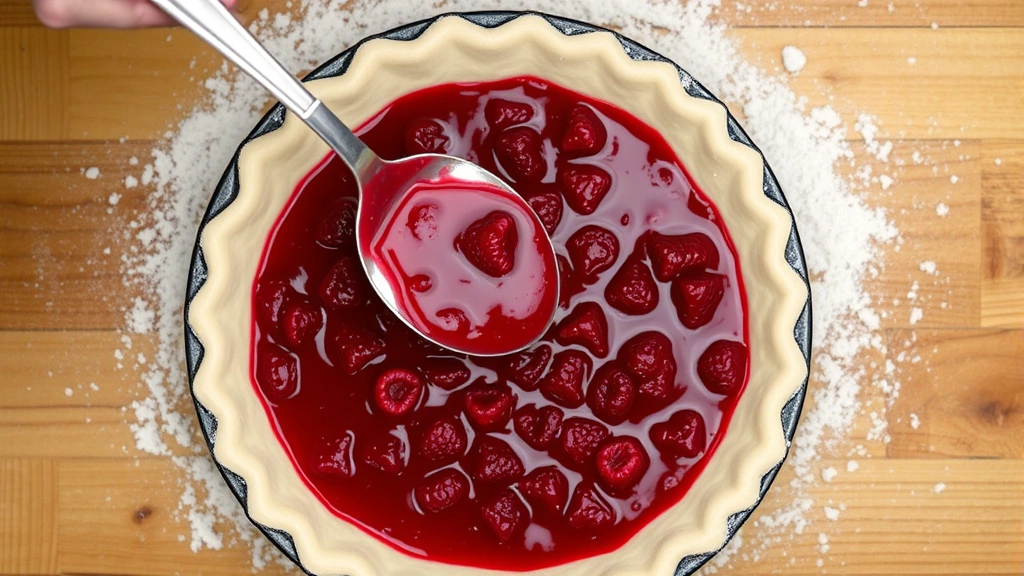
For Fresh Raspberries: Gently rinse and pat dry your raspberries—excess moisture is the enemy of proper thickening. In a large bowl, combine sugar, cornstarch, tapioca starch, and salt. Whisk these together thoroughly, breaking up any lumps. Add the raspberries and gently fold them into the sugar mixture using a rubber spatula. Work carefully to avoid crushing the berries excessively, though some juice release is inevitable and desired. Add lemon juice, vanilla extract, and nutmeg, folding gently to combine. Let this mixture sit for 10 minutes—this allows the sugar to draw out juice from the berries and the starches to begin hydrating. If the mixture looks too wet after 10 minutes, sprinkle an additional teaspoon of cornstarch and fold gently.
For Frozen Raspberries: Do not thaw them first. Combine frozen raspberries directly with the sugar mixture and let them sit for 15-20 minutes. The thawing process will release more liquid than fresh berries, so you may need an additional tablespoon of cornstarch. Frozen berries actually work beautifully because their cell structure has already been broken down by ice crystals, allowing better juice extraction and thickening.
The Secret Technique: Grandma taught me to strain the filling briefly before adding it to the crust. After the 10-minute rest, pour the filling into a fine-mesh strainer set over a bowl for exactly 5 minutes. This removes excess liquid that would otherwise create a runny pie. Return the drained filling to the crust, then pour just ⅓ of the reserved liquid back over the top. This balance creates filling that’s moist and flavorful without being soupy.
Assembly and Baking Techniques
Now comes the moment where all your preparation converges. Proper assembly and baking technique determine whether your pie achieves that perfect golden crust and set filling.
Step 1: Prepare for Blind Baking Preheat your oven to 375°F. Take your bottom crust (which should still be in the refrigerator) and prick it all over with a fork, being careful not to pierce completely through to the pan. Line the crust with parchment paper and fill with pie weights—Grandma used dried beans, which work perfectly. Blind bake for 15 minutes until the crust is set but still pale. Remove the weights and parchment, brush the crust lightly with egg wash, and bake for another 3-4 minutes until it’s set and starting to color slightly.
Step 2: Add Your Filling Remove the partially baked crust from the oven and add your prepared raspberry filling, spreading it evenly. This is why blind baking matters—the crust has already set and begun to brown, so the extended baking time for the filling won’t result in a soggy bottom. Check out our guide on fall recipes for other desserts that use similar blind-baking techniques.
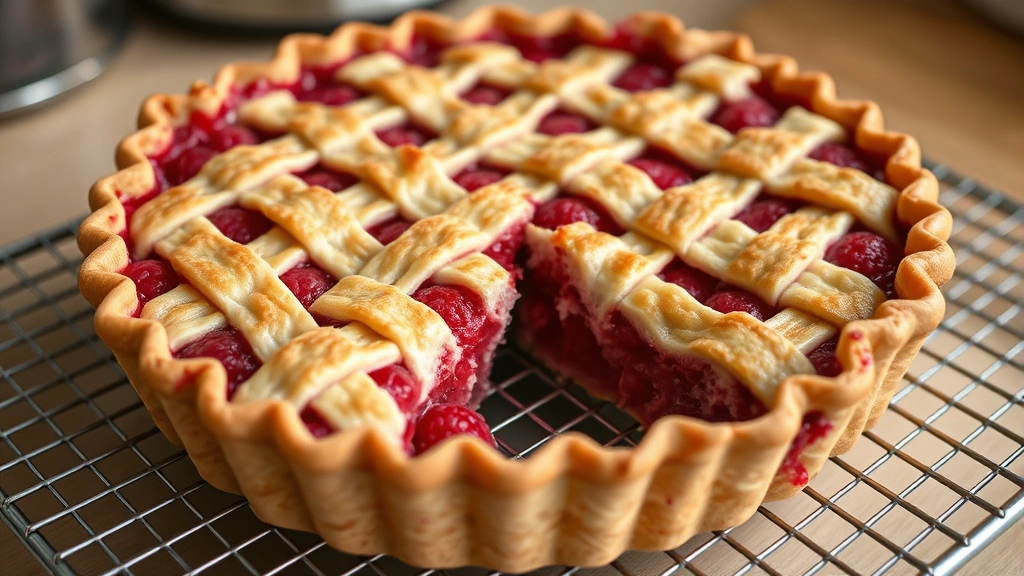
Step 3: Top with the Second Crust Roll out your second dough disk to an 11-inch circle. You have two options: a full top crust or a lattice. For a traditional look, carefully transfer the full crust over the filling and trim excess, leaving 1 inch overhang. Seal the edges by pressing with a fork or your fingers. For a lattice, cut the dough into ½-inch strips and weave them in a crisscross pattern over the filling—this looks impressive and allows steam to escape more effectively.
Step 4: Prepare for Final Baking Beat your egg with a splash of water and brush the entire top crust with this egg wash. This creates that beautiful golden color. If desired, sprinkle with 1 tablespoon of coarse sugar for a subtle sparkle. Cut 4-5 small vents in the top crust if using a full topper, or position your lattice so steam can escape naturally.
Step 5: Bake to Perfection Bake at 375°F for 45-55 minutes, until the crust is deep golden brown and you see filling bubbling at the edges. If the edges brown too quickly, cover them loosely with foil. The filling should bubble—this indicates the starches are gelatinizing properly. Remove from the oven and let cool completely on a wire rack.
Cooling, Slicing, and Serving
This final step is where patience becomes essential. Many home bakers ruin a perfect pie by slicing too soon.
Cooling Timeline: Let your pie cool on the counter for 1 hour, then move it to the refrigerator for at least 4 hours, preferably overnight. This resting period allows the filling to fully set and the crust to firm up, making clean slicing possible. The filling will seem loose when warm but will firm considerably as it cools.
Slicing Technique: Use a long, sharp knife dipped in hot water and wiped clean between cuts. The heat helps the knife glide through the filling without dragging. For the cleanest slices, warm the knife under hot water, wipe it dry, and make one smooth cutting motion—don’t saw back and forth.
Serving Suggestions: Serve slices at room temperature or slightly chilled. A dollop of fresh whipped cream or vanilla ice cream complements the tart raspberries beautifully. For an elegant presentation, dust the plate with a tiny bit of powdered sugar and arrange the slice with the point facing outward. If you’re looking for other summer dessert pairings, explore our summer salad recipes for light meal accompaniments.
Troubleshooting Common Pie Problems
Soggy Bottom Crust: This occurs when the filling releases too much moisture before the crust can set. Solution: Always blind bake the bottom crust. If you skipped this step, ensure your filling drains properly and use the starch ratio recommended above. For future pies, reduce oven temperature by 25°F and extend baking time by 10 minutes.
Runny Filling: If your filling doesn’t set properly, you didn’t allow adequate cooling time or you added too much liquid. Solution: Return the pie to a 350°F oven for 10 minutes to help the starches set further. Next time, ensure you strain the filling and use the exact starch measurements. Grandma taught me that altitude affects baking—high-altitude bakers may need an additional teaspoon of cornstarch.
Tough, Dense Crust: Overmixing or too much water causes this. Solution: For your next pie, mix the dough minimally and add water more gradually. The dough should be shaggy and slightly crumbly when you form the disk.
Burnt Edges: This happens when the outer crust browns faster than the filling bakes through. Solution: Cover edges with foil after 30 minutes of baking. Next time, use a pie shield from the start or fashion one from foil.
Crust Shrinkage: Under-chilled dough shrinks during baking. Solution: Always refrigerate your dough for at least 2 hours before rolling. Consider resting it overnight. Ensure your oven is fully preheated before baking begins.
Berries Falling Out When Slicing: This indicates the filling didn’t set properly or you’re slicing too soon. Solution: Ensure you’ve refrigerated for at least 4 hours. Use the starch measurements exactly as written. If berries still seem loose, the filling may need 30 additional minutes in the refrigerator.
For more detailed baking science, visit Serious Eats, which offers excellent explanations of pastry chemistry and technique. Cook’s Illustrated also provides peer-reviewed baking research and troubleshooting guides. Additionally, Instituto Italiano Gastronomi offers professional pastry techniques and cultural perspectives on pie making traditions.
FAQ
Can I make this raspberry pie recipe ahead of time?
Yes! Bake the pie the day before serving. Store it covered at room temperature for up to 24 hours. If you’re storing it longer, refrigerate it. The filling continues to set during storage, actually improving texture and flavor as the raspberry juice fully develops.
Can I use a store-bought crust?
While possible, homemade crust is far superior in texture and flavor. Grandma would say that using store-bought crust misses the entire point of making pie. However, if time is limited, thaw a quality frozen crust completely and blind bake it according to the package directions before adding filling.
What’s the difference between tapioca starch and cornstarch?
Cornstarch thickens quickly and creates a clear, glossy filling. Tapioca starch adds a subtle sheen and slightly more interesting mouthfeel. Using both together, as Grandma taught me, creates superior texture. Tapioca starch alone can create a slightly stringy filling if overused, so the combination is ideal.
Can I freeze this pie?
Yes, but with considerations. Freeze the unbaked pie, wrapped well in plastic wrap and foil, for up to 1 month. When ready to bake, add 10-15 minutes to the baking time. Alternatively, freeze a baked pie for up to 2 months. Thaw overnight in the refrigerator before serving. The crust texture may not be quite as crispy after freezing, but the filling remains delicious.
Why does my pie crust crack when rolling?
The dough wasn’t adequately chilled or you’re rolling too aggressively. Let the dough rest for the full 2 hours (or overnight). When rolling, work gently and if cracks appear, pinch them together. The dough is forgiving—small cracks disappear during baking.
How do I know when the filling is done baking?
The filling should bubble at the edges and at the vents. You should see active bubbling, not just around the perimeter but throughout. The crust should be deep golden brown. This indicates the starches have gelatinized properly and the filling will set as it cools.
Can I use other berries in this recipe?
Absolutely! Blackberries, blueberries, marionberries, or a mixture work beautifully. Reduce the sugar slightly if using sweeter berries. Blueberries may require an additional teaspoon of cornstarch as they release more juice. Grandma often made mixed-berry pies using whatever was abundant that season.


