
Salmon Croquettes Recipe: Grandma’s Secret Method
Salmon croquettes are a timeless classic that brings together crispy exteriors and tender, flaky salmon centers. This beloved recipe has been passed down through generations, and today we’re sharing the authentic method that made Grandma’s version legendary in kitchens across America. Whether you’re looking for a best healthy food recipe or a comforting family dinner, salmon croquettes deliver both nutrition and nostalgia in every bite.
What makes these croquettes special isn’t just the quality of ingredients—it’s the technique. Grandma understood that the perfect croquette requires patience, precision, and a few clever tricks that home cooks often overlook. From selecting the right salmon to mastering the binding technique, we’ll walk you through every step to ensure your croquettes turn out golden, crispy, and absolutely delicious. This isn’t just a recipe; it’s a culinary inheritance worth preserving.
Why Salmon Croquettes Are Worth Making
Salmon croquettes represent more than just a recipe—they’re a bridge between traditional home cooking and modern nutritional awareness. Canned or fresh salmon provides exceptional protein content, making these croquettes an excellent choice for anyone seeking foods rich in antioxidants and omega-3 fatty acids. Unlike many fried foods, properly made salmon croquettes balance indulgence with genuine health benefits.
The beauty of this recipe lies in its versatility. Grandma’s method works equally well for weeknight dinners, brunch gatherings, or elegant appetizers. Serve them alongside quick breakfast recipes for a protein-packed morning, or present them as the star of a lunch spread. The croquettes maintain their integrity whether served hot or at room temperature, making them ideal for meal prep and entertaining.
What truly sets Grandma’s method apart is understanding the science behind the croquette. The exterior crust must be thick enough to hold the delicate interior together, yet thin enough to remain crispy rather than tough. The filling requires proper moisture balance—too dry and the croquette becomes dense, too wet and it falls apart during cooking. These subtle distinctions separate mediocre croquettes from exceptional ones.

Essential Ingredients for Authentic Croquettes
Grandma knew that quality ingredients matter tremendously, especially when the recipe contains so few components. Here’s what you’ll need to create authentic salmon croquettes:
- Salmon: One 14.75-ounce can of wild-caught salmon (or 1.5 cups fresh cooked salmon), drained and flaked. The key is removing excess liquid without squeezing out flavor.
- Potatoes: One pound of russet potatoes, boiled and mashed until completely smooth. Lumps compromise the texture.
- Breadcrumbs: One cup of panko breadcrumbs for coating, plus one-quarter cup of fine breadcrumbs for the mixture. Japanese panko creates superior crispness.
- Eggs: Two large eggs—one for binding the mixture, one for the egg wash. Room temperature eggs incorporate more smoothly.
- Onion: One-half cup of finely minced onion, sautéed until translucent. Raw onion creates moisture and harsh flavor.
- Seasonings: Two teaspoons of Dijon mustard, one teaspoon of Old Bay seasoning, one-half teaspoon of garlic powder, salt, and fresh black pepper to taste.
- Binding agent: Two tablespoons of mayonnaise (Grandma’s secret for moisture and binding).
- Oil for frying: Vegetable or canola oil for shallow or deep frying.
The combination of ingredients creates a balanced flavor profile that doesn’t overpower the delicate salmon. Grandma avoided excessive seasoning, understanding that salmon’s natural richness should remain the star ingredient.
Step-by-Step Preparation Guide
Step One: Prepare the Potatoes
Begin by peeling and cutting one pound of russet potatoes into equal-sized chunks. Place them in cold salted water and bring to a boil. Cook for 12-15 minutes until a fork pierces them easily. Drain thoroughly and return to the pot. Mash over low heat for two minutes to evaporate excess moisture—this step is crucial for proper texture. Season lightly with salt and pepper, then spread on a plate to cool completely. Cold potatoes are essential; warm ones create a wet mixture that won’t hold together.
Step Two: Prepare the Salmon
If using canned salmon, drain thoroughly in a fine-mesh strainer, pressing gently to remove excess liquid. Remove any bones (they’re edible and nutrient-rich, but Grandma preferred removing them for texture). Flake the salmon into small, uniform pieces. If using fresh salmon, poach it gently in simmering water for 8-10 minutes, cool, and flake. Fresh salmon creates a slightly more delicate texture, while canned salmon offers convenience without sacrificing quality.
Step Three: Sauté the Aromatics
Heat one tablespoon of butter in a small skillet over medium heat. Add one-half cup of finely minced onion and cook for 4-5 minutes, stirring occasionally, until completely translucent and soft. The onion should have no bite remaining. Cool the mixture slightly before incorporating into the binding mixture. This step develops sweetness and eliminates harsh raw onion flavor.
Step Four: Create the Mixture
In a large mixing bowl, combine the cooled mashed potatoes, flaked salmon, and sautéed onion. In a separate small bowl, whisk together one egg, two tablespoons of mayonnaise, two teaspoons of Dijon mustard, one teaspoon of Old Bay seasoning, one-half teaspoon of garlic powder, and one-quarter cup of fine breadcrumbs. Pour this mixture over the salmon and potatoes, then fold together gently using a rubber spatula. Mix until just combined—overmixing develops gluten in the potatoes, creating a dense texture. The mixture should hold together when pressed but remain light and airy.
Mastering the Binding and Shaping Process
This is where Grandma’s secret technique truly shines. Proper shaping determines whether your croquettes hold together during cooking.
Chilling the Mixture
Refrigerate the mixture for at least one hour, preferably overnight. Cold mixture is significantly easier to shape and holds together better during cooking. The chill time allows the breadcrumbs to fully hydrate and the flavors to meld. If you’re short on time, 30 minutes in the freezer provides adequate firming.
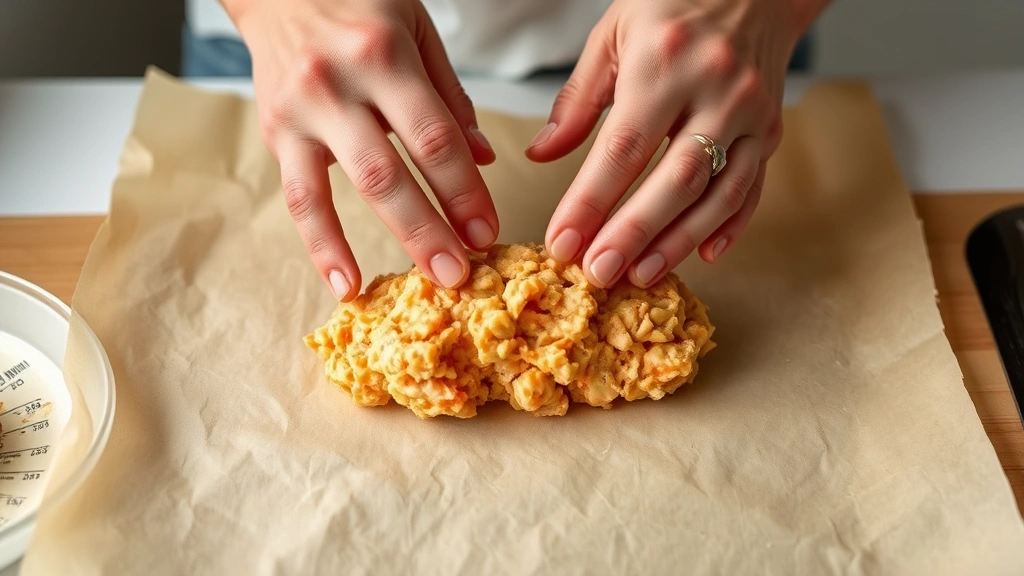
Shaping Technique
Line a baking sheet with parchment paper. Using two tablespoons (one for scooping, one for releasing), form the mixture into oval croquette shapes approximately 3 inches long and 1.5 inches wide. The uniform size ensures even cooking. For a more professional presentation, use an ice cream scoop, then gently shape each portion with damp hands. Keep your hands slightly damp throughout—this prevents sticking while maintaining shape integrity.
The Three-Step Breading Station
Grandma’s method uses a traditional breading station for superior crust development:
- Station One: One cup of panko breadcrumbs in a shallow dish
- Station Two: One beaten egg mixed with one tablespoon of water in another shallow dish
- Station Three: One cup of panko breadcrumbs in a third shallow dish
Roll each croquette in the first panko dish, coating evenly. Dip into the egg wash, allowing excess to drip off, then roll in the second panko dish for a double-crust coating. This double-breading technique creates the distinctive crispy exterior that makes Grandma’s croquettes memorable. Place breaded croquettes on a parchment-lined baking sheet and chill for 15 minutes before cooking. This final chill prevents the breading from sliding off during frying.
Cooking Techniques for Perfect Results
Shallow Frying Method (Grandma’s Preferred Technique)
Heat one-half inch of vegetable oil in a large skillet over medium-high heat. Test the oil temperature by dropping a small breadcrumb into the oil—it should sizzle immediately and turn golden within 15 seconds. The ideal temperature is 350-375°F. Carefully place croquettes into the hot oil, working in batches to avoid overcrowding. Cook for 2-3 minutes per side until deep golden brown. The exterior should be crispy and audibly crackle when bitten. Transfer to a paper towel-lined plate to drain excess oil.
Shallow frying offers advantages over deep frying: it uses less oil, requires less space, and provides easier monitoring of the cooking process. Grandma preferred this method because it produces consistently excellent results without the mess of deep frying.
Deep Frying Alternative
If you prefer deep frying, heat two inches of oil to 350°F in a heavy-bottomed pot. Use a thermometer to maintain consistent temperature. Deep fry croquettes for 2-3 minutes total, turning once halfway through, until uniformly golden. Remove with a slotted spoon and drain on paper towels. Deep frying produces slightly lighter, airier croquettes, but requires more careful temperature management.
Baking Option for Reduced Oil
For a lighter version, preheat your oven to 400°F. Lightly spray or brush breaded croquettes with oil on all sides. Arrange on a parchment-lined baking sheet and bake for 15-18 minutes, turning halfway through, until golden brown. While baked croquettes lack the traditional crispy exterior, they offer a healthier alternative without sacrificing too much texture.
Testing for Doneness
A perfectly cooked croquette should have a golden-brown exterior that crackles when bitten, and a hot, creamy interior that holds together. The salmon should be heated through (no cold spots), and the potato should be completely warm. If your croquettes are browning too quickly before the interior heats, reduce the oil temperature slightly and cook a bit longer.
Sauce Pairings and Serving Ideas
Grandma always served croquettes with complementary sauces that enhanced rather than masked the salmon flavor. Learn how to make homemade sauces that elevate this classic dish.
Classic Tartar Sauce
Combine one cup of mayonnaise, three tablespoons of finely minced dill pickle, one tablespoon of fresh lemon juice, one teaspoon of Dijon mustard, and one minced shallot. This traditional pairing complements salmon’s richness with bright acidity and briny notes.
Dill Cream Sauce
Whisk together one cup of sour cream, two tablespoons of fresh dill, one tablespoon of lemon juice, one minced garlic clove, and salt and pepper to taste. This lighter sauce highlights salmon’s delicate flavor without overwhelming it.
Lemon Aioli
Blend one cup of mayonnaise with three minced garlic cloves, zest and juice of one lemon, and one-half teaspoon of smoked paprika. This sophisticated sauce adds depth and brightness to each bite.
Serving Suggestions
Serve salmon croquettes warm, fresh from the pan, alongside crispy roasted vegetables or a fresh green salad. For brunch, pair them with easy homemade bread recipes and poached eggs for a memorable meal. They also work beautifully as appetizers for cocktail parties—simply cut cooled croquettes in half and serve with toothpicks and sauce for dipping.
Storage and Make-Ahead Tips
Refrigerator Storage
Cooked croquettes keep refrigerated for up to three days in an airtight container. Reheat gently in a 300°F oven for 8-10 minutes until warmed through. Avoid microwaving, which makes the exterior soggy. For best results, reheat on a wire rack set over a baking sheet to allow air circulation underneath.
Freezer Storage
Freeze cooked croquettes for up to two months. Arrange cooled croquettes on a baking sheet, freeze until solid (about two hours), then transfer to a freezer bag. Reheat from frozen in a 325°F oven for 15-18 minutes. Alternatively, freeze uncooked breaded croquettes and cook directly from frozen, adding 1-2 minutes to the cooking time.
Make-Ahead Strategy
Prepare the mixture and shape the croquettes up to one day ahead. Keep them refrigerated on a parchment-lined baking sheet, covered loosely with plastic wrap. Bread them just before cooking for the crispest exterior. This approach allows you to serve fresh croquettes with minimal last-minute effort.
FAQ
Can I use fresh salmon instead of canned?
Absolutely. Use 1.5 cups of flaked cooked salmon. Poach fresh salmon fillet gently in simmering water for 8-10 minutes, cool completely, and flake. Fresh salmon creates a slightly more delicate texture, though canned salmon offers equal nutritional value and convenience. Both versions honor Grandma’s traditional method.
What if my croquettes fall apart during cooking?
This typically indicates insufficient binding. Ensure your potatoes are completely mashed with no lumps, and that you’re using cold mixture when shaping. The egg and mayonnaise create the binding—if your mixture seems dry, add another tablespoon of mayonnaise. Also verify that your oil temperature is correct; oil that’s too cool allows the croquette to disintegrate before the exterior sets.
Can I make these gluten-free?
Yes. Substitute gluten-free panko breadcrumbs for regular panko. Use gluten-free flour mixed with the breadcrumbs if needed. The cooking technique remains identical. Gluten-free versions may brown slightly differently, so monitor closely during cooking.
How do I know when the oil is the right temperature?
Use a cooking thermometer for accuracy—350-375°F is ideal. Alternatively, drop a small piece of bread into the oil. If it browns within 15-20 seconds, the temperature is correct. If it browns too quickly, let the oil cool slightly. If browning is too slow, heat the oil a bit longer.
What’s the difference between Grandma’s method and other croquette recipes?
Grandma’s technique emphasizes proper moisture control, cold mixture handling, and double-breading for superior texture. Many recipes skip the preliminary chilling or use warm mixture, resulting in less cohesive croquettes. The mayonnaise addition provides moisture and binding that ensures the interior stays tender while the exterior becomes crispy.
Can I serve these cold?
Yes. Cooled croquettes are delicious served at room temperature, making them ideal for picnics or packed lunches. The flavor remains excellent, though the exterior loses some crispness. For best results, reheat before serving.
What’s the best oil for frying?
Use neutral oils with high smoke points: vegetable, canola, or peanut oil work best. Avoid olive oil, which has a lower smoke point and imparts flavor that competes with the salmon. Neutral oils allow the salmon’s natural taste to shine.
How many croquettes does this recipe yield?
This recipe produces approximately 12-14 croquettes depending on size. Each serving typically includes 2-3 croquettes. The recipe doubles easily if you’re feeding a larger crowd.


