Ultimate Steak Sandwich? Chef’s Guide
A perfectly crafted steak sandwich transcends the ordinary—it’s a harmonious blend of tender, juicy beef, complementary flavors, and textural contrasts that elevate this classic to restaurant-quality status. Whether you’re a home cook seeking to master this iconic dish or a culinary enthusiast wanting to understand the professional techniques behind it, this comprehensive guide reveals the secrets that separate mediocre sandwiches from extraordinary ones.
The steak sandwich has earned its place in culinary tradition for good reason. Unlike simple assembled sandwiches, it demands precision in meat selection, cooking technique, and component preparation. Professional chefs understand that success lies in the details—from the thickness of your cut to the temperature at which you sear your beef, from the choice of bread to the balance of accompaniments. This guide walks you through every step, ensuring your homemade steak sandwich rivals anything you’d find at a high-end steakhouse.
Selecting Your Beef Cut
The foundation of any exceptional steak sandwich begins with choosing the right cut of beef. Professional chefs typically favor cuts that offer a balance of tenderness, marbling, and flavor intensity. Your selection dramatically influences the final outcome, so understanding each option is crucial.
Ribeye stands as the premier choice for most steakhouse-quality sandwiches. This cut features excellent marbling—those white lines of fat running through the meat—which renders during cooking, keeping the interior juicy while developing a flavorful crust. The ribeye’s rich, beefy taste and natural tenderness make it forgiving for home cooks while delivering professional results.
New York Strip offers a leaner alternative with a more pronounced beef flavor and firmer texture. It’s ideal if you prefer less fat and a steak that maintains its structure better when sliced thin for sandwich applications. The strip’s consistent grain and uniform thickness make slicing uniform pieces straightforward.
Filet Mignon provides maximum tenderness and an elegant presentation, though at a premium price point. This cut works beautifully for upscale versions, though its mild flavor requires careful seasoning and complementary toppings to shine.
Sirloin offers a budget-friendly option without sacrificing quality when properly cooked. While leaner than ribeye, a well-marbled sirloin can deliver satisfying results, especially when paired with flavorful homemade sauces.
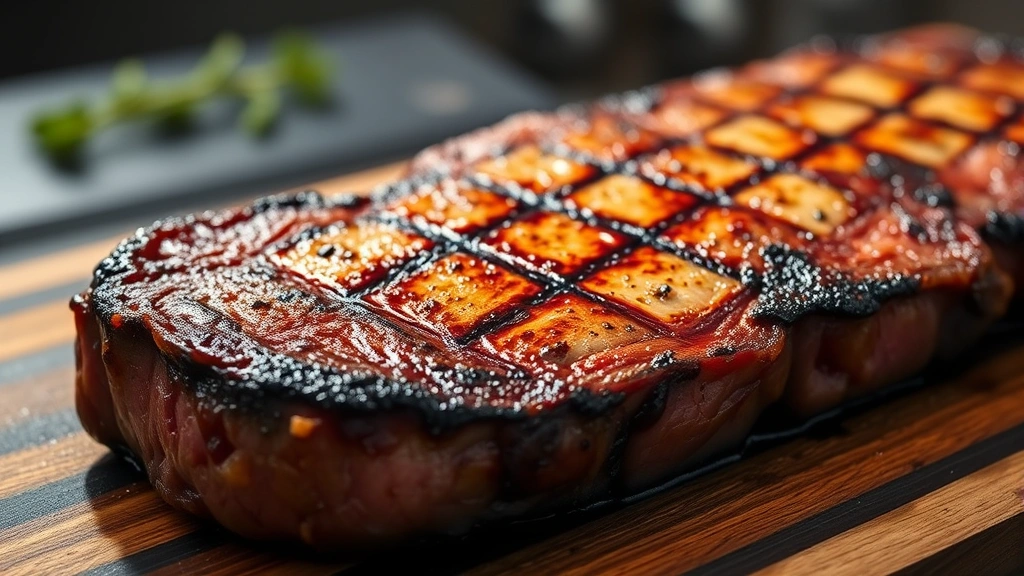
Purchase 1.5 to 2 inches thick steaks to ensure proper searing while maintaining a rare to medium-rare interior. Thinner cuts tend to overcook before developing adequate crust, while thicker cuts require longer cooking times that can dry out the exterior.
Preparing Your Meat
Proper preparation separates amateur cooks from culinary professionals. This phase encompasses temperature management, seasoning strategy, and surface preparation—all critical for optimal results.
Remove from refrigeration 30-40 minutes before cooking. Room-temperature meat cooks more evenly, allowing the interior to reach your target doneness while the exterior develops a proper crust. Cold meat straight from the fridge creates temperature gradients that lead to uneven cooking.
Pat dry thoroughly using paper towels. Moisture on the surface creates steam, preventing the Maillard reaction—the chemical process that generates that delicious brown crust and complex flavors. Professional kitchens understand that dryness is essential for proper browning.
Season generously with kosher salt and freshly cracked black pepper on both sides approximately 15 minutes before cooking. This timing allows salt to dissolve slightly, enhancing moisture retention rather than drawing it out. Avoid fine table salt, which dissolves too quickly and can make the exterior tough. For additional depth, consider adding garlic powder and smoked paprika.
Optional dry brining involves salting uncovered meat 12-24 hours ahead. The salt penetrates deeper, enhancing flavor throughout the meat and improving moisture retention during cooking. This advanced technique yields noticeably superior results for premium cuts.
Some chefs apply a thin layer of oil to the meat’s surface rather than the hot pan, reducing smoke and ensuring better contact with the cooking surface. This technique, preferred by The Culinary Institute of America, minimizes oil splattering while maximizing browning efficiency.
Mastering the Sear
The searing technique represents the most critical cooking phase. This is where amateur sandwiches diverge from restaurant-quality versions.
Use the right pan. Cast iron or stainless steel conducts and retains heat far better than non-stick surfaces, which can’t handle the high temperatures required for proper browning. Preheat your pan for 3-5 minutes over medium-high to high heat until it’s extremely hot—nearly smoking.
Test pan readiness by holding your hand above the surface; you should feel intense heat radiating upward within 2-3 inches. If water droplets bead and dance rather than sizzle immediately, your pan needs more time.
Sear without moving. Place your steak on the hot pan and resist the temptation to flip or move it for 3-4 minutes. This uninterrupted contact allows proper crust development. You’ll hear an aggressive sizzle—this is desirable. Flip once and sear the other side for another 3-4 minutes for 1.5-inch steaks.
Target internal temperatures:
- Rare: 120-125°F
- Medium-Rare: 130-135°F (optimal for sandwiches)
- Medium: 140-145°F
Use an instant-read thermometer inserted horizontally into the thickest part, not touching bone. Remember that meat continues cooking after removal—the carryover effect adds 3-5°F, so remove your steak 5 degrees below target.
Rest your meat for 5-10 minutes after cooking. This crucial step allows juices to redistribute throughout the meat rather than running onto your cutting board. A resting steak yields significantly juicier sandwich meat.
For thicker cuts (2+ inches), consider the reverse-sear method: cook slowly in a 275°F oven until 10 degrees below target, then sear aggressively in a screaming hot pan. This approach yields more even cooking with less risk of overcooking the interior.
Bread Selection and Toasting
Your bread choice fundamentally shapes the eating experience. The best steak sandwich bread provides structural integrity, complementary flavor, and textural contrast without overwhelming the beef.
Ciabatta offers Italian tradition with an open crumb structure that absorbs juices without becoming soggy. Its subtle flavor complements rather than competes with beef, and its sturdy crust provides satisfying texture.
Focaccia delivers richness with its olive oil content and herb-infused surface. Choose a thinner focaccia to avoid overwhelming the sandwich with bread.
Hoagie rolls or sub rolls work well for classic applications. Look for artisanal bakery versions with substantial crust and chewy interior rather than mass-produced options.
Sourdough brings tangy complexity that complements beef beautifully. Its tight crumb resists sogginess effectively, making it ideal for heavily dressed sandwiches.
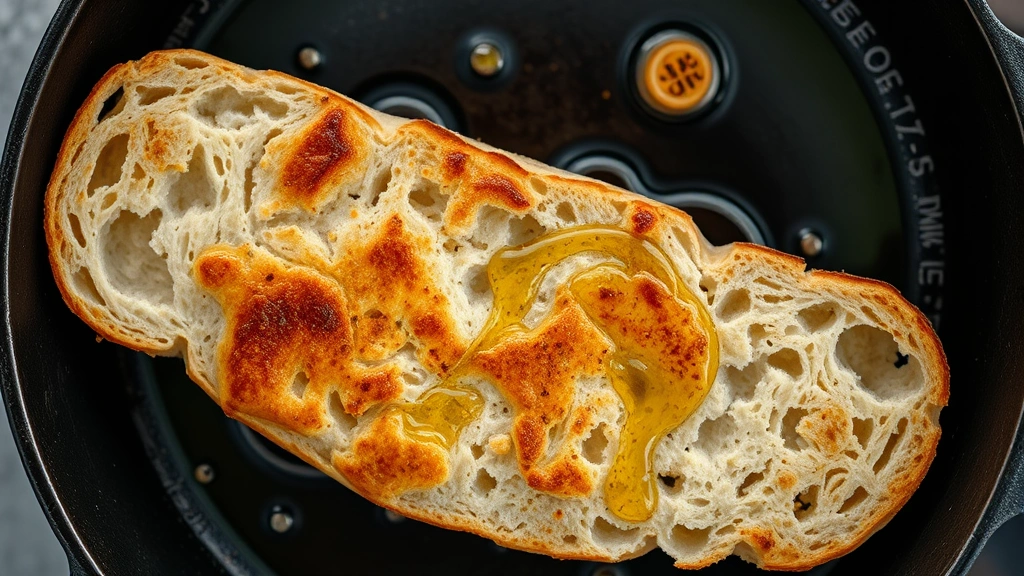
Toasting technique significantly impacts the final product. Brush bread lightly with olive oil or butter and toast cut-side down in a hot skillet or oven at 400°F for 2-3 minutes until golden and crispy. Toasting serves multiple purposes: it creates a moisture barrier preventing the bread from absorbing excess juices, adds textural contrast, and develops subtle caramelized flavors.
Avoid overly thick bread that dominates the sandwich. Your bread should support the steak, not overpower it. A general ratio of 40% bread to 60% fillings works well for balanced bites.
Building Your Condiments
The condiments and toppings you select transform a simple steak sandwich into a sophisticated culinary creation. Understanding flavor balancing is essential.
Mayonnaise-based spreads provide moisture and richness. Mix quality mayonnaise with roasted garlic, fresh herbs, or horseradish for complexity. A horseradish-mayo combination offers sharp, peppery notes that cut through rich beef beautifully.
Caramelized onions represent a non-negotiable element for many chefs. Cook sliced onions slowly in butter over medium heat for 25-30 minutes, stirring occasionally, until deeply golden and sweet. This umami-rich component adds depth and complexity to every bite.
Sautéed mushrooms contribute earthy umami flavors. Use cremini or portobello mushrooms, sliced and cooked in butter with garlic until golden and tender. This addition complements beef’s savory profile perfectly.
Cheese selections should complement rather than overwhelm. Provolone offers Italian heritage and subtle tang. Swiss provides mild creaminess. Smoked gouda brings depth. Apply cheese to the warm steak immediately after cooking, allowing residual heat to soften it slightly without full melting.
Crispy elements add textural contrast. Bacon strips provide smoky saltiness. Crispy shoestring onions offer textural surprise. These elements prevent the sandwich from becoming monotonously soft.
Learn how to create homemade sauces that elevate your sandwich beyond basic condiments. A red wine reduction or chimichurri sauce demonstrates professional technique and impressive flavor development.
Assembly Techniques
How you assemble your sandwich impacts flavor distribution and structural integrity.
Layer strategically. Start with your condiment spread on the toasted bottom bread, creating a moisture barrier. Add the sliced steak next—the warm meat’s residual heat slightly softens the bread beneath while the condiments begin warming. Layer your caramelized onions and mushrooms next, followed by cheese (which will warm from the steak’s residual heat), then any crispy elements, and finally your top bread.
Slice your steak properly. After resting, slice against the grain into ¼-inch thick pieces. Slicing against the grain shortens muscle fibers, making each bite more tender. A sharp serrated knife works better than a chef’s knife for this application, providing cleaner cuts without crushing the meat.
Temperature management ensures all components work harmoniously. Your steak should still be warm when assembled, your bread should be fresh from toasting, and your toppings should be at room temperature. This temperature variation creates interesting sensory experiences.
Pressing technique depends on your sandwich style. Light pressing (using the flat side of a spatula for 10 seconds) helps components adhere without squishing the steak. Avoid aggressive pressing that forces out juices and creates an unpleasant texture.
Some professional establishments wrap assembled sandwiches briefly in parchment paper and allow them to rest 2-3 minutes before serving. This brief rest allows flavors to meld and the sandwich to set, making it less likely to fall apart during eating.
Advanced Flavor Additions
Elevate your sandwich beyond the basics with these professional techniques and creative additions that demonstrate culinary sophistication.
Compound butters represent a restaurant staple. Mix softened butter with minced garlic, fresh herbs (parsley, thyme, rosemary), lemon zest, and a pinch of sea salt. Place a small dollop on the warm steak immediately after cooking—it melts into the meat, providing luxurious richness and herbaceous complexity.
Chimichurri sauce brings bright, fresh contrast to rich beef. Blend fresh parsley, oregano, garlic, red wine vinegar, olive oil, and red pepper flakes. This Argentine condiment’s acidity cuts through fat beautifully while its herbaceous profile adds dimension.
Truffle oil drizzle adds luxurious earthiness. Use sparingly—just a few drops—as truffle flavors intensify quickly. This addition immediately elevates the sandwich’s perceived value and sophistication.
Crispy shallots provide textural contrast and subtle sweetness. Thinly slice shallots and shallow-fry in oil until golden and crispy, then drain on paper towels. Their delicate texture and rich flavor complement beef exceptionally well.
Herb-infused oils add finishing touches. Brush your bread lightly with basil oil, garlic oil, or chili oil before toasting for subtle flavor enhancement that permeates the entire sandwich.
Consider experimenting with beef-forward recipes to understand different beef flavor profiles and cooking techniques that might inspire your sandwich creations. Understanding how professional kitchens approach beef preparation across different dishes enhances your sandwich-making skills.
Explore detailed steak cooking guides from culinary experts to deepen your understanding of heat management and doneness indicators. These resources provide scientific explanations for why certain techniques produce superior results.
Study flavor balancing principles that inform professional cooking. Understanding how salt, fat, acid, and heat interact helps you make intuitive decisions about ingredient combinations and seasoning levels.
FAQ
What’s the best steak cut for sandwiches?
Ribeye remains the top choice for most applications due to its excellent marbling, tenderness, and rich flavor. New York Strip offers a leaner alternative with more pronounced beef taste. Both deliver restaurant-quality results when properly cooked.
Can I make steak sandwiches ahead of time?
Assemble just before serving for optimal texture and temperature. However, you can prepare components ahead: cook and slice steak, make condiments, toast bread, and prepare toppings several hours in advance. Assemble when ready to eat.
How do I prevent a soggy sandwich?
Toast your bread thoroughly to create a moisture barrier. Apply condiments to bread rather than directly on the steak. Use well-drained cooked toppings. Assemble immediately before eating, and wrap briefly in parchment if necessary.
What temperature should my steak reach?
Medium-rare (130-135°F internal temperature) offers the optimal balance of tenderness and juiciness for sandwiches. Remove from heat 5 degrees below target to account for carryover cooking.
Should I use butter or oil for searing?
Use high-heat oil like avocado or grapeseed oil for searing, as butter burns at high temperatures. You can add butter in the final minute for flavor, but oil handles the initial searing better.
How thick should I slice the steak?
Slice against the grain into ¼-inch pieces for optimal tenderness. This thickness allows the steak to remain tender and juicy while being substantial enough to maintain its character in the sandwich.
Can I make this sandwich with leaner cuts?
Yes, though results differ. Sirloin or filet mignon work well when seasoned assertively and paired with flavorful condiments. Lean cuts require careful cooking to avoid dryness; don’t exceed medium doneness.
What’s the purpose of resting the meat?
Resting allows muscle fibers to relax and reabsorb juices, resulting in significantly juicier meat. A 5-10 minute rest after cooking is essential for optimal texture and moisture retention.


