Juicy Top Round Roast? Family Favorite Recipe
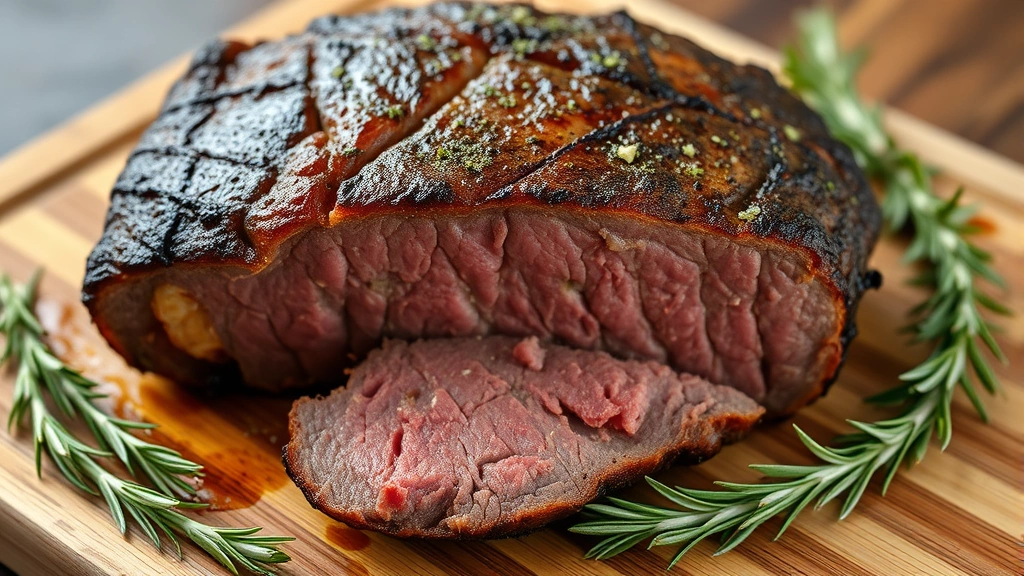
There’s something truly magical about a perfectly cooked top round roast that brings the whole family to the dinner table. This lean, affordable cut of beef has earned its place as a weeknight hero and weekend showstopper, delivering tender, succulent meat that rivals more expensive cuts when prepared with care and attention. The secret lies not in fancy techniques or hard-to-find ingredients, but in understanding how heat, time, and proper seasoning work together to transform a humble roast into something extraordinary.
Top round roast comes from the hindquarters of the cow and, while naturally lean, becomes incredibly juicy when cooked using low-and-slow methods or high-heat searing followed by gentle braising. This versatile cut works beautifully for Sunday dinners, holiday gatherings, and meal-prep sessions. Whether you’re serving it with roasted vegetables, alongside crusty bread, or shredded for sandwiches, this recipe delivers consistent, delicious results that will have your family asking for seconds.
Choosing the Perfect Top Round Roast
Selecting the right roast is your first step toward success. Look for a roast that weighs between 2.5 to 4 pounds, which provides enough mass to retain moisture during cooking while remaining manageable in size. The meat should display a deep red color with a thin layer of fat marbling throughout. Avoid roasts that appear grayish or have excessive surface moisture, as these indicate poor storage or aging.
When shopping, ask your butcher to trim excess external fat while leaving a thin protective layer. This balance prevents the roast from drying out while allowing proper browning. If your roast has a thick fat cap on one side, request that your butcher score it in a crosshatch pattern. This allows seasonings to penetrate deeper and helps render fat more evenly during cooking.
The quality of your beef matters significantly. Grass-fed or grass-finished beef often has superior flavor and texture, though conventional beef works perfectly fine. Check the packaging date and choose roasts packaged within the past two days for optimal freshness. Allow your roast to sit at room temperature for 30-45 minutes before cooking, which ensures even heat distribution and more consistent results.
Ingredients You’ll Need
For the roast:
- 1 top round roast (3-4 pounds)
- 2 tablespoons kosher salt
- 1 tablespoon freshly ground black pepper
- 2 tablespoons garlic powder
- 1 tablespoon onion powder
- 1 tablespoon smoked paprika
- 2 teaspoons dried thyme
- 2 teaspoons dried rosemary
- 3 tablespoons olive oil
For the braising liquid:
- 2 cups beef broth (low-sodium preferred)
- 1 cup red wine (optional but recommended)
- 4 medium carrots, cut into 2-inch pieces
- 4 medium potatoes, quartered
- 1 large yellow onion, cut into wedges
- 6 cloves garlic, minced
- 2 bay leaves
- 1 tablespoon tomato paste
- 1 teaspoon Worcestershire sauce
These ingredients create a complete, restaurant-quality meal in one pot. The combination of herbs and spices builds complex flavor layers, while the braising liquid keeps the meat tender and creates a rich pan sauce. If you prefer a simpler approach, you can skip the wine and vegetables and serve your roast with fresh bread for soaking up the natural juices.
Preparation and Seasoning
Pat your roast completely dry with paper towels. Moisture on the surface prevents proper browning and creates steam rather than the desirable crust. Take your time with this step—it makes a dramatic difference in the final result. Place the dried roast on a clean cutting board.
Combine all dry seasonings in a small bowl: kosher salt, black pepper, garlic powder, onion powder, smoked paprika, thyme, and rosemary. Mix thoroughly to distribute the spices evenly. Rub this seasoning mixture generously all over the roast, working it into crevices and ensuring complete coverage. Don’t be shy—this is where you build the flavorful crust that seals in juices.
For enhanced flavor, consider scoring the fat cap with a sharp knife in a crosshatch pattern, cutting about 1/4 inch deep. This allows seasonings to penetrate and helps render the fat during cooking. Let the seasoned roast rest at room temperature for 20-30 minutes, allowing the salt to begin breaking down muscle fibers and enhancing moisture retention.
The Cooking Method
Preheat your oven to 450°F (232°C). Heat a large Dutch oven or heavy roasting pan over medium-high heat. Add olive oil and let it shimmer until just smoking. Carefully place your seasoned roast in the hot pan and sear for 3-4 minutes per side, creating a deep brown crust. Work in batches if necessary—don’t crowd the pan, as this creates steam and prevents browning. The goal is a rich, caramelized exterior that locks in moisture and adds incredible flavor depth.
Remove the roast temporarily and set aside. Lower heat to medium and add your diced onion to the pan, stirring occasionally for 3-4 minutes until softened and golden. Add minced garlic and tomato paste, cooking for another minute while stirring constantly. This builds the flavor foundation for your braising liquid. Deglaze the pan with red wine (or additional broth if skipping wine), scraping up all the browned bits stuck to the bottom. These flavorful particles—called fond—are liquid gold for your sauce.
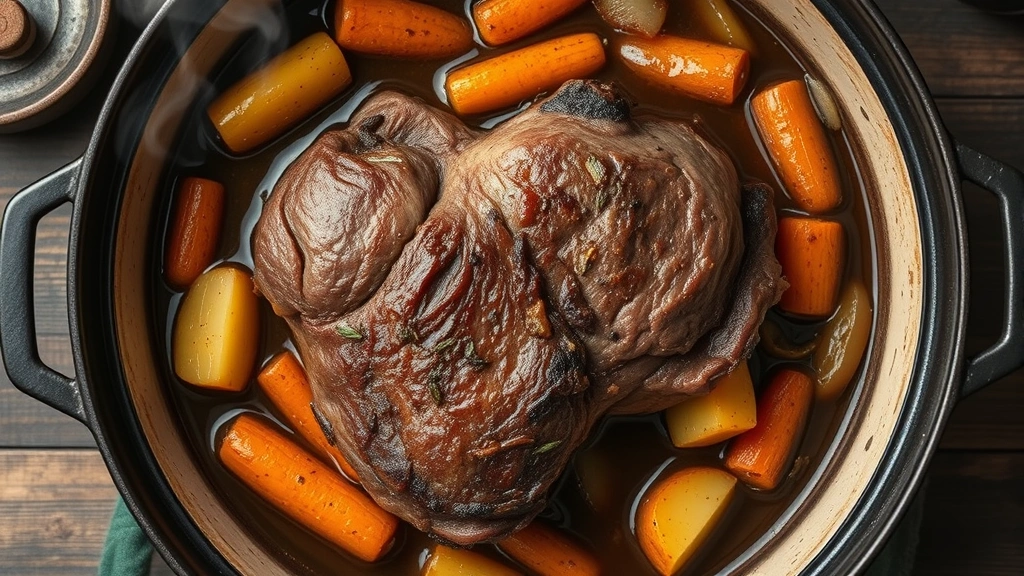
Pour in beef broth, add bay leaves, Worcestershire sauce, and return the roast to the pan. The liquid should come halfway up the sides of the roast. Bring to a gentle simmer on the stovetop, then cover with a lid and transfer to your preheated oven. Reduce oven temperature to 325°F (163°C). This low-and-slow approach is crucial for top round, which benefits from extended, gentle cooking that breaks down connective tissue without drying out the lean meat.
Cook for approximately 2.5 to 3 hours for a 3-4 pound roast. At the 1.5-hour mark, add your carrots and potatoes to the pan. Check the roast after 2.5 hours by inserting a fork—the meat should shred easily when properly cooked. For a more well-done roast, continue cooking until the internal temperature reaches 160-165°F using a meat thermometer inserted into the thickest part. Many home cooks prefer medium-rare (135-140°F internal temperature) for maximum juiciness, which requires approximately 2-2.5 hours total cooking time.
Resting and Slicing
This step is absolutely critical and often overlooked. Remove the roast from the oven and let it rest in the braising liquid for 10-15 minutes. During this resting period, the meat fibers relax and reabsorb juices that were driven to the surface during cooking. Skipping this step results in a dry, stringy roast as all those precious juices spill onto your cutting board.
Transfer the roast to a cutting board and tent loosely with foil. Strain the braising liquid through a fine-mesh sieve, reserving the vegetables and liquid separately. If you prefer a thicker sauce, return the liquid to the stovetop over medium-high heat and simmer for 5-10 minutes until reduced by one-quarter. Whisk in one tablespoon of cornstarch mixed with two tablespoons of cold water for a silky, velvety consistency.
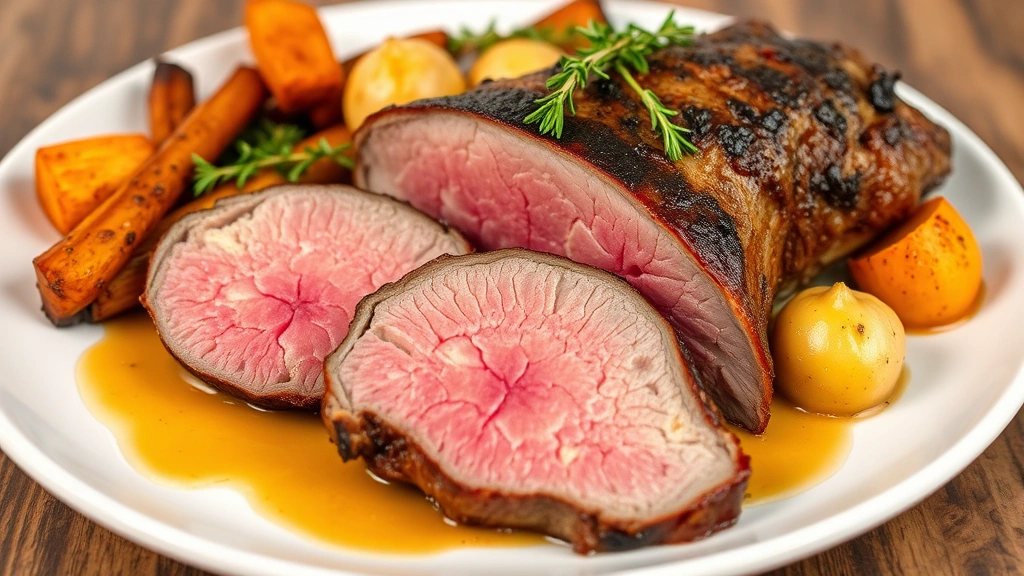
Slice the roast against the grain into 1/4 to 1/2-inch thick slices. Identifying the grain direction is crucial—look at the muscle fibers and cut perpendicular to them. This shortens the fibers and makes each bite more tender. Arrange sliced roast on a serving platter, surround with vegetables, and pour sauce over the top. The meat should be tender enough to cut with a fork, and the exterior should have a deep, flavorful crust that contrasts beautifully with the juicy interior.
Serving Ideas and Pairings
A classic presentation pairs your top round roast with the braised vegetables and pan sauce, creating a complete one-pot meal that requires minimal additional preparation. Serve with crusty sourdough bread for soaking up every drop of that precious sauce.
For a more casual approach, shred leftover roast and use it for sandwiches. Layer on toasted bread with sautéed onions and homemade sauce for something reminiscent of a gourmet steak sandwich. The tender, flavorful meat works beautifully in this application.
Consider serving roast slices alongside creamy mashed potatoes, roasted root vegetables, or a crisp green salad dressed with vinaigrette. The richness of the beef pairs wonderfully with acidic sides that cut through the fat. Red wine remains an excellent beverage pairing, particularly medium-bodied varieties like Merlot or Côtes du Rhône. For special occasions, make this the centerpiece of a family gathering menu featuring complementary sides and desserts.
Storage and Leftovers
Allow the roast to cool to room temperature, then transfer sliced meat and vegetables to airtight containers with the braising liquid. Refrigerate for up to 4 days. The flavor actually improves as the meat marinates in the sauce, making this an excellent make-ahead option for busy weeks.
To reheat, place desired portion in a covered skillet over medium-low heat, stirring occasionally until warmed through, approximately 10-15 minutes. Add a splash of broth if the mixture seems dry. For freezing, store in freezer-safe containers for up to 3 months. Thaw overnight in the refrigerator before reheating using the same gentle, covered method.
Shredded roast transforms beautifully into weeknight meals. Toss with barbecue sauce for pulled beef sandwiches, combine with rice and vegetables for burrito bowls, or mix with egg noodles and sour cream for a comforting stroganoff. The versatility of this cut makes it an excellent meal-prep investment.
FAQ
Why is my top round roast tough and chewy?
This typically results from cooking at too high a temperature or not cooking long enough. Top round requires low-and-slow cooking to break down connective tissue. Ensure your oven temperature stays at 325°F and cook until the meat shreds easily with a fork. Additionally, always slice against the grain—slicing with the grain makes even properly cooked meat seem tough.
Can I cook this recipe on the stovetop instead of using the oven?
Absolutely. After searing and building your braising liquid, reduce heat to low, cover the pot, and simmer gently for 2.5-3 hours, checking occasionally that the liquid maintains a gentle simmer rather than a rolling boil. Stovetop cooking works beautifully and offers more control over temperature. Stir vegetables into the pot at the 1.5-hour mark as you would in the oven method.
What’s the difference between top round and bottom round?
Top round comes from the inside of the rear leg and tends to be slightly more tender with better marbling. Bottom round comes from the outside and is leaner but requires even more careful cooking. Both work with this recipe, though top round generally produces more tender results. Ask your butcher to recommend the best option for your needs.
How do I know when the roast is done?
Use a meat thermometer for accuracy. Top round reaches medium-rare at 135-140°F internal temperature and medium at 145-150°F. For maximum juiciness, cook to medium-rare. The meat should also shred easily when pierced with a fork. If you prefer well-done meat, cook to 160-165°F, though this may result in slightly less juicy results due to the lean nature of this cut.
Can I use beef broth instead of wine in the braising liquid?
Yes, absolutely. Simply replace the red wine with an additional cup of beef broth. You’ll lose some of the depth that wine provides, but the roast will still be delicious and tender. If you want to add complexity without wine, consider adding a tablespoon of balsamic vinegar or apple cider vinegar for acidity and depth.
Why should I sear the roast before braising?
Searing creates the Maillard reaction, which builds a flavorful crust through high-heat browning. This crust adds incredible depth and creates a barrier that helps retain juices during cooking. While you can technically braise without searing, the final result lacks the complexity and richness that searing provides. The extra 10 minutes is absolutely worth the improvement.


