Juicy Turkey Injection Recipe: Chef-Approved Method for Maximum Flavor
There’s nothing quite like biting into perfectly moist turkey meat that bursts with flavor from the inside out. The secret that separates an ordinary holiday bird from an extraordinary one lies in a technique that many home cooks overlook: turkey injection. This chef-approved method delivers seasoned liquid directly into the meat, ensuring every fiber stays juicy while absorbing complex flavors that surface-level brining simply cannot achieve.
Unlike traditional brining, which relies on osmosis to draw moisture into the turkey over hours, injection works immediately and penetrates deep into muscle tissue. Professional pitmasters and competition barbecuers have long understood this advantage, and now you can master this technique in your own kitchen. Whether you’re preparing a small 12-pound turkey for an intimate gathering or a massive 20-pound bird for a crowd, this method guarantees results that will have your guests asking for your secrets.
The beauty of turkey injection lies in its versatility. You control every ingredient, every flavor profile, and every element of the final product. From classic butter-based injections enriched with herbs to bold spice-forward blends inspired by global cuisines, the possibilities are virtually endless. Let’s dive into the science, technique, and proven recipes that will transform your turkey from good to unforgettable.
Why Turkey Injection Works Better Than Traditional Brining
Turkey brining has been a holiday staple for decades, and rightfully so—it does improve moisture retention. However, injection offers distinct advantages that explain why competition cooks and high-end restaurants prefer it. When you brine a turkey, you’re relying on salt concentration differences to draw water into the meat through osmosis. This process takes 12-24 hours and primarily affects the outer layers of the bird.
Injection, by contrast, delivers your seasoning liquid directly into the muscle tissue through multiple penetration points. The liquid disperses throughout the meat immediately, reaching the thickest parts of the thighs and breasts equally. This means no more dry white meat while dark meat remains juicy—a common complaint with brined turkeys.
The science behind injection’s effectiveness comes down to how muscle tissue absorbs liquid. When you force seasoned liquid into the meat using pressure, it breaks down muscle fibers slightly, creating pathways for the liquid to distribute. The salt in the injection solution also helps the muscle retain this moisture during cooking by denaturing proteins in a way that enhances water-holding capacity.
Another key advantage: injection doesn’t require advance planning. While brining demands space in your refrigerator and time measured in hours, you can inject a turkey just 2-4 hours before roasting. This makes it perfect for busy cooks who haven’t thought ahead, or for those with limited fridge space during the holidays.
For a deeper understanding of how proteins interact with moisture in cooking, the Serious Eats food science approach provides excellent technical breakdowns of meat cookery principles.
Essential Equipment and Tools You’ll Need
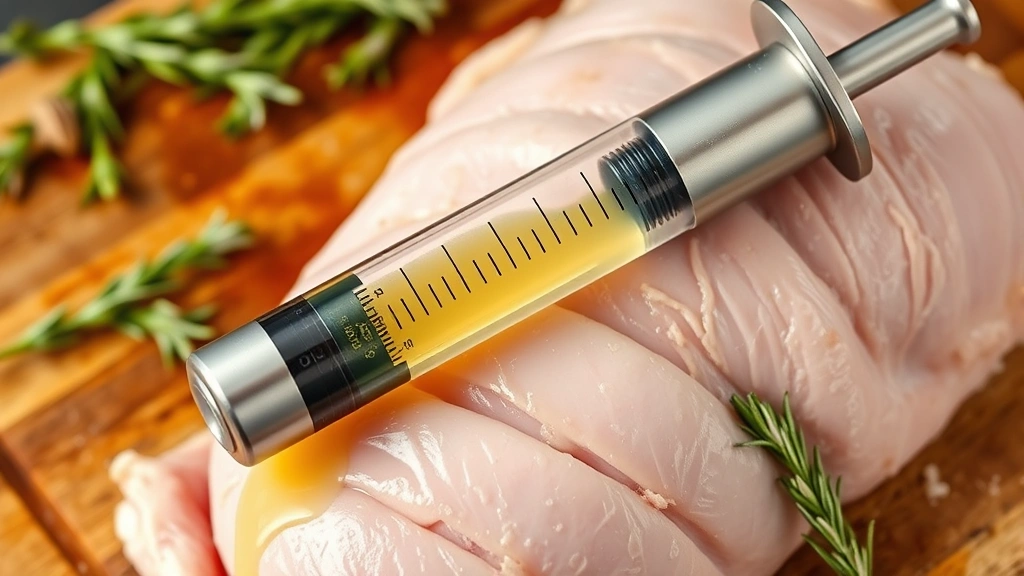
Before diving into recipes, let’s talk about the right tools. You cannot inject turkey effectively with standard kitchen equipment—you need a proper injection syringe designed for this purpose.
- Meat Injector Syringe: Look for a large-capacity injector (40-50ml) with a plunger mechanism. The best ones feature a comfortable handle and a sturdy needle. Stainless steel construction resists corrosion and lasts for years. Popular brands include Maverick House, Masterbuilt, and Oklahoma Joe’s.
- Replacement Needles: Injectors typically come with 2-3 needle sizes. Thicker needles (16-18 gauge) work best for chunky injections with herb pieces, while thinner needles (22 gauge) suit smooth, liquid injections. Keep extras on hand.
- Large Mixing Bowl: You’ll need adequate space to combine and blend your injection liquid thoroughly. Glass or stainless steel bowls work best.
- Whisk or Spoon: For thoroughly blending butter, spices, and liquids into a cohesive mixture.
- Measuring Cups and Spoons: Precision matters when balancing flavors and achieving the right consistency.
- Fine Mesh Strainer: Optional but helpful—if your injection contains herb pieces or larger particles, straining ensures smooth flow through the needle without clogging.
- Paper Towels: Have plenty nearby for cleanup and wiping down your turkey as you inject.
Pro tip: Before your injection day, test your syringe with warm water. Make sure the plunger moves smoothly and the needle isn’t bent or damaged. Nothing’s worse than discovering equipment problems when you’re ready to inject your bird.
Classic Butter and Herb Injection Recipe
This timeless injection captures everything people love about traditional turkey preparation—rich butter, aromatic herbs, and subtle savory notes. It’s the safest choice for family gatherings where guests expect familiar flavors.
Ingredients:
- 1 cup unsalted butter, melted
- 1/2 cup chicken or turkey broth
- 2 tablespoons fresh thyme leaves (or 1 tablespoon dried)
- 1 tablespoon fresh sage, finely chopped (or 1 teaspoon dried)
- 1 tablespoon fresh rosemary, finely chopped (or 1 teaspoon dried)
- 2 cloves garlic, minced extremely fine
- 1 teaspoon kosher salt
- 1/2 teaspoon black pepper
- 1/4 teaspoon cayenne pepper (optional, for subtle heat)
- 2 tablespoons honey or maple syrup
Instructions:
- Combine melted butter with warm broth in a bowl, stirring to emulsify.
- Add all fresh herbs and minced garlic, stirring thoroughly to distribute evenly.
- Season with salt, pepper, and cayenne if using.
- Stir in honey or maple syrup for subtle sweetness that balances the savory herbs.
- Let the mixture cool to room temperature—this prevents the butter from solidifying in the syringe.
- Strain through a fine mesh sieve if you want absolutely smooth injection, or leave herbs in for maximum flavor.
This recipe yields approximately 1.5 cups of injection, which adequately covers a 14-16 pound turkey with multiple injection points. The butter base ensures the injection doesn’t separate and flows easily through standard needles.
Cajun-Spiced Turkey Injection for Bold Flavors
If your family appreciates bold, spicy, and complex flavors, this Cajun-inspired injection delivers restaurant-quality results. It pairs beautifully with similar spice profiles found in other poultry preparations, making it versatile for various holiday menus.
Ingredients:
- 3/4 cup unsalted butter, melted
- 1/2 cup chicken broth
- 1/4 cup apple juice or cider
- 2 tablespoons Cajun seasoning blend (or make your own)
- 1 tablespoon smoked paprika
- 1 tablespoon garlic powder
- 1 tablespoon onion powder
- 2 teaspoons cayenne pepper
- 2 teaspoons dried oregano
- 1 teaspoon dried thyme
- 1 teaspoon black pepper
- 1/2 teaspoon white pepper
- 1 tablespoon Worcestershire sauce
- 1 teaspoon hot sauce (Frank’s RedHot or similar)
- 1/2 teaspoon liquid smoke
- Salt to taste (Cajun blends often contain salt, so taste before adding more)
Instructions:
- Whisk melted butter with broth and apple juice until well combined.
- Add all spices to the liquid, stirring constantly to prevent clumping.
- Incorporate Worcestershire sauce, hot sauce, and liquid smoke, whisking until fully integrated.
- Taste and adjust seasoning—this injection should be bold and spicy, so don’t be shy with the cayenne.
- Allow to cool to room temperature before injecting.
- If spice particles have settled, give it a good stir before each syringe fill.
This robust injection creates a flavor profile reminiscent of New Orleans cooking, with the liquid smoke adding depth typically associated with smoked poultry. The apple juice provides subtle sweetness that rounds out the heat.
Asian-Inspired Injection Recipe
For something completely different, this Asian-fusion injection introduces umami depth and aromatic complexity. It complements traditional Asian cooking techniques and flavor principles beautifully, making it perfect for multicultural holiday celebrations.
Ingredients:
- 1/2 cup unsalted butter, melted
- 1/4 cup soy sauce (low-sodium preferred)
- 1/4 cup mirin or honey
- 1/4 cup chicken broth
- 2 tablespoons rice vinegar
- 1 tablespoon sesame oil
- 1 tablespoon fresh ginger, minced extremely fine
- 3 cloves garlic, minced very fine
- 2 green onions, white parts only, minced
- 1 teaspoon Sichuan peppercorn, finely ground
- 1/2 teaspoon white pepper
- 1/2 teaspoon five-spice powder
- 1 tablespoon honey (in addition to mirin)
- 1 teaspoon sriracha or chili paste (optional)
Instructions:
- Combine melted butter with soy sauce, mirin, broth, and rice vinegar, whisking until emulsified.
- Add sesame oil and whisk again to fully incorporate.
- Stir in ginger, garlic, and green onion parts, ensuring even distribution.
- Add ground Sichuan peppercorn, white pepper, and five-spice powder, whisking thoroughly.
- Stir in honey and optional sriracha for additional heat and complexity.
- Let cool completely before use, as the sesame oil can separate if too warm.
- Stir well before each injection, as soy sauce and sesame oil may settle differently than butter-based injections.
This injection produces incredibly aromatic turkey with subtle Asian spice notes. The combination of soy sauce, ginger, and five-spice creates a sophisticated flavor profile that’s distinctly different from traditional American holiday fare.
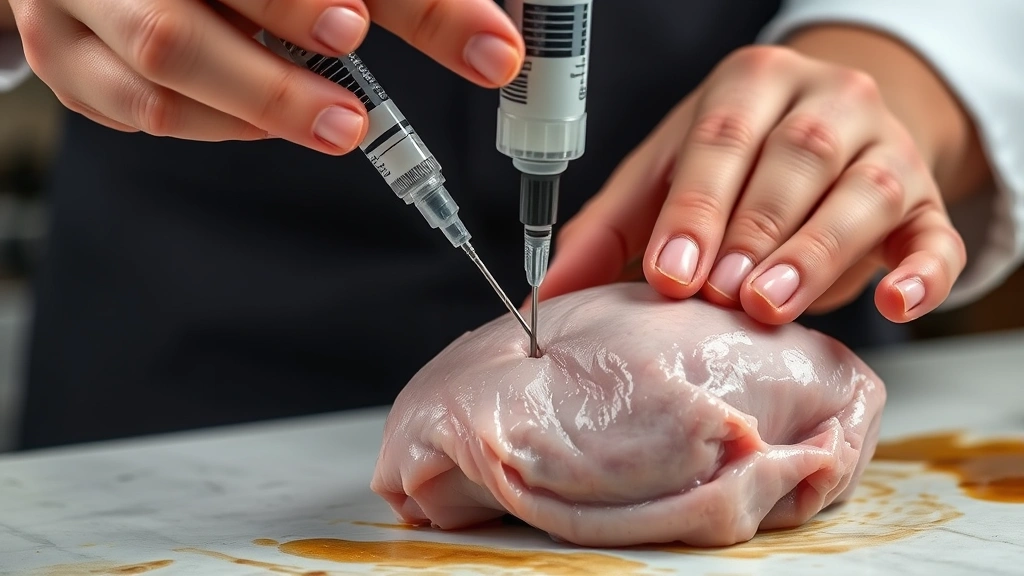
Step-by-Step Injection Technique
Having excellent injection recipes means nothing if you don’t execute the injection properly. This technique requires practice, but following these steps ensures optimal flavor distribution and maximum juiciness.
Preparation:
- Remove your turkey from the refrigerator 30 minutes before injecting. Cold meat is harder to penetrate and won’t absorb the injection as effectively.
- Pat the turkey dry with paper towels, particularly the breast and thigh areas where you’ll inject.
- Place the turkey on a cutting board or rimmed baking sheet to catch any drips.
- Fill your injector syringe with your chosen injection liquid, drawing the plunger back slowly to avoid air bubbles.
Injection Points:
The key to even flavor distribution is injecting at multiple points throughout the bird. A typical turkey requires 8-12 injection points:
- Breasts: Make 4 injections per breast—one near the wing joint, one in the center, one near the breastbone, and one toward the leg. Angle the needle parallel to the breast surface rather than perpendicular, which helps distribute liquid horizontally through the meat.
- Thighs: Make 2-3 injections per thigh, targeting the thickest parts. Thighs need more injection since they’re thicker and benefit from extra moisture.
- Legs: Make 1-2 injections per leg if you want the drumsticks flavorful, though they’re less critical than breasts and thighs.
- Wings: Optional, but 1 injection per wing adds flavor to often-neglected wing meat.
Injection Process:
- Insert the needle at a 45-degree angle into the meat, going about 2-3 inches deep depending on the turkey’s size.
- Once the needle is fully inserted, begin slowly depressing the plunger while slowly withdrawing the needle. This distributes the liquid throughout the muscle tissue as you pull out.
- Withdraw the needle completely, then move to your next injection point.
- After each injection, wipe the needle with a paper towel to remove any turkey juices that might clog it.
- Refill your syringe as needed, maintaining steady pressure on the plunger for consistent delivery.
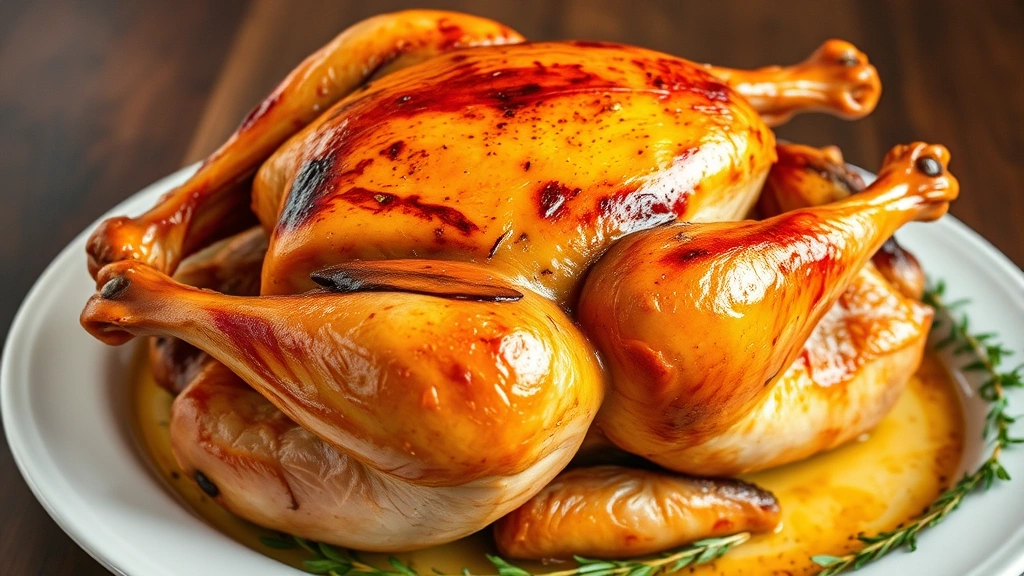
- The turkey should glisten noticeably after proper injection, with visible moisture at the injection sites.
Post-Injection:
- Let the injected turkey rest for 15-30 minutes before roasting, allowing the injection to fully absorb into the meat.
- Pat any surface moisture away with paper towels before roasting—excess surface liquid can prevent proper browning.
- Proceed with your normal roasting method and temperature.
The entire injection process typically takes 10-15 minutes for a standard turkey. Don’t rush—proper technique matters more than speed.
Pro Tips from Professional Chefs
Temperature Control: Keep your injection liquid at room temperature or slightly warm. Cold injection doesn’t flow smoothly through the syringe, and overly hot injection can begin cooking the surface of the turkey before it goes in the oven.
Injection Timing: The ideal window for injection is 2-4 hours before roasting. This gives the meat time to absorb the liquid without allowing it to dry out. Injecting the night before is possible but less ideal, as surface moisture can evaporate.
Strain Your Injection: Even if recipe ingredients seem smooth, strain your injection through fine mesh before using. Tiny herb particles or spice grains can clog your needle, creating frustration mid-injection.
Multiple Injections Are Better Than One: Rather than trying to inject massive amounts at each point, make more injection points with less liquid each. This distributes flavors more evenly than over-injecting a few spots.
Don’t Forget the Thighs: Home cooks often under-inject dark meat. Thighs are thicker and benefit from extra injection. Make your thigh injections deeper and more generous than breast injections.
Combine Injection with Other Techniques: Injection works beautifully alongside proper cooking techniques like careful temperature monitoring. Using a meat thermometer ensures you don’t overcook your perfectly injected bird.
Consistency Matters: Thick, chunky injections flow poorly through standard needles. Aim for a consistency similar to heavy cream—pourable but not watery. If your injection is too thick, warm it slightly or thin it with additional broth.
Needle Size Selection: Use the thickest needle that your syringe accommodates without excessive resistance. Thicker needles deliver more liquid per plunge and reduce injection time, but if your injection contains herb pieces, you may need a thinner needle to avoid clogs.
Reuse Your Injection: If you inject your turkey and have leftover injection, you can baste the bird with it during roasting. This reinforces the flavors and helps maintain moisture. Brush it on every 20-30 minutes during cooking.
Scale Your Recipe: The recipes provided work well for 14-18 pound turkeys. For larger birds, increase ingredients proportionally—you’ll need more total injection volume for bigger meat mass.
Balance Your Flavors: The best injections balance salt, fat, acid, and spice. If your injection tastes too salty when you sample it, remember that it will distribute throughout much more meat than you’re tasting. Trust the recipe unless you have specific reasons to adjust.
Keep Your Equipment Clean: After each use, immediately disassemble your injector syringe and needle, rinsing them thoroughly with hot water. Injection liquid residue can harden and create permanent clogs if left to dry. Store completely dry to prevent corrosion.
FAQ
Can I combine injection with brining?
Yes, absolutely. Many competition cooks use both methods. Brine your turkey first (12-24 hours), then inject it 2-4 hours before roasting. The brining ensures basic moisture retention, while injection adds concentrated flavor. Just reduce the salt in your injection slightly since the turkey already contains salt from brining.
What if my injection clogs the needle?
Stop immediately and don’t force the plunger, which can break your syringe. Remove the syringe, disassemble it, and rinse the needle under hot water while using a thin brush or pipe cleaner to clear the blockage. If particles keep clogging, strain your injection through fine mesh before refilling.
Can I make injection ahead of time?
Yes, you can prepare injection up to 3 days in advance. Store it in an airtight container in the refrigerator. Before using, bring it to room temperature and stir thoroughly, as butter-based injections may separate during storage. You can also gently warm it in a saucepan over low heat, stirring constantly.
Should I inject a frozen turkey?
No. Inject only fully thawed turkeys. A frozen turkey’s cold, hard meat won’t accept the injection properly, and the needle may not penetrate. Always thaw your turkey completely and bring it to room temperature before injecting.
Can I use injection on other poultry?
Absolutely. The same techniques work beautifully on whole chickens and other poultry preparations. Adjust injection volumes based on meat mass—a whole chicken needs only 1/4 to 1/2 cup of injection, delivered through 4-6 injection points instead of 8-12.
What’s the difference between injection and marinade?
Marinades work on the surface and penetrate only slightly through osmosis, typically requiring 4-24 hours. Injection delivers seasoning directly into the meat immediately, penetrating throughout the muscle tissue. Injection is far more effective for large birds because it reaches the interior quickly without requiring extended soaking time.
Can I use store-bought injection instead of making my own?
You can, though homemade injections offer superior flavor control and freshness. Store-bought versions often contain preservatives and may taste artificial. Making your own takes only 10 minutes and costs significantly less, so it’s worth doing from scratch.
How do I know if I’ve injected enough?
The turkey should glisten visibly after injection, with moisture visible at injection sites. A properly injected turkey will show small beads of liquid around each needle entry point. If your turkey looks completely dry after injection, you haven’t injected enough—add more.
Will injection make my turkey too salty?
Not if you follow the recipes provided. The salt in these injections is measured to season the entire turkey appropriately. Taste your injection liquid before using—it should taste quite salty on its own, but when distributed through 14+ pounds of meat, it reaches perfect seasoning levels.
Can I inject a turkey breast instead of a whole bird?
Yes. Turkey breasts are actually easier to inject than whole birds because you can access all angles easily. A single turkey breast (5-7 pounds) needs only 4-6 injection points. Use the same recipes, reducing total injection volume proportionally based on meat weight.


