Ultimate Mac & Cheese? Grandma’s Secret Recipe for Creamy Perfection
There’s something magical about a bowl of creamy, comforting mac and cheese that takes you back to childhood. My grandmother’s version has been passed down through three generations, and honestly, it’s the best mac and cheese recipe I’ve ever tasted. This isn’t your box-mix version—it’s a from-scratch masterpiece with a secret ingredient that elevates the entire dish. The combination of multiple cheeses, a silky béchamel sauce, and a crispy breadcrumb topping creates layers of flavor and texture that keep everyone coming back for seconds.
What makes this recipe truly special is the technique and ingredient selection. Rather than relying on evaporated milk or cream cheese shortcuts, grandma’s approach uses real butter, flour, and whole milk to build a proper cheese sauce from scratch. The secret? A touch of sharp cheddar mixed with creamy Gruyère and a whisper of smoked paprika that adds depth without overpowering the cheese flavor. Combined with a perfectly al dente pasta and a golden, buttery breadcrumb topping, this dish transforms simple ingredients into something restaurant-quality that you can make at home.
Why Homemade Mac & Cheese Beats the Rest
Homemade mac and cheese is incomparably superior to boxed versions, and once you understand why, you’ll never go back. When you make it from scratch, you control every element—the quality of the cheese, the richness of the sauce, and the texture of every bite. Boxed mixes rely on artificial flavors and stabilizers, while this best mac and cheese recipe uses real ingredients that your body actually recognizes.
The sauce-to-pasta ratio is something boxed versions consistently get wrong. They either leave you with soupy, underseasoned pasta or a gluey mess. Grandma’s technique creates an emulsified sauce that coats each noodle perfectly, with enough body to cling without becoming heavy. The cheese flavor develops naturally as the roux cooks, creating a deeper, more complex taste than you’d ever get from powder packets.
Beyond flavor, homemade mac and cheese is actually more economical than you might think. A pound of quality pasta and a selection of good cheeses cost less than multiple boxes of the processed version, especially when you consider the superior nutrition and satisfaction. Plus, when you understand the fundamental technique, you can create variations that suit your family’s preferences perfectly.
Essential Ingredients for the Best Mac and Cheese
The ingredient list is purposefully short because quality matters more than quantity in this dish. Each component serves a specific purpose in creating that legendary creamy texture and rich flavor.
- 1 pound elbow macaroni (bronze-cut or ridged varieties work best for sauce adhesion)
- 4 tablespoons unsalted butter (for the roux base)
- 3 tablespoons all-purpose flour (thickening agent)
- 3 cups whole milk (warmed before adding for smoother sauce)
- 2 cups sharp white cheddar cheese, shredded (the backbone flavor)
- 1.5 cups Gruyère cheese, shredded (adds nuttiness and creaminess)
- ½ cup Parmesan cheese, finely grated (umami depth)
- 1 teaspoon smoked paprika (grandma’s secret ingredient)
- ½ teaspoon dry mustard powder (enhances cheese flavor)
- ¼ teaspoon cayenne pepper (subtle heat)
- 2 teaspoons salt (adjust to taste)
- ½ teaspoon black pepper (freshly ground)
- 1 cup panko breadcrumbs (for topping)
- 3 tablespoons melted butter (for breadcrumb coating)
- 2 tablespoons fresh parsley, finely chopped (garnish)
The cheese selection is critical. Sharp white cheddar provides the primary cheese flavor—don’t use mild or pre-shredded versions, as they contain anti-caking agents that prevent proper melting. Gruyère adds a sophisticated, slightly sweet undertone that complements the cheddar beautifully. Parmesan brings umami richness and helps create that signature savory depth. Using freshly shredded cheese from blocks makes an enormous difference in the final texture.
Step-by-Step Preparation Guide
Proper preparation ensures that when you start cooking, everything comes together smoothly without any scrambling or stress. Mise en place—having all ingredients prepped and ready—is essential for this dish.
Cheese Preparation: Shred all cheeses by hand using the large holes of a box grater or a food processor. If using a food processor, pulse briefly to avoid compacting the cheese. Set the cheeses aside in separate bowls. This prevents clumping when you add them to the hot sauce.
Milk Temperature: This step is often overlooked but makes a massive difference. Warm your milk in a saucepan over medium heat until it steams slightly (around 180°F). A warm milk addition prevents the roux from seizing and ensures a smooth sauce. Cold milk hitting a hot roux creates lumps that are nearly impossible to eliminate.
Breadcrumb Mixture: Combine panko breadcrumbs with melted butter, salt, and pepper in a small bowl. Toss until the breadcrumbs are evenly coated. This creates an even golden crust when baked. Some cooks add grated Parmesan to the topping for extra flavor.
Pasta Selection: Use a one-pound box of quality elbow macaroni or ditali pasta. The ridged texture of bronze-cut pasta (which you can identify by looking for a rougher surface) helps the sauce cling better than smooth pasta. Avoid giant pasta shells or penne—their shape doesn’t work as well for this application.
The Cooking Process: From Start to Finish
Creating the Roux: This is where the sauce begins. Melt butter in a large saucepan or Dutch oven over medium heat. Once melted and foaming, add flour and whisk constantly for 2-3 minutes. This cooking time is crucial—it removes the raw flour taste and creates a nutty, toasted flavor. The mixture should resemble wet sand. If it looks too dry, you may have added too much flour; if it’s too wet, you haven’t cooked it long enough.
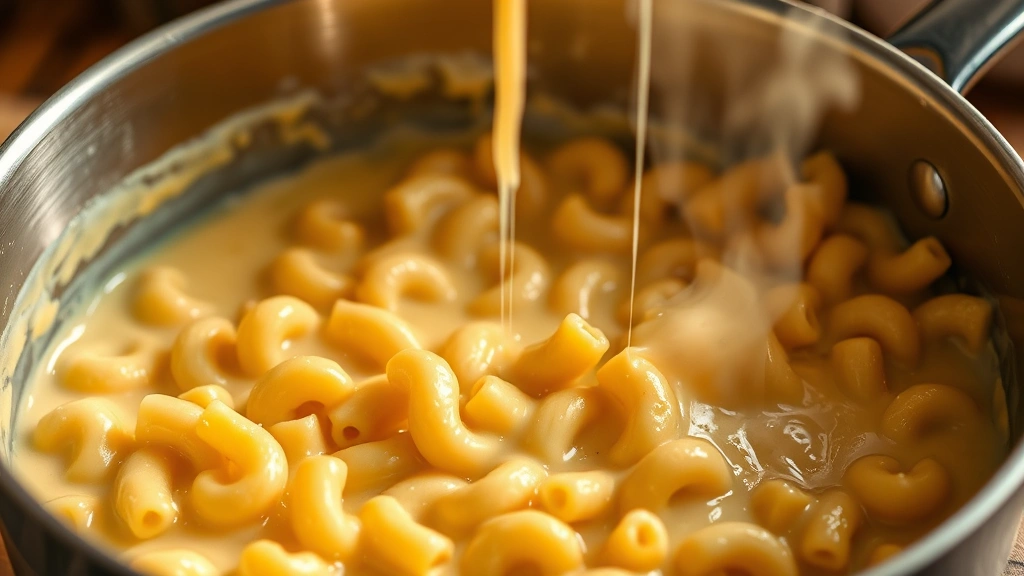
Building the Sauce: Slowly pour the warm milk into the roux while whisking constantly. The key word is slowly. Adding milk too quickly creates lumps. Whisk for 5-7 minutes as the sauce thickens. It should coat the back of a spoon and flow slowly when tilted. The sauce will continue thickening slightly as it cools, so aim for slightly looser than your final desired consistency.
Seasoning the Base: Add smoked paprika, dry mustard powder, cayenne pepper, salt, and black pepper. Whisk thoroughly to distribute the seasonings evenly. Taste and adjust—the sauce should taste slightly over-seasoned at this point because the pasta will dilute the flavors. This is where your sauce develops complexity beyond simple cheese flavor.
Incorporating the Cheese: Remove the saucepan from heat. Add the sharp cheddar and Gruyère in two additions, stirring gently until completely melted before adding the next batch. The residual heat melts the cheese without causing it to break or separate. Finally, add the Parmesan and stir until fully incorporated. The sauce should be smooth, creamy, and luxuriously rich.
Cooking the Pasta: While preparing the sauce, bring a large pot of salted water to a rolling boil. The water should taste like the sea—this is your only opportunity to season the pasta itself. Add the macaroni and cook to al dente, which is typically 1-2 minutes less than the package directions. The pasta will cook slightly more in the oven, and you want it to maintain some texture. Drain the pasta, but don’t rinse it—the starch helps the sauce adhere.
Combining Everything: Pour the drained pasta into the cheese sauce and fold gently but thoroughly with a spatula. Ensure every noodle is coated with sauce. If the mixture seems too thick, add a splash of warm milk. The consistency should be like thick pudding—it will firm up during baking.
Baking and the Golden Topping
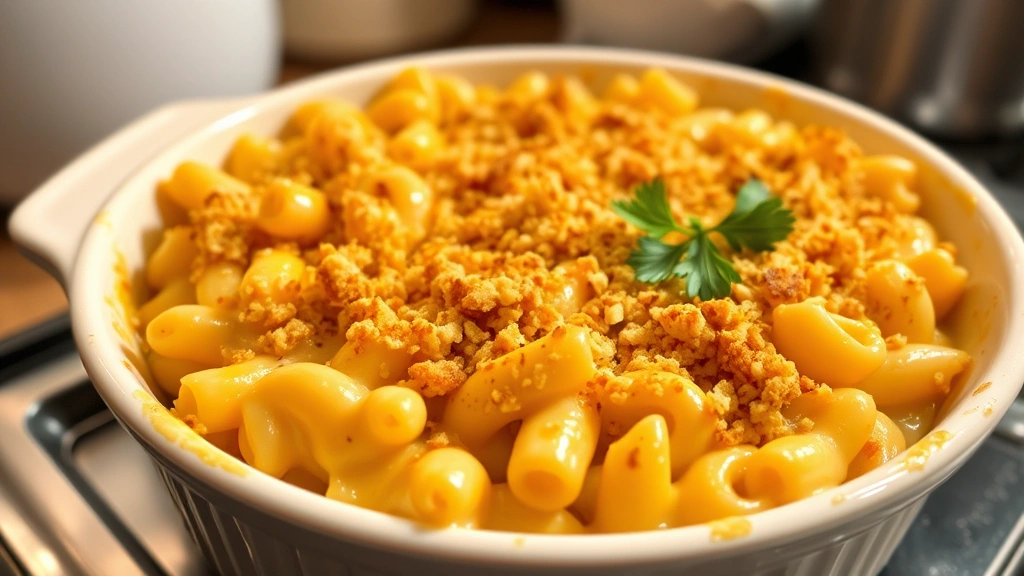
Transfer the mac and cheese mixture to a buttered 9×13-inch baking dish, spreading it evenly. You can also use individual ramekins for elegant plating. Spread the buttered breadcrumb mixture over the top in an even layer, pressing gently so it adheres to the pasta.
Oven Temperature: Preheat your oven to 375°F. This moderate temperature allows the mac and cheese to heat through gently without the top burning before the interior is hot. Place the baking dish on a baking sheet (to catch any drips) and bake for 25-30 minutes, until the top is golden brown and the sauce bubbles slightly at the edges.
If your breadcrumb topping isn’t browning enough, increase the oven temperature to 400°F for the final 5 minutes, watching carefully to prevent burning. Conversely, if the top is browning too quickly, cover the dish loosely with foil and continue baking.
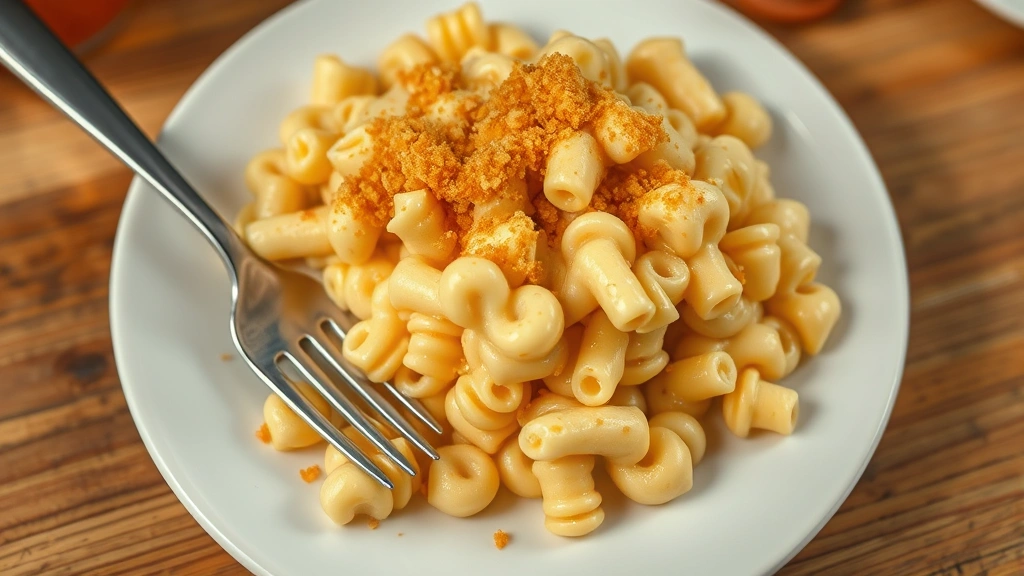
Resting Period: Remove from the oven and let rest for 5 minutes before serving. This allows the sauce to set slightly, making serving easier and the texture more cohesive. Garnish with fresh chopped parsley for color and a subtle fresh note that contrasts the rich, creamy sauce.
Pro Tips and Tricks for Success
Preventing Grainy Sauce: If your sauce breaks or becomes grainy, it’s usually because cheese was added to sauce that was too hot or the milk was too cold. To fix it, remove from heat, add a splash of cold milk, and whisk vigorously. Prevention is easier—keep milk warm and remove sauce from heat before adding cheese.
Cheese Selection Matters: Avoid pre-shredded cheese because the anti-caking agents prevent proper melting. Block cheese shredded fresh gives superior results. For the best flavor, visit a cheese counter where you can ask for recommendations on which cheddars have the sharpest, most developed flavor.
Make-Ahead Strategy: You can prepare the mac and cheese through the combining step, cover it, and refrigerate for up to 24 hours. When ready to bake, add the breadcrumb topping and bake at 350°F for 35-40 minutes, as the dish will be cold. This makes it perfect for reducing food waste by preparing ahead for busy weeknights.
Pasta Texture Control: Cooking pasta slightly under al dente is crucial. It continues cooking in the oven and from the residual heat of the sauce. Over-cooked pasta becomes mushy and loses its pleasant bite. When in doubt, taste a noodle at the minimum recommended cooking time.
Sauce Consistency: The mac and cheese mixture should look slightly looser than your desired final consistency when you transfer it to the baking dish. It firms up considerably during baking as the cheese sets and moisture evaporates. If you prefer a looser, creamier final product, add extra milk before baking.
Using Cast Iron: If you’re interested in alternative cooking methods, you can prepare this dish in a cast iron skillet. Check out our guide on how to cook with cast iron for techniques that work beautifully with mac and cheese.
Creative Variations to Try
Protein Additions: Transform mac and cheese into a complete meal by adding cooked proteins. Crispy bacon bits, diced ham, or shredded chicken recipes work wonderfully. Add proteins after combining the pasta and sauce so they warm through during baking without drying out.
Vegetable Mix-Ins: Roasted broccoli florets, sautéed mushrooms, or steamed peas add nutrition and textural contrast. Sauté vegetables separately until tender before folding into the mac and cheese. This prevents excess moisture that could make the dish watery.
Herb Variations: Fresh herbs transform the flavor profile. Thyme, rosemary, or chives add sophistication. For those interested in how to preserve herbs, consider growing fresh herbs to have them available year-round for recipes like this.
Cheese Combinations: Experiment with different cheese blends. Smoked Gouda adds depth, fontina brings nuttiness, or a touch of blue cheese adds pungency. The key is maintaining the ratio—about 4 cups total cheese to 3 cups milk for proper sauce consistency.
Spice Adjustments: Some families prefer extra heat. Increase the cayenne to ½ teaspoon, add a pinch of white pepper, or include a touch of hot sauce stirred in after cooking. Others prefer a milder version—simply reduce the cayenne and smoked paprika.
Low-Carb Options: For those interested in lighter dinners, check out our low carb dinner recipes for ideas on substituting traditional pasta with cauliflower or zucchini noodles. The sauce works beautifully with these alternatives.
Storage and Reheating Instructions
Refrigerator Storage: Mac and cheese keeps beautifully in the refrigerator for 3-4 days in an airtight container. The sauce will thicken as it cools, which is completely normal. Reheat gently over low heat on the stovetop, adding a splash of milk to restore creaminess, or reheat covered in the oven at 350°F for 15-20 minutes.
Freezing: This dish freezes exceptionally well for up to three months. Freeze the unbaked mac and cheese in a freezer-safe container or directly in your baking dish covered with plastic wrap and foil. Thaw overnight in the refrigerator, add the breadcrumb topping, and bake as directed, adding 10 minutes to the baking time.
Stovetop Reheating: Transfer cold mac and cheese to a saucepan over low heat. Stir frequently, adding milk one tablespoon at a time until you reach the desired consistency. This method prevents the bottom from sticking and allows you to control the reheating temperature, preventing the cheese from separating.
Oven Reheating: Cover the baking dish with foil and reheat at 350°F for 20-25 minutes. Remove the foil for the final 5 minutes if you want to crisp up the top. This method works well for larger quantities and is convenient when you’re preparing other dishes simultaneously.
FAQ
Why is my mac and cheese sauce lumpy?
Lumpy sauce usually results from adding cold milk to hot roux or cold cheese to hot sauce. Always warm milk before adding it to the roux, and remove the sauce from heat before adding cheese. If lumps do form, strain the sauce through a fine-mesh sieve or blend it with an immersion blender.
Can I use evaporated milk instead of whole milk?
While evaporated milk creates a richer sauce, whole milk produces superior flavor and texture in this recipe. If you must use evaporated milk, use 2 cups evaporated milk plus 1 cup regular milk. The extra richness of evaporated milk can make the sauce heavy.
What’s the best cheese for this recipe?
Sharp white cheddar provides the primary flavor, Gruyère adds sophistication, and Parmesan brings umami depth. Avoid mild cheeses and pre-shredded varieties. Block cheeses shredded fresh create the smoothest, creamiest sauce.
How do I prevent the breadcrumb topping from burning?
Ensure breadcrumbs are coated evenly with melted butter and don’t pack them too densely. Bake at 375°F for the time specified. If the top browns too quickly, cover loosely with foil. If it’s not browning enough, increase temperature to 400°F for the final 5 minutes.
Can I make this in a slow cooker?
Yes! Prepare the cheese sauce on the stovetop, combine with cooked pasta in the slow cooker, and cook on low for 1-2 hours. Add the breadcrumb topping and bake in a 375°F oven for 20-25 minutes until golden. This method is convenient for potlucks or when oven space is limited.
Is there a dairy-free version?
You can substitute butter with olive oil and use unsweetened plant-based milk. For cheese, nutritional yeast mixed with cashew cream creates a surprisingly good substitute, though the flavor won’t be identical. Experiment to find your preferred ratio.
How many servings does this recipe make?
This recipe serves 8-10 people as a side dish or 6-8 as a main course. The recipe can be halved for smaller portions—use a 7×9-inch baking dish and reduce baking time by 5 minutes.
What’s the difference between this and baked mac and cheese?
All versions of this recipe are technically baked, but some people differentiate between stovetop-finished versions and those baked with a topping. This version is fully baked with a breadcrumb topping, creating texture contrast and a golden finish.


