Juicy Bottom Round Roast? Chef-Approved Method for Tender, Flavorful Results
Bottom round roast has a reputation for being tough and dry, but that’s only true if you cook it wrong. This lean cut from the hindquarters of the beef contains minimal marbling, which means it requires specific techniques to transform it into a succulent centerpiece that rivals more expensive cuts. The secret isn’t expensive equipment or exotic ingredients—it’s understanding the science behind collagen breakdown and moisture retention.
Professional chefs have mastered the art of coaxing incredible tenderness and juiciness from bottom round roast through a combination of brining, low-and-slow cooking, and strategic resting periods. This comprehensive guide reveals the exact methods used in restaurant kitchens, adapted for your home kitchen. Whether you’re preparing a family dinner or impressing guests, you’ll learn how to deliver restaurant-quality results that prove bottom round roast deserves a spot on your table.
Understanding Bottom Round Roast Anatomy
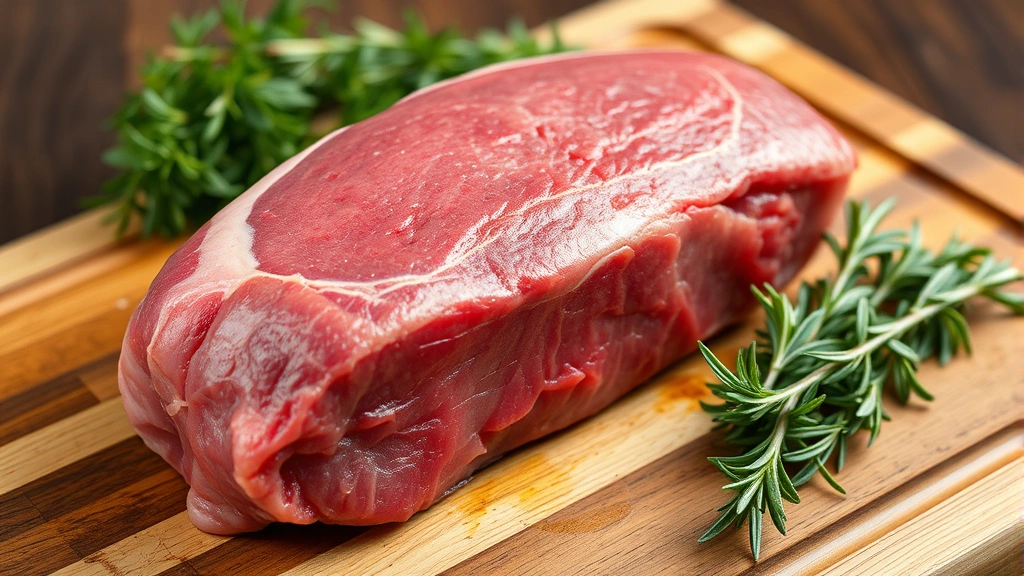
The bottom round comes from the rear leg of the cow, specifically the bottom portion of the round primal cut. This muscle group works constantly during the animal’s life, creating dense muscle fibers with significant collagen content. Understanding this structure is crucial because it explains why standard cooking methods fail—you need heat and time to break down collagen into gelatin, which creates that desirable tender, juicy texture.
Bottom round typically weighs between three and five pounds and contains a fat cap on one side. This protective layer helps prevent the exterior from drying out during cooking. The meat itself has minimal intramuscular fat compared to premium cuts like ribeye or chuck roast, which is why brining becomes essential. A proper brine solution helps the meat retain moisture throughout the cooking process by allowing salt to denature muscle proteins, enabling them to hold water more effectively.
When shopping for bottom round roast, look for meat with a deep red color and a firm texture. Ask your butcher to leave the fat cap intact—it provides insulation during cooking. Many professional chefs prefer roasts in the three to four-pound range because they cook more evenly than larger cuts. Avoid packages with excessive liquid, which may indicate the meat has been previously frozen and thawed.
The Brining Process: Foundation for Juiciness
Brining is where the transformation begins. This process involves submerging the meat in a saltwater solution, allowing salt to penetrate the muscle tissue and fundamentally change how proteins behave during cooking. The salt breaks down myosin proteins, creating a network that traps moisture even under high heat. This is non-negotiable for bottom round roast—it’s the difference between dry, tough meat and incredibly juicy results.
Basic Brine Formula:
- 1 gallon water
- ¾ cup kosher salt
- ½ cup brown sugar
- 2 tablespoons black peppercorns
- 4-5 bay leaves
- 6-8 fresh thyme sprigs
- 4-5 garlic cloves, smashed
- 1 tablespoon red pepper flakes (optional)
Combine water and salt in a large pot and heat until salt dissolves completely. Add brown sugar and stir until dissolved. Remove from heat and add remaining aromatics. Allow the brine to cool to room temperature, then refrigerate until completely chilled. This cooling step is critical—never submerge raw meat in warm brine, as it creates food safety risks.
Place your bottom round roast in a large container or resealable bag and pour the cooled brine over it, ensuring the meat is completely submerged. Weigh it down with a plate if necessary. Brine for 12 to 24 hours in the refrigerator. Many chefs prefer the longer timeframe, allowing more complete salt penetration. After brining, remove the roast and pat it completely dry with paper towels—this moisture removal is essential for achieving a proper sear.
Some home cooks question whether brining is worth the time investment. Restaurant kitchens universally use this technique because the results are scientifically measurable. Brined meat retains 15-20% more moisture than unbrined meat, which translates directly to improved juiciness and tenderness. This is one investment of time that pays dividends.
Seasoning and Preparation Steps
After brining, the roast needs careful seasoning. Because the meat has absorbed salt during brining, you should reduce additional salt in your seasoning blend. Over-salting at this stage results in an unpleasantly salty final product. Instead, focus on complementary flavors that enhance the natural beef taste.
Chef-Approved Seasoning Blend:
- 2 tablespoons coarse black pepper
- 1 tablespoon garlic powder
- 1 tablespoon onion powder
- 1 tablespoon smoked paprika
- 1 teaspoon cayenne pepper
- 1 teaspoon dried thyme
- 1 teaspoon dried rosemary
- ½ teaspoon kosher salt (reduced amount)
Pat the brined roast dry with paper towels—this step cannot be overstated. Moisture on the surface prevents browning. Allow the roast to sit at room temperature for 45 minutes to one hour before cooking. This equilibration period allows the interior temperature to rise, promoting more even cooking throughout the meat. Cold meat placed directly in a hot pan cooks unevenly, with the exterior overcooking before the interior reaches the target temperature.
Rub the seasoning blend evenly over all surfaces of the roast, paying special attention to crevices and edges. Consider scoring the fat cap in a crosshatch pattern—this allows seasoning to penetrate deeper and helps render the fat during cooking. Use a sharp knife and make shallow cuts, about ¼-inch deep, cutting through the fat layer but not into the meat itself.
Searing Technique for Flavor Development
The sear is where flavor magic happens. High heat causes the Maillard reaction, a chemical process that creates complex flavor compounds and develops a flavorful brown crust. This crust isn’t just about appearance—it adds depth and richness to the entire roast through the juices that flow from the seared exterior into the interior during cooking.
Use a heavy-bottomed Dutch oven or large cast-iron skillet for searing. These materials distribute heat evenly and retain temperature when the cold roast is added. Heat the pan over medium-high heat for five to seven minutes. You want the surface temperature around 400-450°F. Test readiness by holding your hand six inches above the pan—you should feel intense heat.
Add a high-smoke-point oil like avocado oil or refined vegetable oil to the hot pan. Wait for the oil to shimmer and just begin smoking. Carefully place the roast in the pan, fat-side down first. Resist the urge to move it—let it sit undisturbed for four to five minutes. This contact time allows the Maillard reaction to develop properly. You’ll hear a satisfying sizzle and smell rich, meaty aromas—this indicates the reaction is occurring.
Once the fat cap is deeply browned, use tongs to flip the roast and sear the other side for another four to five minutes. Sear the remaining sides for two to three minutes each, rotating every 90 seconds. The entire searing process takes 15-20 minutes, and it’s worth every second. The resulting brown crust contributes significantly to the final flavor profile.
As you sear, rendered fat accumulates in the pan. Don’t discard this—it’s liquid gold for your cooking process. This fat will be used for braising liquid, adding incredible depth to the final dish.
Low and Slow Cooking Method
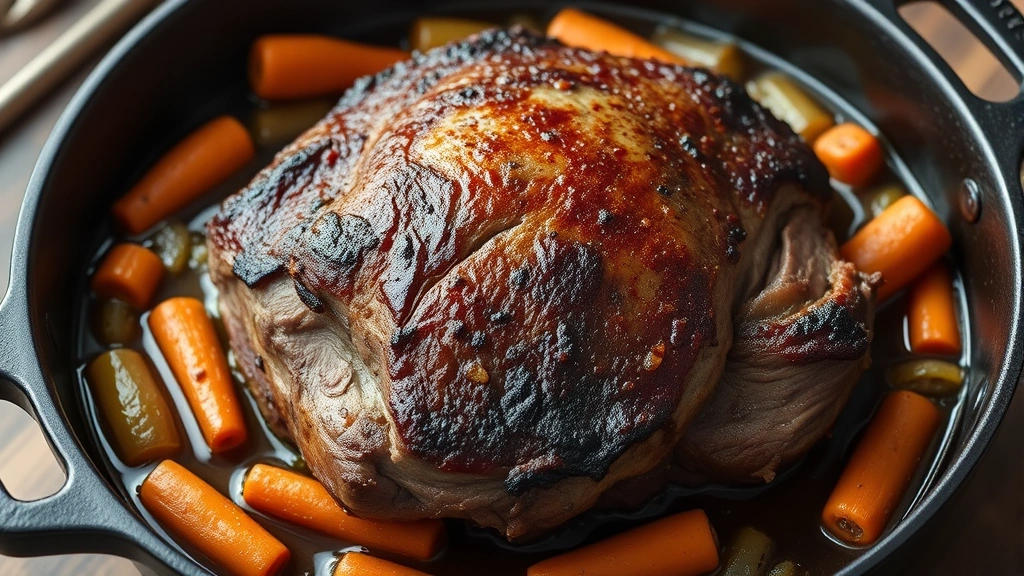
After searing, the roast enters the low-and-slow phase where collagen transforms into gelatin and the meat becomes impossibly tender. Remove the seared roast from the pan and set aside. In the same pan with the rendered fat, sauté aromatic vegetables: one large onion (quartered), four to five carrot chunks, and four to five celery pieces. Cook for five to seven minutes until vegetables begin to soften and caramelize.
Add 2 cups beef stock or broth to the pan, scraping the bottom with a wooden spoon to release all the flavorful browned bits (called the fond). This deglazing step incorporates those incredible flavors into your braising liquid. Add two cups dry red wine—the acidity and tannins complement beef beautifully. Consider wines like Cabernet Sauvignon, Merlot, or even a budget-friendly red blend. The wine reduces during cooking, concentrating flavors.
Return the seared roast to the pan, nestling it among the vegetables. Add fresh herbs: four to five thyme sprigs, two to three bay leaves, and one rosemary sprig. The braising liquid should come halfway up the side of the roast—not fully submerging it. Cover the Dutch oven with a lid and transfer to a preheated 275°F oven.
Cooking time depends on roast size and shape. A three-pound roast typically requires 3 to 3.5 hours. A four-pound roast may need 3.5 to 4 hours. The roast is done when a fork pierces the meat with minimal resistance. Internal temperature should reach 195-205°F for maximum tenderness—this high temperature allows collagen complete breakdown. Unlike quick-cooking steaks, beef roasts benefit from cooking past the traditional 160°F medium-rare temperature.
Every 45 minutes, carefully turn the roast over and baste with braising liquid. This rotation ensures even cooking and moisture distribution. The basting adds flavor and prevents the exposed top from drying out. Some chefs prefer not to open the oven too frequently, believing it disrupts the cooking environment, but turning the roast helps tremendously with bottom round, which benefits from even heat exposure on all sides.
You’ll notice the braising liquid gradually becomes richer and more concentrated as the roast releases collagen and gelatin. This liquid is your sauce—never discard it. As the roast cooks, it will become increasingly tender, eventually reaching a point where it practically falls apart when touched.
Resting and Carving Mastery
The resting period is where many home cooks fail, rushing to carve the moment the roast emerges from the oven. This is a critical mistake. During resting, carryover cooking continues slightly while muscle fibers relax and reabsorb moisture that was driven toward the surface during cooking. Without adequate rest, you’ll cut into the roast and watch precious juices flood the cutting board instead of remaining in the meat.
Remove the roast from the braising liquid and place it on a cutting board. Tent loosely with aluminum foil—not tightly sealed, as trapped steam will continue cooking the exterior. Allow the roast to rest for 15 to 20 minutes. This timeframe allows the interior temperature to stabilize and the muscle fibers to relax completely. During this rest, strain the braising liquid through a fine-mesh sieve, pressing vegetables to extract all liquid. Discard solids and vegetables.
For the finishing sauce, skim excess fat from the braising liquid if desired, though some fat contributes to mouth feel and flavor. Transfer the defatted liquid to a saucepan and simmer over medium heat. For every cup of liquid, combine one tablespoon cornstarch with two tablespoons cold water to create a slurry. Whisk this into the simmering liquid, stirring constantly until thickened. Alternatively, you can reduce the liquid by half through simmering, which concentrates flavors naturally without thickening agents.
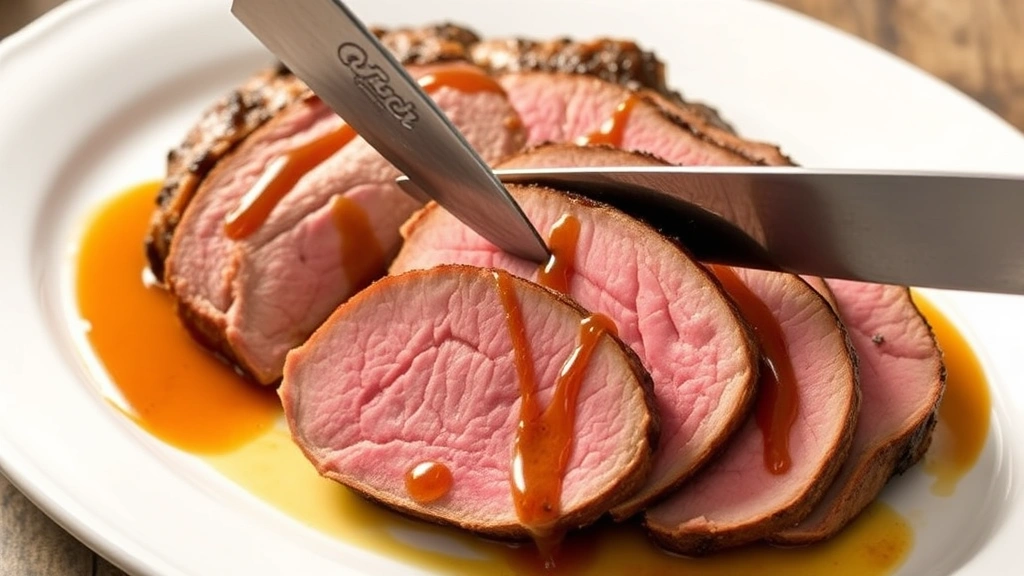
After resting, carving technique matters enormously. Examine the roast and identify the direction of muscle fibers—you’ll see them running in a particular direction. Always slice perpendicular to these fibers, which shortens them and creates tenderness with each bite. Use a sharp carving knife and long, smooth strokes rather than sawing motions. Slice to your preferred thickness—quarter-inch slices are ideal for most presentations.
Transfer carved slices to a warm platter and pour the finished sauce over them just before serving. The warm sauce reheats the slices slightly and adds moisture, ensuring each bite delivers that juicy quality you’ve worked to achieve.
Serving Suggestions and Pairings
A perfectly cooked bottom round roast deserves thoughtful accompaniments. Consider pairing it with Mediterranean salad recipe options for a lighter counterpoint to the rich beef. The acidity and fresh vegetables balance the meat beautifully.
Classic accompaniments include creamy mashed potatoes, which soak up the delicious pan sauce. Roasted root vegetables like carrots, parsnips, and potatoes cooked alongside the roast develop incredible flavor from the braising liquid. Horseradish cream provides a sharp contrast that cuts through richness and cleanses the palate between bites.
For wine pairing, serve the same red wine used in braising. The wine’s tannins complement the beef’s richness, while acidity balances the sauce. Cabernet Sauvignon, Merlot, or Bordeaux blends work wonderfully. If you prefer white wine, choose full-bodied options like aged Chardonnay.
Leftover roast slices can be repurposed into sandwiches, beef salads, or added to grain bowls. Store in an airtight container with some braising liquid to maintain moisture. Properly stored, cooked roast keeps for three to four days in the refrigerator.
FAQ
Can I skip brining and still get good results?
Technically yes, but results will be noticeably inferior. Brining provides scientifically measurable improvements in moisture retention and tenderness. If time is extremely limited, at minimum apply salt to the roast surface 40 minutes before cooking—this abbreviated brining still offers benefits. However, the 12-24 hour brining process is the professional standard for excellent results.
What if I don’t have a Dutch oven?
A large covered roasting pan works, though Dutch ovens are preferable because they distribute heat more evenly and retain temperature better. If using a roasting pan, cover tightly with heavy-duty aluminum foil. You may need to add additional liquid because evaporation increases without a fitted lid. Check liquid levels more frequently.
Can I cook this in a slow cooker instead?
Yes, though results differ slightly. After searing, place the roast in a slow cooker with vegetables and braising liquid. Cook on low for 7-8 hours or high for 4-5 hours. Slow cookers don’t develop the same depth of flavor as oven braising because they don’t achieve high enough temperatures for optimal Maillard reaction. However, the low-and-slow cooking still produces tender results. Always sear the roast before slow cooking to develop flavor.
How do I know when the roast is done?
Use a meat thermometer inserted into the thickest part without touching bone. Target 195-205°F for maximum tenderness. A fork should pierce the meat with almost no resistance. The roast should be falling-apart tender, not just medium-rare. Cooking past traditional medium-rare temperatures is necessary for tough cuts like bottom round.
Why is my roast still tough after cooking?
This typically results from insufficient cooking time or temperature. Bottom round requires reaching 195-205°F internally, which takes longer than many expect. If your roast is tough, you likely removed it too early. The meat was not cooked long enough for collagen to break down into gelatin. Additionally, skipping the brining step significantly reduces tenderness. Finally, slicing with the grain instead of against it makes meat seem tougher—always identify fiber direction and cut perpendicular to it.
Can I use this method for other roasts?
Absolutely. This technique works beautifully for chuck roast, rump roast, and eye of round. Cooking times vary slightly based on shape and size. The brining, searing, and low-and-slow braising principles apply universally to tough, collagen-rich cuts. For more tender cuts like rib roast, you can skip brining and reduce cooking time significantly.
Should I brown the vegetables separately?
Some professional chefs sauté vegetables after removing the roast, as described in this guide. Others add raw vegetables directly. Pre-sautéing develops deeper vegetable flavors that enrich the braising liquid. However, if time is limited, raw vegetables work—they’ll soften during the three to four hours of braising. The difference is subtle but noticeable to experienced palates.
What’s the best way to store leftovers?
Allow the roast to cool completely, then slice and transfer to an airtight container with some braising liquid. Store in the refrigerator for three to four days. The liquid prevents the meat from drying out. You can also freeze sliced roast with liquid for up to three months. Thaw in the refrigerator and reheat gently in a low oven with the braising liquid.


