Crumble Topping Recipe: Grandma’s Secret to Perfect Fruit Desserts
There’s something magical about biting through a golden, buttery crumble topping to discover warm, tender fruit beneath. This humble dessert has graced dinner tables for generations, and today I’m sharing the exact technique my grandmother passed down—the one that makes everyone ask for seconds. A crumble topping recipe isn’t just about mixing flour and butter; it’s about understanding the science behind achieving that perfect texture: crispy on the outside, slightly chewy within, and utterly irresistible.
The beauty of mastering this crumble topping recipe lies in its versatility. Whether you’re topping apple crisps, berry cobblers, or stone fruit desserts, the fundamental technique remains the same. What sets grandma’s version apart is her attention to detail—the temperature of ingredients, the size of the crumbles, and the baking time all play crucial roles in creating that signature texture.
This guide will walk you through everything you need to know, from ingredient selection to troubleshooting common mistakes. By the end, you’ll understand why this simple topping has become a timeless classic and how to make it work perfectly every single time.
The Science Behind Crumble Toppings
Understanding the chemistry of a crumble topping transforms you from someone who follows recipes to someone who can troubleshoot and innovate. The foundation of any crumble is the interaction between fat and flour. When cold butter breaks into flour, it creates tiny pockets of fat surrounded by flour particles. During baking, these pockets of butter melt, creating steam that separates the flour particles. This is what gives you that coveted crumbly, tender texture rather than a dense, cake-like layer.
Temperature control is absolutely critical. Room-temperature or warm butter will blend too smoothly with the flour, creating a paste-like consistency that bakes into a solid, compact layer. This is precisely why grandma always kept her butter in the freezer until the last moment. The cold butter remains in distinct pieces, never fully incorporating into the flour mixture.
The ratio of fat to flour also determines your final texture. A higher fat content yields a more tender, almost sandy crumble, while less fat produces a slightly firmer topping with more distinct crumbles. Grandma’s secret ratio—and one that consistently delivers restaurant-quality results—is roughly one part cold butter to two parts flour, with a binding element (usually sugar or egg) to hold everything together just enough.
Essential Ingredients Explained
Before diving into the recipe, let’s discuss each component and why it matters:
- All-purpose flour: This is your base. It provides structure and, when combined with fat, creates the crumbly texture. Some bakers prefer cake flour for a more delicate crumble, but all-purpose flour gives you the best balance of texture and ease.
- Cold butter: Never skip the step of cutting cold butter into small cubes. Unsalted butter is preferred so you can control the salt content, but salted butter works in a pinch. The key is that the butter must be cold—ideally straight from the refrigerator or freezer.
- Brown sugar: Grandma preferred brown sugar over white sugar because it adds moisture and a subtle depth of flavor. The molasses in brown sugar also helps bind the crumbles together slightly, preventing them from becoming too powdery.
- Salt: A pinch of salt enhances all the flavors and balances sweetness. It’s often overlooked but absolutely essential.
- Optional spices: Cinnamon, nutmeg, or ginger add warmth and complexity. These spices should complement your fruit filling, not overpower it.
- Nuts: Chopped pecans, walnuts, or almonds add texture and nutrition. Toast them lightly first to enhance their flavor.
- Oats: Rolled oats (not instant) add chewiness and heartiness. They’re optional but beloved by many traditional recipes.
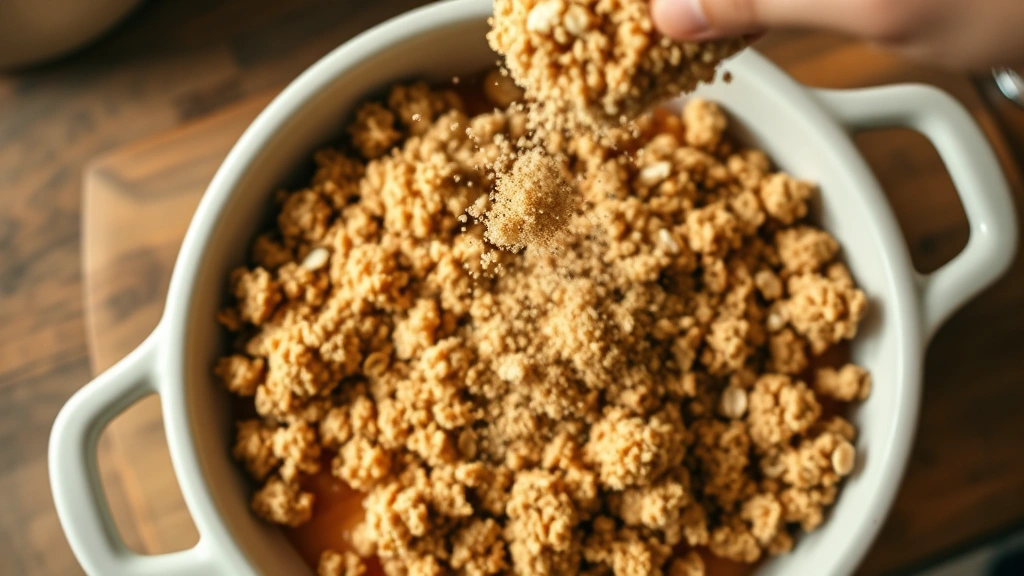
Grandma’s Classic Crumble Topping Recipe
This is the exact recipe that has been used in my family for over forty years. It works beautifully over any fruit filling, from classic apple to modern berry combinations.
Ingredients for 1 standard 9×13 inch pan (or 8×8 inch deep dish):
- 1 cup (125g) all-purpose flour
- ¾ cup (150g) packed brown sugar
- ½ cup (115g) cold unsalted butter, cut into small cubes
- ½ cup (50g) old-fashioned rolled oats
- ½ cup (60g) chopped pecans or walnuts
- 1 teaspoon vanilla extract
- ¼ teaspoon fine sea salt
- ½ teaspoon ground cinnamon (optional but recommended)
- ¼ teaspoon ground nutmeg (optional)
This recipe yields enough topping for a standard fruit dessert serving 8-10 people. The quantities scale easily: for a smaller 8×8 pan, use three-quarters of the ingredients; for two 9×13 pans, simply double everything.
[IMAGE_1]
Step-by-Step Instructions
The process is straightforward, but precision matters. Here’s how to execute it perfectly:
- Prepare your workspace: Gather all ingredients and have them at the correct temperature. Cold ingredients are non-negotiable. If your kitchen is warm, place your bowl and flour in the freezer for five minutes before beginning.
- Combine dry ingredients: In a large mixing bowl, whisk together the flour, brown sugar, salt, cinnamon, and nutmeg. Breaking up any brown sugar lumps with the back of a spoon ensures even sweetness distribution. This step also incorporates air into the mixture, which contributes to texture.
- Add oats and nuts: Stir in the rolled oats and chopped nuts. Make sure they’re evenly distributed throughout the dry mixture. If using toasted nuts, ensure they’ve cooled completely before adding.
- Cut in the butter: This is where many home bakers struggle. Add your cold butter cubes to the flour mixture. Using a pastry cutter, two knives, or your fingertips, work the butter into the flour until the mixture resembles coarse breadcrumbs or sand. You want to see small pea-sized pieces of butter throughout—not a smooth paste. This typically takes 3-5 minutes of work. If you’re using your fingers, work quickly so the warmth of your hands doesn’t melt the butter.
- Add vanilla extract: Drizzle the vanilla extract over the mixture and gently toss with a fork. Don’t overmix; you’re just distributing the vanilla and bringing some of the mixture together very slightly.
- Spread over fruit: Once your fruit filling is prepared and in your baking dish, evenly distribute the crumble topping. Don’t pack it down—let it sit loosely so steam can escape during baking, creating those desirable crispy bits. The topping should cover the fruit completely but not be compressed.
- Bake: Place in a preheated 375°F (190°C) oven for 35-45 minutes, depending on your specific oven and the depth of your filling. The topping should be golden brown, and you should see some bubbling fruit at the edges. If the topping is browning too quickly, tent with aluminum foil for the last 10-15 minutes.
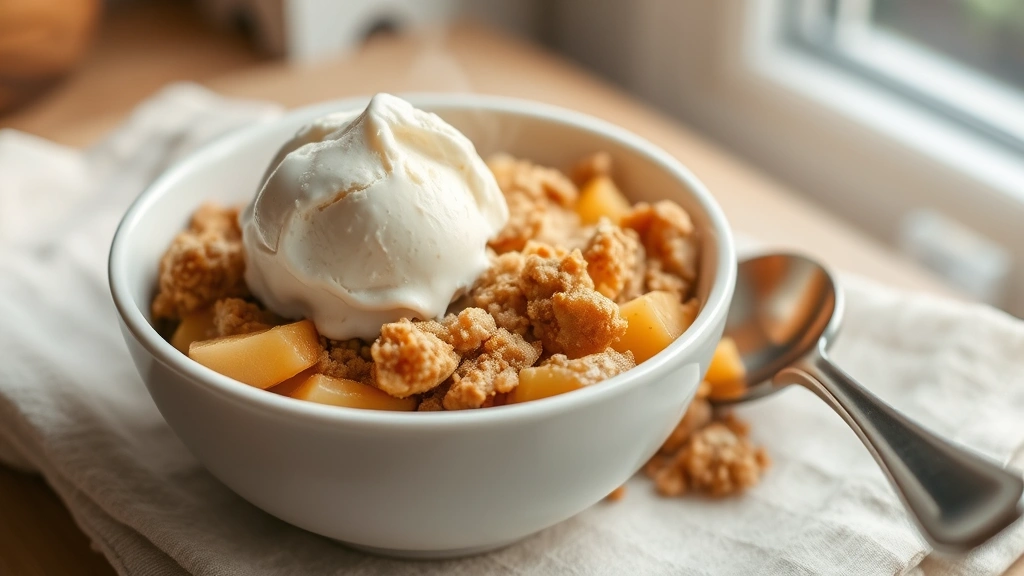
- Cool before serving: Allow 10-15 minutes of cooling time. This lets the filling set slightly and the topping firm up. Serve warm with vanilla ice cream or whipped cream.
The entire process from start to finish takes about 10 minutes of active preparation time, making this an incredibly practical best healthy food recipe for weeknight desserts.
Variations and Flavor Combinations
The beauty of a crumble topping recipe is its flexibility. Once you master the basic technique, you can customize it endlessly. Here are some variations that work beautifully:
Almond Crumble: Replace half the flour with almond flour and substitute almonds for pecans. Add ½ teaspoon almond extract in place of vanilla. This creates a more delicate, almost marzipan-like flavor.
Coconut Version: Add ½ cup shredded unsweetened coconut to the dry ingredients. Use coconut oil instead of butter for a lighter, tropical twist. This pairs beautifully with mango or pineapple fillings.
Spiced Grandma’s Version: Increase cinnamon to 1 teaspoon and add ⅛ teaspoon cloves and ⅛ teaspoon cardamom. This deeper spiced version works exceptionally well over apple or pear fillings.
Brown Butter Crumble: Brown your butter before cutting it into cubes. This adds a nutty, complex flavor that elevates even simple fruit fillings. The process takes about 5 minutes on the stovetop, and you must cool it completely before use.
Ginger-Honey Crumble: Replace 2 tablespoons of brown sugar with honey and add 1 teaspoon ground ginger plus ¼ teaspoon ground cloves. This combination is phenomenal over stone fruits or rhubarb.
Savory Herb Version: Reduce brown sugar to ¼ cup, omit cinnamon and nutmeg, and add ½ teaspoon dried thyme, ¼ teaspoon cayenne pepper, and 2 tablespoons grated Parmesan cheese. This works surprisingly well over vegetable toppings. For more traditional options, explore our vintage grandma recipes collection.
Baking Tips for Perfect Results
Even with the best recipe, execution determines success. Here are professional baking tips that separate good crumbles from exceptional ones:
Oven temperature accuracy: Use an oven thermometer to verify your oven temperature. Many home ovens run hot or cold, which directly affects baking time and browning. A crumble that bakes at 375°F in one oven might need 400°F in another.
Don’t skip the cooling period: Resist the urge to dig in immediately. The 10-15 minute rest allows the fruit filling to set and the topping to become crispy. Cutting into a crumble too early results in a soupy mess.
Prevent soggy bottoms: If you’re worried about a wet filling making the topping soggy, bake the crust or just the bottom layer for 10 minutes before adding the crumble topping. This creates a barrier that prevents moisture from being absorbed.
Maximize crunchiness: For extra-crispy topping, increase the oven temperature to 400°F and reduce baking time to 30-35 minutes. Watch carefully to prevent burning. Some bakers also brush the top with a light egg wash or melted butter before baking for added crispness and shine.
Fruit preparation matters: Don’t over-mix your fruit filling. Cut fruit into uniform pieces so they cook evenly. If using very juicy fruit, toss with 1-2 tablespoons cornstarch to absorb excess moisture. This prevents the filling from becoming runny.
Room temperature consideration: In very warm kitchens, work faster and keep all ingredients cold. In winter or cool kitchens, you have more flexibility. The warmer your environment, the more critical it is to keep everything chilled.
Test for doneness: The crumble is done when the topping is deep golden brown (not pale) and you can see the filling bubbling at the edges. If the topping looks pale after 35 minutes, it needs more time. Don’t rely solely on the clock—your eyes and the aroma are better indicators.
Storage and Make-Ahead Guide
One of the best aspects of this recipe is how well it stores and how far ahead you can prepare:
Make the topping in advance: Prepare the crumble topping (through step 5) up to 3 days ahead. Store it in an airtight container in the refrigerator or up to 3 months in the freezer. You can bake directly from frozen—just add 5-10 minutes to the baking time and cover with foil if browning too quickly.
Assemble and freeze: Combine your fruit filling and raw crumble topping in the baking dish, cover tightly with plastic wrap and foil, and freeze for up to 2 months. Bake from frozen, adding 15-20 minutes to the standard baking time.
Store baked crumbles: Cover cooled crumbles with plastic wrap and refrigerate for up to 4 days. Reheat gently in a 300°F oven for 10-15 minutes to restore crispness. The crumble will soften slightly after 2-3 days as the filling releases moisture.
Freezing baked crumbles: Wrap completely baked and cooled crumbles in plastic wrap and then foil. Freeze for up to 3 months. Thaw overnight in the refrigerator and reheat at 300°F for 15-20 minutes before serving.
Pro tip for entertaining: Prepare the dry crumble mixture days in advance, keep it refrigerated, and assemble everything the morning of your event. This reduces last-minute stress and ensures everything is perfectly timed.
For more inspiration on preparing make-ahead dishes, check out how to make homemade pickles and other preservation techniques that showcase advance preparation.
FAQ
Can I use salted butter instead of unsalted?
Yes, you can, but reduce the salt in the recipe to ⅛ teaspoon or omit it entirely. Salted butter varies in salt content by brand, making it harder to control the final flavor. Unsalted butter gives you complete control.
Why is my crumble topping too dense and cake-like?
This typically happens when the butter is too warm or when you’ve overmixed the ingredients. The butter must be cold and remain in distinct pieces. Work quickly and stop mixing as soon as the mixture resembles breadcrumbs. You should still see small butter pieces throughout.
Can I make this recipe gluten-free?
Absolutely. Replace all-purpose flour with a 1:1 gluten-free flour blend. The texture will be slightly different but equally delicious. Some bakers add 1 tablespoon of cornstarch to improve texture. Ensure your oats are certified gluten-free if that’s a concern.
What’s the difference between a crumble and a crisp?
Technically, a crisp includes oats in the topping (which this recipe does), while a crumble traditionally doesn’t. Both terms are often used interchangeably in modern cooking. A cobbler has biscuit-sized topping pieces, and a grunt has dropped biscuit dough. The distinctions have blurred in contemporary home cooking.
My crumble topping is too dry and crumbly to hold together. How do I fix it?
Add liquid binders like 1-2 tablespoons of melted butter or a beaten egg mixed into the topping before spreading. Start with small amounts and toss gently. You want the mixture to hold together when squeezed but still have visible crumbles.
Can I use coconut oil instead of butter?
Yes, though the flavor will be different. Coconut oil creates a lighter, more delicate crumble. Use refined coconut oil if you don’t want coconut flavor. Keep it equally cold and follow the same technique. The results will be slightly less rich but still excellent.
How do I prevent fruit filling from bubbling over onto the oven floor?
Place a baking sheet on the rack below your crumble to catch any drips. Don’t fill your baking dish more than three-quarters full. If your filling is particularly juicy, reduce the liquid slightly or add cornstarch to absorb excess moisture.
Is this recipe suitable for a paleo or keto diet?
The recipe as written contains sugar and flour, so it’s not suitable for strict paleo or keto diets. However, you can adapt it by using almond flour instead of all-purpose flour, replacing brown sugar with monk fruit or erythritol sweetener (adjust to taste), and keeping the butter and nuts. The texture will differ but remain delicious.
Can I double this recipe for a larger crowd?
Yes, simply double all ingredients. For two 9×13 inch pans, follow the same technique and baking time. For very large batches, mix in two separate bowls rather than one to ensure even distribution and prevent overworking the mixture.
Why does my crumble topping sometimes turn out greasy?
This usually means the butter wasn’t cold enough or you’ve added too much. Use the exact amounts specified and ensure your butter comes straight from the refrigerator or freezer. If your kitchen is very warm, chill the mixing bowl and all ingredients beforehand.
Mastering this crumble topping recipe opens doors to countless dessert possibilities. Whether you’re serving it over fresh summer berries, caramelized apples, or stone fruits, the technique remains your greatest asset. Start with grandma’s classic version, practice until you achieve that perfect golden-brown exterior with crispy-yet-tender interior, then experiment with variations that suit your taste. This recipe has earned its place in family traditions for good reason—it’s reliable, delicious, and brings genuine joy to the table.
For more culinary inspiration and traditional recipes, explore Serious Eats’ comprehensive baking guides, King Arthur Baking Company’s detailed techniques, and America’s Test Kitchen’s scientific approach to baking for additional resources on perfecting your dessert game.


