Crispy Chicken Fries: Chef’s Secret Recipe for Perfect Golden Results
Chicken fries have become a beloved comfort food staple, offering the satisfying crunch of fried chicken with the convenient, hand-held format of french fries. But what separates mediocre chicken fries from truly exceptional ones? The secret lies in technique, ingredient selection, and understanding the science behind achieving that coveted golden-brown exterior while maintaining juicy, tender meat inside. This comprehensive guide reveals professional chef techniques that will elevate your homemade chicken fries from ordinary to extraordinary.
Creating restaurant-quality chicken fries at home requires more than simply breading and frying chicken strips. Professional chefs employ specific brining methods, precise temperature control, and strategic breading techniques that most home cooks overlook. Whether you’re preparing a quick weeknight dinner or impressing guests at a gathering, mastering these chef-approved methods will transform your chicken fries into something truly special. Let’s explore the secrets that make the difference.
Selecting and Preparing Your Chicken
The foundation of exceptional chicken fries begins with selecting the right cut of chicken. Professional chefs universally recommend using boneless, skinless chicken breasts for the most consistent results. Look for breasts that are relatively uniform in thickness, ideally between three-quarters and one inch thick. If your chicken breasts are significantly thicker, you’ll want to butterfly them or pound them to achieve even cooking.
When shopping, choose fresh chicken over frozen whenever possible. Fresh chicken absorbs marinades and brines more effectively, resulting in more flavorful and juicier fries. If using frozen chicken, thaw it completely in the refrigerator over 24 hours rather than using quick-thaw methods, which can compromise texture and moisture retention.
Once you’ve selected your chicken, slice it into uniform strips approximately half an inch wide and three to four inches long. Consistency in size is crucial—thinner strips will cook faster and crisp more thoroughly on the outside, while thicker strips ensure a more tender interior. Use a sharp chef’s knife and maintain steady pressure to create clean cuts without ragged edges that could dry out during frying.
Pat your chicken strips completely dry with paper towels before proceeding. Any surface moisture interferes with breading adhesion and creates steam during frying, which prevents that essential crispy exterior from developing. This simple step is often overlooked but makes a dramatic difference in your final results.
The Brining Process: Moisture Lock Strategy
Here’s where professional chefs separate themselves from casual home cooks: brining is non-negotiable for superior chicken fries. Brining involves submerging chicken in a saltwater solution that breaks down muscle fibers and allows them to retain more moisture during cooking. This technique is fundamental in professional kitchens and transforms the texture of your finished chicken fries.
The basic brine formula is simple: combine one-quarter cup of kosher salt with one quart of cold water. Stir until the salt completely dissolves. For enhanced flavor, professional chefs add aromatics to their brine. Consider adding two tablespoons of sugar (which promotes browning), one teaspoon of black peppercorns, two bay leaves, three cloves of garlic, and fresh thyme sprigs. These additions infuse the chicken with subtle flavors that enhance the final dish.
Submerge your prepared chicken strips in the brine and refrigerate for a minimum of two hours, though four to eight hours yields optimal results. Don’t exceed twelve hours, as the chicken can become overly salty. Remove the chicken from the brine and pat it completely dry with fresh paper towels—this drying step is absolutely essential before breading.
The science behind brining is straightforward: salt denatures the muscle proteins, allowing them to hold more water. When you cook brined chicken, this retained moisture transforms to steam, creating a barrier that keeps the interior tender while the exterior crisps beautifully. This is why brined chicken fries remain juicy even when cooked to a deep golden-brown color.
Breading Techniques for Maximum Crispiness
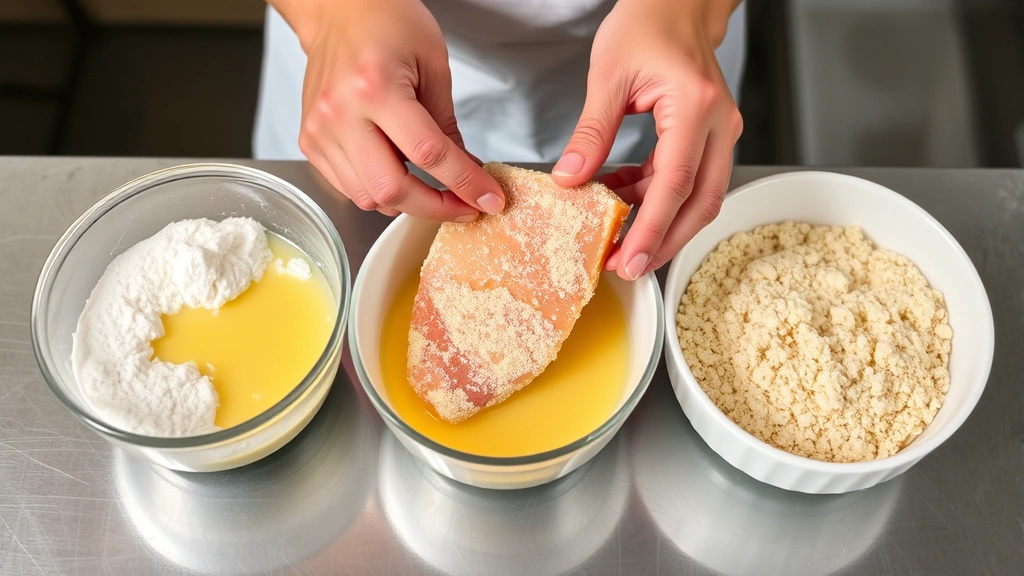
Achieving the perfect crispy coating requires understanding the three-step breading method that professional chefs employ. This technique creates multiple layers of texture and crunch that persist even after cooling.
Step One: The Flour Mixture
Combine one cup of all-purpose flour with one tablespoon of cornstarch. The cornstarch is crucial—it absorbs moisture and creates an exceptionally crispy texture. Add one teaspoon of garlic powder, one teaspoon of onion powder, half a teaspoon of smoked paprika, and half a teaspoon of cayenne pepper. Season with salt and black pepper to taste. Mix these ingredients thoroughly in a shallow bowl.
Step Two: The Egg Wash
In a separate shallow bowl, whisk three large eggs with two tablespoons of whole milk and one tablespoon of hot sauce (Frank’s RedHot or similar). The milk creates a thinner, more adhesive wash than eggs alone, while the hot sauce adds subtle flavor and helps bind the coating. Some professional chefs add one teaspoon of Dijon mustard for additional flavor complexity.
Step Three: The Final Coating
Combine one cup of panko breadcrumbs with one-quarter cup of grated Parmesan cheese, one-half teaspoon of garlic powder, and one-half teaspoon of dried oregano. Panko breadcrumbs are essential here—their larger, airier structure creates superior crispiness compared to regular breadcrumbs. The Parmesan adds umami depth and encourages browning.
The breading assembly line works like this: take one dried chicken strip and coat it thoroughly in the flour mixture, shaking off excess. Dip it into the egg wash, ensuring complete coverage. Finally, press it into the panko mixture, coating all sides generously. For extra-crispy results, repeat the egg wash and panko steps—this double-coating technique creates exceptional texture.
Place your breaded strips on a wire rack set over a baking sheet and refrigerate for at least thirty minutes. This resting period allows the coating to set and adhere more firmly, reducing the likelihood of breading separating during frying. Many professional chefs refrigerate breaded chicken for up to four hours for maximum adhesion.
Oil Temperature and Frying Method
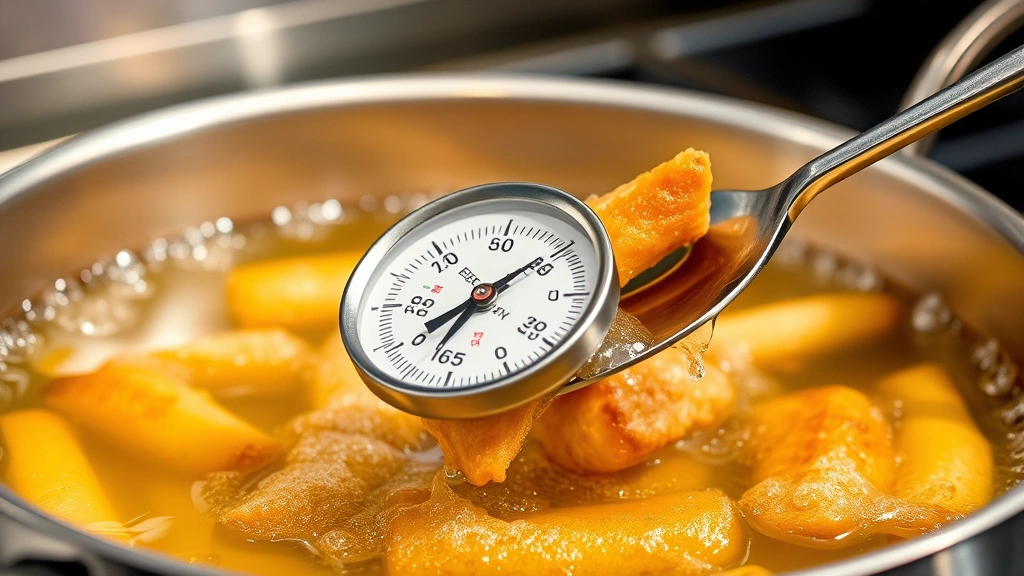
Temperature control is absolutely critical for perfect chicken fries. The ideal frying temperature is 350 to 365 degrees Fahrenheit. Too hot, and your coating browns before the interior cooks through. Too cool, and you’ll end up with greasy, soggy fries instead of crispy ones.
Invest in a reliable deep-fry or candy thermometer—this single tool makes an enormous difference in consistency. Insert it into your oil before heating and monitor it continuously throughout the frying process. Oil temperature naturally fluctuates as you add chicken, so you may need to adjust your heat occasionally to maintain the target range.
Choose your oil carefully. Professional chefs prefer oils with high smoke points: peanut oil (450°F smoke point), vegetable oil (400-450°F), or canola oil (400°F). Avoid olive oil, which has a low smoke point and will burn at frying temperatures. Many chefs prefer peanut oil for its neutral flavor and superior frying characteristics.
Use a heavy-bottomed pot or Dutch oven filled with at least three inches of oil. Cast iron retains heat exceptionally well and provides consistent temperatures. Fill the pot only halfway to prevent oil from splattering when you add chicken.
When frying, work in batches—overcrowding the pan causes temperature drops and uneven cooking. Add only four to six strips at a time, depending on your pot size. Maintain at least two inches of space between pieces. Fry for three to four minutes per batch, turning halfway through cooking, until the coating achieves a deep golden-brown color.
Remove finished chicken fries with a slotted spoon and transfer them to a wire rack set over paper towels. The rack allows air to circulate underneath, preventing the bottom from becoming soggy. Never place fried chicken directly on paper towels, as they trap steam and moisture against the coating.
Seasoning Secrets Professional Chefs Use
Beyond the breading mixture, professional chefs employ additional seasoning strategies to create depth of flavor. Finishing salt applied immediately after frying is one such secret. While your chicken is still hot and the exterior is slightly tacky, sprinkle a pinch of fleur de sel or sea salt. This technique allows the salt to adhere perfectly and enhances the savory profile without making the chicken taste overly salty.
Consider creating a signature spice blend specific to your chicken fries. Some professional variations include:
- Cajun Style: Add one teaspoon of cayenne, one-half teaspoon of white pepper, one teaspoon of paprika, and one-half teaspoon of dried thyme to your breading mixture
- Asian-Inspired: Incorporate one teaspoon of ginger powder, one-half teaspoon of white pepper, one tablespoon of sesame seeds, and one-half teaspoon of garlic powder
- Italian Herb: Mix in one teaspoon of dried basil, one-half teaspoon of dried oregano, one-half teaspoon of dried rosemary, and one-quarter teaspoon of red pepper flakes
- Honey Sriracha Glaze: After frying, toss finished chicken fries with a mixture of two tablespoons of honey, one tablespoon of sriracha, and one tablespoon of melted butter
Many chefs also prepare compound butters to serve alongside chicken fries. Mix softened butter with fresh herbs, garlic, lemon zest, or hot sauce. A pat of herb butter melting over hot chicken fries elevates the dish significantly.
Common Mistakes and How to Avoid Them
Even with quality ingredients and proper technique, certain mistakes can derail your results. Understanding these pitfalls helps you achieve consistency:
Mistake One: Insufficient Drying – Moisture on your chicken or in your breading prevents proper crisping. Always pat chicken completely dry after brining and before breading. Similarly, ensure your flour mixture doesn’t contain any lumps of moisture.
Mistake Two: Skipping the Rest Period – Refrigerating breaded chicken allows the coating to set properly. Frying immediately after breading often results in breading separating during cooking. That thirty-minute minimum rest period is non-negotiable.
Mistake Three: Overcrowding the Pan – This is perhaps the most common error. Too much chicken in the oil simultaneously causes temperature drops, uneven cooking, and greasy results. Patience with batch frying yields superior outcomes.
Mistake Four: Inconsistent Chicken Thickness – Uniform sizing ensures even cooking. Thicker pieces remain undercooked while thinner pieces over-crisp if you’re not careful. Take time to cut uniform strips.
Mistake Five: Using Old or Degraded Oil – Oil breaks down with use, developing off-flavors and smoking at lower temperatures. Professional kitchens change frying oil regularly. For home use, strain oil through cheesecloth after each use and replace it every four to six frying sessions.
Mistake Six: Neglecting Temperature Monitoring – A thermometer is your best friend. Guessing at temperature leads to inconsistent results. Invest in a quality thermometer and check frequently.
For serving suggestions beyond simple condiments, consider pairing your chicken fries with homemade dipping sauces. A classic approach combines understanding culinary techniques with creative flavor combinations. You might also explore complementary sides—crispy fries pair wonderfully with fresh salads or fruit-based accompaniments for balanced meals.
Storage and reheating matter too. Store leftover chicken fries in an airtight container in the refrigerator for up to three days. Reheat in a 350-degree oven for five to seven minutes to restore crispiness, rather than using a microwave, which creates soggy results.
For those interested in expanding their culinary repertoire, exploring other comfort food techniques and recipes can enhance your overall cooking skills. Understanding the principles behind achieving perfect texture and flavor in fried chicken fries translates to other cooking methods and dishes.
FAQ
How long should I brine chicken before making fries?
Minimum two hours, optimal four to eight hours. Don’t exceed twelve hours, as the chicken becomes overly salty. Refrigerate throughout the brining process to maintain food safety.
Can I use chicken thighs instead of breasts?
While possible, boneless, skinless chicken breasts are preferred for chicken fries. Thighs contain more fat and connective tissue, resulting in a different texture. If using thighs, cut them into similar-sized strips and expect slightly longer cooking times.
What’s the difference between panko and regular breadcrumbs?
Panko breadcrumbs are made from a different type of bread and have a larger, airier structure. This creates superior crispiness and crunch compared to regular breadcrumbs, which are finer and more compact. For chicken fries, panko is always superior.
Can I bake chicken fries instead of frying?
Yes, though the texture differs. Spray breaded chicken strips with cooking oil and bake at 400 degrees for twelve to fifteen minutes, flipping halfway through. While healthier, baked versions lack the deep golden color and crispy texture of fried chicken fries.
How do I keep chicken fries crispy after cooking?
Transfer finished chicken to a wire rack rather than placing directly on paper towels. This allows air circulation and prevents steam from making the coating soggy. Serve immediately for optimal crispiness.
What oil is best for frying chicken?
Peanut oil is preferred by professional chefs due to its high smoke point (450°F) and neutral flavor. Vegetable and canola oil also work well. Avoid olive oil, which has a low smoke point and burns at frying temperatures.
Can I make the breading mixture ahead of time?
Yes, prepare all three breading components several hours in advance. Store in separate airtight containers at room temperature. The egg wash is best prepared fresh, though it can be made up to one hour ahead and refrigerated.
Why does my coating separate during frying?
This typically indicates insufficient rest time before frying. Always refrigerate breaded chicken for at least thirty minutes to allow the coating to set properly. Additionally, ensure your chicken is completely dry before breading, and use the three-step breading method for better adhesion.


