Easy Popcorn Balls Recipe: Grandma’s Favorite Treat
There’s something magical about popcorn balls that takes us straight back to childhood memories and cozy family gatherings. This easy popcorn balls recipe has been passed down through generations, capturing the heart of classic American comfort food in every bite. Whether you’re preparing for a holiday celebration, a school bake sale, or simply craving a nostalgic treat, popcorn balls deliver that perfect combination of crispy, chewy, and sweet that everyone loves.
Grandma’s version of this beloved snack is surprisingly simple to make, requiring just a handful of pantry staples and about thirty minutes of your time. The beauty of this recipe lies in its versatility—you can customize it with different add-ins, adjust the sweetness level, and even wrap each ball as a homemade gift. Let’s explore why this timeless treat continues to be a favorite in kitchens across America and discover the secrets to making perfect popcorn balls every single time.
What You’ll Need for Perfect Popcorn Balls
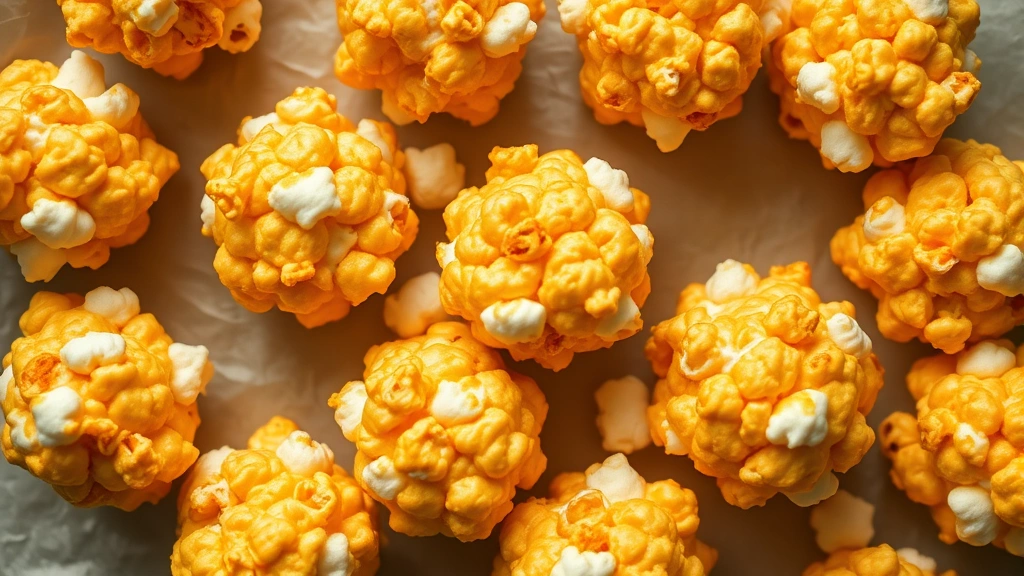
The ingredient list for popcorn balls is refreshingly short, which is one reason grandmothers everywhere have loved making this recipe for decades. You’ll start with popped popcorn as your base—about 3 quarts of freshly popped corn works perfectly. The fresher your popcorn, the better your final product will be, so avoid using pre-packaged varieties that have been sitting in your pantry for months.
For the binding agent, you’ll need butter (½ cup, unsalted is preferable), marshmallows (one 10-ounce bag works beautifully), and vanilla extract (1 teaspoon for authentic flavor). The marshmallows are crucial—they melt into a sticky, sweet coating that holds everything together while keeping the popcorn light and airy. Some recipes call for corn syrup, but the marshmallow method is cleaner and more forgiving for home cooks.
You’ll also want to have salt (¼ teaspoon) on hand to balance the sweetness, and cooking spray or additional butter for greasing your hands and work surface. A candy thermometer is optional but helpful if you want to ensure your mixture reaches the right temperature. Consider gathering wax paper or parchment paper for setting your finished balls.
Step-by-Step Instructions
Begin by popping your corn using your preferred method—stovetop, air popper, or microwave all work wonderfully. Once popped, transfer the kernels to a large bowl and remove any unpopped kernels that could damage teeth. This is an important safety step that grandmas never skip. Spread the popcorn loosely in the bowl; you want it to have room for the marshmallow mixture to coat everything evenly.
In a large saucepan over medium-low heat, combine the butter and marshmallows. Stir constantly and gently—this is key to preventing burning and ensuring smooth melting. The mixture should take about 5-7 minutes to fully combine into a glossy, uniform consistency. Once the marshmallows have melted completely, remove the pan from heat and immediately stir in the vanilla extract and salt. The vanilla adds depth and masks any overly sweet notes, making the treat more sophisticated.
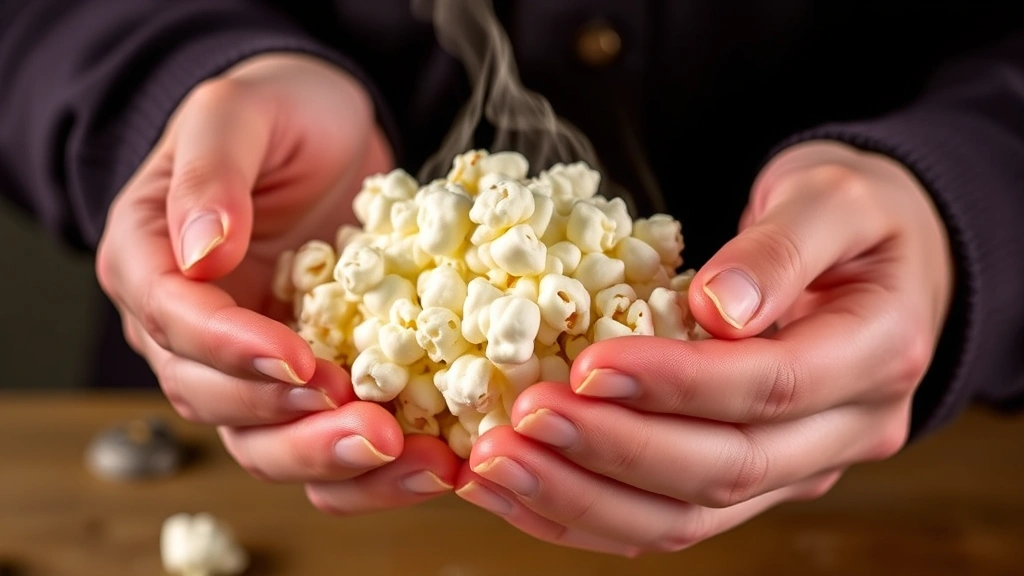
Working quickly while the marshmallow mixture is still warm, pour it over your prepared popcorn. Using a large spoon or spatula, gently toss the popcorn to coat every kernel evenly. This step requires patience—rushing will result in unevenly coated balls. Take your time and ensure the marshmallow mixture reaches into all the nooks and crannies. The mixture will be quite hot, so consider using buttered hands or wearing food-safe gloves.
Once everything is coated, let the mixture cool for about 2-3 minutes until it’s manageable but still warm enough to shape. Grease your hands generously with cooking spray or butter, then scoop about ¼ cup of the popcorn mixture and gently press it into a ball shape. The key word here is gently—you want to maintain the popcorn’s light, airy structure rather than compress it into a dense lump. Each ball should hold together but still have a slightly loose, fluffy texture.
Place each finished ball on a sheet of wax paper to set. The balls will continue to firm up as they cool to room temperature, which typically takes about 30-45 minutes. Resist the temptation to handle them during this setting time, as they’re still quite delicate.
Pro Tips for Success
One of the most common mistakes home cooks make is overheating the marshmallow mixture. If it gets too hot, it can become grainy or separate from the popcorn. Keep your heat on medium-low and watch carefully—you’re looking for a smooth, glossy consistency, not bubbling or browning.
Temperature control matters significantly when shaping your balls. If the mixture cools too much, it becomes difficult to work with and won’t hold together properly. If it’s still too hot, it’ll burn your hands despite greasing. The sweet spot is when you can hold a portion in your palm for a few seconds without discomfort—around 130-140°F if you’re using a thermometer.
For perfectly uniform balls, consider using an ice cream scoop. A ¼ cup scoop gives you consistently sized portions that look professional and cook evenly. This is especially useful if you’re making these for a gift or event.
Don’t skip the greasing step for your hands and utensils. Cooking spray works better than oil because it creates less mess and doesn’t make your hands slippery. Reapply spray between each ball if needed.
If you’re making a large batch, prepare your work surface with wax paper beforehand. Having everything organized streamlines the process and prevents the mixture from cooling too much while you’re searching for materials.
Flavor Variations and Add-Ins
While grandma’s classic version is perfection itself, there’s plenty of room for creativity with this versatile recipe. Cinnamon popcorn balls are wonderful during fall and winter—simply add ½ teaspoon of ground cinnamon and ¼ teaspoon of nutmeg to your marshmallow mixture before coating the popcorn.
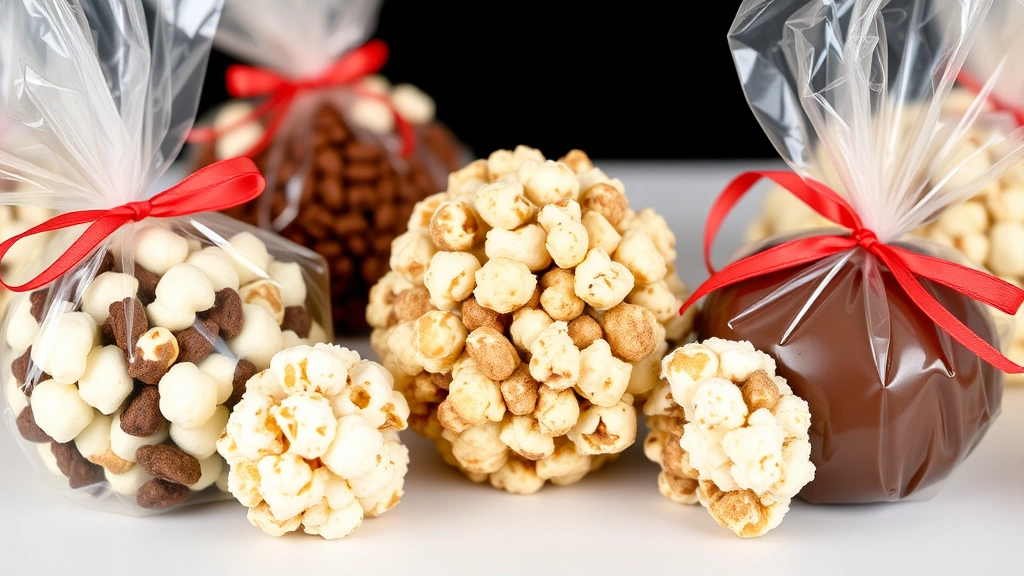
For a chocolate lover’s version, melt 2 ounces of milk chocolate and drizzle it over the finished balls once they’ve set, or add chocolate chips to the coating mixture. Peanut butter popcorn balls can be created by replacing half the butter with smooth peanut butter, creating a richer, more savory profile.
Consider adding toasted nuts to your popcorn before mixing—pecans, walnuts, or almonds all complement the sweetness beautifully. Toss them in after removing unpopped kernels but before adding the marshmallow mixture. You might also try dried cranberries or mini chocolate chips mixed into the popcorn for bursts of flavor and texture.
For a sophisticated twist, add a pinch of sea salt to the top of each ball right after shaping—the salt-sweet combination is absolutely divine. Some bakers enjoy a maple variation by substituting ½ teaspoon of maple extract for vanilla, creating an autumnal treat that pairs wonderfully with quick breakfast recipes for morning snacking.
Storage and Shelf Life
Properly stored popcorn balls maintain their quality for up to one week at room temperature. Place them in an airtight container with parchment paper between layers to prevent sticking. Keep them away from direct sunlight and heat sources, as warmth can soften the marshmallow coating.
For longer storage, popcorn balls can be frozen for up to three weeks. Wrap each ball individually in plastic wrap, then place them in a freezer-safe container. Thaw them at room temperature for about 30 minutes before serving—they’ll return to their original texture and taste.
Humidity is the enemy of popcorn balls. In very humid climates, store them in the refrigerator in an airtight container with silica gel packets to absorb excess moisture. The cold won’t harm them, though you may want to let them come to room temperature before eating for the best texture.
If your popcorn balls become slightly stale, you can refresh them by placing them in a warm oven (200°F) for 5-10 minutes. This softens the marshmallow coating and revives the crispness of the popcorn.
Making It a Family Activity
One of the greatest joys of this recipe is how perfectly it lends itself to family cooking. Children as young as five or six can help pop the corn and toss ingredients under supervision. This recipe offers a wonderful opportunity to pass down culinary traditions, just as grandmas have done for generations, and create lasting memories in the kitchen.
Assign different tasks to different family members: one person can handle popping the corn, another can grease hands and prepare the work surface, and older children can help with the marshmallow melting under adult supervision. The shaping stage is where everyone can participate—let each person create their own popcorn balls, celebrating their individual styles and sizes.
This activity pairs beautifully with other grandma approved dinner recipes as part of a larger cooking day or holiday tradition. Consider making popcorn balls alongside other homemade treats to create a complete gift basket or holiday spread.
For younger children, this is an excellent introduction to basic cooking concepts like melting, mixing, and shaping. They’ll develop confidence in the kitchen and create something they’re genuinely proud to share with family and friends.
The versatility of this recipe also makes it perfect for themed cooking nights. Make cinnamon versions during October, chocolate varieties around Valentine’s Day, or keep the classic version for year-round enjoyment. Each variation becomes a new tradition in your family’s cooking repertoire.
If you enjoy teaching cooking skills, this recipe demonstrates several fundamental techniques used in culinary schools and professional kitchens—temperature control, timing, texture development, and proper food handling. It’s a simple recipe that teaches important lessons.
For those interested in the science behind candy making, popcorn balls offer a fascinating study in how different ingredients interact. The marshmallows provide both structure and sweetness, while the popcorn’s inherent starches help stabilize the mixture. Understanding food science principles can help you troubleshoot any issues and create variations with confidence.
FAQ
Can I use pre-made popcorn balls instead of making them from scratch?
While store-bought popcorn balls are convenient, homemade versions are fresher, more flavorful, and significantly more cost-effective. Plus, there’s an irreplaceable joy in serving something you’ve made yourself. The quality difference is noticeable, especially within the first few days.
What’s the best way to reheat stale popcorn balls?
Place them on a baking sheet in a 200°F oven for 5-10 minutes. This gently softens the marshmallow coating without melting it completely. Alternatively, you can microwave a single ball for 10-15 seconds, though this requires careful monitoring to prevent overdoing it.
Can I make popcorn balls with homemade marshmallows?
Absolutely! Homemade marshmallows work beautifully and add a gourmet touch. You’ll need about 3 cups of homemade marshmallows cut into chunks. They’ll melt slightly faster than store-bought marshmallows, so watch carefully and stir constantly.
Is there a dairy-free version of this recipe?
Yes! Substitute the butter with coconut oil or dairy-free butter, and use vegan marshmallows (many brands now offer this option). The texture and taste will be very similar to the traditional version, making it an excellent option for guests with dietary restrictions.
Why are my popcorn balls too hard or too soft?
Hard balls usually indicate the marshmallow mixture was cooked too long or cooled too much before shaping. Soft balls suggest the mixture was either too warm when shaped or hasn’t had enough time to set. Aim for that sweet spot—warm enough to shape easily but not so hot it burns your hands.
Can I add food coloring to popcorn balls?
Yes! Add a few drops of gel food coloring to the marshmallow mixture while it’s melting. This creates festive versions perfect for holidays. Red for Christmas, orange for Halloween, or pastels for spring celebrations.
How do I prevent the marshmallow from separating from the popcorn?
This happens when the mixture is too hot or when you’re too rough with the tossing. Keep heat at medium-low, stir gently and constantly, and use a light hand when coating the popcorn. The mixture should coat evenly without creating clumps.
Are popcorn balls suitable for people with nut allergies?
Yes, the basic recipe contains no nuts. However, if you’re adding nuts as variations, ensure they’re prepared in a nut-free environment if serving to allergic individuals. Always check marshmallow and other ingredient labels for potential cross-contamination warnings.
Can I make popcorn balls without marshmallows?
Traditional popcorn balls rely on marshmallows for their signature texture, but you could substitute with alternative binders like taffy or caramel. These create different but equally delicious treats, though they won’t be “grandma’s classic version.”
What’s the best gift-wrapping method for popcorn balls?
Wrap each ball individually in colorful cellophane, tie with ribbon, and place in a decorative box or bag. This protects them from damage and creates an attractive presentation. Include a note mentioning the ingredients for those with allergies.


