Grandma’s Best Dinner Recipes? Tested and Approved
There’s something magical about sitting down to a home-cooked meal prepared with love and time-tested techniques. Grandma’s dinner recipes have stood the test of time for a reason—they’re comforting, delicious, and most importantly, they work. These aren’t fancy restaurant dishes requiring exotic ingredients or complicated culinary degrees. Instead, they’re straightforward meals that families have enjoyed for generations, with flavors that remind us of simpler times and warmer kitchens.
The beauty of grandma-approved dinner recipes lies in their reliability and heart. Whether you’re cooking for your own family, hosting a dinner party, or simply looking to expand your weeknight meal rotation, these tested recipes deliver consistent results. They teach us that good cooking doesn’t need to be complicated—it needs to be thoughtful, prepared with quality ingredients, and made with intention. Let’s explore some of the best grandma-approved dinner recipes that have earned their place at family tables across generations.
Classic Meatloaf: The Ultimate Comfort Food
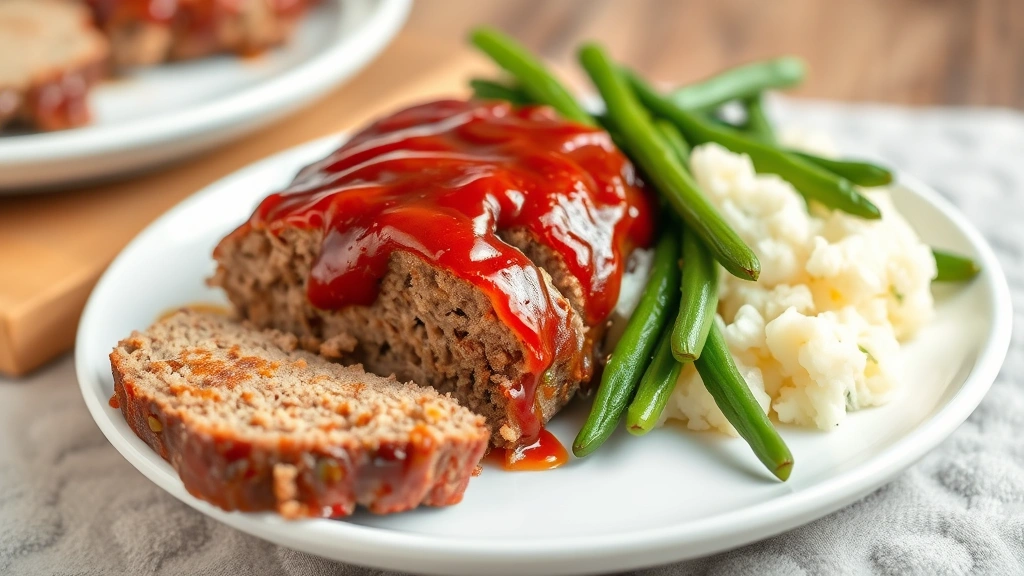
Meatloaf stands as one of the most iconic grandma-approved dinner recipes, and for good reason. This humble dish transforms simple ground beef into something extraordinary through proper technique and quality ingredients. The secret to an exceptional meatloaf isn’t hidden in expensive components—it’s in understanding how to bind ingredients properly and cook them with care.
The foundation of great meatloaf begins with the right meat blend. Many experienced cooks recommend using a combination of ground beef and ground pork, which creates a more tender, flavorful loaf than beef alone. The ratio should typically be about 70% beef to 30% pork, though some grandmas swear by an even split. Start by placing your ground meat in a large mixing bowl without handling it too much—overworking the meat leads to a dense, tough meatloaf.
Next comes the binding mixture, which is crucial for texture. Combine breadcrumbs (about one cup for two pounds of meat) with milk, eggs, minced onion, and seasonings. This mixture, sometimes called a panade, absorbs moisture and keeps the meatloaf from becoming dry during cooking. Add finely minced garlic, salt, pepper, and a touch of Worcestershire sauce. Some grandmas add a tablespoon of ketchup to the mixture for subtle sweetness and acidity.
When it’s time to combine everything, use your hands and mix gently until just incorporated. Form the mixture into a loaf shape and place it in a baking pan or on a rimmed baking sheet lined with foil. The topping is where many grandmas add their personal touch—a mixture of ketchup, brown sugar, and vinegar brushed over the top creates a delicious glaze that caramelizes in the oven.
Bake at 350°F for about 50-60 minutes, depending on thickness. The internal temperature should reach 160°F. Let it rest for 5-10 minutes before slicing. Serve alongside mashed potatoes and steamed vegetables for the ultimate comfort dinner. This recipe pairs wonderfully with easy dinner recipes for beginners since it requires minimal active cooking time.

Pot Roast with Root Vegetables
Pot roast represents the pinnacle of slow-cooked, one-pot comfort meals that grandmas have perfected over decades. This dish is forgiving, adaptable, and produces incredibly tender, flavorful meat that falls apart with a fork. The beauty of pot roast is that it actually improves when made a day ahead, making it perfect for meal planning.
Begin with a quality cut of beef—chuck roast is ideal because its marbling and connective tissue break down during long, slow cooking, creating incredible tenderness and flavor. A 3-4 pound roast serves about 6-8 people comfortably. Pat the meat dry with paper towels, then season generously with salt and pepper on all sides.
Heat oil in a heavy Dutch oven or large pot over medium-high heat. Once hot, sear the roast on all sides until deeply browned—this takes about 2-3 minutes per side. This step, called the Maillard reaction, develops complex flavors that are essential to the dish’s depth. Remove the roast and set aside.
In the same pot, sauté diced onions until softened, about 3-4 minutes. Add minced garlic and cook for another minute. Pour in beef broth to deglaze the pan, scraping up the flavorful browned bits from the bottom. Return the roast to the pot and add bay leaves, fresh thyme, and a splash of red wine if desired. Bring to a simmer, cover, and transfer to a 325°F oven.
After about 2 hours, add your vegetables: large chunks of carrots, potatoes, parsnips, and celery. These root vegetables take about 45 minutes to become tender. The pot roast is done when a fork easily pierces the meat and vegetables are completely soft. The cooking liquid becomes a rich, savory gravy that coats everything beautifully.
Baked Chicken and Rice Casserole
Casseroles hold a special place in grandma’s recipe collection because they’re efficient, economical, and endlessly customizable. A chicken and rice casserole represents the perfect weeknight dinner—it comes together quickly, bakes unattended, and feeds a crowd with minimal fuss.
This classic combines tender chicken, fluffy rice, and a creamy sauce bound together with cheese and seasoning. Start with about 2-3 pounds of chicken—either breasts cut into chunks or a whole chicken cut into pieces. The choice depends on your preference; bone-in pieces add more flavor but require longer cooking.
In a large baking dish, combine uncooked long-grain white rice (about 2 cups), chicken broth (4 cups), and cream of mushroom or cream of chicken soup (one can). Season with salt, pepper, garlic powder, and paprika. Arrange chicken pieces on top of the rice mixture, then sprinkle with shredded cheddar cheese.
Cover with foil and bake at 350°F for about 45-50 minutes, until the rice is tender and chicken is cooked through (165°F internal temperature). Remove foil for the last 10 minutes to allow the cheese to brown slightly. Let rest for 5 minutes before serving. This dish pairs excellently with summer salad recipes for a complete meal.
The versatility of this casserole makes it perfect for using up ingredients on hand. Add frozen peas, corn, or green beans. Include sautéed mushrooms or caramelized onions. Some grandmas add diced bell peppers or fresh herbs like thyme and parsley. The formula remains the same—rice, liquid, protein, and binding sauce—but the variations are endless.
Beef Stew That Warms the Soul
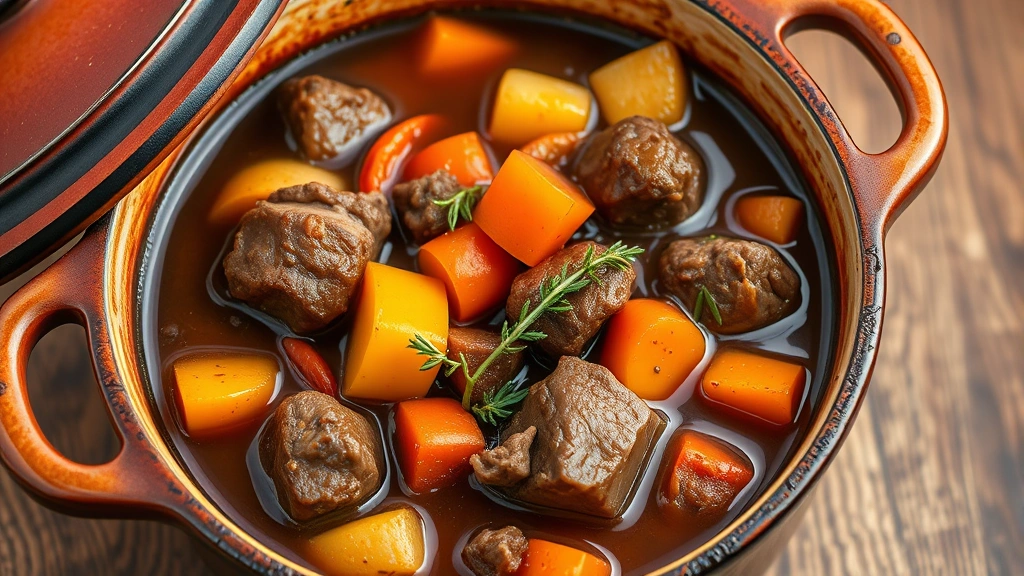
A proper beef stew is one of the most satisfying dinner recipes in any grandma’s repertoire. Unlike quick weeknight meals, beef stew rewards patience and low-and-slow cooking, developing deep, complex flavors that can’t be rushed. This is the dish to make on a chilly evening when you want comfort in a bowl.
Start with well-marbled beef chuck, cut into 1.5-2 inch cubes. Pat dry and season with salt and pepper. Working in batches to avoid crowding the pan, sear the beef in a hot Dutch oven with a bit of oil until deeply browned on multiple sides. Set the browned beef aside.
In the same pot, sauté diced onions until softened and beginning to caramelize. Add minced garlic and cook briefly. Sprinkle flour over the vegetables—about 3 tablespoons—and stir constantly for 1-2 minutes to cook out the raw flour taste. This flour acts as a thickener for the stew.
Deglaze the pot with red wine (about one cup), scraping up all the browned bits. Pour in beef broth (about 4-5 cups) and add the browned beef back to the pot along with bay leaves, fresh thyme, and a tablespoon of tomato paste. The tomato paste adds depth and umami to the broth.
Bring to a simmer, cover, and cook on low heat (or in a 325°F oven) for about 2-2.5 hours. During the last 30 minutes, add your vegetables: carrots cut into chunks, potatoes cut into cubes, and pearl onions. The stew is done when the beef is incredibly tender and the vegetables are soft.
The beauty of beef stew is that it tastes even better the next day, as flavors meld and deepen. Make it ahead and reheat gently before serving. Serve in bowls with crusty bread for soaking up the rich broth. This is the ultimate healthy crockpot recipes alternative when you want maximum flavor.
Homemade Pasta with Marinara Sauce
While many grandmas serve pasta as a side dish, the best ones make it the star of dinner. Homemade pasta paired with a simple, well-made marinara sauce represents Italian grandmother cooking at its finest. This meal teaches an important lesson: exceptional food comes from quality ingredients and proper technique, not complexity.
Start with a classic marinara sauce, which requires just a few components: quality canned tomatoes, garlic, olive oil, and salt. Heat good olive oil in a large pot and gently cook sliced garlic until fragrant but not browned—burnt garlic tastes bitter. Add two 28-ounce cans of crushed San Marzano tomatoes and a teaspoon of salt. Simmer gently for 20-30 minutes, stirring occasionally. The longer, gentler cooking develops sweet, mellow tomato flavors.
For the pasta, you can use fresh homemade pasta or high-quality dried pasta—both are equally valid. If making fresh pasta, combine 3 cups flour with 6 eggs and a pinch of salt, knead until smooth, rest for 30 minutes, then roll and cut. If using dried pasta, choose bronze-cut varieties, which have a rougher texture that holds sauce better.
Cook pasta in generously salted boiling water until al dente—tender but with a slight firmness when bitten. Reserve about one cup of pasta cooking water before draining. Toss the hot pasta with the marinara sauce, adding pasta water a bit at a time to reach desired consistency. The starch in the pasta water emulsifies with the sauce, creating a silky coating.
Finish with fresh basil, a drizzle of good olive oil, and grated Parmesan cheese. Serve immediately with crusty bread for a complete meal. Consider pairing this with how to make homemade bread for an authentic Italian dinner experience.
Fried Chicken: Crispy and Golden
Fried chicken represents one of the most beloved grandma-approved dinner recipes, combining technique, seasoning, and proper oil temperature to achieve that perfect crispy exterior and juicy interior. This is the dish that separates good cooks from great ones—it’s simple in concept but requires attention to detail.
Begin by preparing your chicken pieces the night before if possible. Cut a whole chicken into 8 pieces: two breasts, two thighs, two drumsticks, and two wings. Pat thoroughly dry with paper towels—moisture prevents proper browning and crisping. Season generously with salt and let sit uncovered in the refrigerator for at least 4 hours, preferably overnight. This dry-brining process seasons the meat throughout and helps retain moisture.
Prepare your breading station with buttermilk in one shallow dish and a mixture of flour, paprika, garlic powder, onion powder, cayenne, salt, and pepper in another. The buttermilk creates an acidic environment that tenderizes the chicken while providing the moisture needed for the flour coating to adhere properly.
Dip each piece in buttermilk, then coat thoroughly in the seasoned flour, pressing gently so the coating adheres. Let breaded pieces rest on a wire rack for at least 15 minutes—this allows the coating to set properly.
Heat oil (vegetable or peanut oil works best) to 325°F in a heavy Dutch oven or large pot. The oil temperature is crucial—too hot and the coating burns before the chicken cooks through; too cool and the chicken absorbs oil, becoming greasy. Use a reliable thermometer to monitor temperature.
Working in batches to avoid crowding, carefully place breaded chicken pieces in the hot oil. Dark meat (thighs and drumsticks) takes about 12-15 minutes; white meat (breasts) takes about 10-12 minutes. The chicken is done when the internal temperature reaches 165°F and the coating is deep golden brown.
Drain on paper towels and serve hot with mashed potatoes and gravy. This recipe also pairs wonderfully with chicken and biscuits recipe for a complete comfort meal.
Fish and Chips Night
Fish and chips represents a classic dinner that grandmas have served for generations, whether as a Friday night tradition or a special treat. The combination of crispy battered fish, fluffy chips, and tartar sauce creates a satisfying meal that’s more achievable at home than many people realize.
For the fish, choose firm white fish that won’t fall apart during frying—cod, halibut, or pollock work beautifully. Cut into fillets about 1 inch thick. Pat dry thoroughly, as any moisture will cause splattering and prevent proper crisping.
The batter is where magic happens. Combine one cup flour, one teaspoon baking powder, one teaspoon salt, and a half teaspoon each of paprika and cayenne. In another bowl, whisk together one cup cold beer or sparkling water with one egg yolk. The carbonation in beer creates an extra-light, crispy batter. Combine wet and dry ingredients gently—a few lumps are fine; overmixing creates tough batter.
For chips, cut potatoes into thick, even batons and soak in cold water for at least 30 minutes. This removes excess starch and helps them cook evenly. Pat dry before frying.
Heat oil to 325°F and fry chips in batches for about 5-6 minutes until they’re tender inside but not yet golden. Remove and drain. Increase oil temperature to 350°F, dip fish pieces in batter, and fry until the coating is golden and the fish flakes easily—about 3-4 minutes depending on thickness.
Increase oil temperature once more to 375°F and fry chips again for 1-2 minutes until crispy and golden. Serve immediately with malt vinegar, tartar sauce, and lemon wedges.
Tips for Perfecting Grandma Recipes
Understanding the principles behind these classic recipes helps you execute them perfectly and adapt them to your preferences. Here are essential tips that grandmas have learned through years of cooking:
Use quality ingredients: Grandma recipes aren’t fancy, but they demand good ingredients. Quality butter, fresh eggs, real cheese, and good olive oil make measurable differences. You don’t need expensive specialty items—just honest, well-made products.
Season gradually and taste constantly: Rather than adding all seasoning at once, build flavors gradually and taste as you go. You can always add more salt, but you can’t remove it. Many grandmas keep a small spoon dedicated to tasting as they cook.
Don’t rush slow-cooked meals: Recipes like pot roast and beef stew benefit from time. Resist the urge to increase heat to speed things up—low and slow develops flavors that quick cooking can’t achieve.
Invest in proper equipment: A heavy Dutch oven, reliable thermometer, and sharp knives make cooking easier and more successful. These tools last decades and are worth the investment.
Prepare mise en place: Gathering and preparing all ingredients before cooking prevents mistakes and keeps you organized. This French technique makes cooking more enjoyable and prevents scrambling.
Learn from failures: Even experienced grandmas have cooking mishaps. Rather than discarding the result, figure out what went wrong. Did the oil temperature vary? Was something overcooked? Understanding failures prevents repetition.
Keep a cooking journal: Note what worked, what didn’t, and personal modifications you made. Over time, this becomes invaluable for perfecting recipes to your preferences.
Understand the science: Knowing why things happen—why resting meat retains juices, why room-temperature ingredients mix better, why acid balances richness—helps you become a more intuitive cook. Resources like Serious Eats and Cook’s Illustrated offer excellent explanations of cooking science.
Make recipes your own: While respecting traditional techniques, don’t hesitate to adapt recipes to your tastes. Add vegetables you love, adjust seasonings to preference, or substitute ingredients based on what’s available. This is how family recipes evolve and become personal.
Consider exploring King Arthur Baking Company’s learning resources for detailed technique guides, or America’s Test Kitchen for thoroughly tested recipes and methods.
FAQ
What makes a recipe “grandma-approved”?
A grandma-approved recipe combines reliability, simplicity, and soul. These recipes work consistently, don’t require fancy ingredients or complicated techniques, and create meals that comfort and satisfy. They’ve been tested countless times and proven to please families across generations.
Can I prepare these meals in advance?
Many of these recipes actually improve when made a day ahead. Pot roast, beef stew, and marinara sauce all develop deeper flavors overnight as ingredients meld. Store in airtight containers in the refrigerator for up to three days, or freeze for longer storage. Reheat gently on the stovetop, adding liquid if needed.
How do I adapt these recipes for dietary restrictions?
Most of these recipes can be modified. For vegetarian versions, use vegetable broth and substitute plant-based proteins. Gluten-free cooking requires gluten-free flour substitutes in breading and sauces. Dairy-free options exist for creamy dishes using coconut milk or cashew cream. The core technique remains the same—only ingredients change.
What’s the best way to learn these recipes?
Start with recipes that appeal to you most. Read through the entire recipe before cooking. Watch video demonstrations if available. Cook alongside someone experienced if possible. The first time might not be perfect—that’s normal. Each repetition teaches you more about how the recipe behaves and how to adjust for your preferences.
How do I know when food is properly cooked?
Use a reliable meat thermometer—this removes guesswork. Chicken and pork should reach 165°F, beef can be cooked to preference but 160°F for well-done is standard. For vegetables, they should be fork-tender. For pasta, taste and look for al dente texture. These indicators matter more than cooking times, which vary based on equipment and ingredient size.
Can I substitute ingredients in these recipes?
Yes, with understanding. Proteins can often be swapped—chicken for pork, or beef for lamb. Vegetables are highly flexible. However, avoid substituting fundamental ingredients like eggs in baking or oil in frying without understanding the impact. When unsure, consult reliable cooking resources before making changes.


