Eye of Round Roast? Chef’s Favorite Method
The eye of round roast is one of the most misunderstood cuts of beef in the kitchen. Many home cooks shy away from it, believing it’s too tough or flavorless to bother with. However, professional chefs know a secret: when prepared correctly, this lean and economical cut transforms into a tender, succulent centerpiece that rivals more expensive roasts. The key lies in understanding the meat’s structure and applying the right cooking techniques to coax out its hidden potential.
This guide walks you through everything you need to know about cooking eye of round roast like a seasoned chef. From selecting the perfect cut at the butcher counter to mastering the low-and-slow roasting method, you’ll discover why this humble beef cut deserves a permanent place in your dinner rotation. Whether you’re preparing a weeknight family meal or hosting a dinner party on a budget, the eye of round roast delivers impressive results when treated with proper technique and respect.
What Is Eye of Round Roast
The eye of round is a lean, cylindrical cut that comes from the round primal, specifically the hindquarters of the cow. This muscle group is used heavily during the animal’s life, making the meat lean and dense. The cut’s distinctive shape—nearly perfectly round when viewed from above—gives it its memorable name. Butchers typically sell this roast in three-to-five-pound sizes, making it ideal for family meals or small dinner parties.
Understanding the meat’s composition is crucial for cooking success. The eye of round contains minimal marbling (intramuscular fat), which means it relies heavily on proper cooking technique to achieve tenderness. The muscle fibers run throughout the cut, and when cooked incorrectly, they can become tough and chewy. However, when you apply the right method, these fibers break down beautifully, creating a tender bite that belies the cut’s lean reputation.
This cut belongs to the same family as sirloin tip roast and bottom round, but it’s smaller and more tender than its cousins. The tight grain structure means it slices beautifully for presentation, making it perfect for formal dinners. Because of its leanness, the eye of round has become increasingly popular among health-conscious cooks looking for best healthy food recipes that don’t sacrifice flavor.
Why Chefs Love This Cut
Professional chefs appreciate the eye of round for several compelling reasons. First, the economics make sense: this cut costs significantly less than prime rib, tenderloin, or strip roast, yet delivers impressive results when treated properly. For restaurants operating on tight margins, this allows them to serve restaurant-quality beef at accessible prices. Second, the lean nature of the meat means it’s lower in fat, appealing to modern diners seeking healthier options.
The predictable shape and size of the eye of round make it ideal for batch cooking. Chefs can calculate cooking times precisely and achieve consistent results across multiple roasts. The tight grain structure means perfect slicing for presentation—each slice shows clean, attractive muscle fibers rather than irregular chunks. This visual appeal matters in fine dining, where plating and presentation are paramount.
Flavor development through proper browning creates a complex, savory crust that compensates for the cut’s leanness. When seared correctly, the Maillard reaction creates hundreds of flavor compounds that enhance the entire dish. The lean meat also absorbs marinades and seasonings more readily than fattier cuts, making it an excellent canvas for creative flavor profiles. Many chefs actually prefer this versatility, as it allows them to showcase different cuisines and spice profiles throughout their menus.
Selecting and Preparing Your Roast
When shopping for eye of round roast, look for meat with a deep red color and a firm texture. Avoid packages with excessive liquid, which indicates the meat has been sitting too long. Ask your butcher to remove any surface fat and the thin membrane (called the silver skin) that sometimes covers the outside. This membrane prevents seasonings from penetrating the meat and should be removed before cooking.
Size matters significantly for cooking success. A three-to-four-pound roast cooks more evenly than a larger five-to-six-pound roast. If you’re feeding a large crowd, it’s better to cook two smaller roasts rather than one massive one. This approach ensures more consistent doneness throughout and reduces the risk of overcooking the outer portions while waiting for the center to reach target temperature.
Remove your roast from the refrigerator 45 minutes to an hour before cooking. This critical step allows the meat to come to room temperature, ensuring even cooking throughout. Cold meat placed directly in a hot oven develops an uneven temperature gradient, with the exterior overcooking before the center reaches the proper temperature. Room temperature meat cooks more predictably and achieves better texture.
Pat the roast dry with paper towels before seasoning. Moisture on the surface prevents proper browning and creates steam rather than the flavorful crust you’re after. Use a generous hand with salt and freshly ground black pepper. Don’t be shy—this is your only opportunity to season the exterior, and it’s the foundation for flavor development. Some chefs add garlic powder, onion powder, or dried herbs at this stage, but salt and pepper alone are perfectly adequate.
The Chef’s Favorite Roasting Method
The chef’s favorite method for eye of round roast combines high-heat searing with low-temperature roasting. This two-stage approach delivers a flavorful brown crust while maintaining a tender, juicy interior. Start by heating your oven to 450 degrees Fahrenheit. Use a heavy-bottomed roasting pan or cast-iron skillet—these distribute heat evenly and develop superior browning.
Add a high-heat oil (vegetable, canola, or avocado oil) to your pan and heat until it shimmers and just begins to smoke. This intense heat is essential for proper crust development. Carefully place your seasoned roast in the hot pan. Resist the urge to move it around—let it sit undisturbed for three to four minutes to develop a golden-brown crust. Rotate the roast 90 degrees and sear for another three minutes. Continue rotating until all sides have developed a deep brown crust, approximately twelve to fifteen minutes total.
Once the roast is properly seared, transfer the pan to your preheated 450-degree oven. Roast for ten minutes at this high temperature to finish the browning process. Then reduce the oven temperature to 325 degrees Fahrenheit. This lower temperature allows the interior to cook gently without overcooking the exterior. Insert a meat thermometer into the thickest part of the roast, being careful not to touch bone if any exists.
Continue roasting at 325 degrees until the internal temperature reaches your target doneness. For medium-rare (the recommended temperature for beef), aim for 130-135 degrees Fahrenheit. Remember that the roast will continue cooking as it rests, a process called carryover cooking. This means you should remove it from the oven when it reaches 125-130 degrees to account for this temperature rise.
Temperature Control and Timing
Cooking time varies based on roast size and your oven’s characteristics. As a general guideline, expect approximately fifteen to twenty minutes per pound at 325 degrees Fahrenheit after the initial high-heat searing. A three-pound roast typically requires forty-five to sixty minutes at the lower temperature, while a four-pound roast needs fifty to seventy minutes.
Invest in a reliable instant-read meat thermometer—this is non-negotiable for consistent results. Cheap thermometers provide inaccurate readings that can result in overcooked, dry meat or dangerously undercooked roasts. Quality thermometers cost twenty to forty dollars and last for years, making them an excellent kitchen investment. Insert the thermometer into the thickest part of the roast, perpendicular to the muscle fibers, and wait for the reading to stabilize.
The low-and-slow method at 325 degrees is forgiving compared to higher-temperature roasting. The gentle heat allows the meat’s proteins to unwind gradually, resulting in superior tenderness. This contrasts sharply with the common mistake of roasting at 375-400 degrees throughout, which tends to tighten the muscle fibers and create a tough texture.
Some advanced cooks use the reverse-sear method: roasting at low temperature first (250-275 degrees), then searing in a hot pan at the end. This technique offers excellent temperature control and often produces superior results, though it requires more active cooking time. Either method works beautifully when executed properly.
Creating the Perfect Crust
The crust is where much of the flavor comes from in a lean roast like eye of round. The Maillard reaction—a chemical process that occurs when proteins and carbohydrates combine under high heat—creates hundreds of savory flavor compounds. This is why proper searing is absolutely critical. Don’t skip this step or rush through it.
The oil you choose matters. Avoid olive oil, which has a low smoke point and burns easily. Instead, use vegetable oil, canola oil, or avocado oil, all of which can withstand the intense heat required for proper browning. The oil should shimmer and just begin to smoke before you add the roast. If it’s not hot enough, you’ll steam the meat rather than sear it.
Some chefs add butter or fresh herbs to the pan during searing for additional flavor. Thyme, rosemary, and garlic all complement beef beautifully. Baste the roast with this herb-infused butter as it sears, allowing the flavors to coat the meat. This technique is optional but highly recommended for maximum flavor development.
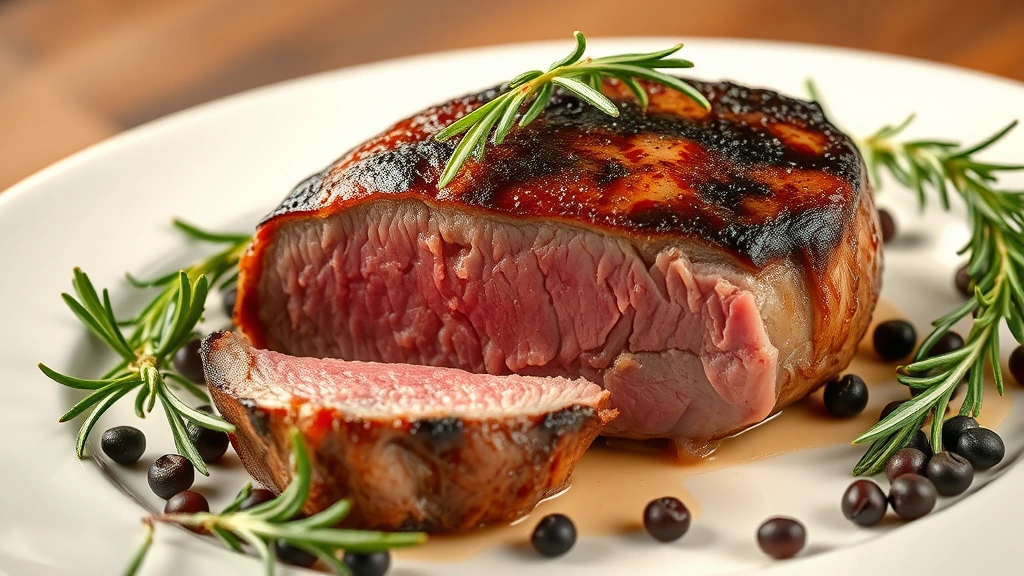
Don’t worry if the crust looks very dark—that’s exactly what you want. Properly seared beef should have a nearly black crust. This is not burning; it’s the Maillard reaction doing its job. The depth of this crust directly correlates with the depth of flavor in your finished dish.
Resting and Carving
Resting is absolutely critical and often overlooked by home cooks. After removing the roast from the oven, place it on a cutting board and tent it loosely with aluminum foil. Allow it to rest for fifteen to twenty minutes. During this time, the residual heat continues cooking the interior slightly while the muscle fibers relax and reabsorb juices.
When you cut into a roast immediately after cooking, the hot meat is still in a state of tension. The juices flow out onto the cutting board, leaving the meat dry. During the resting period, the muscle fibers relax, and the juices redistribute throughout the meat, resulting in moister, more flavorful slices. This is not optional—it’s essential.
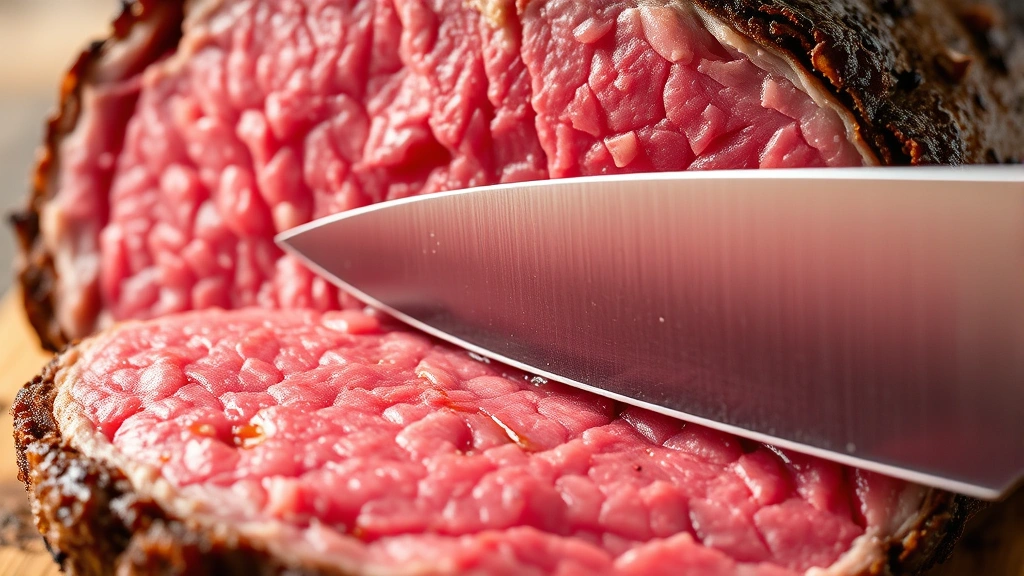
After resting, examine the roast to determine the grain direction. The muscle fibers should be visible, running in one primary direction. Slice against the grain—perpendicular to these fibers. This shortens the muscle fibers in each slice, making the meat more tender. Slicing with the grain leaves long fibers intact, resulting in a tougher, chewier bite.
Use a sharp carving knife or serrated bread knife for clean slices. Dull knives tear the meat fibers, creating an unattractive appearance and potentially damaging the texture. Aim for slices about one-quarter inch thick for optimal presentation and eating experience.
Serving Suggestions and Sides
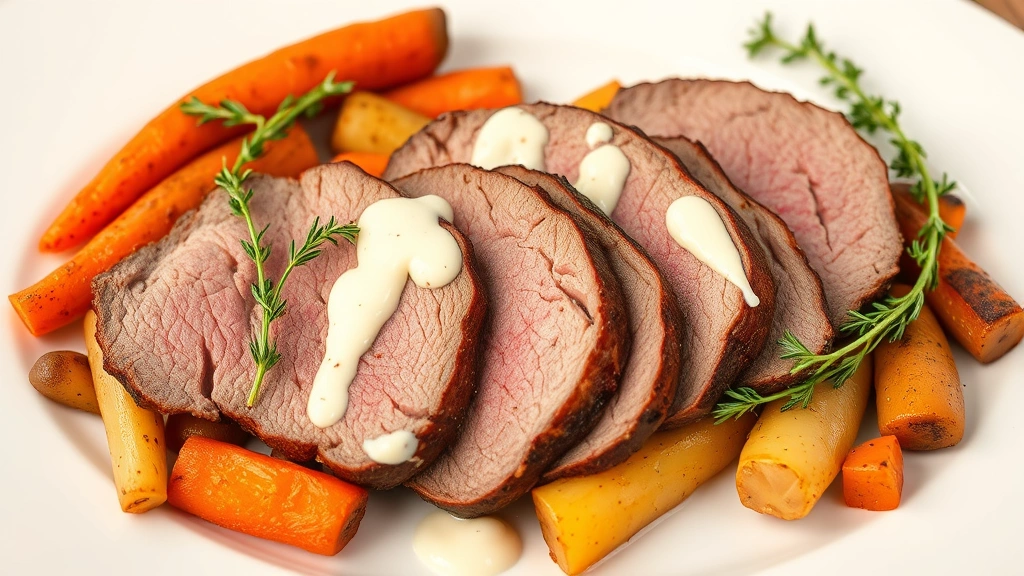
Eye of round roast pairs beautifully with classic beef sides. Roasted root vegetables—carrots, potatoes, parsnips, and beets—complement the lean meat perfectly. The vegetables’ natural sweetness and tender texture provide balance to the savory beef. Consider roasting them in the same pan during the last portion of cooking time, allowing them to absorb the flavorful pan drippings.
Creamed horseradish sauce adds a sharp, pungent note that cuts through the richness of beef. This traditional accompaniment is simple to prepare: fold grated horseradish and a touch of vinegar into whipped heavy cream. The brightness elevates the entire dish. For a lighter option, make a mustard-based sauce using Dijon mustard, beef broth, and a splash of red wine.
Yorkshire pudding is the traditional British accompaniment to roast beef. The eggy, puffy pastries soak up pan juices beautifully and provide textural contrast. If you’re seeking how to make homemade bread accompaniments, crusty rolls or a rustic loaf work wonderfully for soaking up sauce.
Incorporate this roast into your food waste reduction tips by using leftovers creatively. Thinly sliced cold roast makes excellent sandwiches, while thicker slices can be reheated gently and served with different sauces throughout the week. Shredded roast adds protein to salads, grain bowls, and soups.
Green vegetables like asparagus, green beans, or Brussels sprouts provide color and nutritional balance. Roast them separately with olive oil, salt, and pepper, or steam them and toss with a compound butter infused with garlic and fresh herbs. The earthy, slightly bitter notes of these vegetables complement the savory beef wonderfully.
Consider pairing your eye of round roast with a bold red wine like Cabernet Sauvignon or Malbec. The tannins in these wines complement beef beautifully, and the wine’s acidity cuts through the richness of any sauce. For non-alcoholic options, a rich beef broth or a robust vegetable-based drink pairs well.
FAQ
How long does eye of round roast last in the refrigerator?
Properly stored cooked eye of round roast lasts three to four days in the refrigerator. Keep it in an airtight container, and slice it only as needed. Store any pan drippings or sauce separately to prevent the meat from drying out. For longer storage, freeze cooked roast for up to three months.
Can I cook eye of round roast in a slow cooker?
Yes, the slow cooker method works well for eye of round. Sear the roast first in a hot pan to develop crust, then transfer to the slow cooker with broth and vegetables. Cook on low for six to eight hours until very tender. The moist cooking environment prevents the lean meat from drying out. However, you’ll sacrifice the flavorful browned exterior that the oven method provides.
What’s the difference between eye of round and sirloin tip roast?
Both cuts come from the round primal and are quite lean. Eye of round is smaller, more tender, and has a more uniform shape, making it better for traditional roasting. Sirloin tip is larger and slightly less tender, often used for pot roast or braising. Eye of round is generally the superior choice for the chef’s favorite roasting method described here.
Is eye of round roast good for medium-well doneness?
While possible, medium-well is not ideal for eye of round due to its leanness. At medium-well (150-155 degrees), the lean meat becomes noticeably drier. Medium-rare (130-135 degrees) is the recommended doneness, providing the best balance of food safety and meat quality. If you prefer your beef more cooked, consider a fattier cut instead.
Can I marinate eye of round before cooking?
Absolutely. A twelve-to-twenty-four-hour marinade enhances flavor and can improve tenderness. Acidic ingredients like vinegar, wine, or citrus juice help break down muscle fibers. Oil-based marinades with herbs and spices add tremendous flavor. Pat the roast dry before searing, as excess marinade prevents proper browning.
What internal temperature indicates doneness?
Remove from oven at 125-130 degrees Fahrenheit for medium-rare. The roast will continue cooking during the resting period, reaching 130-135 degrees. For medium (slightly more cooked), remove at 130-135 degrees, reaching 135-140 degrees after resting. Use an instant-read meat thermometer inserted into the thickest part for accuracy.
Why is my roast tough despite following the recipe?
Tough roast usually results from overcooking. The low-and-slow method at 325 degrees is forgiving, but if your oven runs hot or you miscalculate timing, the meat can become dry and tough. Always use a meat thermometer rather than relying on time estimates. Also ensure you’re slicing against the grain, which is critical for tenderness in lean cuts.


