Lemon Glaze Recipe: Baker’s Secret to Perfect Shine and Flavor
A silky, tangy lemon glaze is the finishing touch that transforms ordinary baked goods into bakery-quality creations. Whether you’re drizzling it over pound cakes, donuts, scones, or cookies, mastering this baker’s secret elevates your desserts from homemade to professional. The beauty of a lemon glaze recipe lies in its simplicity—just a few pantry staples combine to create a glossy coating with bright citrus flavor that complements nearly any cake or pastry.
What makes a truly exceptional lemon glaze isn’t just the ingredients, but understanding the science behind the ratios and techniques. Professional bakers have perfected the balance between sweetness, acidity, and consistency to achieve that Instagram-worthy shine while ensuring the glaze sets properly without becoming too thick or remaining too runny. In this comprehensive guide, you’ll discover the baker’s secrets that separate mediocre glazes from show-stopping finishes.
Understanding Lemon Glaze Fundamentals
A lemon glaze recipe operates on three fundamental principles that professional bakers understand intuitively. First, the ratio of liquid to powdered sugar determines whether your glaze will coat, drip, or pool. Second, the acidity from fresh lemon juice creates brightness that balances sweetness while also affecting how the glaze sets. Third, the temperature at which you apply the glaze impacts how it adheres and dries on your baked goods.
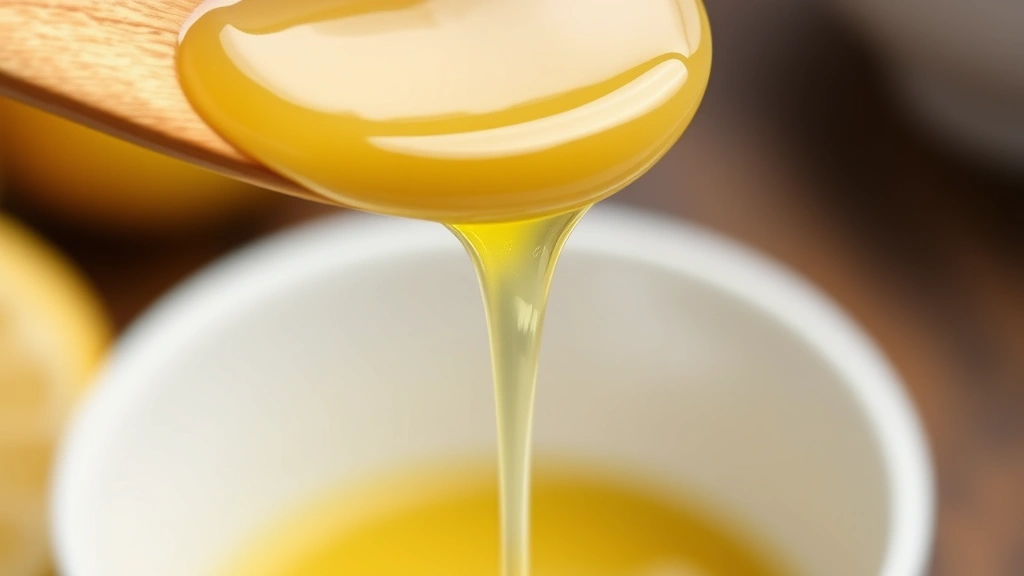
The science behind glaze consistency involves understanding how sugar dissolves and crystallizes. When you combine powdered sugar with liquid, the tiny sugar crystals dissolve, creating a smooth suspension. The more liquid you add, the more fluid the glaze becomes. Professional bakers often test their glaze by dipping a spoon—the glaze should coat the spoon and slowly drip off, creating ribbons. This visual test is more reliable than measuring alone, as humidity and ingredient variations affect consistency constantly.
Temperature plays a crucial role that many home bakers overlook. A warm glaze flows more easily and creates a thinner, more refined coating, while a cool glaze becomes thicker and more matte. For that coveted bakery shine, applying glaze to slightly warm baked goods (cooled for 10-15 minutes) while the glaze is still at room temperature creates optimal adhesion and glossiness.
Essential Ingredients Explained
Every component in a lemon glaze recipe serves a specific purpose, and understanding these roles helps you troubleshoot and create variations confidently.
Powdered Sugar: This is your glaze’s foundation, providing sweetness and body. Powdered sugar (also called confectioners’ sugar) contains cornstarch, which helps prevent crystallization and creates a smoother texture than regular granulated sugar. Always sift powdered sugar before using to eliminate lumps that create a grainy, unprofessional finish.
Fresh Lemon Juice: Never substitute bottled lemon juice for fresh-squeezed—the difference is dramatic. Bottled juice contains preservatives that affect flavor and consistency. Fresh lemon juice provides authentic tartness and acidity that activates the glaze’s brightness. The acidity also helps prevent the glaze from becoming overly sweet and cloying.
Butter: A small amount of butter enriches the glaze and creates a silkier mouthfeel. Melted butter incorporates smoothly, while room-temperature butter can create tiny lumps. Some bakers prefer a small amount of unsalted butter to control sodium levels and allow lemon flavor to dominate.
Milk or Heavy Cream: This adjusts consistency without diluting flavor as much as water would. Milk creates a lighter glaze, while heavy cream produces a richer, more luxurious coating that sets slightly thicker. The fat content affects both texture and how the glaze clings to baked goods.
Lemon Zest: While optional, a small amount of finely grated lemon zest intensifies flavor and adds visual appeal. The colorful specks signal freshness and quality to anyone enjoying your creation. Always zest before juicing to avoid the juice making the zester slip.
Classic Lemon Glaze Recipe
This is the foundational recipe that professional bakers use, with the flexibility to adjust consistency for your specific needs:
Ingredients:
- 2 cups powdered sugar, sifted
- 3-4 tablespoons fresh lemon juice
- 2 tablespoons melted butter
- 2-3 tablespoons whole milk or heavy cream
- ½ teaspoon vanilla extract (optional but recommended)
- Pinch of salt
- 1 teaspoon finely grated lemon zest (optional)
Instructions:
- Sift your powdered sugar into a medium mixing bowl, breaking up any clumps with the back of a spoon. This step is non-negotiable for a smooth, lump-free glaze.
- In a small bowl, whisk together fresh lemon juice, melted butter, milk, vanilla extract, and salt until fully combined.
- Pour the wet ingredients into the powdered sugar gradually, stirring constantly with a whisk or wooden spoon. Add ingredients slowly—you can always add more liquid, but you cannot remove it.
- Whisk until the mixture reaches a smooth, pourable consistency. It should coat the back of a spoon and slowly drip off, creating ribbons.
- If the glaze is too thick, add milk one teaspoon at a time until it reaches the desired consistency. If too thin, whisk in additional sifted powdered sugar, one tablespoon at a time.
- Stir in lemon zest if desired, distributing it evenly throughout the glaze.
- Use immediately for best results, or cover and refrigerate for up to three days, whisking well before using.
This recipe yields enough glaze to coat one 9-inch cake, a dozen large donuts, or 18-24 cookies. The beauty of this formula is its scalability—simply multiply all ingredients proportionally for larger batches.
Step-by-Step Application Techniques
Applying glaze correctly determines whether your baked goods look homemade or professionally finished. Here are professional techniques used in commercial bakeries:
For Cakes: Allow your cooled cake to sit on a wire rack with parchment paper or a rimmed baking sheet underneath to catch drips. Pour glaze slowly from the center, allowing it to flow naturally toward the edges. For a thin, elegant coating, pour less glaze; for a more generous pooling effect, pour more. Rotate the cake slowly for even coverage. Pro tip: slightly warm cakes (around 85-90°F) accept glaze beautifully while still maintaining structure.
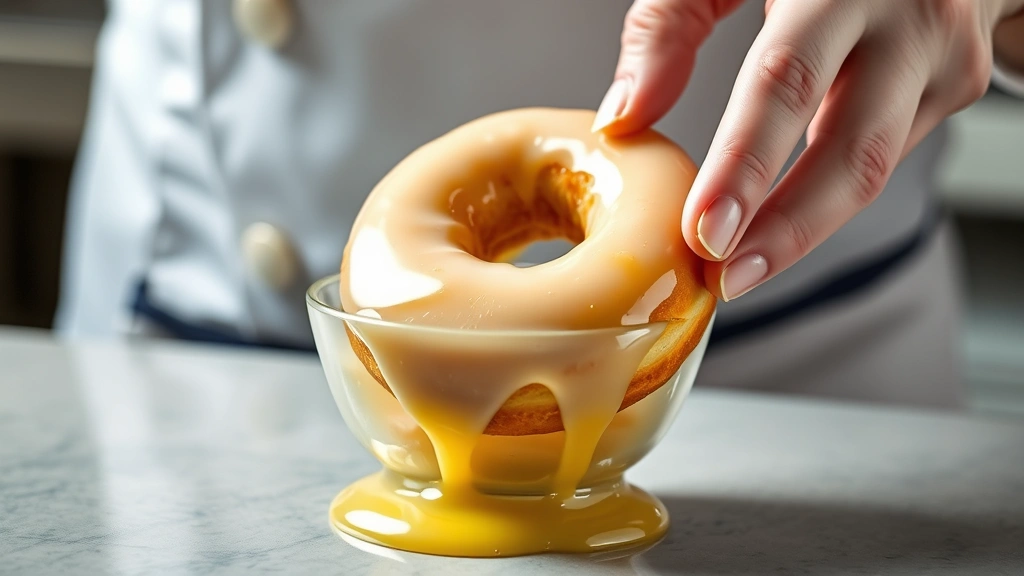
For Donuts and Pastries: Dip the top of each donut into the glaze, rotating gently to coat evenly. Hold it over the bowl for a moment to allow excess to drip off. This creates a uniform, professional appearance. Place on a wire rack and allow glaze to set before stacking or boxing.
For Cookies: For cookies like shortbread or sugar cookies, you can dip half the cookie into glaze for a elegant look, or use a small spoon to drizzle glaze in decorative patterns across the top. Allow glaze to set completely (usually 30-60 minutes depending on humidity) before stacking.
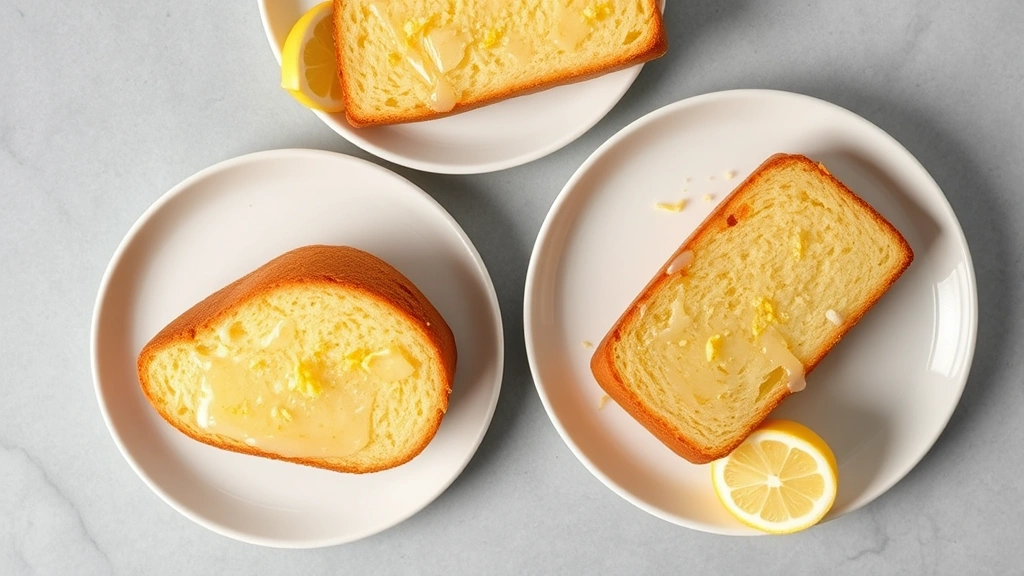
For Scones and Quick Breads: Drizzle glaze from a fork or whisk in thin lines across the top for a refined presentation. This technique works beautifully on gluten free dessert recipes and traditional baked goods alike.
Troubleshooting Common Issues
Glaze Too Thick and Lumpy: This typically indicates insufficient liquid or lumps in your powdered sugar. Solution: whisk in milk one teaspoon at a time while stirring constantly. Alternatively, strain the glaze through a fine-mesh sieve to remove lumps.
Glaze Too Thin and Runny: Your glaze has too much liquid relative to sugar. Solution: whisk in additional sifted powdered sugar, one tablespoon at a time, until it reaches the proper consistency. This is why adding liquid gradually is crucial.
Glaze Won’t Set or Remains Sticky: High humidity interferes with glaze setting. Solution: add slightly more powdered sugar to achieve a thicker consistency that sets faster. You can also place glazed items in a cool, dry location or use a dehumidifier in your kitchen.
Glaze Crystalizes or Becomes Grainy: This occurs when powdered sugar isn’t fully dissolved or when the glaze sits too long. Solution: always sift powdered sugar before using. If glaze crystalizes while sitting, gently reheat it over low heat or microwave for 5-10 seconds, then whisk smooth.
Glaze Separates or Looks Oily: This indicates the butter isn’t fully incorporated. Solution: ensure butter is completely melted before combining with other ingredients. If separation occurs, whisk vigorously or briefly blend with an immersion blender.
Variations and Flavor Combinations
Once you master the basic lemon glaze recipe, endless variations await. These combinations work beautifully on cakes, pastries, and even with how to make chocolate truffles:
Honey Lemon Glaze: Replace one tablespoon of milk with honey for added richness and a subtle floral note. Honey also helps the glaze stay moist and prevents it from drying out too quickly.
Lavender Lemon Glaze: Add ¼ teaspoon dried culinary lavender (steeped in the milk for 10 minutes, then strained) for an elegant, slightly floral variation. This pairs beautifully with shortbread cookies and pound cakes.
Coconut Lemon Glaze: Substitute coconut milk for regular milk to create a tropical twist. The coconut’s richness complements lemon’s brightness perfectly.
Almond Lemon Glaze: Add ¼ teaspoon almond extract along with the vanilla for a sophisticated flavor depth. This works particularly well on gluten free dessert recipes.
Cream Cheese Lemon Glaze: Blend 2 ounces softened cream cheese with the butter before combining with other ingredients. This creates a tangy, rich glaze with a more luxurious mouthfeel.
Limoncello Glaze: Replace one tablespoon of milk with limoncello for an Italian-inspired variation with sophisticated depth.
Poppy Seed Lemon Glaze: Stir one tablespoon of poppy seeds into the finished glaze for textural interest and visual appeal.
Storage and Make-Ahead Tips
Understanding proper storage extends your glaze’s usability and ensures quality:
Room Temperature: Freshly made glaze can sit at room temperature for 2-3 hours before crystallization becomes an issue. Cover loosely with plastic wrap to prevent dust while allowing air circulation.
Refrigerated Storage: Store glaze in an airtight container for up to 5 days. The glaze will thicken as it cools. Before using, remove from refrigeration 30 minutes before needed, allowing it to reach room temperature. Whisk gently to restore smoothness.
Freezing: Lemon glaze freezes well for up to 2 months in airtight containers. Thaw overnight in the refrigerator, then bring to room temperature and whisk before using. Freezing may slightly affect texture, so re-whisk carefully to restore smoothness.
Make-Ahead Strategy: For entertaining or baking multiple batches, make glaze the day before and refrigerate. This actually improves flavor as lemon notes deepen and develop. Simply whisk well before using, adjusting consistency with additional milk or powdered sugar as needed.
Professional bakers often make large batches of glaze weekly, portioning into small containers for quick access. This workflow efficiency is worth adopting for home bakers who bake regularly.
Mastering a lemon glaze recipe transforms your baking from adequate to exceptional. The techniques and understanding you’ve gained here apply not just to lemon glazes, but to all glaze-making. Start with the classic recipe, practice the application techniques, and soon you’ll create glazed desserts that rival your favorite bakery. Your friends and family will demand to know your baker’s secret—and now, you have it.
FAQ
Can I use bottled lemon juice instead of fresh?
While possible, bottled lemon juice produces noticeably inferior results. Preservatives alter flavor, and the juice lacks the brightness of fresh-squeezed. For the best lemon glaze, always use freshly squeezed juice. One medium lemon typically yields 2-3 tablespoons of juice.
How long does it take for lemon glaze to set completely?
Setting time varies based on humidity, temperature, and glaze thickness. Generally, expect 30-60 minutes at room temperature for a firm set. In humid conditions, it may take longer. For faster setting, place glazed items in a cool, dry location or air-conditioned room.
Can I make this glaze dairy-free?
Yes. Replace milk with unsweetened almond milk, oat milk, or coconut milk. Replace butter with coconut oil or dairy-free butter. The consistency may require slight adjustment, but the glaze works beautifully with these substitutions.
What’s the difference between glaze and frosting?
Glaze is thinner and pourable, creating a smooth coating that drips and sets with a glossy finish. Frosting is thicker, spreadable, and often whipped for texture. Glaze is decorative and flavor-enhancing, while frosting is more substantial and filling-like.
Can I add food coloring to lemon glaze?
Absolutely. Gel food coloring works best—add just a drop or two, as gel coloring is concentrated. Liquid food coloring may thin the glaze excessively. Yellow, white, or pastel colors complement lemon beautifully.
Why does my glaze crack when it dries?
Cracking occurs when glaze is too thick or sets too quickly. Solution: ensure your glaze has proper consistency (should flow from a spoon in ribbons), and apply to items that are completely cooled but not refrigerated. Avoid applying glaze to items straight from the oven.


