Authentic Molcajete Recipe: Grandma’s Secret to Perfect Mexican Salsa
A molcajete is more than just a kitchen tool—it’s a gateway to authentic Mexican cuisine that has been passed down through generations. Unlike modern blenders or food processors, this ancient volcanic rock mortar and pestle creates textures and flavor profiles that simply cannot be replicated by electric appliances. My grandmother’s molcajete recipe represents years of culinary wisdom, showing exactly how to transform fresh ingredients into vibrant, complex salsas that make every meal special.
The beauty of using a molcajete lies in its gentle grinding action, which bruises ingredients rather than pulverizing them. This technique releases essential oils and flavors in ways that preserve the integrity of each component. Whether you’re preparing a simple pico de gallo or an elaborate mole sauce, understanding the proper molcajete technique will elevate your cooking and connect you to centuries of Mexican culinary tradition.
In this comprehensive guide, I’ll share my grandmother’s authentic secrets, including the best ingredients to use, proper grinding techniques, and several variations that have made this method a staple in my family kitchen. You’ll learn not just what to make, but why these traditional methods matter for achieving genuine Mexican flavors.
Understanding Your Molcajete Tool
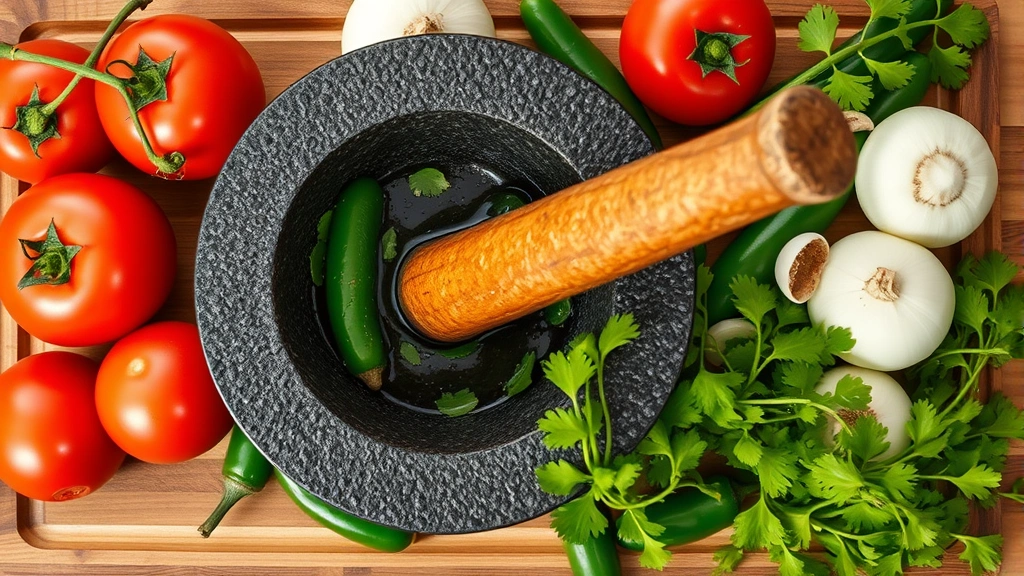
Before diving into the molcajete recipe itself, you need to understand what makes this tool so special. A traditional molcajete is crafted from volcanic rock, typically basalt, which provides the perfect surface texture for grinding. The porous nature of volcanic stone creates natural friction points that grip ingredients, preventing them from sliding around while you work.
The bowl shape is crucial—it’s wider at the base and slightly narrower at the top, allowing you to control ingredient movement. The pestle, called a tejolote, is slightly rounded and shorter than a typical mortar and pestle, requiring a specific grinding motion that’s different from what many cooks expect.
When you first acquire a molcajete, proper seasoning is essential. You’ll want to grind uncooked rice with salt several times to remove volcanic dust and seal the pores. This preparation ensures your salsa won’t have a gritty texture and prevents the tool from absorbing too much moisture.
Quality matters significantly. Look for molcajetes that feel substantial and have a rough, unglazed surface. Avoid decorative versions with smooth finishes, as these won’t provide adequate grip for proper grinding. A good molcajete should weigh several pounds and feel balanced in your hands.
Essential Ingredients for Authentic Salsa
My grandmother always insisted that ingredient quality determines your molcajete recipe’s success. Unlike recipes where you can compensate with technique, traditional salsa making demands the freshest, ripest components available.
Roma tomatoes are the foundation. Choose tomatoes that are deeply red, fragrant, and yield slightly to pressure. These varieties have fewer seeds and less water than beefsteak tomatoes, resulting in a thicker, more concentrated salsa. Avoid tomatoes picked too early—they lack the sweetness and depth necessary for authentic flavor.
Fresh cilantro should smell bright and grassy. Grandmother always bought cilantro the same day she planned to make salsa, as its flavor diminishes quickly. The leaves should be vibrant green with no yellowing or wilting.
White onions provide sharp bite and slight sweetness. Unlike yellow onions, white varieties have a cleaner, more delicate flavor that doesn’t overpower. Medium-sized onions work best, as they tend to be sweeter than larger specimens.
Fresh jalapeños or serranos add heat and complexity. Serranos are spicier but offer more floral notes, while jalapeños provide gentler heat with herbaceous undertones. Always taste a small slice to gauge heat level before committing to quantity.
Lime juice must be fresh-squeezed. Bottled lime juice lacks the bright acidity and aromatic quality that fresh limes provide. One medium lime yields approximately two tablespoons of juice.
Sea salt or kosher salt enhances all flavors. Iodized table salt can impart metallic notes, so grandmother always avoided it. The salt’s granule size affects grinding, so medium-grain varieties work best in a molcajete.
Classic Red Salsa Recipe
This is grandmother’s most-requested molcajete recipe, the one she taught me when I was barely tall enough to reach the counter. It’s straightforward yet produces restaurant-quality results when technique is respected.
Ingredients:
- 3 medium Roma tomatoes, halved
- 1/2 white onion, roughly chopped
- 1-2 fresh jalapeños, depending on heat preference
- 1/4 cup fresh cilantro leaves
- 1 lime, juiced
- 1/2 teaspoon sea salt
- 1 garlic clove (optional, though grandmother rarely used it)
Step One: Prepare Your Molcajete
Begin by warming your molcajete slightly under warm running water. This isn’t essential, but grandmother swore it helped release flavors more effectively. Dry it thoroughly with a clean cloth. The tool should be completely dry before you begin grinding.
Step Two: Toast Your Tomatoes (Optional but Recommended)
While not strictly traditional, lightly charring tomato halves over an open flame or on a cast-iron skillet deepens their flavor considerably. This step takes only two to three minutes per side. The slight blackening concentrates sugars and adds subtle smokiness. Allow them to cool enough to handle before proceeding.
Step Three: Begin with Salt
Place salt in your molcajete first. Using your tejolote in a circular grinding motion, work the salt against the bottom. This creates a paste that acts as an abrasive, helping to break down subsequent ingredients. Grandmother called this “preparing the bed” for other components.
Step Four: Add Jalapeños
Add your jalapeños next, grinding them into the salt with firm, controlled circular motions. Don’t rush this step—proper grinding takes two to three minutes. You want to release the pepper’s oils and break down the flesh without creating a puree. The texture should remain somewhat chunky, with visible pepper pieces.
Step Five: Incorporate Onion
Add onion pieces gradually, grinding each addition thoroughly before adding more. The onion will release liquid as you work, creating a flavorful base. Continue the circular grinding motion, occasionally scraping the sides of the molcajete back toward the center. This step typically requires three to four minutes.
Step Six: Add Tomatoes
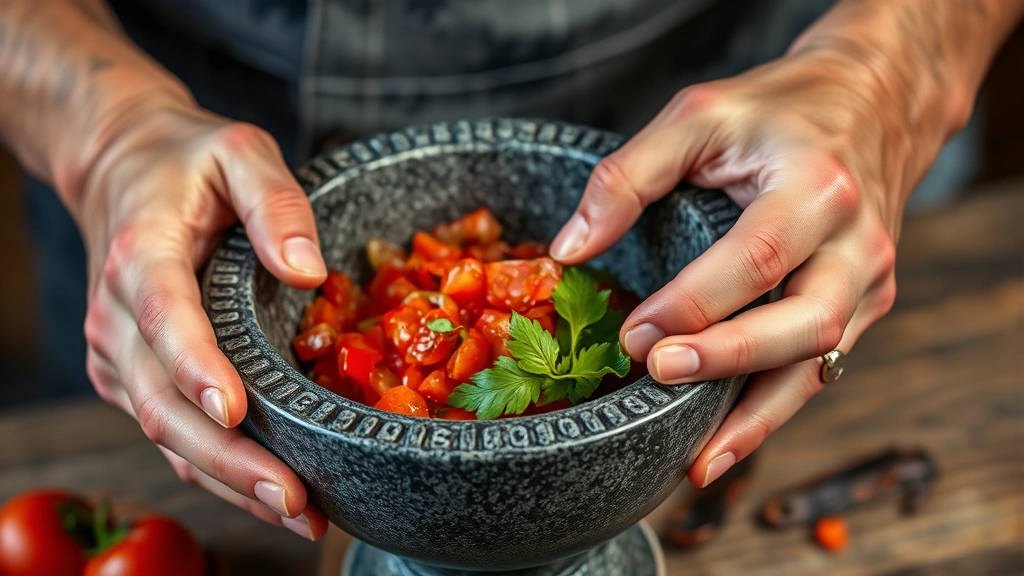
Add tomato pieces in stages, allowing each addition to break down before adding more. This prevents overwhelming the molcajete and maintains better texture control. The grinding motion changes slightly here—you’ll use more of a pressing action combined with circular movements, as tomatoes break down more easily than harder vegetables.
Step Seven: Finish with Cilantro and Lime
Add cilantro leaves last, grinding gently to incorporate without completely obliterating them. Cilantro’s delicate nature means aggressive grinding destroys its bright flavor. Squeeze lime juice over the finished salsa and stir gently with the tejolote to combine. Taste and adjust salt as needed.
The entire process takes approximately twelve to fifteen minutes. This time investment is what separates authentic molcajete salsa from quick blender versions. Your patience rewards you with complex layers of flavor that develop as ingredients gradually break down together.
Grandma’s Green Salsa Variation
Salsa verde represents another essential molcajete recipe in grandmother’s repertoire. This version uses tomatillos instead of tomatoes, creating a brighter, more acidic profile that pairs beautifully with fish, chicken, or pork dishes.
Key Differences from Red Salsa:
Tomatillos provide the foundation here, requiring slightly different handling than tomatoes. These green fruits have a papery husk that must be removed completely. Rinse them well, as the husks can be sticky. Unlike tomatoes, tomatillos benefit significantly from roasting. Grandmother roasted them on a comal (a traditional flat griddle) until the skins blistered and darkened, which concentrates their flavor and removes some raw bite.
The ratio of ingredients shifts slightly for green salsa. Use more cilantro—approximately one-third cup compared to one-quarter cup in red salsa. Add serrano peppers instead of jalapeños for their more delicate heat and floral notes. Grandmother always included one garlic clove in green salsa, though she omitted it from her red version.
Green Salsa Ingredients:
- 4-5 medium tomatillos, roasted
- 1/2 white onion, chopped
- 1-2 serrano peppers
- 1/3 cup fresh cilantro
- 1 garlic clove, minced
- 1 lime, juiced
- 1/2 teaspoon sea salt
Preparation Method:
Begin with salt in your molcajete as before. Add garlic next, grinding it thoroughly into the salt—this prevents garlic chunks from dominating the final salsa. Add serrano peppers, grinding until well incorporated. Add roasted tomatillos in stages, pressing them firmly to release their juices. The tomatillos will break down more readily than tomatoes, so use a more pressing motion than circular grinding.
Add onion next, grinding until incorporated. Finally, add cilantro gently, stirring rather than grinding extensively. Finish with fresh lime juice and taste for seasoning adjustments. Green salsa has a shorter shelf life than red—consume within one or two days for optimal flavor.
Advanced Molcajete Techniques
Once you’ve mastered basic molcajete recipes, grandmother’s advanced techniques open new possibilities. These methods require understanding how different ingredients behave under grinding and how to layer flavors strategically.
Building Flavor Layers:
Rather than adding all ingredients simultaneously, experienced cooks build salsa in distinct layers. Start with aromatics (onion, garlic), then move to heat elements (peppers), followed by main components (tomatoes or tomatillos), and finish with fresh elements (cilantro). This approach allows flavors to meld gradually rather than fighting for dominance.
Temperature Control:
Grandmother discovered that room-temperature ingredients work better than cold ones. Cold vegetables are harder to grind and release flavors less readily. Remove ingredients from refrigeration thirty minutes before preparing salsa. This small adjustment noticeably improves the final product’s complexity and smoothness.
Creating Texture Variation:
Professional molcajete technique involves understanding when to stop grinding. Some ingredients should remain chunky while others become nearly smooth. Tomatoes typically become more uniform, while cilantro should retain visible leaf pieces. This textural variation creates interest and prevents the monotonous consistency that blenders produce.
Incorporating Roasted Elements:
Beyond tomatillos, grandmother occasionally roasted other ingredients. Charred onions, blackened garlic, or roasted poblano peppers add smoky depth. Roast these items lightly over an open flame or on cast iron, then allow them to cool before grinding. The roasting process concentrates flavors and adds complexity impossible to achieve with raw ingredients.
Balancing Acid and Salt:
Lime juice and salt work together to brighten flavors and create balance. Add salt first to prepare the molcajete’s grinding surface, then adjust final seasoning after adding lime juice. The acid from lime can mask salt initially, so taste carefully before assuming more salt is needed. Grandmother’s rule: when in doubt, add more lime rather than more salt.
Pairing Your Molcajete Creations
Understanding what to serve with your molcajete recipe is essential for maximizing its impact. The salsa you’ve carefully prepared deserves appropriate accompaniments and dishes.
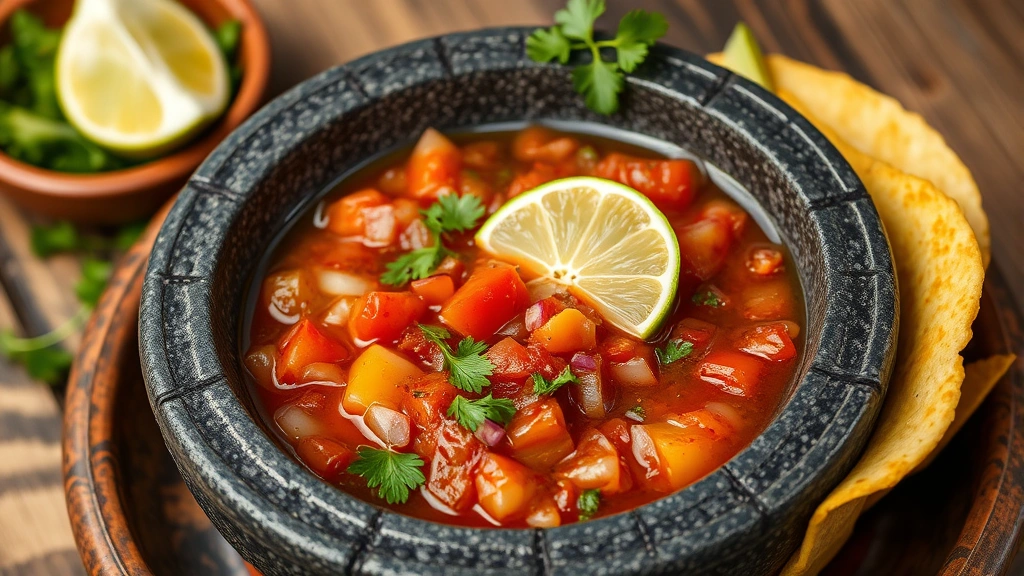
Traditional Pairings:
Fresh warm tortillas—corn or flour—represent the classic pairing. The salsa’s brightness complements the tortillas’ slight sweetness and neutral flavor. Grandmother served her molcajete salsas alongside recipes with shredded chicken, particularly in enchiladas or tacos. The salsa’s acidity cuts through rich chicken fat, creating balance on the palate.
Protein Combinations:
Red salsa pairs exceptionally well with grilled meats and chicken seasoning recipe applications. The salsa’s acidity brightens heavy proteins. Green salsa works beautifully with fish, particularly white varieties like halibut or snapper. The bright, herbaceous notes complement delicate fish flesh without overwhelming it. For vegetarian applications, molcajete salsa transforms simple beans or grilled vegetables into restaurant-quality dishes.
Creative Applications:
Beyond chips and tacos, authentic molcajete salsa enhances unexpected dishes. Spoon it over grilled fish or poultry. Mix it into healthy crockpot recipes for added brightness. Use it as a base for chilaquiles or huevos rancheros. The versatility of well-made molcajete salsa means it elevates virtually any Mexican or Mexican-inspired dish.
Storage and Make-Ahead Strategies:
Fresh molcajete salsa is best consumed immediately, though it keeps refrigerated for two to three days. The flavors meld slightly during storage, which some prefer to the fresh version. Cover it tightly to prevent oxidation, which darkens the salsa and dulls its bright flavors. Never freeze molcajete salsa—the freezing process breaks down vegetable cell walls, resulting in watery, unpleasant texture when thawed. For food waste reduction tips, prepare salsa in quantities you’ll actually consume rather than making large batches that spoil.
Complementary Dishes:
Grandmother often served molcajete salsa alongside simple rice and beans, creating complete meals that required minimal additional cooking. The salsa’s bright flavors eliminate the need for heavy sauces or complicated preparations. This simplicity reflects authentic Mexican home cooking philosophy—let quality ingredients shine rather than masking them with unnecessary complexity.
FAQ
Can I use a regular mortar and pestle instead of a molcajete?
While a mortar and pestle will grind ingredients, it won’t produce the same results. The smooth surface of traditional mortars doesn’t provide adequate grip, causing ingredients to slide rather than break down. The specific shape and porous volcanic rock of a molcajete create conditions impossible to replicate with other tools. If you must use alternatives, accept that texture and flavor complexity will suffer somewhat.
How long does authentic molcajete salsa keep?
Properly stored molcajete salsa lasts two to three days refrigerated in an airtight container. The fresher it is, the better it tastes, so consume within the first day when possible. Green salsa (salsa verde) has a slightly shorter shelf life than red salsa due to cilantro’s delicate nature. Never freeze molcajete salsa, as the thawing process produces undesirable watery texture.
What’s the difference between molcajete and traditional food processors?
Food processors pulverize ingredients, breaking down cell walls and creating uniform puree. Molcajetes grind ingredients, bruising rather than destroying them. This distinction creates vastly different textures and flavor profiles. Molcajete salsas retain visible ingredient pieces and complex layered flavors, while processor versions become smooth and somewhat one-dimensional.
Should I roast tomatoes before using them in molcajete salsa?
Roasting is optional but recommended. Light charring concentrates tomato flavor and adds subtle smokiness that enhances the final salsa. If you roast, do so lightly—just enough to blister the skin. Over-roasting produces bitter flavors and overly soft tomatoes that become mushy when ground. Unroasted tomatoes produce fresher, brighter salsa if you prefer that profile.
Can I prepare molcajete salsa ahead of time?
You can prepare ingredients ahead—wash and chop them, storing separately in the refrigerator. However, the actual grinding should occur shortly before serving. Molcajete salsa’s charm lies in its fresh flavors and proper texture, both of which deteriorate with time. Prepare the salsa no more than two hours before serving for optimal results.
What should I do if my salsa becomes too watery?
Watery salsa typically results from over-grinding tomatoes, which releases excessive liquid. To remedy this, drain some liquid using a fine-mesh strainer. Alternatively, add more of other ingredients proportionally—additional onion, peppers, and cilantro can balance excess liquid. Going forward, use slightly less ripe tomatoes or roast them to concentrate their moisture before grinding.
How do I know if my molcajete is properly seasoned?
A properly seasoned molcajete won’t impart gritty texture to salsa and won’t absorb excessive moisture. Test by making a small batch of salsa and observing the texture. If it feels gritty, continue seasoning by grinding rice with salt several more times. The molcajete should feel smooth to the touch when properly seasoned, though still porous enough to provide grinding grip.
Are there regional variations of molcajete salsa I should know about?
Absolutely. Different Mexican regions have distinct molcajete salsa traditions. Oaxacan versions often include avocado and less cilantro. Yucatecan versions incorporate habanero peppers and different spice profiles. Learning regional variations expands your cooking repertoire and deepens appreciation for Mexico’s diverse culinary traditions. Grandmother’s recipe represents central Mexican style, which serves as an excellent foundation before exploring regional variations.


