Fluffy ricotta cheesecake is the Italian baker’s secret weapon—a lighter, airier alternative to traditional New York-style cheesecake that melts on your tongue with delicate sweetness. Unlike its heavier cousin, this dessert relies on whipped ricotta cheese, which creates an incredibly tender crumb and subtle flavor profile that lets quality ingredients shine. Whether you’re preparing dessert for a special occasion or simply craving something indulgent yet elegant, mastering this ricotta cheesecake recipe will elevate your baking repertoire and impress even the most discerning palates.
The beauty of fluffy ricotta cheesecake lies in its simplicity and technique. By understanding the proper methods for combining ingredients, achieving the right texture, and baking at optimal temperatures, you’ll create a dessert that rivals any Italian bakery. This guide walks you through every step, from selecting premium ricotta to troubleshooting common baking challenges. Get ready to discover why this recipe has been treasured by professional bakers for generations.
Why Ricotta Makes the Perfect Cheesecake
Ricotta cheese differs fundamentally from cream cheese in both composition and culinary application. While cream cheese contains about 33% fat and creates a dense, tangy foundation, ricotta offers a lighter texture with approximately 10-13% fat content, delivering a naturally fluffy consistency. This distinction matters tremendously when crafting the ideal cheesecake. The whey content in ricotta provides moisture without heaviness, resulting in a dessert that feels luxurious yet doesn’t overwhelm the palate after a few bites.
Italian pastry chefs have leveraged ricotta’s unique properties for centuries, particularly in Sicily and Southern Italy where ricotta production remains an art form. The cheese’s delicate flavor allows complementary ingredients like candied citrus, pistachios, and chocolate to take center stage rather than competing with an aggressive dairy base. When properly incorporated with whipped egg whites and sugar, ricotta transforms into a cloud-like filling that bakes into a set yet tender crumb structure. This textural contrast between the crispy crust and silky filling creates the hallmark appeal of traditional Italian ricotta cheesecake.
Beyond taste and texture, ricotta cheesecake offers practical advantages for home bakers. The recipe requires no water bath, eliminating the risk of cracks and condensation issues common with cream cheese versions. Baking times are shorter, typically 35-45 minutes, reducing the window for overbaking. Additionally, ricotta cheesecake doesn’t require lengthy cooling periods, meaning you can serve it within hours rather than waiting overnight. This combination of superior flavor, texture, and convenience explains why this recipe deserves a permanent place in your dessert rotation.
Essential Ingredients and Substitutions
Creating authentic fluffy ricotta cheesecake demands attention to ingredient quality and proper measurements. Here’s what you’ll need for a standard 9-inch springform pan:
- Ricotta cheese: 2 pounds (910g) whole milk ricotta, preferably fresh from Italian markets or specialty cheese shops. Avoid low-fat varieties, which lack the richness necessary for optimal texture.
- Sugar: 1½ cups (300g) granulated sugar, divided between filling and topping layers
- Eggs: 5 large eggs, separated into yolks and whites at room temperature
- Butter: 6 tablespoons (85g) unsalted, plus extra for greasing
- Graham cracker crumbs: 1½ cups (180g) finely ground crackers for the crust
- Vanilla extract: 2 teaspoons pure vanilla, never imitation
- Lemon zest: 1 tablespoon finely grated from organic lemons
- Salt: ¼ teaspoon fine sea salt
- Optional liqueurs: 2 tablespoons rum, limoncello, or maraschino for depth
Regarding substitutions, you have limited options without compromising the essential character of this dessert. Some bakers experiment with mascarpone, though this yields a richer, denser result. For a gluten-free dessert, replace graham crackers with almond flour or gluten-free cookie crumbs. If you cannot locate quality whole milk ricotta, strain regular ricotta through cheesecloth for 2-4 hours to remove excess moisture. This step proves essential—watery ricotta produces a soggy, sunken cheesecake.
Sourcing premium ingredients makes a dramatic difference in the final product. Visit local Italian markets, specialty cheese shops, or Eataly locations for imported ricotta that hasn’t been sitting in supermarket coolers. The flavor difference between mass-produced and artisanal ricotta becomes immediately apparent once you taste the finished cheesecake. Similarly, invest in real vanilla extract and organic citrus—these flavor components should complement rather than mask the delicate ricotta.
Preparing Your Crust Foundation
The crust serves as both structural support and textural contrast for your fluffy filling. A properly constructed crust prevents moisture from seeping into the pan while providing a pleasant crunch that enhances the overall eating experience. Begin by preheating your oven to 325°F (163°C) and positioning the rack to the lower-middle position—this ensures even baking without over-browning the top.
Combine 1½ cups finely ground graham cracker crumbs with 6 tablespoons melted butter and 2 tablespoons sugar in a medium bowl. The mixture should resemble wet sand with no dry pockets remaining. Press this mixture firmly into the bottom of a 9-inch springform pan, working from the center outward and using the bottom of a measuring cup to create an even, compact layer. The crust should measure approximately ¼-inch thick and cover the entire bottom surface. Don’t press so hard that you compress the mixture into a dense brick—you want slight airiness that allows for gentle crunch.
Bake the crust alone for 8-10 minutes until it turns light golden brown and smells fragrant. This pre-baking step, called blind baking, ensures the crust sets properly and won’t absorb excess moisture from the filling. Remove from the oven and let cool for 5 minutes while you prepare the filling. If the crust puffs up during baking, gently press it down with the measuring cup. The crust will continue to firm as it cools and bakes alongside the cheesecake filling.
Creating the Fluffy Ricotta Filling
This is where the magic happens—transforming simple ingredients into cloud-like filling requires proper technique and attention to detail. The key lies in whipping egg whites to stiff peaks while keeping yolks separate, creating two distinct components that fold together at the final moment.
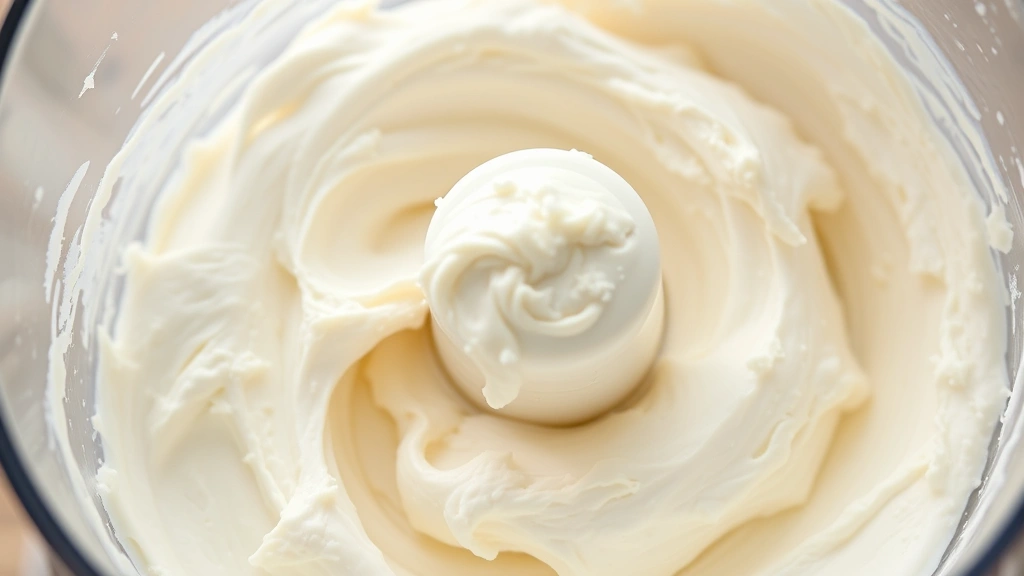
Start by placing 2 pounds ricotta cheese in a food processor fitted with the metal blade. Process for 2-3 minutes, pausing occasionally to scrape down the sides, until the ricotta becomes completely smooth and creamy with no lumps or grainy texture. This step cannot be rushed—inadequate processing results in a bumpy, uneven filling. Transfer the processed ricotta to a large mixing bowl.
Add 5 egg yolks to the ricotta along with 1 cup sugar, 2 teaspoons vanilla extract, 1 tablespoon lemon zest, and ¼ teaspoon salt. Using an electric mixer on medium speed, beat this mixture for 3-4 minutes until pale and thoroughly combined. The mixture should lighten slightly in color and become very smooth. This step incorporates air while ensuring even distribution of flavorings.
In a separate, impeccably clean bowl, whip 5 egg whites using an electric mixer on high speed. Begin with the mixer on medium speed for 30 seconds to break up the whites, then increase to high speed. Beat for approximately 4-5 minutes total until stiff peaks form—when you lift the whisk, the peaks should stand upright without drooping. This stage is crucial: properly whipped egg whites provide the leavening that creates the signature fluffy texture. Under-whipped whites result in dense cheesecake; over-whipped whites become grainy and separate.
Gently fold the whipped egg whites into the ricotta mixture in three additions, using a rubber spatula and employing a folding motion rather than stirring. Fold from the bottom of the bowl up and over the top, rotating the bowl slightly with each fold. The goal is to incorporate the whites while preserving as much air as possible. After the final fold, the filling should appear light, airy, and uniform in color with no visible streaks of egg white.
Baking Techniques for Perfect Results
Pour the prepared filling into the pre-baked crust, smoothing the top with a spatula but not overworking the batter. Place the springform pan on a sturdy baking sheet (this catches any potential drips and aids in even heat distribution) and transfer to your preheated 325°F oven.
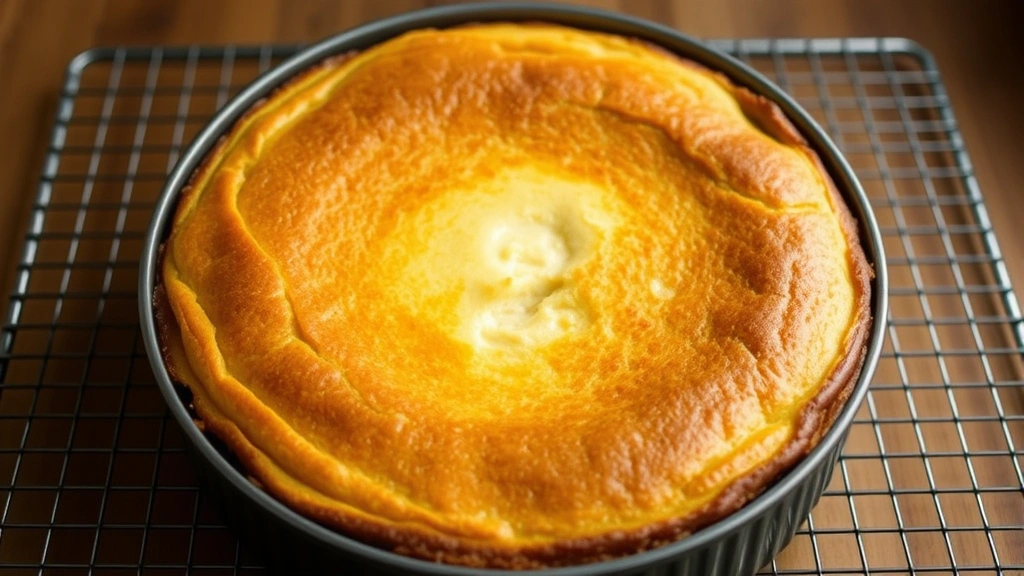
Bake for 40-45 minutes. The cheesecake is done when the edges appear set and slightly puffed but the center still jiggles very slightly when gently shaken—approximately a 2-inch circle in the very middle should wobble. The internal temperature should register 160°F (71°C) on an instant-read thermometer inserted into the center, though visual cues matter more than precise temperature readings. If you bake too long, the cheesecake will crack and become dense; if you underbake, it won’t set properly and will collapse as it cools.
Avoid opening the oven door during baking, as temperature fluctuations cause cracking and uneven texture. If you must check doneness, open the door gently and quickly, minimizing heat loss.
Once the cheesecake reaches the perfect doneness point, turn off the oven and crack the door open about 3 inches. Let the cheesecake sit in this cooling environment for 15 minutes. This gradual temperature transition prevents the dramatic contraction that causes cracks. After 15 minutes, remove the cheesecake from the oven and let it cool at room temperature for 30 minutes more.
Cooling and Storage Methods
Proper cooling directly impacts the final texture and appearance of your cheesecake. After the initial room temperature cooling, refrigerate the cheesecake in its springform pan for at least 4 hours, though overnight cooling is ideal. During this refrigeration period, the filling sets completely while the flavors meld and develop.
To remove the cheesecake from the springform pan, run a thin, sharp knife around the perimeter between the filling and the pan sides. This prevents the cheesecake from cracking or tearing when you release the springform. Gently release the springform latch and carefully lift away the sides. If you’re serving the cheesecake on the crust-lined pan bottom, it’s ready to slice and serve. For a more elegant presentation, slide a thin offset spatula between the crust and the pan bottom, then carefully transfer the cheesecake to a serving plate.
Ricotta cheesecake keeps remarkably well when properly stored. Cover leftovers with plastic wrap or transfer to an airtight container and refrigerate for up to 5 days. The flavor actually improves after a day or two as ingredients fully integrate. For longer storage, wrap individual slices in plastic wrap and freeze for up to 3 months. Thaw frozen cheesecake overnight in the refrigerator before serving—never at room temperature, which can cause condensation and sogginess.
Flavor Variations and Toppings
While the classic ricotta cheesecake stands beautifully on its own, numerous variations allow creative expression. Consider these complementary flavors:
Pistachio Version: Fold ¾ cup finely ground roasted pistachios into the ricotta mixture along with ½ teaspoon almond extract. Top with additional chopped pistachios before baking.
Chocolate-Studded: Add ¾ cup mini chocolate chips to the filling just before folding in the egg whites. For deeper chocolate flavor, add 2 tablespoons unsweetened cocoa powder to the ricotta mixture before beating with yolks.
Candied Citrus: Mix 2-3 tablespoons finely chopped candied orange or lemon peel into the filling. This variation pairs beautifully with the lemon zest already present in the base recipe.
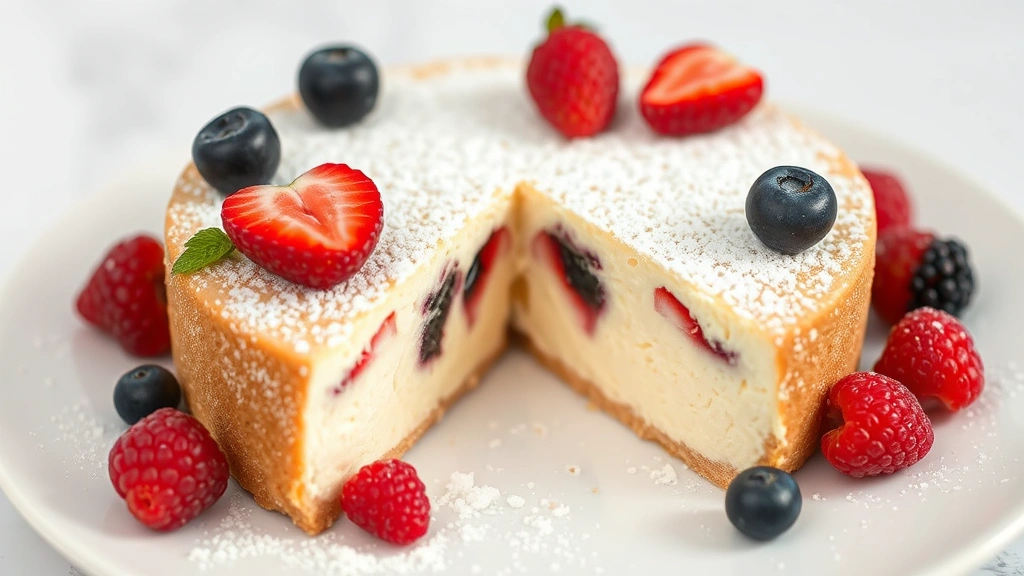
Berry Swirl: Prepare a berry compote by simmering 1 cup fresh or frozen berries with 3 tablespoons sugar for 5 minutes until jammy. Drizzle this mixture into the filling before baking, then gently swirl with a knife for a marbled effect.
For toppings, fresh berries scattered over the cooled cheesecake provide brightness and visual appeal. A dusting of powdered sugar offers elegance without competing flavors. Some bakers prepare a simple glaze using powdered sugar, lemon juice, and a touch of water, brushed over the cooled surface for shine and subtle tang.
If you enjoy experimenting with comfort food recipes, ricotta cheesecake serves as an excellent foundation for creative interpretations. The neutral base accommodates both traditional Italian flavors and unexpected modern additions, making it infinitely adaptable to your preferences and available ingredients.
FAQ
Can I use store-bought ricotta or must I use fresh ricotta?
While fresh ricotta from Italian markets produces superior results, store-bought ricotta works acceptably if you strain it first. Place ricotta in a fine-mesh strainer lined with cheesecloth and refrigerate for 2-4 hours to remove excess whey. This step is non-negotiable—store-bought ricotta contains more moisture than fresh varieties, and skipping this step results in a watery, sunken cheesecake.
What causes cracks in ricotta cheesecake?
Cracks typically result from overbaking, rapid temperature changes, or opening the oven door excessively during baking. Follow the cooling instructions precisely—the gradual transition from oven heat to room temperature is essential. Additionally, ensure your oven temperature is accurate by using an oven thermometer. Ovens frequently run hot or cold, causing timing discrepancies.
Can I make this cheesecake without separating eggs?
No. The egg white separation is fundamental to achieving the fluffy texture that distinguishes ricotta cheesecake from denser varieties. Whipped egg whites provide the leavening that creates the characteristic light, airy crumb. Using whole eggs results in a significantly denser, heavier dessert that defeats the purpose of choosing ricotta over cream cheese.
How do I know when the cheesecake is perfectly baked?
Look for slight puffing around the edges with a small jiggle in the very center when you gently shake the pan. An instant-read thermometer should register 160°F in the center. The cheesecake will continue to set as it cools, so slight underbaking is preferable to overbaking.
Can I substitute mascarpone for ricotta?
Mascarpone creates a noticeably richer, denser cheesecake with less of the signature fluffy texture. If you choose to substitute, reduce the amount to 1.5 pounds and increase the lemon juice to ¼ cup to balance the richness. The result will be delicious but distinctly different from traditional ricotta cheesecake.
Does ricotta cheesecake need a water bath?
No—this is one of its advantages over cream cheese versions. Ricotta’s lower fat content and the whipped egg white structure eliminate the need for a water bath. The absence of a water bath means fewer complications and faster preparation.
Can I prepare the filling ahead of time?
The filling must be baked immediately after preparation. Once egg whites are whipped and folded in, the air begins dissipating. Refrigerating the filling before baking causes the egg whites to deflate, resulting in a denser cheesecake. You can process the ricotta and prepare all ingredients up to 2 hours ahead, then combine and bake when ready.
What’s the best way to serve ricotta cheesecake?
Serve chilled directly from the refrigerator using a sharp knife dipped in hot water and wiped clean between cuts. This prevents filling from sticking to the blade. Accompaniments might include fresh berries, a drizzle of honey, or a small glass of dessert wine like moscato d’Asti.


