Best Salsa Recipe for Canning: Preserver’s Guide
Homemade canned salsa brings the vibrant flavors of fresh tomatoes, peppers, and herbs directly to your pantry, ready to enhance tacos, chips, and countless dishes year-round. Whether you’re a seasoned preserver or attempting your first batch, understanding the proper techniques ensures both safety and exceptional taste. This comprehensive guide walks you through selecting ingredients, mastering the canning process, and troubleshooting common challenges to create shelf-stable salsa that rivals any commercial product.
Canning salsa requires more than simply combining ingredients and sealing jars. The acidity level, processing time, and sterilization procedures are critical factors that prevent foodborne illness while maintaining the fresh, zesty character that makes homemade salsa so desirable. By following tested recipes and proven methods, you’ll produce batches of salsa that stay fresh for months and deliver consistent quality every single time.
Essential Ingredients for Canned Salsa
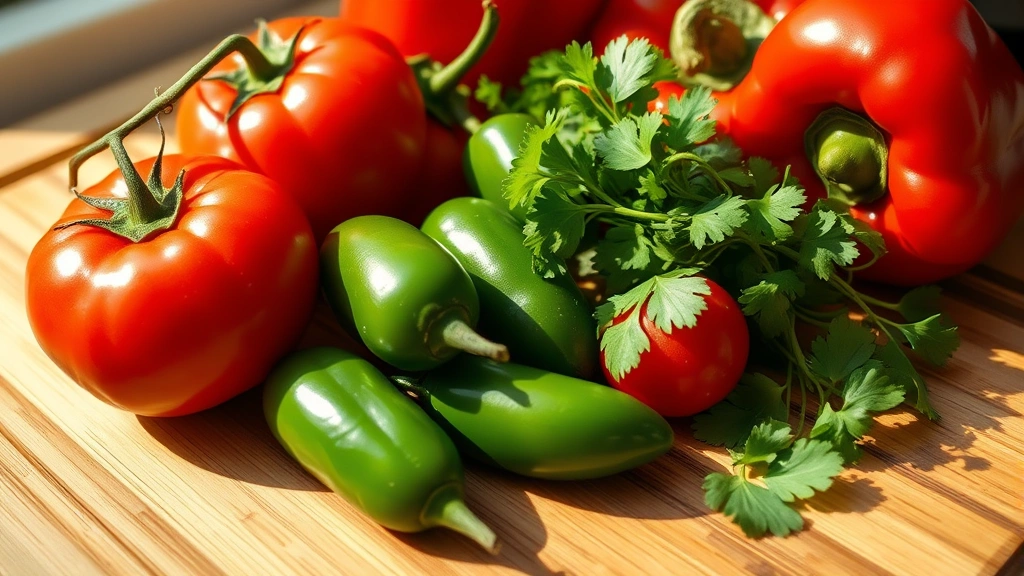
The foundation of exceptional canned salsa begins with quality ingredients selected at peak ripeness. Tomatoes form the base, and choosing the right variety makes a tremendous difference in your final product. Roma tomatoes, also called plum tomatoes, are ideal because they contain fewer seeds and less water than beefsteak varieties, resulting in thicker salsa that doesn’t separate during storage. San Marzano tomatoes offer exceptional flavor and are favored by professional canners, though they cost slightly more. For the best results, harvest or purchase tomatoes when they’re deeply colored and yield slightly to pressure.
Fresh peppers add heat, flavor, and complexity to your salsa. Jalapeños provide moderate spice with fruity undertones, while habaneros deliver intense heat for those preferring fiery salsa. Poblano peppers contribute smoky, mild flavor without overwhelming heat. Bell peppers—red, yellow, or orange—add sweetness and body without spiciness. Always remove seeds and membranes before chopping, as these concentrated areas contain the most capsaicin and can create uneven heat distribution throughout your batch.
Onions and garlic provide aromatic depth that rounds out the flavor profile. Yellow onions offer balanced sweetness and mild pungency, while white onions deliver sharper, more assertive flavor. Fresh garlic cloves should be minced finely to distribute evenly throughout the salsa. Cilantro, lime juice, and cumin are the traditional seasonings that define authentic salsa character. The lime juice serves a dual purpose: enhancing flavor while providing additional acidity that supports food safety during the canning process.
Vinegar is non-negotiable in canned salsa recipes. White vinegar or apple cider vinegar ensures proper acidity levels (pH below 4.0) necessary for safe water bath canning. Never omit or reduce the vinegar amount, as this directly impacts whether your salsa remains shelf-stable or becomes vulnerable to harmful bacteria growth. Salt enhances flavors and aids preservation, though you can adjust quantities based on personal preference without compromising safety.
Equipment and Supplies You’ll Need
Successful salsa canning requires specific equipment designed for safe home food preservation. A large stainless steel pot (at least 6-quart capacity) serves as your primary cooking vessel, allowing room for ingredients to simmer without boiling over. Avoid aluminum pots, as acidic ingredients like tomatoes and vinegar react with aluminum and can discolor your salsa or impart metallic flavors.
A water bath canner is essential for processing your filled jars. This large pot with a rack insert holds jars submerged in boiling water during processing. If you don’t own a dedicated canner, a large stockpot with a canning rack works effectively. Many home canners also invest in a pressure cooker for canning, which allows for higher temperatures and faster processing times, particularly useful when preparing large quantities.
Mason jars in pint or quart sizes are standard for salsa canning. Always use jars specifically manufactured for canning, as regular drinking glasses lack the proper thickness and rim design. Purchase new lids annually, as the sealing compound deteriorates after one year of storage. Bands (the metal rings) can be reused indefinitely if they’re not bent or damaged. Before canning, inspect all jars for chips or cracks, which prevent proper sealing.
Additional essential tools include a canning funnel (prevents spills and simplifies jar filling), a bubble remover (removes air pockets that compromise sealing), a jar lifter (safely removes hot jars from boiling water), and a clean kitchen towel. A thermometer helps monitor water and food temperatures, ensuring you reach proper processing heat. A large colander drains excess liquid from chopped vegetables, and a sharp knife facilitates quick, uniform ingredient preparation.
Classic Tomato-Based Salsa Recipe
Yield: Approximately 7-8 pints
Ingredients:
- 8 pounds fresh Roma tomatoes, cored and chopped
- 6 jalapeño peppers, seeded and minced
- 1 large red bell pepper, diced
- 1 large onion, finely chopped
- 6 garlic cloves, minced
- 1 cup fresh cilantro, chopped
- ½ cup lime juice (approximately 4-5 fresh limes)
- ½ cup white vinegar
- 2 teaspoons ground cumin
- 1 teaspoon salt
- ½ teaspoon black pepper
- ¼ teaspoon cayenne pepper (optional, for extra heat)
This recipe balances fresh vegetable character with the acidity necessary for safe preservation. The ratio of tomatoes to other ingredients ensures proper texture—thick enough to cling to chips yet loose enough to pour smoothly. The lime juice and vinegar work synergistically, providing both flavor brightness and safety through their combined acidity.
You can modify this basic formula to create variations reflecting your taste preferences. Some canners prefer their salsa chunkier by chopping vegetables into larger pieces, while others prefer smoother consistency achieved by pulsing ingredients in a food processor. Adjust jalapeño quantities based on desired heat level, or substitute with habaneros for significantly spicier results. For corn salsa variations, add 2 cups fresh corn kernels (or frozen corn, thawed) in the final minutes of cooking.
Step-by-Step Canning Process
Preparation Phase (30 minutes before cooking):
Begin by washing all fresh vegetables thoroughly under cool running water, removing any soil or debris. Blanch tomatoes for 30-60 seconds in boiling water, then immediately transfer to ice water. This loosens the skin, making peeling effortless. Core the tomatoes, removing the stem end, then slip off the skin. Chop tomatoes into uniform pieces to ensure even cooking and consistent texture throughout your batch.
While preparing vegetables, sterilize your jars, lids, and bands. Place clean jars in a boiling water bath for 10 minutes, or run them through a hot dishwasher cycle. Keep jars hot until filling time by leaving them in the hot water. Soak lids in hot (not boiling) water for 5 minutes to soften the sealing compound, making them pliable and ready to seal.
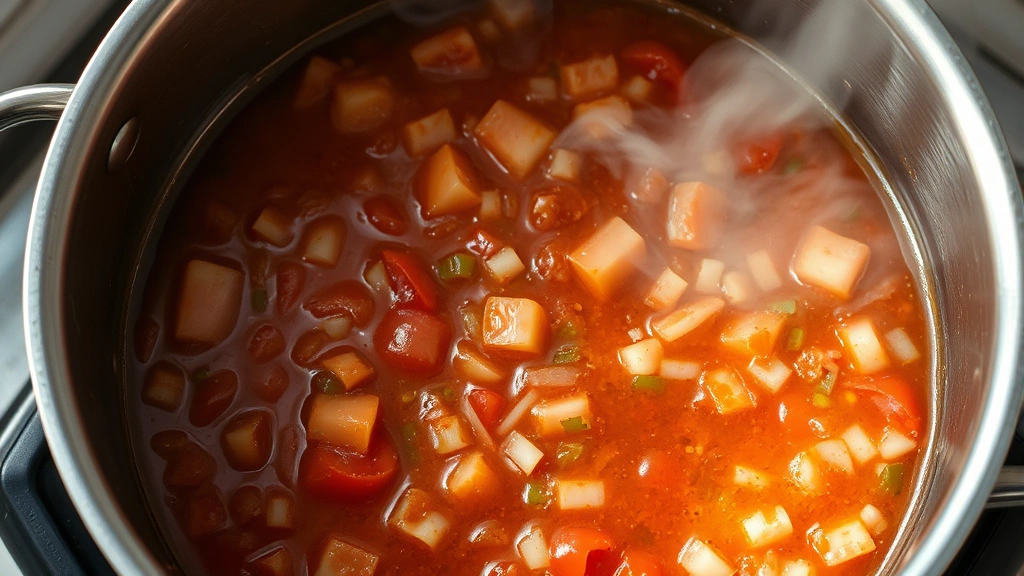
Cooking Phase (45-60 minutes):
Combine all chopped vegetables, vinegar, and lime juice in your large stainless steel pot. Bring the mixture to a rolling boil over medium-high heat, stirring occasionally to prevent sticking and ensure even heating. Once boiling, reduce heat to medium and maintain a gentle boil for 20-30 minutes. This cooking time allows flavors to meld while reducing excess liquid, creating the proper consistency.
During the final 5 minutes of cooking, add salt, cumin, black pepper, and cayenne (if using). Stir in the fresh cilantro, which brightens the flavor profile. Taste your salsa and adjust seasonings as needed—remember that flavors will mellow slightly during storage, so you can be slightly more aggressive with seasoning than you might prefer in fresh salsa.
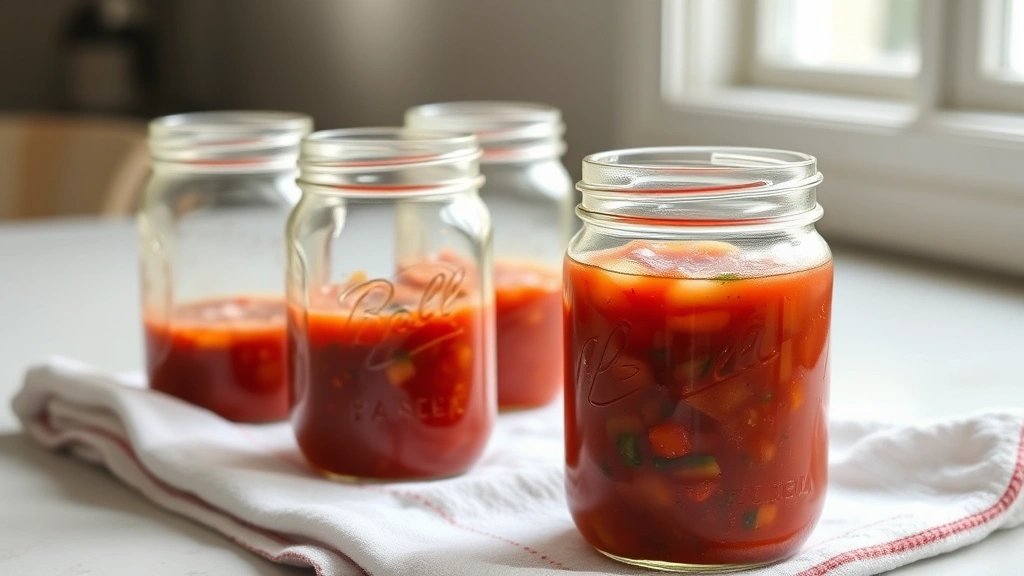
Filling Phase (10-15 minutes):
Working quickly while salsa is still hot, remove a jar from the water bath using your jar lifter. Place the canning funnel over the jar mouth and ladle hot salsa into the jar, leaving ½-inch headspace (the gap between the salsa surface and the jar rim). This headspace allows for expansion during processing and helps create proper seals.
Use your bubble remover tool to slide around the inside of the jar, releasing trapped air bubbles. Wipe the jar rim thoroughly with a clean, damp cloth, removing any splashes or residue that might prevent proper sealing. Center a hot lid on the jar rim and screw the band down firmly but not excessively tight—you should be able to turn it slightly by hand.
Repeat this process with remaining jars until all salsa is jarred, working methodically to maintain the hottest possible temperature during filling and processing.
Processing Phase (15-20 minutes):
Place filled jars on the canning rack in your water bath canner, ensuring they’re covered by at least 1-2 inches of boiling water. If necessary, add more boiling water to reach the proper level. Cover the canner with its lid and bring the water back to a rolling boil. Once boiling, process pint jars for 15 minutes (quart jars for 20 minutes). Processing time varies by altitude—add 5 minutes for every 1,000 feet above sea level.
Set a timer and maintain a rolling boil throughout the entire processing time. If the water stops boiling, restart your timer from the beginning. After the processing time concludes, turn off heat and allow jars to rest in the hot water for 5 minutes before removing them.
Cooling Phase (12-24 hours):
Using your jar lifter, carefully remove jars from the water bath and place them on a clean kitchen towel, spacing them several inches apart. Avoid placing hot jars on cold surfaces, as temperature shock can crack them. As jars cool, you’ll hear distinctive “popping” sounds as the lids seal, creating a vacuum seal. This is the satisfying confirmation that your canning effort succeeded.
Allow jars to cool completely—at least 12-24 hours—before testing seals or moving them to storage. Once cool, press the center of each lid. Properly sealed lids remain flat and don’t flex or pop. If any lids flex, those jars didn’t seal properly and should be refrigerated and consumed within a few days, or reprocessed using a fresh lid.
Safety Considerations and pH Levels
Food safety is paramount when canning salsa. The primary concern is botulism, a serious foodborne illness caused by the bacterium Clostridium botulinum. This pathogen thrives in low-acid environments, which is why proper acidity is non-negotiable in salsa recipes. Safe salsa must have a pH of 4.0 or lower, measured on the acidity scale where lower numbers indicate greater acidity.
The vinegar and lime juice in tested recipes provide this crucial acidity. Never reduce these ingredients or substitute with other acids you think might work similarly. Lemon juice can replace lime juice in equal quantities, but regular vinegar (5% acidity) must not be replaced with reduced-acid vinegar or homemade vinegars of unknown acidity. If you’re experimenting with unusual ingredients or significant recipe modifications, use pH test strips or a pH meter to verify your salsa’s acidity before canning.
Many home canners invest in resources from the National Center for Home Food Preservation, which provides scientifically tested recipes and processing guidelines. The USDA’s official canning guide also offers detailed safety information and troubleshooting advice. These authoritative sources have conducted extensive testing to determine exact processing times, ingredient ratios, and safety parameters.
Always follow tested recipes precisely, particularly regarding ingredient proportions and processing times. If your salsa looks unusual after processing—such as excessive liquid separation, mold growth, or cloudiness—discard it without tasting. These signs indicate improper preservation, and consuming the product could cause serious illness. When in doubt, err on the side of caution and start a fresh batch using verified recipes.
Variations and Flavor Combinations
Fire-Roasted Salsa: Before chopping, char tomatoes, peppers, and onions directly over a gas flame or under your oven broiler until the skin blackens. This caramelization adds smoky depth that elevates your salsa significantly. The charred skin comes off easily under cool running water, revealing tender, concentrated flavor beneath.
Mango Salsa: Substitute 2 pounds of fresh tomatoes with 4 cups diced fresh mango for a tropical variation. Reduce lime juice to ¼ cup and add 2 tablespoons honey to balance the mango’s sweetness. This variation pairs beautifully with fish tacos and grilled chicken.
Black Bean Salsa: Add 3 cups cooked black beans (or two 15-ounce cans, drained and rinsed) in the final minutes of cooking. Include 1 teaspoon cumin and ½ teaspoon smoked paprika for additional depth. This hearty variation works wonderfully as a burrito filling or served alongside rice and beans.
Corn and Poblano Salsa: Use 2 pounds tomatoes, 3 roasted and diced poblano peppers, 2 cups fresh corn kernels, and reduce jalapeños to 2. This milder variation appeals to those preferring less heat while maintaining complex flavor layers. The poblanos provide subtle smokiness without excessive spice.
Pineapple-Habanero Salsa: Combine 6 pounds tomatoes with 2 cups diced fresh pineapple and 4-6 habanero peppers (seeded for less heat). This intensely flavorful variation delivers tropical sweetness balanced by serious heat. Habaneros are significantly hotter than jalapeños, so this version suits adventurous palates.
When creating custom variations, maintain the basic acid-to-vegetable ratio: at least ½ cup combined vinegar and lime juice per 8 pounds fresh vegetables. This ensures your creation remains safely preserved. Test any significant modifications by measuring pH before committing to full batches, or consult university extension services for guidance on custom recipes.
Storage and Shelf Life
Properly canned salsa stored in a cool, dark location remains safe and flavorful for 12-18 months. The ideal storage temperature is 50-70°F, making pantries, basements, or root cellars perfect locations. Avoid storing jars in direct sunlight or areas subject to temperature fluctuations, such as above stoves or near heating vents. Consistent, cool conditions preserve color, flavor, and nutritional value.
Once you open a jar, transfer unused salsa to a smaller container and refrigerate it. Opened salsa keeps for 3-4 weeks in the refrigerator, covered. The cold temperature slows bacterial growth and preserves freshness. Never leave salsa at room temperature for extended periods, as this encourages spoilage.
Label each jar with the contents and processing date using a permanent marker or adhesive labels. This practice helps you rotate stock, using older jars first and maintaining freshness. Even though shelf-stable canned salsa lasts over a year, the flavor gradually fades with time. Salsa processed and stored properly tastes best within the first 6-12 months.
Homemade canned salsa makes exceptional gifts for family and friends. Include a handwritten label noting the contents, processing date, and storage instructions. Pair jars with tortilla chips or other complementary items for thoughtful, personalized presents that showcase your food preservation skills and culinary enthusiasm.
If you’re interested in expanding your preservation skills beyond salsa, explore other recipes featuring nutrient-dense ingredients that benefit from canning. Many vegetable-based condiments and sauces employ similar techniques, allowing you to build confidence and expertise with each batch. Consider also learning about traditional dishes that complement your homemade salsa, such as caldo de pollo, a comforting soup that pairs beautifully with fresh salsa on the side.
FAQ
Can I use a food processor to chop ingredients for canned salsa?
Yes, a food processor significantly speeds ingredient preparation, particularly when processing large tomato quantities. Pulse vegetables in short bursts rather than continuous processing, which can create an overly fine, soup-like consistency. For best results, process tomatoes separately from other vegetables, as they release more liquid and can make other ingredients too wet. You may need to drain excess liquid from processed tomatoes before cooking, which also concentrates flavors.
What causes salsa to separate into liquid and solids during storage?
Separation occurs when too much liquid remains in your finished salsa. Ensure you cook your mixture long enough—20-30 minutes of simmering—to reduce excess moisture. Using tomatoes with high water content (like beefsteak varieties) rather than Roma tomatoes contributes to this problem. If separation occurs, simply stir the jar before serving. While not visually ideal, properly processed salsa with separation remains perfectly safe and flavorful.
Can I can salsa without a water bath canner?
Water bath canning is the approved method for high-acid foods like salsa. While a large stockpot with a rack can substitute for a dedicated canner, you must ensure jars are covered by at least 1-2 inches of boiling water and maintain a rolling boil throughout processing. Pressure canning isn’t necessary for salsa due to its acidity, though some canners use pressure cookers for convenience. Never attempt oven canning or other non-traditional methods, which don’t reliably kill botulism spores.
Why didn’t my salsa jars seal properly?
Seal failures usually result from one of several factors: jars weren’t hot enough during filling, headspace was excessive or insufficient, the jar rim wasn’t clean before applying the lid, or the processing time was too short. Ensure jars remain in hot water until immediately before filling. Wipe rims thoroughly with a damp cloth, removing all splashes. Verify you’re leaving exactly ½-inch headspace. If using questionable lids from previous years, replace them with new lids, as old sealing compounds lose effectiveness.
Can I reduce the salt in canned salsa recipes?
Yes, salt can be reduced or adjusted to taste without compromising safety, as long as you maintain proper vinegar and lime juice quantities. Salt enhances flavor and aids preservation but isn’t essential for safe canning of high-acid foods. Reduce salt gradually in test batches, noting how flavor develops. You might also substitute kosher salt or sea salt for table salt, which some canners find provides better flavor distribution.
How do I know if my canned salsa has spoiled?
Trust your senses. Discard any salsa that shows mold growth, cloudiness, unusual odors, or fizzing when opened. These signs indicate bacterial growth or fermentation, making the salsa unsafe to eat. Never taste questionable salsa to test it—the risks outweigh any benefit. Properly processed and stored salsa should smell fresh and aromatic, with bright color and clear appearance.
Can I use fresh garlic instead of minced garlic from a jar?
Fresh garlic is strongly preferred over jarred minced garlic for canned salsa. Fresh garlic provides superior flavor and texture, while jarred varieties contain preservatives and lack the vibrant character of fresh cloves. Mince fresh garlic immediately before cooking to preserve its pungent, complex flavor compounds. If you prefer milder garlic character, reduce the quantity—fresh garlic’s intensity varies considerably based on size and variety.
Is cilantro essential in canned salsa, or can I omit it?
Cilantro is traditional in authentic salsa but not essential for safety. If you dislike cilantro (some people have a genetic variation making it taste soapy), simply omit it or substitute with fresh parsley for similar herbaceous character. You might also add fresh basil or oregano for different flavor profiles. Ensure any fresh herbs are added in the final minutes of cooking to preserve their delicate flavors.


