How to Make Cheese Curds: Tested Recipe
Cheese curds are a delightful dairy creation that squeaks between your teeth when you bite into them—a sure sign of freshness and proper technique. These bite-sized nuggets of cheese have become increasingly popular beyond their Wisconsin roots, appearing on menus from food trucks to upscale restaurants. Making cheese curds at home is more achievable than you might think, requiring just a handful of ingredients and patience to master the process.
Whether you’re looking to impress guests with homemade appetizers or simply want to understand the science behind cheese-making, this tested recipe will guide you through every step. The beauty of homemade cheese curds lies in their superior taste and texture compared to store-bought varieties. You’ll control the salt content, the exact aging time, and can even experiment with different milk types to create your perfect curd.
This comprehensive guide breaks down the cheese-making process into manageable steps, explaining the why behind each action so you can troubleshoot any issues and achieve consistent results every time you make a batch.
Ingredients You’ll Need
Creating authentic cheese curds starts with high-quality ingredients. The foundation of any great cheese curd recipe is fresh, whole milk—preferably not ultra-pasteurized, as the high heat treatment can interfere with proper curd formation. You’ll also need liquid rennet, which is the enzyme that causes milk proteins to coagulate and separate from the whey.
Here’s what you’ll gather for a basic batch:
- 1 gallon of whole milk (non-ultra-pasteurized, ideally local or from a quality dairy)
- 1/4 teaspoon of liquid rennet (diluted in 1/4 cup cool, non-chlorinated water)
- 1 1/2 teaspoons of salt (use cheese salt or kosher salt, not iodized)
- 1/4 teaspoon of mesophilic culture (optional but recommended for authentic flavor)
- Non-chlorinated water (for diluting rennet and adjusting temperature)
The quality of your milk directly impacts the final product. Fresh milk from grass-fed cows produces superior curds with richer flavor. If you’re following an easy dinner recipes for beginners approach, understand that cheese-making is more about precision than complexity.
Essential Equipment
Successful cheese curd production requires specific tools that ensure proper temperature control and curd handling. Invest in quality equipment since you’ll use these items repeatedly for your cheese-making adventures.
- Large stainless steel pot (at least 4-quart capacity)
- Accurate thermometer (dairy thermometer reading 0-220°F is ideal)
- Cheese knife (long blade for cutting curds into 1/4-inch cubes)
- Cheesecloth (unbleached, food-grade quality)
- Colander (stainless steel preferred)
- Large slotted spoon (for stirring and handling curds)
- Measuring spoons and cups (for precise ingredient measurements)
- Instant-read thermometer (backup temperature verification)
- Cheese mold or butter mold (optional, for shaping)
Temperature control is absolutely critical in cheese-making. Fluctuations of even 2-3 degrees can significantly affect your results, so invest in a reliable dairy thermometer rather than relying on standard kitchen thermometers.
Step-by-Step Process
Step 1: Prepare Your Milk
Pour one gallon of fresh whole milk into your large stainless steel pot. Slowly heat the milk to 90°F, stirring occasionally to ensure even temperature distribution. This gentle warming activates the milk proteins and prepares them for the culturing process. Use your thermometer constantly—too rapid heating can damage the milk structure.
While the milk warms, prepare your rennet solution by diluting 1/4 teaspoon of liquid rennet in 1/4 cup of cool, non-chlorinated water. Stir gently and let it sit for a few minutes. This dilution ensures even distribution throughout the milk.
Step 2: Add Culture
Once your milk reaches 90°F, sprinkle the mesophilic culture (if using) over the surface and let it rehydrate for one minute without stirring. Then, gently stir for about one minute to distribute the culture evenly throughout the milk. This culture develops flavor and helps curds firm up properly. Let the milk rest for 5 minutes at 90°F while the culture begins its work.
Step 3: Add Rennet
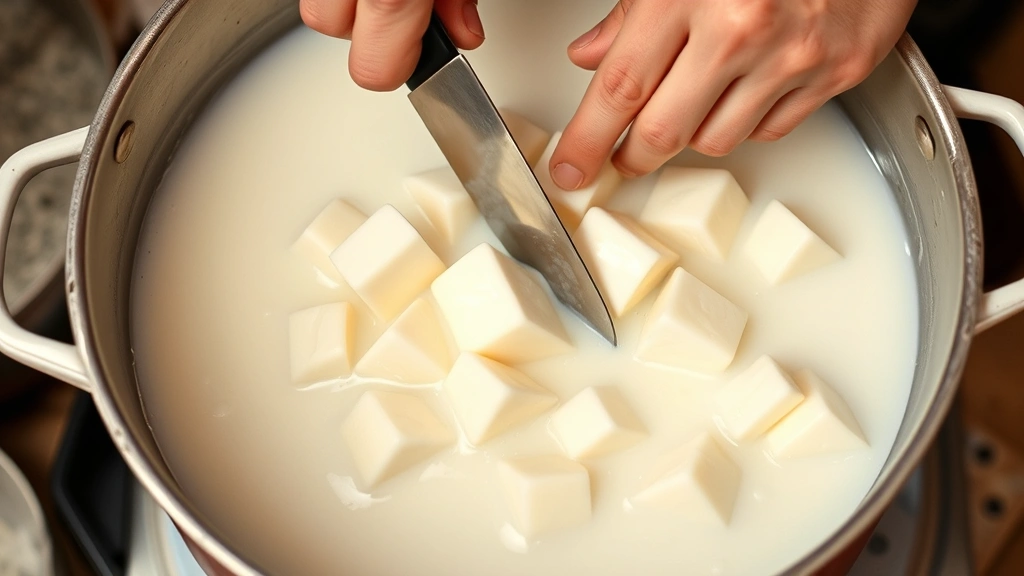
Using an up-and-down motion with a long spoon, gently stir your diluted rennet into the milk for one full minute. This distributes the rennet evenly and is crucial for uniform curd formation. After stirring, maintain the milk at 90°F and let it sit undisturbed for 30-40 minutes. During this time, the rennet coagulates the milk proteins, forming a custard-like mass called curds.
You’ll know the curds are ready when you can insert a knife at a 45-degree angle and it breaks cleanly—this is called the “clean break” test. If the curds break cleanly and don’t flow back together, you’re ready to proceed.
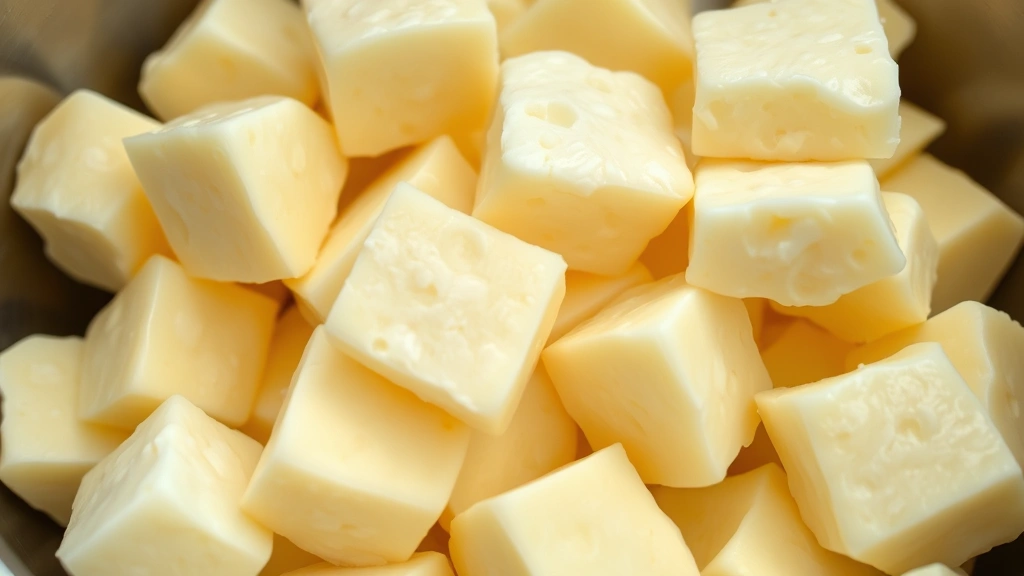
Step 4: Cut the Curds
Using a long-bladed cheese knife, cut the curd mass into 1/4-inch cubes. Work slowly and methodically, making vertical cuts, then angled cuts, then horizontal cuts to achieve uniform small pieces. This size is critical—smaller curds release whey more efficiently, resulting in firmer, squeakier curds. After cutting, let the curds rest for 5 minutes.
Step 5: Cook the Curds
Slowly increase the temperature of the curds to 104°F over about 30 minutes, stirring gently every few minutes. This gradual heating firms up the curds and helps them expel more whey. Maintain 104°F for 30 minutes, continuing to stir gently. The curds should feel slightly firm but still somewhat soft when squeezed gently.
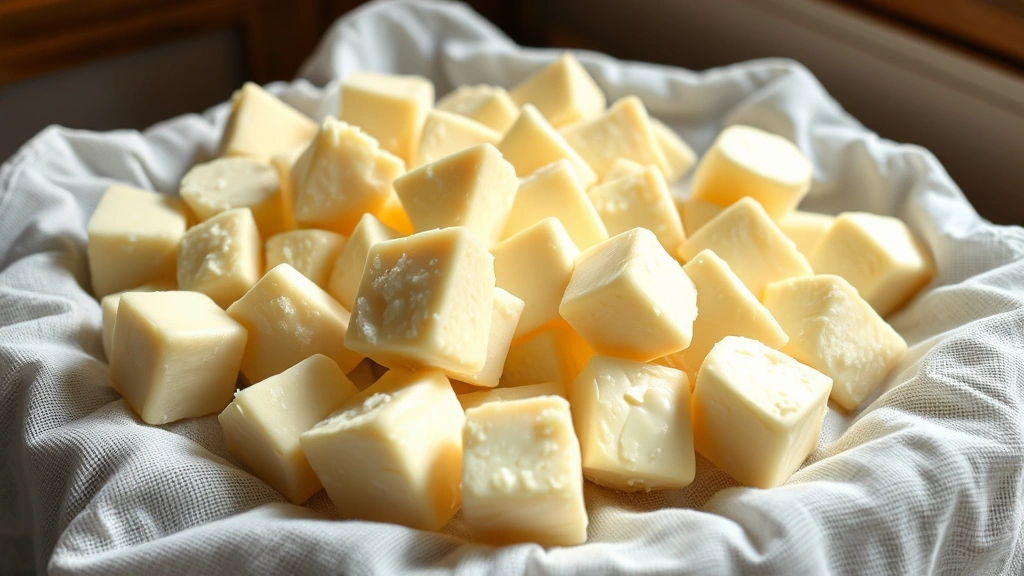
Step 6: Drain the Whey
Line your colander with cheesecloth and carefully pour the curds and whey through it. Reserve the whey—you might need it later if the curds need more moisture. Let the curds drain for a few minutes, then gather the corners of the cheesecloth and hang it to drain for about 30 minutes. The curds should be moist but not wet.
Step 7: Salt and Rest
Transfer the drained curds to a clean bowl and gently toss with 1 1/2 teaspoons of salt. Work gently to avoid breaking apart the curds. Let the salted curds rest at room temperature (68-72°F) for 30-60 minutes. During this time, they’ll firm up and develop their characteristic squeak. Toss them gently every 15 minutes to ensure even salt distribution and prevent matting.
Step 8: Optional Drying
If you prefer crispier curds that squeak more pronounced, spread them on a clean cloth or paper towels and let them air-dry for another 30-60 minutes at room temperature. This removes excess moisture and intensifies the squeak factor.
Troubleshooting Guide
Even experienced cheese makers encounter occasional issues. Understanding what went wrong helps you adjust your technique for the next batch.
Curds Are Too Soft: This usually indicates insufficient cooking time or temperature was too low. Increase the final cooking temperature to 105-106°F and extend the cooking time by 5-10 minutes. Alternatively, your milk might be ultra-pasteurized—switch to a different brand.
Curds Won’t Form: The most common cause is using ultra-pasteurized milk or milk that’s been frozen. The rennet may also be expired or stored improperly. Always verify your rennet’s expiration date and store it in the refrigerator. Temperature fluctuations during the 30-40 minute coagulation period can also prevent proper curd formation.
Curds Are Grainy or Rubbery: You’ve likely cooked them too long or at too high a temperature. Reduce the final temperature to 102-103°F and shorten the cooking time. Avoid aggressive stirring, which breaks down the curds.
Curds Lack Flavor: Increase the amount of culture slightly, or let the culture work longer before adding rennet. You might also try using local, grass-fed milk, which naturally has more complex flavors.
Curds Are Too Salty: Use less salt next time—start with 1 teaspoon and adjust to taste. Remember, salt is a preservative, but too much overpowers the delicate cheese flavor.
Storage and Shelf Life
Fresh cheese curds are best enjoyed within 24 hours of making them, while they still have that characteristic squeak and tender texture. Store them in an airtight container in the refrigerator at 35-40°F. The squeaking will gradually diminish over a few days as the curds lose moisture and age.
For longer storage, you have a few options. Vacuum-sealing extends shelf life to about one week. You can also freeze cheese curds for up to three months, though the texture changes slightly upon thawing—they become softer and lose some of the squeak. Frozen curds work wonderfully in 3 ingredient ground beef recipes or as appetizers when fried.
To refresh day-old curds and restore some squeak, gently warm them in a double boiler to 90°F, then cool them quickly in an ice bath. This realigns the proteins slightly and can restore some texture.
Flavor Variations
Once you master the basic recipe, experiment with different flavor profiles. Add herbs like fresh dill, chives, or jalapeños to the curds just before the salting step. You can also smoke finished curds over applewood or hickory for a unique twist.
For a spicy version, toss finished curds with a tiny pinch of cayenne pepper or smoked paprika. Create a peri peri chicken recipe pairing by making slightly spiced curds with similar heat levels. Some cheese makers add a touch of lipase powder to the milk for a more Italian-style, tangy curd.
You can also experiment with different milk types. Goat milk produces tangier curds with a slightly different texture. Jersey or Guernsey milk creates richer, more golden curds. Keep detailed notes on your experiments—recording milk source, culture amount, cooking temperature, and final texture helps you replicate successes and improve failures.
For those interested in the science of cooking, understanding cheese science and protein denaturation will deepen your appreciation for the process. Additionally, consulting cultures for health resources provides detailed information about dairy cultures and their characteristics.
The Anova culinary guides offer precision cooking techniques that apply to cheese-making temperature control. For comprehensive cheese-making education, the UMass Cheese Program provides research-backed information. Finally, cheesemaking.com offers extensive resources, forums, and detailed guides for home cheese makers of all levels.
FAQ
Can I Use Ultra-Pasteurized Milk?
Ultra-pasteurized milk is heated to such high temperatures that the protein structure is damaged, making it extremely difficult to form proper curds. The high heat breaks down some of the casein proteins that rennet needs to coagulate. Always choose regular pasteurized or, ideally, raw milk (if legal in your area) for the best results.
What If I Don’t Have a Cheese Thermometer?
A reliable instant-read thermometer works as a substitute, though a dedicated dairy thermometer is more convenient and accurate. Temperature precision is crucial—even 2-3 degree variations affect curd formation. Never rely on visual cues alone, as milk appearance doesn’t reliably indicate temperature.
How Long Does the Entire Process Take?
From start to finish, making cheese curds takes approximately 2.5 to 3 hours. This includes milk heating, culturing, cooking, draining, and resting periods. Most of this time is passive—you’re simply monitoring temperature and letting chemistry do the work.
Can I Make Cheese Curds Without Rennet?
Rennet is essential for proper curd formation. While some acids like vinegar or lemon juice can coagulate milk, they produce a different product that lacks the characteristic squeak and texture of true cheese curds. Rennet is inexpensive and widely available online.
Why Don’t My Curds Squeak?
The squeak comes from moisture inside the curd structure and requires proper cooking temperature and duration. If your curds don’t squeak, they likely weren’t cooked hot enough or long enough. Next time, increase the final temperature to 105°F and extend cooking time by 10 minutes. Also ensure you’re not over-drying them after salting.
Can I Make Cheese Curds in Smaller Batches?
Yes, you can scale the recipe down. Use half the ingredients for a half-gallon batch. However, smaller batches are harder to maintain at precise temperatures, so they require more attention. Many cheese makers find one-gallon batches the sweet spot for home production.
What’s the Difference Between Cheese Curds and Mozzarella?
Cheese curds are fresh curds that are eaten shortly after making, while mozzarella is a stretched-curd cheese that’s heated and kneaded to create its characteristic stringy texture. Curds are crumbly and squeaky; mozzarella is smooth and elastic. The base process is similar, but mozzarella requires additional heating and stretching steps.
How Do I Know When Curds Are Done Cooking?
Properly cooked curds should feel slightly firm when you squeeze them gently—they should spring back but still be somewhat tender. They should have released most of their whey, appearing somewhat shrunken and separated in the liquid. If they feel mushy, they need more cooking time or higher temperature.
Is It Worth Making Cheese Curds at Home?
Absolutely. Homemade curds have superior texture and flavor compared to most commercial versions. You control salt content, can use premium milk, and can experiment with flavors. The process is rewarding and teaches you valuable food science principles. Plus, fresh curds are significantly more expensive to buy, so homemade versions offer good value if you make them regularly. Consider pairing your homemade curds with how to grill steak perfectly for an impressive meal, or explore foods to avoid for weight loss to balance your appetizer portions.
Can I Sell Homemade Cheese Curds?
Laws vary by location. Some areas allow limited home food production under cottage food laws, while others require commercial kitchen facilities and licensing. Check your local health department regulations before selling any homemade dairy products. Most home cheese makers make curds purely for personal consumption or gifts.


