Crispy Chex Mix in Oven? Kitchen-Tested Recipe
Chex mix is the ultimate savory snack that transforms ordinary cereal into something absolutely irresistible. Whether you’re preparing for game day, need a quick party appetizer, or simply crave that satisfying crunch, oven-baked Chex mix delivers every single time. This classic treat has been a pantry staple since the 1950s, and for good reason—it’s simple, customizable, and endlessly delicious.
The beauty of making Chex mix in your oven lies in the control you gain over texture and flavor. Unlike stovetop methods that require constant stirring, oven-baking ensures even toasting and prevents burning. You’ll achieve that perfect golden-brown crispness that keeps everyone reaching for more. Plus, the aroma filling your kitchen is an added bonus that makes your home smell like a gourmet snack factory.
Let me share my kitchen-tested approach to creating the crispiest, most flavorful Chex mix you’ve ever tasted. I’ve perfected this recipe through countless batches, experimenting with temperatures, timing, and ingredient combinations to nail the ideal balance of savory, buttery, and crunchy.
Ingredients You’ll Need
The foundation of exceptional Chex mix starts with quality ingredients. Here’s exactly what you’ll need to create a batch that rivals any store-bought version:
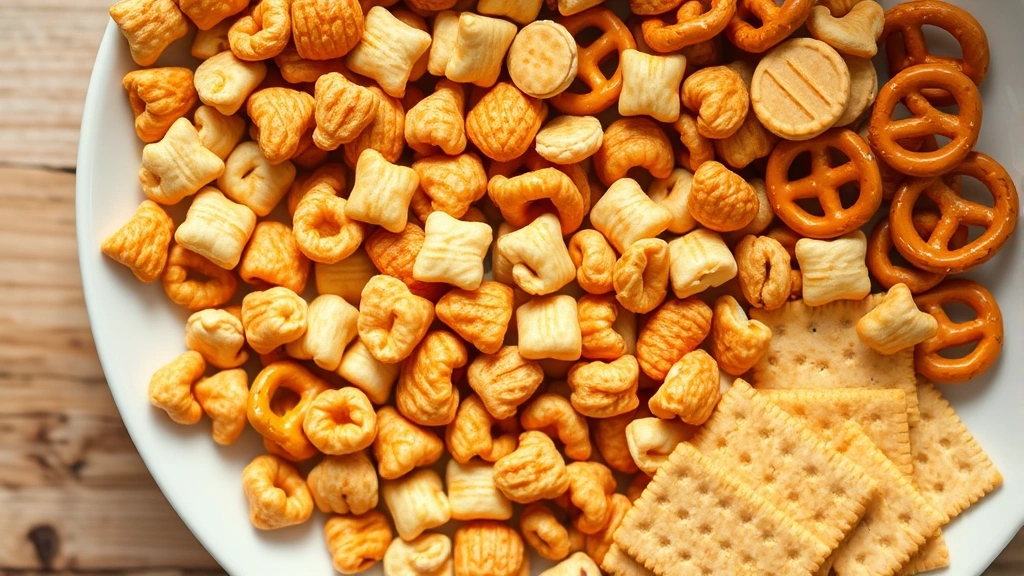
- 3 cups Chex cereal (rice, wheat, or corn—your preference)
- 2 cups mixed nuts (cashews, peanuts, or almonds work wonderfully)
- 1 cup bite-sized pretzels or pretzel sticks
- 1 cup dried snacks (bagel chips, crackers, or breadstick pieces)
- 4 tablespoons unsalted butter, melted
- 2 tablespoons Worcestershire sauce (essential for that savory depth)
- 1 tablespoon soy sauce (adds umami complexity)
- 2 teaspoons garlic powder
- 1 teaspoon onion powder
- ½ teaspoon cayenne pepper (optional, for heat)
- 1 teaspoon sea salt (adjust to taste)
- ½ teaspoon black pepper
The combination of Worcestershire and soy sauce creates a deeply savory foundation that elevates this beyond basic snack territory. These ingredients work together to build layers of flavor that develop further as the mixture cools.
Preparation Steps
Success begins with proper preparation. Taking time to organize your ingredients and equipment ensures smooth execution and prevents any scrambling during the baking process.
Step 1: Gather Your Equipment
You’ll need a large mixing bowl, a measuring cup, a small bowl for wet ingredients, a wooden spoon or spatula for stirring, and a large rimmed baking sheet. I recommend using a baking sheet with raised edges—this prevents pieces from sliding off during stirring and helps contain everything in one place.
Step 2: Combine Dry Ingredients
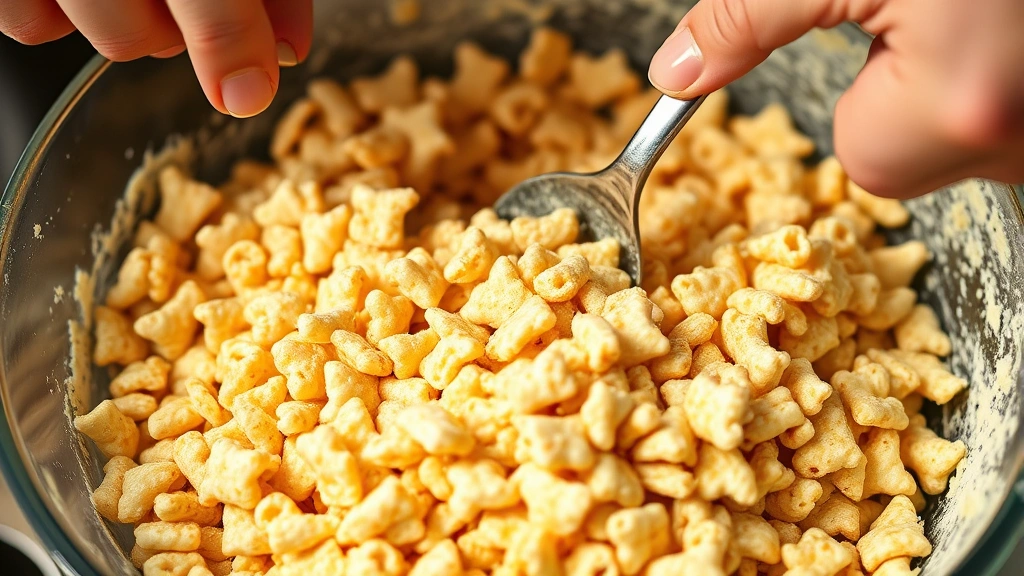
Pour all your cereal, nuts, pretzels, and dried snacks into your large mixing bowl. Take a moment to toss everything together gently, ensuring even distribution. This preliminary mixing helps the seasoning coat everything uniformly when you add the wet ingredients. If you notice any particularly large pretzel pieces, consider breaking them into smaller, more uniform sizes for consistent texture throughout.
Step 3: Prepare the Wet Mixture
In your small bowl, whisk together melted butter, Worcestershire sauce, and soy sauce until fully combined. The butter acts as the binding agent that helps seasonings adhere to every piece. Whisk in your garlic powder, onion powder, cayenne pepper (if using), salt, and black pepper. Stir until you have a smooth, homogeneous mixture with no visible clumps of powder.
Step 4: Coat Everything Evenly
Drizzle the wet mixture over your dry ingredients in a slow, steady stream while stirring constantly with a wooden spoon. This gradual approach prevents clumping and ensures every piece gets coated. You’re looking for a light, even coating—the mixture shouldn’t be wet or soggy. Continue stirring for about 2-3 minutes until you’re confident every piece has contacted the seasoning mixture. Pay special attention to the bottom of the bowl where heavier pieces tend to settle.
Baking Instructions
Oven temperature and timing are critical to achieving that ideal crispness. These factors separate mediocre Chex mix from the truly exceptional version you’re aiming for.
Preheating Your Oven
Preheat your oven to 250°F (120°C). This lower temperature might seem counterintuitive, but it’s the secret to even baking without burning. Higher temperatures risk charring the nuts and smaller pieces before the cereal fully crisps. Patience here pays dividends in the final product.
Spreading on the Baking Sheet
Spread your coated mixture in a single, even layer on your rimmed baking sheet. Avoid piling pieces on top of each other—they need direct contact with the hot baking surface to crisp properly. If your mixture doesn’t fit comfortably in one layer, use two baking sheets and rotate them halfway through baking.
The Baking Process
Place your baking sheet in the preheated oven and bake for 45-50 minutes, stirring every 10-12 minutes. This frequent stirring is crucial—it prevents burning on the edges, ensures even heat distribution, and helps the pieces dry out uniformly. Set a timer on your phone to remind yourself; this prevents the common mistake of forgetting about it halfway through.
During the early stages, you might notice the mixture looks slightly damp. Don’t worry—this is normal as the moisture from the sauces is still evaporating. By the final 15 minutes, you should see a noticeable change in appearance. The cereal pieces will look golden, the nuts will smell toasted and fragrant, and the pretzels will have deepened in color slightly.
Cooling and Storage
Cooling is when the magic truly happens. The mixture continues crisping as it cools, so resist the urge to eat it while it’s still warm—you won’t experience the full crunch factor yet.
Initial Cooling
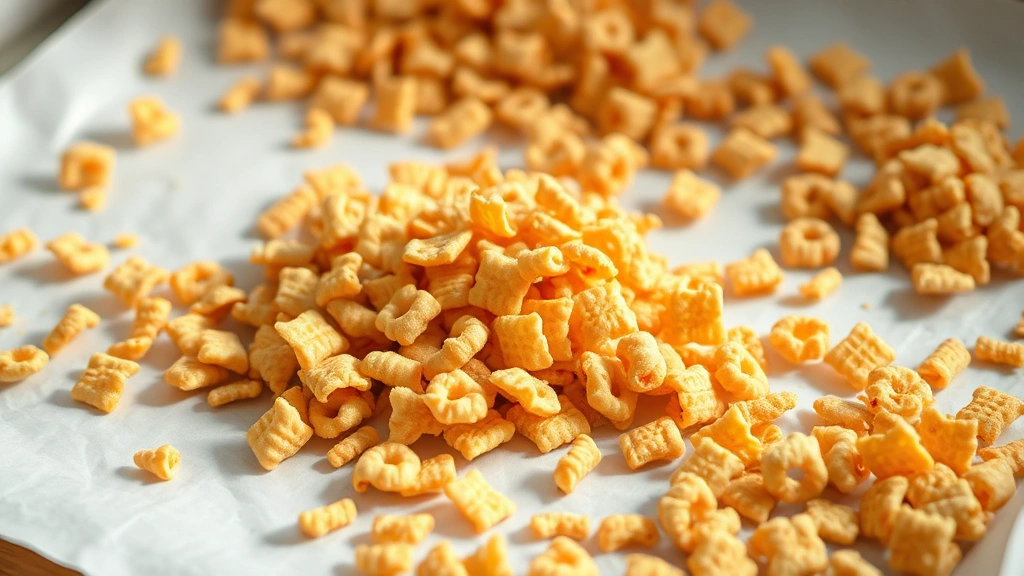
Remove the baking sheet from the oven and spread the hot mixture on several layers of paper towels or parchment paper. Spread it as thinly as possible to maximize air exposure. Let it cool at room temperature for at least 30-45 minutes. During this time, it will continue to firm up and achieve that signature crunch you’re after. You’ll notice the pieces that seemed slightly soft when hot become perfectly crispy as they cool completely.
Breaking Up Clusters
Once completely cooled, break apart any pieces that have stuck together. This creates individual, bite-sized pieces rather than clusters. Many people enjoy these clusters, but breaking them up ensures uniform texture throughout your batch.
Storage Tips
Transfer your cooled Chex mix to airtight containers or resealable bags. Proper storage maintains crispness for up to 10 days, though it rarely lasts that long in my house. Store in a cool, dry place away from direct sunlight. Avoid the refrigerator, which can introduce moisture and compromise texture. If your Chex mix does become slightly soft over time, you can refresh it by spreading it on a baking sheet and warming it in a 200°F oven for 5-10 minutes.
Flavor Variations
Once you’ve mastered the basic recipe, explore these delicious variations. The foundation remains the same, but these tweaks create entirely different flavor profiles. If you enjoy experimenting with other recipes, you might appreciate exploring healthy granola recipes for similar techniques.
Spicy Sriracha Version
Add 1 tablespoon of sriracha sauce to your wet mixture and reduce the Worcestershire sauce to 1 tablespoon. Add an extra ½ teaspoon of cayenne pepper for heat lovers. The sriracha brings a complex spiciness with subtle sweetness that transforms the classic profile.
Sweet and Savory Combination
Mix in 2 tablespoons of honey and 1 tablespoon of brown sugar with your wet ingredients. Reduce the salt to ½ teaspoon. Add dried cranberries or raisins to your dry ingredients before baking. This creates a sweet-savory balance that appeals to those who enjoy complexity in their snacks.
Ranch-Flavored Version
Replace the garlic and onion powder with 2 tablespoons of dry ranch dressing mix. Add 1 tablespoon of fresh or dried dill. This version delivers that beloved ranch flavor profile in snack form—perfect for ranch enthusiasts.
Barbecue-Smoked Variation
Add 1 tablespoon of liquid smoke and 1 tablespoon of ketchup to your wet mixture. Include 1 teaspoon of smoked paprika. This version tastes like barbecue smoke without any actual grilling required.
Asian-Inspired Sesame Mix
Replace Worcestershire sauce with 3 tablespoons of soy sauce. Add 1 tablespoon of sesame oil, 2 teaspoons of ginger powder, and 1 teaspoon of white pepper. Top with toasted sesame seeds after cooling. This creates an umami-rich snack with Asian flavor notes.
Pro Tips for Perfect Results
These kitchen-tested insights come from making Chex mix dozens of times. They’ll help you troubleshoot issues and achieve consistent excellence.
Temperature Control Matters
Invest in an oven thermometer if you don’t already have one. Many home ovens run hot or cold, which affects baking times. Knowing your actual oven temperature ensures you can adjust accordingly. If your oven runs hot, reduce the temperature by 25°F and watch carefully during the final 10 minutes.
Stirring Frequency Is Essential
Don’t skip the stirring steps. Pieces on the outer edges brown faster than those in the middle of the sheet. Frequent stirring redistributes pieces and prevents any from burning. Use a spatula to reach into corners where pieces tend to accumulate.
Moisture Control
The key to crispness is removing all moisture. If you live in a humid climate, you might need to extend baking time by 5-10 minutes. Conversely, in very dry climates, watch carefully to avoid over-baking. The mixture should look completely dry and feel crispy when you break a piece.
Seasoning Adjustments
Taste a cooled piece before storing. If you want more savory depth, add a pinch of salt. If the garlic or onion flavor is too strong, you’ve learned for next time. Seasoning preferences vary greatly, and you might prefer different ratios than the base recipe suggests.
Equipment Recommendations
Professional bakers often recommend using cast iron cookware for even heat distribution, though baking sheets work perfectly fine. If using cast iron, reduce baking time slightly as it heats more intensely. Always line your baking sheet with parchment paper for easy cleanup and to prevent sticking.
Quality Ingredients Make a Difference
Use fresh Chex cereal and fresh nuts. Stale ingredients result in stale snacks. Check expiration dates before starting. Fresher ingredients toast more evenly and develop better flavor during baking.
Scaling the Recipe
This recipe easily doubles or triples. If multiplying, maintain the same proportions and bake in batches rather than overcrowding your baking sheet. Overcrowding prevents proper crisping and results in uneven texture.
FAQ
Can I make Chex mix in a slow cooker instead of the oven?
Yes, you can make Chex mix in a slow cooker on the low setting for 2-3 hours, stirring every 30 minutes. However, oven-baking provides more consistent results and superior crispness. Slow cookers can create uneven browning and sometimes produce a softer texture. For the crispiest results, stick with the oven method.
Why is my Chex mix turning out soft instead of crispy?
Soft Chex mix typically results from insufficient baking time, oven temperature that’s too low, or inadequate cooling time. Ensure your oven is properly preheated and that you’re baking for the full 45-50 minutes. Resist eating it warm—it needs the full cooling period to develop crispness. If humidity is high in your area, extend baking time by 5-10 minutes.
Can I use butter-flavored cooking spray instead of melted butter?
While cooking spray works in a pinch, melted butter creates superior flavor and better seasoning adhesion. Cooking spray doesn’t distribute seasonings as evenly, resulting in patchy flavoring. For best results, use actual melted butter.
How long does homemade Chex mix stay fresh?
Properly stored in airtight containers, homemade Chex mix stays fresh and crispy for 7-10 days. After that, it may begin losing crispness, though it’s still safe to eat. Store in cool, dry conditions away from sunlight and humidity. Avoid the refrigerator, which introduces moisture.
Can I make Chex mix without Worcestershire sauce?
Absolutely. If you don’t have Worcestershire sauce, substitute with an equal amount of soy sauce or tamari sauce. You could also use liquid smoke or additional garlic powder for depth. The Worcestershire sauce adds a specific tangy umami element, but these alternatives create delicious results.
What’s the best way to reheat Chex mix if it becomes soft?
Spread softened Chex mix on a baking sheet and warm it in a 200°F oven for 5-10 minutes. This revives crispness without over-cooking. Check frequently to avoid burning. Allow it to cool completely before storing again.
Can I customize the mix-ins beyond what’s listed?
Absolutely! Try adding wasabi peas, roasted chickpeas, dried seaweed snacks, or even coconut flakes. Just ensure all ingredients are already dry—avoid anything that will release moisture during baking. Experiment with different combinations to create your signature version.
Is there a gluten-free version of this recipe?
Yes! Use gluten-free Chex cereal, gluten-free pretzels, and gluten-free crackers. Ensure your Worcestershire sauce is gluten-free (many brands contain gluten). The seasoning components are naturally gluten-free, making adaptation straightforward.


