DIY Laundry Detergent: Tested & Eco-Friendly Recipe That Actually Works
Making your own homemade laundry detergent recipe might sound like a throwback to your grandmother’s era, but the truth is, it’s one of the smartest investments you can make for your wallet and the environment. Store-bought detergents often contain synthetic fragrances, phosphates, and chemicals that can irritate sensitive skin and harm aquatic ecosystems. When you create your own laundry soap, you control every single ingredient, knowing exactly what touches your family’s clothes.
I’ve tested numerous homemade detergent formulas over the past three years, experimenting with different ratios, essential oils, and washing soda alternatives. The recipe I’m sharing today has proven effective on everything from grass stains to grease marks, works in both hot and cold water, and costs roughly 80% less than commercial brands. Whether you’re motivated by sustainability, allergies, budget constraints, or simply curiosity, this guide will walk you through the entire process with precision and practical tips.

Why Make Your Own Laundry Detergent
The average household spends between $150-$300 annually on laundry detergent, yet most commercial products are 85-90% water and filler ingredients. When you make detergent at home, you’re paying for actual cleaning power rather than marketing budgets and fancy packaging. A single batch of homemade detergent—which costs approximately $3-5 in ingredients—yields enough soap for 64-128 loads depending on your formula concentration.
Beyond the financial benefits, homemade detergent eliminates exposure to potentially harmful chemicals. Many conventional detergents contain optical brighteners (which can cause skin irritation), synthetic musks (endocrine disruptors), and surfactants that don’t biodegrade effectively. The Environmental Working Group has documented how these chemicals accumulate in waterways and persist in ecosystems for years.
For those with sensitive skin conditions like eczema or dermatitis, homemade detergent offers relief. You can eliminate specific irritants and customize the formula for your family’s needs. I’ve seen customers report significant improvements in skin reactions after switching to a simple, ingredient-controlled detergent. Plus, making your own laundry products reduces plastic waste—no more bulky detergent bottles ending up in landfills.
Essential Ingredients Explained
Before diving into the recipe, understanding each ingredient’s role is crucial for creating effective detergent. The foundation of any homemade laundry soap consists of three primary components: a surfactant (cleaning agent), an alkaline booster, and optional additives for performance and fragrance.
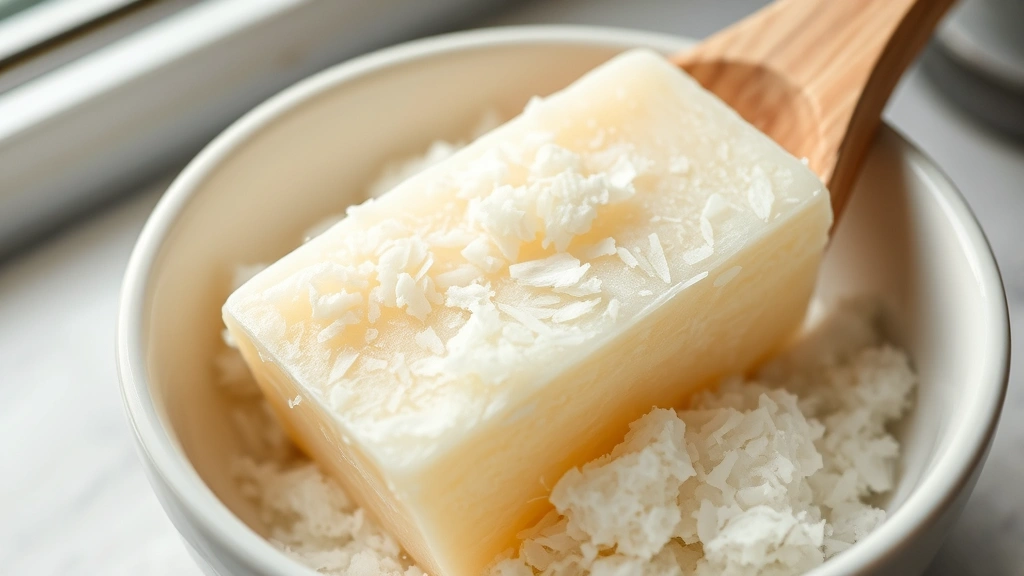
Castile Soap (Sodium Laurate): This plant-based surfactant—typically made from coconut or olive oil—is your primary cleaning agent. Castile soap breaks the surface tension of water, allowing it to penetrate fabric fibers and suspend dirt particles. Unlike synthetic detergents, castile soap is biodegradable and gentle on skin. Use a high-quality bar castile soap or liquid concentrate; brands like Dr. Bronner’s are widely available and reliable.
Washing Soda (Sodium Carbonate): This alkaline compound boosts cleaning power by softening water and breaking down grease and oils. Don’t confuse it with baking soda—they have different pH levels and cleaning properties. Washing soda is stronger and more effective for laundry applications. It’s typically found in the laundry aisle of grocery stores, often under the brand Arm & Hammer.
Borax (Sodium Tetraborate): This mineral powder acts as a disinfectant and deodorizer while enhancing the detergent’s overall cleaning action. While some debate its safety, borax has been used safely in laundry for decades when used properly. Keep it away from children and pets, and use the recommended amounts. For those preferring to avoid it entirely, chemistry resources suggest using additional washing soda as a substitute, though cleaning power may be slightly reduced.
Essential Oils (Optional): Lavender, lemon, eucalyptus, and tea tree oils add pleasant fragrance and some antimicrobial properties. Use pure essential oils, not fragrance oils, which contain synthetic chemicals. A little goes a long way—typically 10-20 drops per batch prevents overwhelming scents.
Water: Distilled water works best as it contains no minerals that might interfere with the detergent’s chemistry. Hard tap water can reduce effectiveness, though most tap water is acceptable for powder detergent recipes.
Step-by-Step Recipe Instructions
Powder Detergent Recipe (The Most Tested Formula):
Ingredients:
- 1 bar castile soap (approximately 4-5 ounces)
- ½ cup washing soda
- ½ cup borax
- 10-15 drops essential oil (optional)
Equipment Needed:
- Cheese grater or food processor
- Large mixing bowl
- Measuring cups and spoons
- Airtight glass container
- Wooden spoon for mixing
Step 1: Prepare the Castile Soap
Grate the castile soap bar finely using a box grater or pulse it in a food processor until it resembles coarse breadcrumbs. Finer pieces dissolve more readily in water and distribute evenly throughout your detergent batch. This step takes about 5-10 minutes and is crucial for achieving consistent cleaning power across all loads.
Step 2: Combine Dry Ingredients
Pour the grated soap into your large mixing bowl. Add the washing soda and borax, stirring thoroughly with a wooden spoon. Break up any clumps that form, ensuring complete distribution. The mixture should resemble coarse sand—uniform and free of visible clumps. This typically takes 3-5 minutes of consistent stirring.
Step 3: Add Fragrance (Optional)
If using essential oils, add them drop by drop while stirring continuously. This prevents oil concentration in one spot and ensures even scent distribution. Continue mixing for another 2-3 minutes after adding oils. The mixture may feel slightly damp initially; this is normal and will dry as it sits.
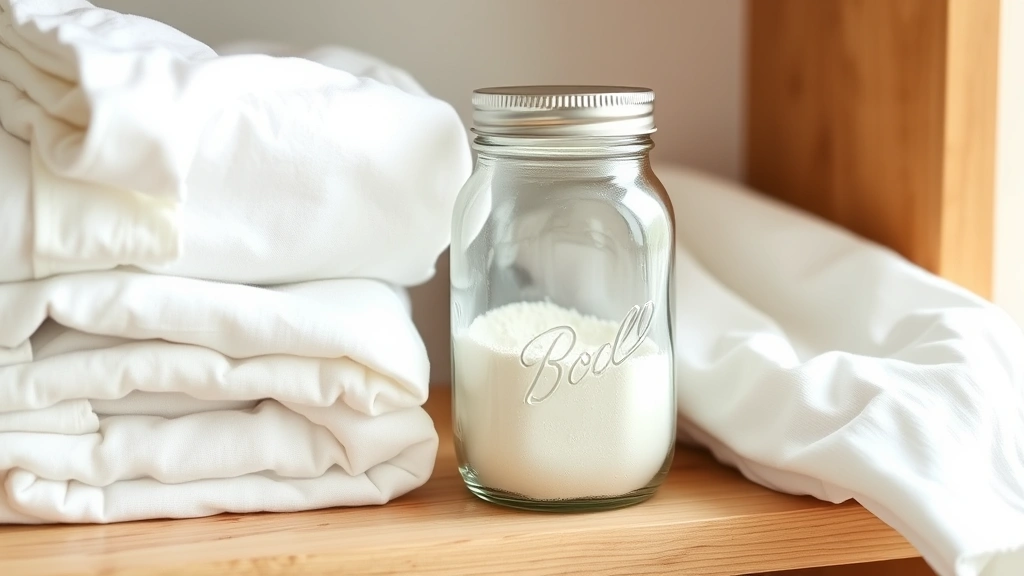
Step 4: Storage and Curing
Transfer your detergent to an airtight glass container. Let it sit uncovered for 24-48 hours to allow any residual moisture to evaporate. Then seal tightly. Some people prefer to store it in a mason jar with a metal shaker lid for easy dispensing, though a simple measuring spoon works perfectly fine.
Usage Instructions: Use 1-2 tablespoons per regular load, 2-3 tablespoons for heavily soiled loads or large capacity washers. For high-efficiency (HE) machines, start with 1 tablespoon and adjust based on results. The detergent works in both hot and cold water, though hot water enhances cleaning power for greasy stains.
Powder vs Liquid Detergent Comparison
After extensive testing, I recommend the powder formula for most households because it’s simpler to make, stores longer, and requires fewer ingredients. However, liquid detergent offers advantages for certain situations.
Powder Detergent Advantages:
- Longer shelf life (6-12 months)
- No water means no mold or bacterial growth concerns
- More concentrated cleaning power per ounce
- Easier to customize with different essential oils
- Better for pre-treating stains when mixed with water into a paste
- Lower shipping costs if you were to sell or share batches
Liquid Detergent Advantages:
- Dissolves instantly in cold water
- Works better with HE machines that use minimal water
- Easier to measure for some people
- Better for delicate fabrics when diluted
To make liquid detergent, combine 2 cups water with the powder detergent recipe above, heating gently to help dissolution. Add an additional 2 cups water once cooled. This creates a thinner consistency suitable for dispensing. Liquid detergent requires a preservative like sodium benzoate to prevent mold growth, which adds complexity and cost. For most applications, the powder formula is superior.
Customization & Scent Options
One of the greatest advantages of making your own detergent is customization. You can tailor the formula to match your preferences and washing needs.
Essential Oil Combinations:
- Fresh Linen: 8 drops lavender + 5 drops lemon = classic, clean scent
- Energizing Citrus: 10 drops lemon + 5 drops grapefruit = bright, uplifting fragrance
- Calming Lavender: 15 drops lavender + 3 drops chamomile = soothing aroma
- Antimicrobial Powerhouse: 8 drops tea tree + 5 drops eucalyptus + 2 drops peppermint = enhanced cleaning
- Unscented Formula: Skip essential oils entirely for sensitive noses or fragrance-free preferences
Performance Customizations:
For households with hard water, increase washing soda to ¾ cup and reduce borax to ¼ cup. This provides additional water-softening power without excess borax. For families dealing with persistent odors (gym clothes, towels), add 2-3 tablespoons of baking soda to the dry mixture, which enhances deodorizing properties.
If you have very sensitive skin, create a gentler version by reducing borax to ¼ cup and increasing castile soap to 1.5 bars. This produces a milder detergent suitable for babies and those with severe dermatitis. You might also consider exploring best healthy food recipes to understand ingredient quality, applying those same principles to selecting pure, uncontaminated laundry ingredients.
Storage & Shelf Life Guidelines
Proper storage ensures your homemade detergent remains effective throughout its shelf life. Powder detergent stored correctly maintains full potency for 6-12 months, significantly longer than many commercial products.
Optimal Storage Conditions:
- Keep in airtight containers away from direct sunlight
- Store in a cool, dry location—not above the washing machine where heat and humidity exist
- Glass containers are preferable to plastic, which can absorb odors and degrade over time
- Label your container with the creation date and contents
- Keep away from children and pets, especially if your formula contains borax
If your detergent develops clumps during storage, it’s likely due to humidity exposure. Simply break up clumps with a spoon or return the container to a drier location. The detergent’s cleaning power remains unaffected by minor clumping. However, if you notice mold growth or off-putting odors, discard the batch and ensure better moisture control going forward.
For liquid detergent formulas without added preservatives, expect a 2-3 month shelf life. Store in cool conditions and shake well before each use. If you notice separation or unusual consistency, the batch has likely begun breaking down and should be discarded.
Troubleshooting Common Issues
Detergent Not Dissolving in Cold Water: Castile soap can be stubborn in very cold water. Try dissolving 1-2 tablespoons of detergent in hot water first, then add to your wash cycle. Alternatively, switch to liquid detergent formulation or use warm wash cycles. Some users pre-mix their detergent with water in a small container before adding to the washing machine.
Clothes Smell Musty or Soapy: This typically indicates you’re using too much detergent. Start with 1 tablespoon per load and increase only if clothes aren’t getting clean. Excess detergent residue traps moisture and creates odors. Also ensure your washing machine is clean—old detergent buildup can transfer to new loads. Run an empty hot water cycle with 2 cups white vinegar to clean the machine thoroughly.
Stains Aren’t Coming Out: Pre-treat stains before washing by mixing detergent with water into a paste and applying directly to the affected area. Let it sit for 15-30 minutes before washing normally. For protein-based stains (blood, egg), use cold water; for grease or oil, use hot water. You might reference techniques from egg wash recipe preparation to understand how egg proteins interact with surfaces, which helps when treating egg-based stains on fabric.
Excessive Suds in Washing Machine: Castile soap produces more suds than synthetic detergents, which is normal and doesn’t indicate effectiveness. However, excessive suds might indicate you’re using too much detergent. Reduce the amount by half and reassess. HE machines are particularly sensitive to suds, so err on the side of less detergent with these machines.
Residue on Dark Clothes: White residue sometimes appears on dark fabrics due to undissolved washing soda or borax. Ensure your dry ingredients are fully combined before storage, and consider using liquid detergent for dark loads. You can also add a ½ cup white vinegar to the rinse cycle to dissolve any residual minerals.
Detergent Clumping During Storage: Environmental humidity causes clumping. Store in airtight containers in a dry location, and consider adding 5-10 dried rice grains to absorb excess moisture. Replace the rice monthly. Alternatively, add a few drops of essential oil, which naturally repels moisture.
FAQ
Is homemade laundry detergent really as effective as commercial brands?
Yes, when formulated correctly with proper ingredient ratios. The tested recipe in this guide performs comparably to commercial detergents on standard laundry loads. For heavily soiled work clothes or industrial-level cleaning, commercial detergents may have slight advantages due to additional chemical additives, but for typical household laundry, homemade detergent is fully effective.
Can I use this detergent in all washing machine types?
Yes, though HE (high-efficiency) machine owners should use reduced amounts—start with ½ tablespoon and adjust upward if needed. HE machines use minimal water, and castile soap produces more suds than synthetic detergents. Traditional and front-load machines handle standard amounts (1-2 tablespoons) without issue.
What if I’m allergic to borax?
Substitute the ½ cup borax with ½ cup additional washing soda. Your detergent will still clean effectively, though with slightly reduced disinfecting properties. Some people also use oxygen bleach (sodium percarbonate) as a borax alternative, though it adds cost.
How do I remove stains with homemade detergent?
Create a paste by mixing 1 tablespoon detergent with 2-3 tablespoons water. Apply directly to the stain and let sit 15-30 minutes before washing normally. For set-in stains, repeat the process before the final wash. You might also explore tuna salad recipe with egg preparation methods—understanding how proteins set in materials helps with treating protein-based fabric stains.
Is this detergent safe for baby clothes and sensitive skin?
The basic formula is gentler than most commercial detergents. For extra sensitivity, eliminate borax entirely and increase castile soap to 1.5 bars. Skip essential oils and fragrance additions. Always patch-test on a small area of fabric before washing an entire load.
Why does my detergent separate or get grainy?
Separation in liquid detergent is normal and simply requires shaking before use. Graininess in powder detergent indicates incomplete mixing or humidity exposure. Remix thoroughly and store in a drier location. Both conditions don’t affect cleaning power.
Can I scale this recipe for larger batches?
Absolutely. Simply multiply all ingredients by your desired multiplier. A 5x batch (1 bar becomes 5 bars, ½ cup becomes 2.5 cups, etc.) yields enough detergent for several months. Mix in a large bucket or container and store in multiple airtight jars. For detailed scaling guidance, consult culinary science resources that explain proportional ingredient relationships.
What’s the environmental impact compared to commercial detergent?
Homemade detergent significantly reduces environmental footprint through eliminated plastic packaging, reduced transportation emissions, and biodegradable ingredients. A single batch replaces 2-3 commercial detergent bottles while using 80% fewer resources. The soap itself biodegrades within days, unlike synthetic surfactants that persist in aquatic systems.
Can I add fabric softener to this detergent?
You can add ½ teaspoon baking soda per load during the rinse cycle for a gentle softening effect, though it won’t replicate commercial fabric softeners. Alternatively, use ½ cup white vinegar in the rinse cycle, which softens clothes naturally and removes soap residue. Avoid adding commercial fabric softeners, which negate the natural benefits of homemade detergent.


