Lemon Bundt Cake: Grandma’s Secret Recipe
There’s something magical about a slice of lemon bundt cake that transports you straight to your grandmother’s kitchen. The bright, zesty flavor combined with a tender crumb and glossy glaze makes this dessert a timeless favorite that never goes out of style. This isn’t just any lemon bundt cake recipe—it’s the closely guarded secret that my grandmother perfected over decades, passed down through our family with specific techniques and ingredient ratios that make all the difference between a mediocre cake and an absolutely unforgettable one.
What makes this lemon bundt cake truly special is the combination of fresh lemon juice, lemon zest, and a touch of almond extract that creates layers of citrus flavor without any artificial taste. The secret lies not just in the ingredients themselves, but in the timing of when you add them and how you prepare your bundt pan. My grandmother always insisted that the quality of your lemons matters tremendously—she’d select bright yellow lemons that felt heavy for their size, knowing they contained the most juice and oil-rich zest.
Whether you’re baking this for a special occasion, a casual Sunday brunch, or simply because you want to fill your home with the aroma of fresh lemon, this recipe delivers consistent, delicious results every single time. The cake stays moist for days, making it perfect for gift-giving or meal prep, and it pairs beautifully with afternoon tea, coffee, or even as a light dessert after dinner.
Essential Ingredients for Grandma’s Lemon Bundt Cake
The foundation of any great cake starts with understanding your ingredients and their roles. For this lemon bundt cake recipe, you’ll need three cups of all-purpose flour, one teaspoon of baking powder, and half a teaspoon of baking soda. These dry ingredients work together to create a crumb that’s tender yet sturdy enough to support the cake’s weight without becoming dense.
The wet ingredients are where the magic happens: one cup of unsalted butter at room temperature, two cups of granulated sugar, four large eggs, one cup of sour cream, and the zest and juice of four to five fresh lemons. My grandmother’s secret addition was a quarter teaspoon of almond extract, which somehow amplifies the lemon flavor without making it taste like almonds. She also added a pinch of sea salt to enhance all the flavors and balance the sweetness.
For the glaze, you’ll need two cups of powdered sugar, three tablespoons of fresh lemon juice, and one tablespoon of lemon zest. Some bakers add a tablespoon of butter to the glaze for extra richness, though my grandmother preferred to keep it simple and let the lemon shine through.
One crucial detail: always use fresh lemon juice, never bottled. The difference in flavor is dramatic, and since lemon is the star of this cake, it deserves the best quality you can source. Room temperature ingredients are also non-negotiable for achieving the proper emulsification and light, fluffy texture.
Preparation and Pan Setup: The Foundation of Success
Before you even gather your ingredients, take time to properly prepare your bundt pan. This step is absolutely critical and often overlooked by home bakers. My grandmother would butter her pan generously, then dust it with a mixture of flour and a tiny bit of lemon zest. This prevents sticking and adds a subtle flavor to the cake’s exterior.
To properly butter a bundt pan, use a pastry brush or your fingers to coat every crevice, including the center tube. Pay special attention to the decorative grooves where cake tends to stick most stubbornly. After buttering, sprinkle your flour-zest mixture throughout the pan, tilting and rotating it so the coating reaches everywhere. Tap out any excess flour—you want a thin, even coating, not a thick layer.
Alternatively, you can use baking spray designed for bundt pans, which many modern bakers find more reliable. Whatever method you choose, test it by gently tapping the inverted pan—you shouldn’t see any bare spots where the metal shows through.
Preheat your oven to 325 degrees Fahrenheit. This slightly lower temperature than standard cakes is intentional; it allows the cake to bake more evenly and prevents the outside from browning too quickly before the inside is fully cooked. Let your oven preheat for at least fifteen minutes before you’re ready to pour your batter.
Mixing Method and Technique: Creating the Perfect Crumb
The creaming method is essential for this lemon bundt cake. Start by beating one cup of softened butter with two cups of granulated sugar for three to four minutes until the mixture is pale, fluffy, and nearly doubled in volume. This process incorporates air into the batter, which creates the cake’s tender structure. Don’t rush this step—proper creaming is what separates a dense, heavy cake from one with a delicate crumb.
Add your four eggs one at a time, beating well after each addition. This ensures each egg fully incorporates and contributes to the emulsification process. If your mixture looks slightly curdled after adding the eggs, don’t panic—this is normal and will resolve itself as you continue mixing.
In a separate bowl, whisk together three cups of flour, one teaspoon of baking powder, half a teaspoon of baking soda, and your pinch of sea salt. My grandmother always sifted these dry ingredients together, claiming it made a difference in the final texture. While modern flour is more consistent, sifting doesn’t hurt and ensures no lumps hide in your dry mix.
Now for the critical alternating method: add your dry ingredients and sour cream in three alternating additions, starting and ending with the dry ingredients. This means: dry, wet, dry, wet, dry. Beat on low speed just until combined after each addition—overmixing at this stage develops gluten and creates a tough, dense cake. The batter should come together smoothly without any visible flour streaks.
Fold in your lemon zest, fresh lemon juice, and almond extract gently by hand using a rubber spatula. This prevents overmixing and keeps your batter light and airy. The lemon juice will slightly thin the batter, which is exactly what you want.
Baking Instructions and Temperature Control
Pour your batter into your prepared bundt pan, smoothing the top with a spatula. Place it in your preheated 325-degree oven on the middle rack. Bake for fifty to sixty minutes, until a toothpick inserted into the thickest part comes out with just a few moist crumbs clinging to it. The cake should be golden brown on top and spring back slightly when gently pressed.
Avoid opening the oven door during the first thirty minutes of baking, as temperature fluctuations can cause the cake to fall or develop a sunken center. After thirty minutes, you can peek, but try to minimize heat loss.
Different ovens vary in temperature accuracy, so start checking at the forty-five-minute mark. Every oven has hot and cold spots, and bundt cakes sometimes brown unevenly. If you notice one side browning faster than the other, rotate the pan halfway through baking.
Once done, remove the cake from the oven and let it cool in the pan for fifteen minutes. This waiting period is crucial—the cake needs time to set so it doesn’t fall apart when unmolded. My grandmother would use this time to prepare her glaze.
After fifteen minutes, run a thin knife around the edges and the center tube to loosen the cake. Place your serving plate upside down over the bundt pan, hold your breath, and flip it quickly and confidently. If you hesitate, the cake might stick. If it doesn’t immediately release, gently tap the bottom of the pan and try again. Once unmolded, let the cake cool completely on a wire rack before applying the glaze.
Making the Perfect Glaze and Final Touches
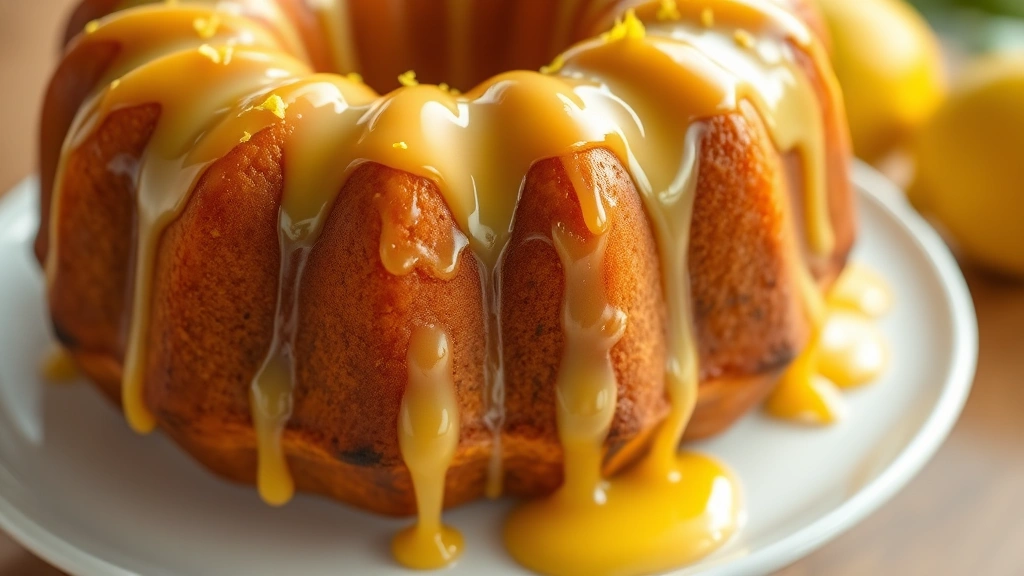
While your cake cools, prepare the glaze by whisking together two cups of powdered sugar and three tablespoons of fresh lemon juice until smooth and pourable. The consistency should be thick enough to coat the back of a spoon but thin enough to drizzle slowly from a whisk. If it’s too thick, add lemon juice one teaspoon at a time; if too thin, add more powdered sugar.
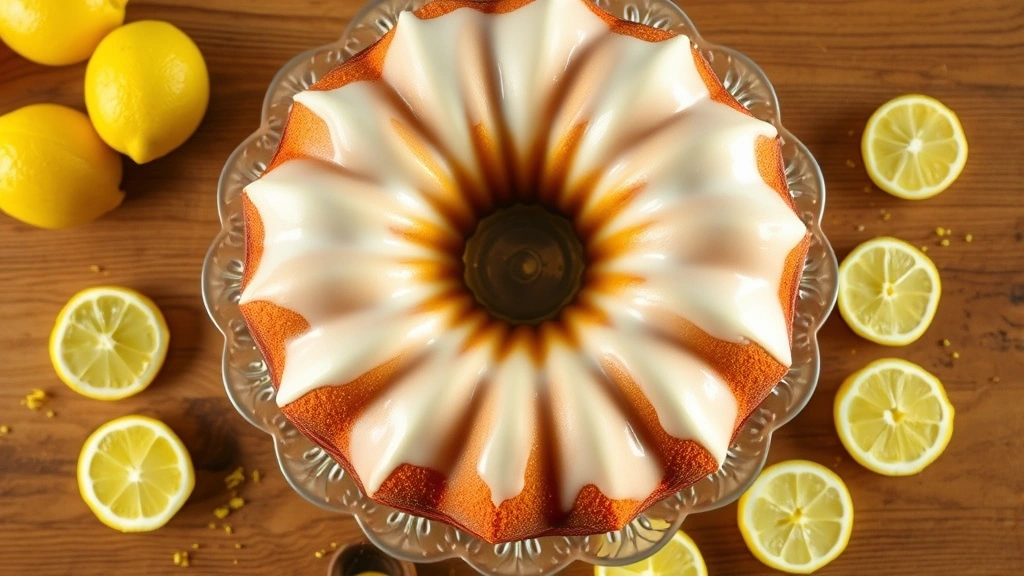
Once your cake is completely cool, drizzle the glaze over the top, allowing it to cascade down the sides naturally. The glaze will set as it cools, creating a beautiful, glossy finish. Sprinkle fresh lemon zest over the wet glaze for an elegant presentation and an extra burst of citrus flavor.
Some bakers like to add a tablespoon of melted butter to their glaze for richness, while others prefer it purely lemon-forward. Experiment to find your preference. You can also make a thicker glaze by using less lemon juice for a more substantial coating, or keep it thin and delicate as my grandmother preferred.
Storage and Serving Tips for Maximum Freshness
One of the best qualities of this lemon bundt cake is its longevity. Properly stored, it stays moist and delicious for up to five days, making it perfect for preparing ahead. Store your cake in an airtight container at room temperature, away from direct sunlight and heat sources. The glaze will keep the cake from drying out, and the high moisture content from the sour cream ensures it doesn’t become stale quickly.
If you need to store it longer, wrap individual slices tightly in plastic wrap and freeze for up to three months. Thaw at room temperature for about an hour before serving. The cake actually develops deeper flavor after a day or two, so don’t be afraid to make it ahead for special occasions.
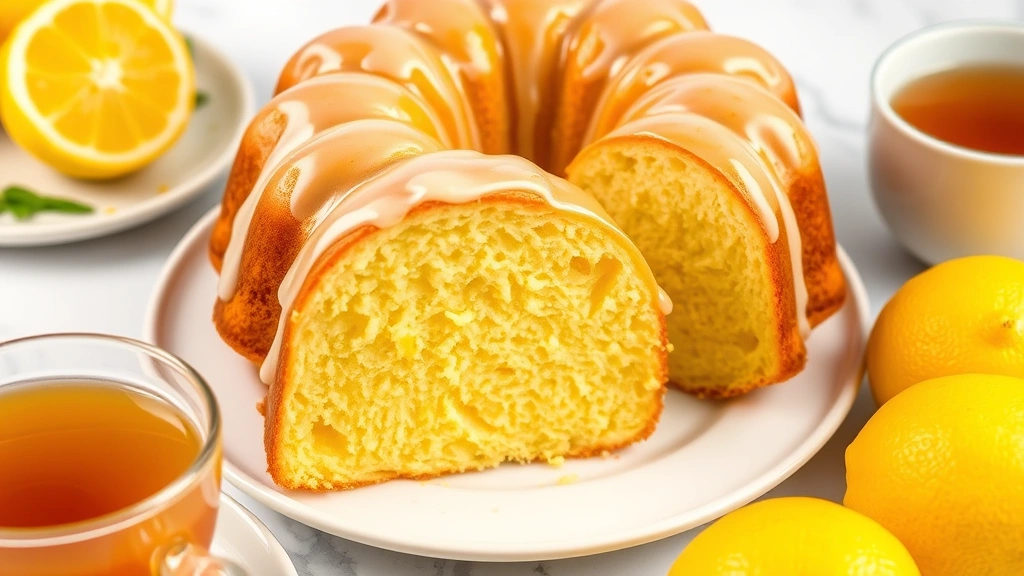
For serving, slice with a sharp knife dipped in hot water and wiped clean between cuts for neat, beautiful slices. This cake is wonderful on its own, but pairs beautifully with whipped cream, vanilla ice cream, or a cup of hot tea. It also works wonderfully as part of a dessert spread alongside other treats like strawberry pie or cherry cobbler for a complete fruit-forward dessert experience.
Creative Variations and Flavor Combinations
While the classic version is perfection, this recipe is wonderfully adaptable. For a blueberry lemon bundt cake, fold in one and a half cups of fresh blueberries during the final mixing stages. The berries add moisture and complement the lemon beautifully. You can also make a blueberry compote to serve alongside slices for extra flavor.
For a poppy seed lemon cake, add two tablespoons of poppy seeds to your dry ingredients. The slight crunch and nutty flavor creates interesting texture contrast. Some bakers also enjoy adding a tablespoon of vanilla extract along with the almond extract for increased depth.
If you want to create a lemon raspberry bundt cake, use frozen raspberries tossed lightly in flour before folding them in—this prevents them from sinking to the bottom. The tartness of raspberries complements lemon perfectly.
For special occasions, consider making a lemon ricotta bundt cake by replacing half the sour cream with whole milk ricotta cheese. This creates an even more tender crumb and adds subtle sweetness. You could also prepare fruit preserves to swirl into the batter before baking, creating beautiful marbling and pockets of intense fruit flavor.
Another elegant variation involves adding a lemon curd filling. Pour half your batter into the prepared pan, add a layer of lemon curd, then top with remaining batter. As the cake bakes, the curd creates a surprise layer of intense lemon flavor in the middle.
For those who prefer breakfast-friendly options, you can transform this into a lemon breakfast bundt cake by reducing sugar slightly and topping with streusel instead of glaze. Serve warm with coffee for a delightful morning treat.
Frequently Asked Questions About Lemon Bundt Cake
Why did my lemon bundt cake stick to the pan?
Sticking typically results from inadequate pan preparation. Ensure you’ve buttered or sprayed every crevice, including the center tube and decorative grooves. Some bakers find that dusting with a flour and cornstarch mixture (rather than just flour) provides extra insurance against sticking. If this happens, gently run a thin knife around the edges again and try unmolding more slowly.
Can I use bottled lemon juice instead of fresh?
While you technically can, the flavor difference is significant. Bottled juice often has a bitter, chemical taste that overpowers the delicate lemon flavor my grandmother worked so hard to perfect. Fresh lemon juice is worth the extra effort—you’ll taste the difference in every bite. If you must use bottled, reduce the amount slightly as it’s more concentrated.
My cake sank in the middle. What went wrong?
A sunken center usually indicates overmixing, opening the oven door too frequently, or baking at too high a temperature. It can also result from underbaking—the cake needs to be fully set before cooling. Try baking at 325 degrees instead of higher temperatures, and avoid opening the oven during the first thirty minutes. Also ensure your baking powder and baking soda haven’t expired.
How can I make this cake more moist?
The sour cream and lemon juice already provide excellent moisture. If you find yours drying out, you might be overbaking it. Invest in an oven thermometer to ensure accurate temperature, and check doneness starting at forty-five minutes. You can also brush the warm cake with lemon simple syrup before cooling for extra moisture.
Can I make this as cupcakes instead?
Absolutely! Divide batter among lined muffin tins and bake at 325 degrees for twenty to twenty-five minutes. The recipe yields about eighteen to twenty-four cupcakes depending on size. Frost with the same glaze or a lemon cream cheese frosting for extra indulgence.
What’s the best way to zest lemons?
A microplane zester gives the finest, most consistent zest without including the bitter white pith underneath. If using a box grater, use only the smallest holes and avoid pressing hard. For this recipe, aim for about two to three tablespoons of loosely packed zest from your four to five lemons.
How far in advance can I bake this cake?
You can bake this cake up to three days ahead and store it unglazed in an airtight container. Apply the glaze one day before serving for best presentation. Alternatively, bake and glaze it completely up to two days ahead—the glaze actually helps preserve the cake’s moisture.
What if my lemon juice is too acidic or bitter?
This sometimes happens with older lemons or certain varieties. Taste your juice before using—it should taste bright and sweet-tart, not harsh. If it’s too strong, dilute it slightly with water or reduce the amount. You can also balance excessive tartness by adding an extra quarter teaspoon of vanilla or almond extract.


