Christmas Casserole Delight: Grandma’s Secret Recipe
There’s something magical about a homemade casserole that appears on the Christmas table year after year. It’s not just food—it’s tradition, comfort, and love baked into one dish. My grandmother’s Christmas casserole recipe has been passed down through three generations, and every holiday season, family members ask for it before the turkey is even carved. This isn’t your average layered dish; it’s a carefully crafted combination of flavors that somehow tastes better than you’d expect from such simple ingredients.
What makes this casserole truly special is the balance of creamy richness, savory depth, and subtle sweetness that emerges during baking. The secret lies not just in the ingredients themselves, but in understanding how they interact with each other. Over decades of family gatherings, my grandmother perfected the ratios, cooking times, and layering technique that transform basic pantry staples into something memorable. Whether you’re cooking for a crowd or want to impress your own family, this recipe delivers consistent, delicious results.
Let me share the complete method, tips, and variations that have made this dish a holiday staple in our home. You’ll learn exactly why each step matters and how to adapt it to your preferences while maintaining the integrity of this beloved classic.
The History and Magic Behind Grandma’s Recipe
My grandmother developed this casserole recipe in the 1960s when casseroles were becoming the centerpiece of American holiday tables. Unlike many recipes from that era that relied heavily on cream of mushroom soup, hers took a different approach. She believed in building layers of flavor through careful ingredient selection and proper technique rather than masking flavors with excessive cream. This philosophy made her casserole stand out at every potluck and family gathering.
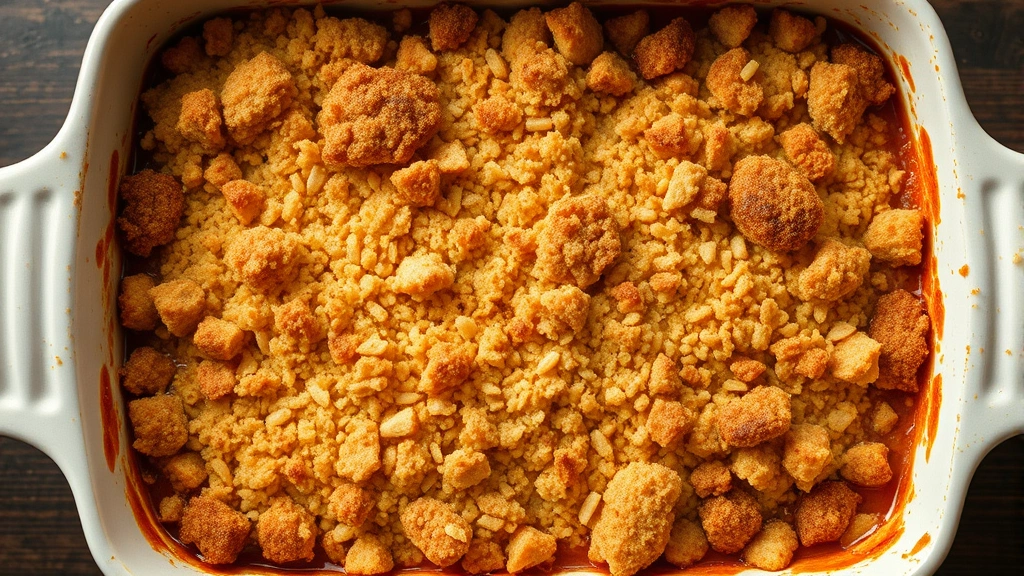
The magic happens through the Maillard reaction—that delicious browning that occurs when proteins and carbohydrates heat together. By arranging ingredients strategically and baking at the right temperature, the top develops a golden, slightly crispy layer while the interior stays moist and cohesive. The edges caramelize slightly, creating pockets of intensified flavor that make people come back for seconds.
Understanding the science helps you troubleshoot if something goes wrong. If your casserole comes out too dry, you need more liquid or shorter baking time. If it’s too soupy, you might need to reduce liquid or increase the baking temperature slightly. My grandmother kept detailed notes about humidity levels and oven variations, which is why she always had backup recipes written in her kitchen notebook.
Essential Ingredients and Ingredient Quality
The foundation of this casserole relies on quality ingredients that work in harmony. Here’s what you’ll need:
- 2 tablespoons unsalted butter for sautéing and richness
- 1 large yellow onion, diced into uniform pieces
- 3 cloves garlic, minced finely
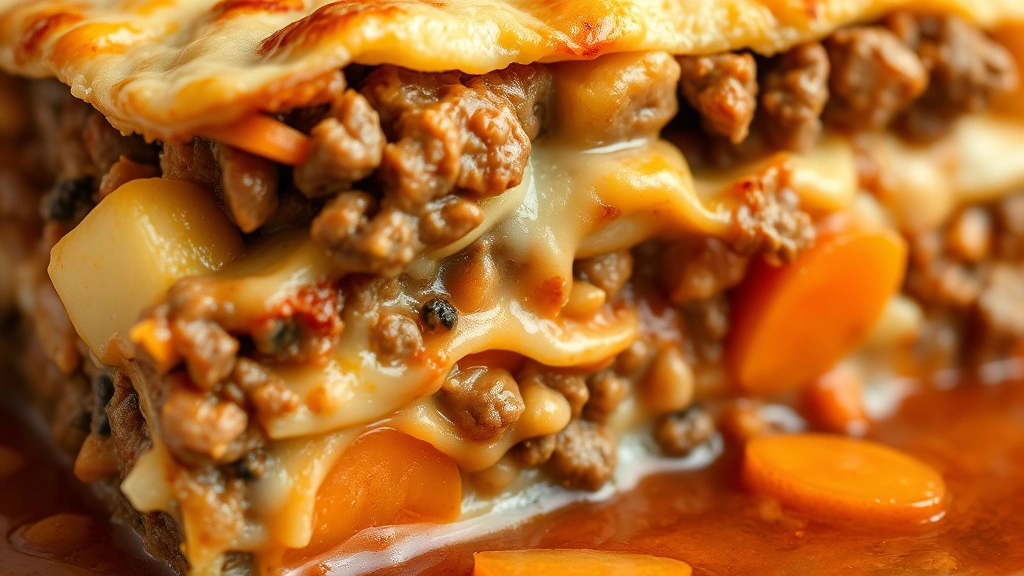
- 1 pound ground beef (80/20 blend recommended)
- 2 cups diced potatoes, cut into half-inch cubes
- 1 cup diced carrots, same size as potatoes
- 2 cups beef broth, quality matters here
- 1 cup whole milk or heavy cream
- 3 tablespoons all-purpose flour for thickening
- 2 cups shredded cheddar cheese, freshly shredded
- 1 teaspoon dried thyme
- 1 teaspoon dried rosemary
- Salt and black pepper to taste
- ½ cup breadcrumbs for topping
- 2 tablespoons melted butter for breadcrumb topping
Ingredient quality truly matters in casseroles because every component’s flavor shows through clearly. Use freshly shredded cheese rather than pre-shredded varieties, which contain anti-caking agents that prevent smooth melting. Choose a good quality beef broth—homemade is ideal, but look for low-sodium versions at your grocery store that don’t contain excessive additives. The difference between ordinary and excellent broth becomes apparent in the final dish’s depth of flavor.
For vegetables, aim for uniform sizes so everything cooks evenly. This prevents some vegetables from being mushy while others remain hard. A sharp knife and a cutting board with a guide help maintain consistency. Some cooks prefer slightly smaller pieces for more tender vegetables, while others like larger chunks that maintain their structure through baking.
Step-by-Step Preparation Instructions
Preparation Phase (15 minutes):
- Preheat your oven to 350°F (175°C). Position the rack in the middle of the oven for even heat distribution.
- Prepare all vegetables while the oven preheats. Dice the onion into roughly ¼-inch pieces, mince the garlic, cube the potatoes, and dice the carrots. Set aside in separate small bowls.
- Shred your cheese and set it aside. Combine breadcrumbs with 2 tablespoons melted butter in a small bowl and set aside.
- Mix flour with a pinch of salt in a small bowl to prevent lumps when added to liquid.
Cooking Phase (20 minutes):
- Heat 2 tablespoons butter in a large skillet over medium-high heat. Once foaming, add diced onion and sauté for 4-5 minutes until translucent and beginning to soften.
- Add minced garlic and cook for 1 minute until fragrant. This brief cooking time develops garlic’s sweetness without bitterness.
- Increase heat to high and add ground beef. Break it apart with a wooden spoon and cook for 8-10 minutes, stirring occasionally, until browned and no pink remains. Drain excess fat if necessary (though 80/20 beef shouldn’t produce much).
- Add diced potatoes and carrots to the beef mixture. Stir well to combine. Cook for 2-3 minutes, allowing vegetables to begin releasing their flavors into the meat.
- Pour in beef broth and bring to a simmer. Cook for 5 minutes to allow vegetables to begin softening slightly.
- In a small bowl, whisk together the flour and milk until completely smooth with no lumps. This slurry prevents flour from forming clumps when added to hot liquid.
- Slowly pour the milk-flour mixture into the simmering beef mixture while stirring constantly. Continue stirring until the liquid thickens noticeably, about 2-3 minutes.
- Add dried thyme, dried rosemary, and season with salt and pepper to taste. Remember that cheese will add saltiness, so season conservatively.
- Remove from heat and stir in the shredded cheddar cheese until completely melted and incorporated.
Assembly and Baking:
- Pour the entire beef mixture into a 9×13-inch baking dish, spreading it evenly with a spatula. Make sure vegetables are distributed throughout rather than settling to the bottom.
- Sprinkle the buttered breadcrumb mixture evenly across the top, creating a thin, even layer.
- Place the baking dish in the preheated 350°F oven on the middle rack.
- Bake for 30-35 minutes until the breadcrumb topping is golden brown and the edges are bubbling. You’ll see the sauce bubbling around the edges before the top fully browns.
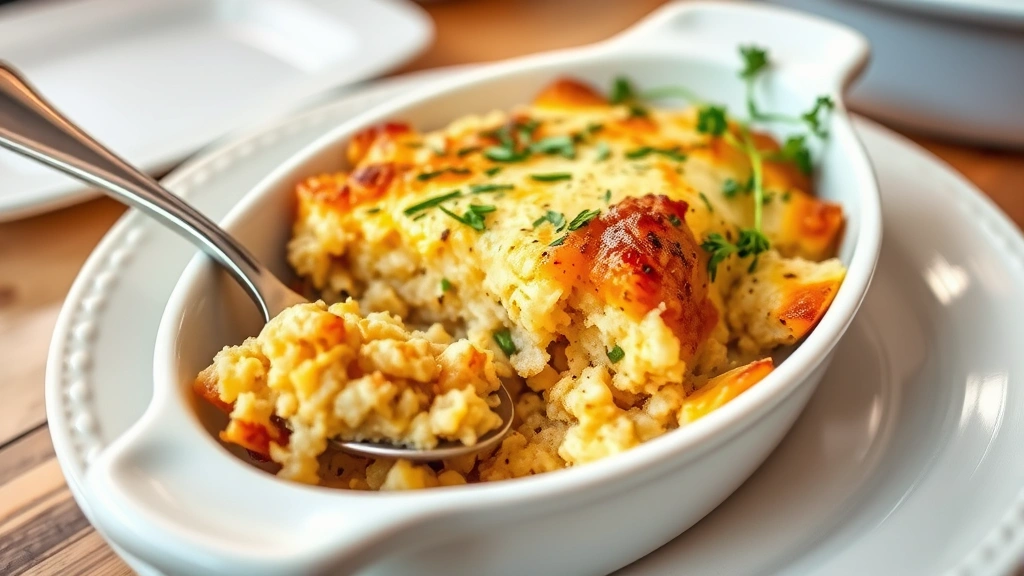
- Remove from oven and allow to rest for 5-10 minutes. This resting period allows the sauce to set slightly, making serving cleaner and helping flavors meld together.
Baking Techniques for Perfect Results
Temperature control is crucial for casserole success. The 350°F temperature is specifically chosen because it allows the interior to heat through and the sauce to thicken while the top browns gradually without burning. Too high, and you’ll have a burnt top with an undercooked interior. Too low, and the dish takes forever while potentially drying out.
Oven placement matters more than many home cooks realize. The middle rack provides the most even heat distribution. If your oven has hot spots, rotate the baking dish halfway through cooking. You’ll notice the top beginning to brown around the 20-minute mark, which is normal. If browning too quickly, you can tent loosely with foil for the final 10 minutes.
The resting period after baking is non-negotiable. During this time, carryover cooking continues slightly, and more importantly, the sauce sets up. The starch in the flour and the proteins in the cheese work together to create a thicker, more cohesive texture. If you serve immediately, the casserole will be soupy; after resting, it holds together beautifully on the plate.
For make-ahead convenience, you can assemble the casserole completely, cover it with plastic wrap, and refrigerate for up to 24 hours before baking. Simply add 10-15 minutes to the baking time since you’re starting from cold. This flexibility makes it perfect for Christmas morning when oven space is precious.
Serving Suggestions and Pairing Ideas
This casserole works beautifully as a main dish or hearty side. Pair it with fresh salads like a chef salad recipe for a lighter contrast, or serve alongside roasted veggies for additional nutrition. The creamy, savory casserole balances well with acidic sides or crisp vegetables.
For a traditional Christmas presentation, serve with crusty bread to soak up the sauce, a crisp green salad, and perhaps easy coleslaw for textural contrast. The coleslaw’s acidity cuts through the casserole’s richness beautifully.
Wine pairing suggestions: A medium-bodied red wine like Pinot Noir or Côtes du Rhône complements the beef and herbs wonderfully. If serving as a lighter lunch, a Sauvignon Blanc works surprisingly well with the vegetables and cheese.
Portion sizing: This recipe serves 8-10 people as a main course, or 12-15 as a side dish. Calculate approximately 1 cup per person for a main course serving. The casserole holds well on a warming tray for 30-45 minutes if you need to stagger serving.
Leftovers are excellent. Store covered in the refrigerator for up to 4 days. Reheat gently in a 325°F oven covered with foil for about 20 minutes, or microwave individual portions at 50% power for 2-3 minutes. The texture may soften slightly upon reheating, but flavors actually deepen as ingredients continue melding together.
Variations and Creative Adaptations
Shredded Chicken Version: Replace ground beef with shredded chicken recipe for a lighter option. Use chicken broth instead of beef broth and reduce the simmering time since chicken cooks faster than ground beef. This variation works beautifully for those preferring poultry during the holidays.
Vegetarian Adaptation: Omit meat entirely and add an extra cup of mixed vegetables like mushrooms, celery, and peas. Use vegetable broth and increase cheese to 2½ cups for richness. The flavor profile shifts but remains deeply satisfying.
Seafood Variation: Create a luxurious version using shrimp or scallops instead of beef. Use fish or seafood broth, reduce cooking time significantly, and consider adding a splash of white wine to the sauce. This elegant adaptation impresses sophisticated diners.
Cheese Variations: Experiment with different cheeses while keeping the quantity constant. Try Swiss cheese for nuttiness, Gruyère for depth, or a combination of cheddar and Fontina. Each cheese brings unique characteristics to the final dish.
Herb Modifications: Beyond thyme and rosemary, try sage (excellent with beef), oregano (Mediterranean flair), or herbes de Provence for complexity. Start with ½ teaspoon of any new herb since they vary in intensity.
Topping Options: Instead of breadcrumbs, try crushed crackers, panko for extra crunch, crispy fried onions, or even a mixture of breadcrumbs and grated Parmesan. Each creates different textural interest.
Spice Additions: A pinch of paprika, cayenne pepper, or smoked paprika adds complexity. Some family members prefer a touch of Worcestershire sauce for umami depth. Add these gradually, tasting as you go.
My grandmother always said that once you understand the principles—how proteins brown, how vegetables soften, how starches thicken, and how cheeses melt—you can adapt any casserole recipe confidently. The Christmas Casserole serves as an excellent foundation for experimentation while maintaining the tradition that makes it special.
FAQ
Can I make this casserole ahead of time?
Absolutely! Assemble the casserole completely, cover with plastic wrap, and refrigerate for up to 24 hours. Bake when ready, adding 10-15 minutes to the cooking time since you’re starting from cold. This makes it perfect for Christmas when oven space is limited.
What if my casserole comes out too dry?
This usually indicates either too much baking time or insufficient liquid. Next time, reduce baking time by 5 minutes or add an extra ¼ cup broth to the mixture. You can also drizzle a bit of warm broth over individual servings before eating.
Can I freeze this casserole?
Yes, freeze the unbaked casserole for up to 3 months. Cover tightly with plastic wrap and foil. Thaw overnight in the refrigerator before baking, adding 15-20 minutes to the cooking time. Alternatively, bake first, cool completely, then freeze for up to 2 months and reheat gently.
Why is my casserole too soupy?
The sauce may not have thickened properly. Ensure you whisked the flour and milk together thoroughly before adding to avoid lumps, and stir constantly while the mixture simmers. If it’s still too soupy after baking, the resting period should help it set. For future batches, increase flour to 3½ tablespoons or reduce liquid slightly.
Can I use fresh herbs instead of dried?
Yes, but use triple the amount—so 3 teaspoons fresh thyme and 3 teaspoons fresh rosemary. Add fresh herbs in the last few minutes of cooking to preserve their delicate flavor and bright color. Dried herbs are actually preferable for this dish since they distribute more evenly and develop deeper flavors during long baking.
What type of baking dish works best?
A 9×13-inch ceramic or glass baking dish is ideal. Glass allows you to see browning from underneath, while ceramic distributes heat evenly. Avoid metal pans, which can cause uneven browning and may react with acidic components. The dish should have sides at least 2 inches tall to contain the sauce.
How do I prevent the breadcrumb topping from burning?
Ensure breadcrumbs are coated evenly with melted butter. If browning too quickly, tent loosely with foil for the final 10-15 minutes of baking. You can also reduce oven temperature to 325°F and extend baking time by 5-10 minutes for gentler browning.
Can I double this recipe?
Yes, double all ingredients and use two 9×13-inch baking dishes. Baking time remains the same since you’re maintaining the same depth in each dish. This works perfectly for large gatherings or if you want to freeze one for later use.


