
Cherry Jam Recipe: Grandma’s Secret Technique for Perfect Homemade Preserves
There’s something magical about opening a jar of homemade cherry jam on a quiet morning—the deep crimson color, the rich aroma, and that first spoonful that tastes nothing like store-bought versions. My grandmother’s cherry jam recipe has been passed down through three generations, and today I’m sharing her closely guarded secrets that make this preserve absolutely irresistible. This isn’t just any jam; it’s a technique refined over decades that produces the perfect balance of tartness, sweetness, and texture that keeps people coming back for more.
What sets Grandma’s method apart is her understanding of fruit chemistry and timing. While most home cooks simply boil cherries with sugar and call it done, she knew the importance of maceration, proper temperature control, and knowing exactly when to stop cooking. The result is a jam that’s thick enough to spread beautifully on toast yet maintains the authentic cherry flavor without tasting overly processed. Whether you’re preserving the summer harvest or preparing gifts for the holidays, this cherry jam recipe will become your go-to formula.
Why This Cherry Jam Recipe Works
Grandma’s approach to making cherry jam differs fundamentally from conventional methods. The secret lies in understanding that jam-making isn’t just about combining fruit and sugar—it’s about respecting the fruit’s natural pectin content, managing moisture evaporation precisely, and recognizing when the preserving point has been reached. This cherry jam recipe produces a consistently perfect result because it accounts for variables that most recipes overlook.
The technique emphasizes patience. Rather than rushing the process with high heat, Grandma preferred a moderate, controlled boil that allowed the fruit’s natural flavors to concentrate without caramelizing. She also understood that the pectin in cherry skin is essential for achieving that perfect gel without adding commercial pectin. This natural approach means your jam will taste purely of cherries, sugar, and perhaps a whisper of lemon—nothing artificial, nothing overwrought.
Home cooks often struggle with jam consistency—either ending up with something too runny or, worse, a rubbery mess. This cherry jam recipe solves that problem through the wrinkle test and specific temperature monitoring, ensuring you achieve that ideal spreadable consistency every single time.
Choosing the Right Cherries
The foundation of any exceptional cherry jam recipe begins with selecting quality fruit. Grandma always insisted that you cannot make great jam from mediocre cherries, no matter how perfect your technique. She preferred tart cherries (also called sour cherries) like Montmorency or Balaton varieties because they have superior pectin content and a complexity of flavor that sweet cherries simply cannot match.
If you can only find sweet cherries at your local market, don’t despair—you can still make excellent jam, but you’ll need to adjust your approach slightly. Sweet cherries require less sugar and benefit from added lemon juice to brighten the flavor. Grandma’s rule of thumb: choose cherries that are fully ripe but still firm, with a deep color indicating maximum flavor concentration. Avoid overripe cherries that have become soft or show any signs of mold or damage.
For the best results, purchase cherries at a farmers market during peak season (typically June through August) or from a local orchard. The fresher your fruit, the better your finished jam will taste. If you’re working with frozen cherries during off-season, thaw them completely and drain excess liquid before proceeding with this cherry jam recipe.
Essential Ingredients and Equipment
For the cherry jam recipe, you’ll need:
- 4 pounds fresh tart cherries (about 8 cups), pitted
- 3 pounds granulated sugar (adjust to 2.5 pounds if using sweet cherries)
- 3 tablespoons fresh lemon juice
- 1/4 teaspoon salt
- Optional: 1/2 teaspoon vanilla extract or 1/4 teaspoon almond extract for depth
Equipment you’ll want on hand:
- Large heavy-bottomed stainless steel pot (at least 8-quart capacity)
- Wooden spoon for stirring
- Candy/jam thermometer (accurate to 220°F/104°C)
- Cherry pitter (saves enormous time and frustration)
- Fine-mesh strainer
- Sterilized glass jars with lids (pint or half-pint size)
- Canning funnel
- Clean kitchen towels
- Plate for the wrinkle test
Grandma always emphasized that investing in proper equipment makes the difference between an enjoyable experience and a frustrating one. A quality cherry pitter, in particular, transforms what could be an hour of tedious work into a manageable task.
Grandma’s Step-by-Step Technique
Now we arrive at the heart of this cherry jam recipe—the actual method that produces those perfect results. Grandma’s technique is methodical and requires attention, but it’s far from complicated. The key is understanding the why behind each step, which helps you adapt if circumstances require adjustment.
Step One: Pit Your Cherries
Begin by pitting your four pounds of cherries. If you don’t have a cherry pitter, you can use a small knife or even a clean paperclip, but honestly, a dedicated pitter is worth every penny. Place your pitted cherries in a large bowl, reserving any juice that accumulates. You should have approximately eight cups of fruit and juice combined.
Step Two: Prepare Your Mise en Place
Grandma always prepared everything before beginning—no scrambling for ingredients mid-process. Measure out your sugar, lemon juice, and salt. Have your sterilized jars ready. Set up your thermometer so it’s easily readable. This preparation prevents mistakes and keeps you focused on the jam itself.
Step Three: The Critical Maceration Phase
This step separates Grandma’s cherry jam recipe from ordinary versions. Combine your pitted cherries (with their juice), sugar, and salt in your large pot. Stir gently but thoroughly to distribute the sugar evenly. Cover the pot loosely and let it sit at room temperature for 12 to 24 hours. This maceration period allows the sugar to draw moisture from the fruit through osmosis, creating a syrup that will cook more evenly and develop deeper flavor.
The Maceration Process
Understanding maceration is crucial to mastering this cherry jam recipe. During those quiet hours when the mixture sits, something remarkable happens at the cellular level. The sugar penetrates the fruit cells, drawing out moisture and natural juices. This pre-cooking step serves multiple purposes: it helps preserve the cherry’s natural color, develops more concentrated flavor, and ensures more even cooking when you finally apply heat.
Grandma would often check on her macerating cherries, stirring gently every few hours if she was around, though she noted this wasn’t strictly necessary. After the maceration period, you’ll notice your cherries have released substantial liquid and the sugar has mostly dissolved. This is exactly what you want. The cherries will appear slightly shrunken and darker in color—this is the beginning of your jam.
If you’re in a hurry, you can reduce maceration time to 4-6 hours, though the results won’t be quite as refined. Grandma was adamant that rushing this step compromises the final product, so plan accordingly when making this cherry jam recipe.
Cooking and Temperature Control
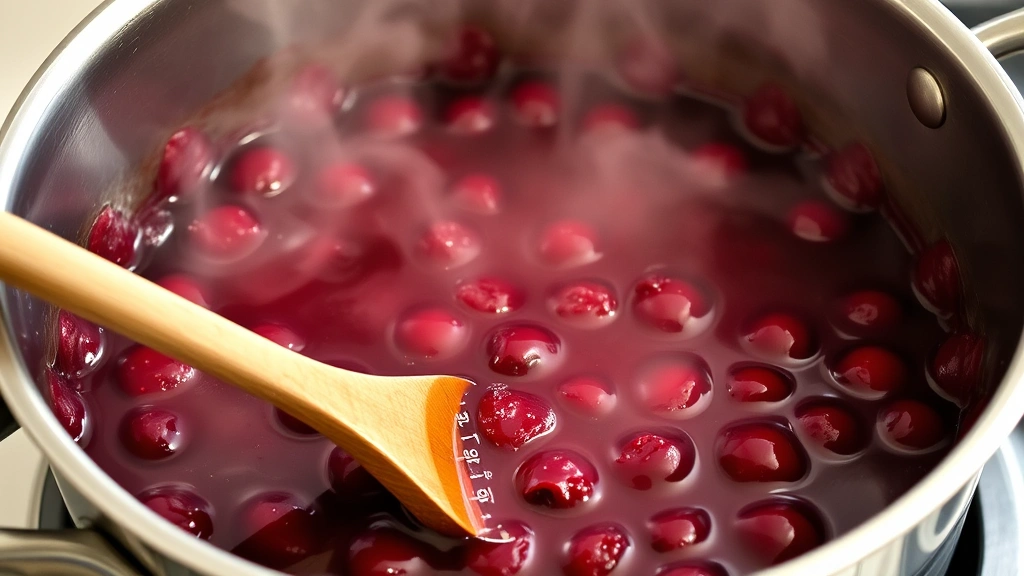
After maceration, place your pot over medium-high heat. Stir occasionally as the mixture heats, ensuring the sugar dissolves completely and nothing sticks to the bottom. Once the mixture reaches a gentle boil, add your lemon juice. This acid serves multiple purposes: it brightens the cherry flavor, aids in pectin development, and helps prevent crystallization during storage.
Now comes the part where Grandma’s technique truly shines. Rather than maintaining a vigorous rolling boil that many recipes recommend, she preferred a moderate, steady boil that she called a “soft rolling boil.” This means you should see bubbles breaking the surface consistently, but not an aggressive, violent boil. This approach requires a thermometer because you’re cooking by temperature rather than time.
Maintain your pot at this moderate temperature, stirring occasionally but not constantly. Constant stirring can break down the fruit too much and introduce excess air. Stir just enough to prevent sticking and ensure even cooking. As the jam cooks, it will gradually darken and thicken. After about 20-30 minutes, insert your thermometer. You’re aiming for 220°F (104°C), which is the gel point for jam.
This is where patience becomes your greatest asset. The journey from 180°F to 220°F might take 30-45 minutes depending on your heat source and pot size. Resist the urge to increase heat to speed things up—high heat can scorch the bottom and create an unpleasant cooked flavor. Grandma would say, “Good jam cannot be rushed,” and she was absolutely right.
Testing for Proper Set
While the thermometer is your primary guide, Grandma also relied on the wrinkle test to confirm proper set. Here’s how it works: place a small plate in your freezer about 20 minutes before you expect the jam to be done. When your thermometer approaches 220°F, drop a small spoonful of jam onto the cold plate. Let it cool for one minute, then push it gently with your finger. If the surface wrinkles and the jam doesn’t flow back together immediately, you’ve reached proper set. If it’s still too liquid, continue cooking and test again in five minutes.
This cherry jam recipe benefits from testing because individual stovetops vary significantly, and altitude affects cooking temperatures. The wrinkle test ensures you’re not relying solely on thermometer readings. Grandma discovered that her jam often reached perfect set at 219°F, not the standard 220°F, because of her elevation and specific pot. Pay attention to your own results and adjust accordingly for future batches.
One common mistake is overcooking. If your jam reaches 225°F or higher, it will set too firmly and develop a rubbery texture. If it’s undercooked at 215°F, it will be too soft. The narrow range between 218-222°F is your sweet spot for this cherry jam recipe.
Jarring and Storage
Once your jam reaches the proper set point, remove it from heat immediately. Let it cool for exactly five minutes—this brief rest allows the foam to settle and the jam to thicken slightly, making it easier to jar without air bubbles. If you prefer less foam, you can skim it off with a clean spoon, though Grandma considered this optional.
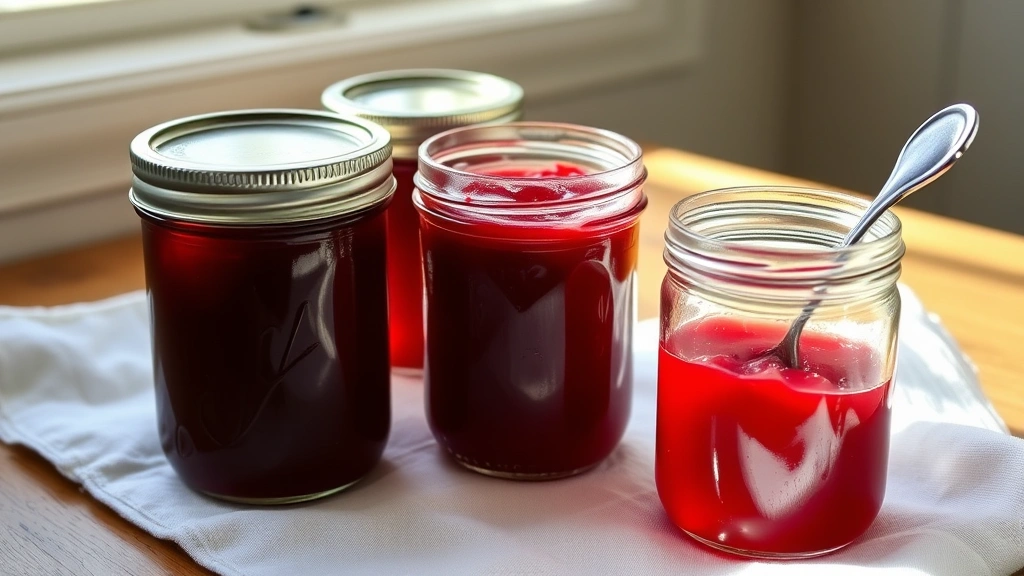
Using a canning funnel, carefully pour your hot jam into sterilized jars, leaving 1/4 inch headspace. Wipe the rim clean with a damp cloth, then apply your lids and rings. If you’re using a water bath canner for long-term storage, process the jars for 10 minutes. If you prefer the simpler method Grandma often used, simply let the jars cool to room temperature on a kitchen towel. The residual heat will create a seal.
You’ll know the jars have sealed properly when you hear the distinctive “ping” as they cool, or when you press the center of the lid and it doesn’t flex. Store your sealed jars in a cool, dark place. Properly sealed jam will keep for up to two years, though Grandma’s rarely lasted more than a few months before being enjoyed on toast, in pastries, or paired with cheeses.
This cherry jam recipe typically yields about 8-10 half-pint jars. The yield can vary slightly depending on how much liquid your cherries released during maceration and cooking.
Flavor Variations and Additions
While Grandma’s classic cherry jam recipe is perfect on its own, she wasn’t opposed to thoughtful variations. She often made a batch with a whisper of almond extract—just 1/4 teaspoon stirred in after cooking—which complemented the cherry flavor beautifully. This variation pairs wonderfully with delicate sauces for lighter dishes.
Some years, she’d add a small handful of fresh basil leaves during the maceration phase, creating an unexpected herbaceous note that elevated the jam from simple to sophisticated. For those preferring deeper complexity, a cinnamon stick during cooking adds warmth without overpowering the cherry flavor. Always remove whole spices before jarring.
If you’re interested in pairing your homemade jam with other recipes, consider serving it alongside glazed salmon dishes, as the tartness complements rich fish beautifully. It also works wonderfully as a filling for pastries or swirled into gourmet appetizers.
Grandma’s golden rule for variations: never add more than one or two additional flavors, and always add them after the jam has cooked to full set. This preserves the integrity of your cherry jam recipe while allowing creative expression.
For savory applications, you can reduce sugar slightly and add a pinch of black pepper or fresh thyme. This creates a condiment perfect for roasted fish preparations or charcuterie boards. The brightness of homemade condiments truly elevates simple dishes.
FAQ
Can I use frozen cherries for this jam recipe?
Yes, absolutely. Thaw frozen cherries completely and drain off excess liquid before beginning. You may need to slightly reduce cooking time since frozen cherries are already partially broken down. The maceration period becomes even more important with frozen fruit.
What if my jam didn’t set properly?
If your finished jam is too soft, you can re-cook it. Pour it back into your pot, add 2 tablespoons of lemon juice, and bring it back to 220°F. This cherry jam recipe can be salvaged. Alternatively, use softer jam as a sauce for desserts or swirl into yogurt.
Can I reduce the sugar in this cherry jam recipe?
You can reduce it to 2.5 pounds, but reducing further affects both set and preservation. Lower-sugar jams require refrigeration and won’t keep as long. The sugar isn’t just for sweetness—it’s essential for proper gel formation and preservation.
How long does homemade cherry jam last?
Properly sealed jam keeps for 2 years in a cool, dark pantry. Once opened, refrigerate and use within 3-4 weeks. Always use clean utensils when removing jam from the jar to prevent contamination.
Is this cherry jam recipe safe for canning?
Yes. The high sugar content and acid from lemon juice make this jam safe. If you’re water bath canning, process for 10 minutes at sea level (adjust for altitude). However, many home cooks safely use the passive cooling method Grandma preferred without additional processing.
What’s the difference between jam and jelly?
This cherry jam recipe produces jam because it contains whole fruit pieces. Jelly would be made from strained juice. Grandma preferred jam because it retained more of the fruit’s texture and nutritional value.
Can I make this recipe in smaller batches?
Yes, you can halve the recipe, but use the same thermometer method for accuracy. Smaller batches cook faster, so watch carefully as you approach 220°F. The maceration period remains the same regardless of batch size.


