Cloud Slime Recipe: Tried and True Method
Cloud slime has become a beloved sensory creation that combines the satisfying texture of fluffy slime with the visual appeal of edible clouds. Whether you’re looking for a fun kitchen project with kids or a unique dessert-inspired craft, this cloud slime recipe delivers impressive results every time. Unlike traditional slime recipes, cloud slime offers a lighter, fluffier consistency that feels almost cloud-like in your hands—hence the name.
This tried and true method has been tested and refined by slime enthusiasts and food craft creators worldwide. The beauty of making cloud slime at home is that you likely already have most ingredients in your kitchen pantry. With just a few key components and about fifteen minutes of preparation time, you’ll create a sensory experience that’s both visually stunning and delightfully tactile.
What Is Cloud Slime?
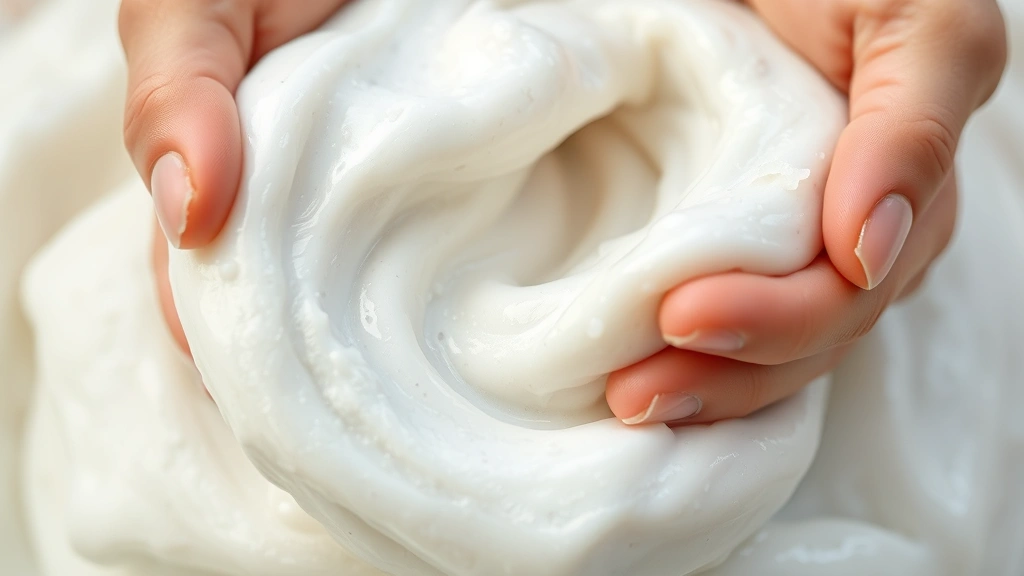
Cloud slime represents a unique category of slime that prioritizes texture and fluffiness over the stretchy, elastic qualities of traditional slime. The characteristic fluffy texture comes from the incorporation of shaving cream or foam-based products that create thousands of tiny air pockets throughout the mixture. When you hold cloud slime, it feels light, airy, and almost like holding a sweet, squishy cloud in your hands.
The appeal of cloud slime extends beyond just the tactile experience. Many people enjoy the visual transformation as you mix ingredients together, watching a liquid consistency gradually transform into a fluffy, cloud-like substance. This makes it perfect for sensory play, stress relief, or simply as a fun kitchen experiment. The cloud slime recipe we’re sharing has been perfected through countless batches and tweaks, ensuring consistent, satisfying results.
Cloud slime differs significantly from other slime varieties because it doesn’t require borax or contact lens solution activators that some traditional slime recipes demand. This makes it safer for younger children and easier to clean up when the play session ends. The ingredient list remains simple and kitchen-friendly, which is why this method has become so popular among families and craft enthusiasts.
Essential Ingredients You’ll Need
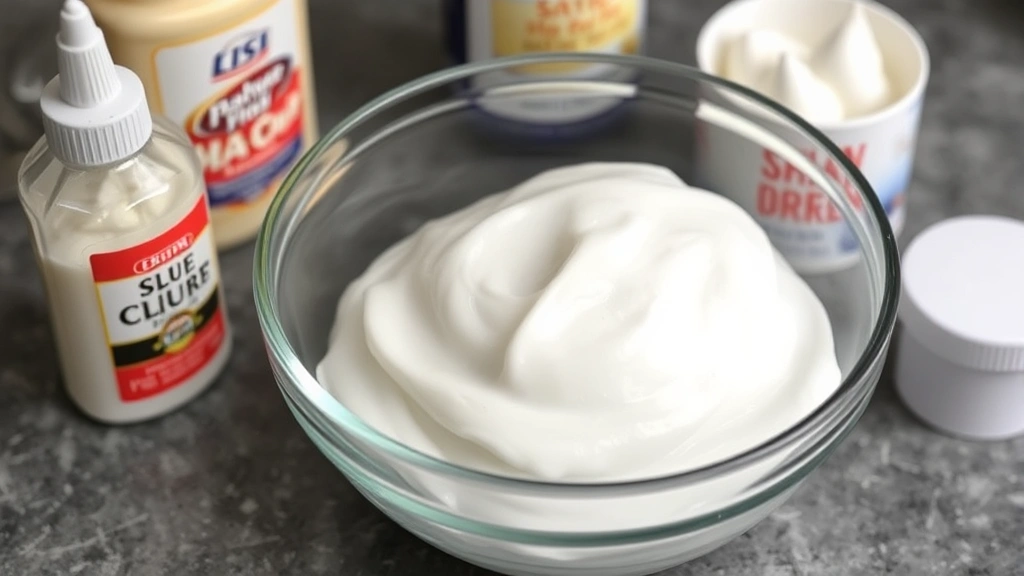
Before you begin making your cloud slime, gather these essential ingredients. Most of these items are pantry staples or common household products:
- White school glue (approximately 4-6 ounces)—This serves as your slime base and provides the sticky foundation
- Shaving cream (1-2 cups)—The key ingredient that creates the fluffy, cloud-like texture
- Liquid starch or borax solution (2-4 tablespoons)—This activates the slime and creates the proper consistency
- Food coloring (optional, 2-3 drops)—Add vibrant colors to your creation
- Vanilla extract or essential oils (optional, a few drops)—Enhance the sensory experience with pleasant scents
- Glitter or foam beads (optional)—Add sparkle and texture variation
- Mixing bowl—Use a medium-sized bowl for easy mixing
- Spoon or spatula—For stirring and folding ingredients together
The quality of your ingredients matters, particularly the shaving cream and glue. Opt for name-brand white school glue rather than generic versions, as they tend to produce more consistent results. For shaving cream, regular foam varieties work best—avoid gel-based shaving products as they won’t create the same fluffy texture.
Step-by-Step Instructions
Follow these detailed steps to create your perfect batch of cloud slime:
- Prepare your workspace—Lay down newspaper or a plastic tablecloth to protect your work surface. Have all ingredients measured and within arm’s reach before you begin mixing.
- Pour the glue into your mixing bowl—Squeeze approximately 4-6 ounces of white school glue into your medium-sized mixing bowl. This amount typically creates enough slime for one person to enjoy for an extended play session.
- Add your shaving cream—Generously spray shaving cream into the bowl with the glue. Start with about one cup and add more if you want a fluffier final product. The more shaving cream you add, the lighter and airier your slime becomes.
- Incorporate food coloring (if desired)—Add 2-3 drops of food coloring to your mixture. Stir thoroughly to distribute the color evenly throughout. If you want a deeper shade, add another drop or two, but remember that a little goes a long way.
- Add scent enhancement (optional)—Squeeze in a few drops of vanilla extract or your favorite essential oil. This step is entirely optional but adds a delightful sensory dimension to your creation.
- Stir ingredients together—Mix the glue, shaving cream, coloring, and any additives using a spoon or spatula. Stir until the mixture becomes relatively uniform in color and consistency. This should take about 2-3 minutes of steady stirring.
- Add the activator slowly—Pour liquid starch into the mixture while continuing to stir. Add it gradually—about half a tablespoon at a time—rather than dumping it all in at once. The mixture will begin to thicken and transform before your eyes.
- Transition to hand mixing—As the mixture becomes thicker and more slime-like, switch from using a utensil to using your hands. Knead and fold the slime in the bowl, continuing to incorporate the activator until you reach your desired consistency.
- Knead until perfect—Continue kneading for another 2-3 minutes until the slime reaches a fluffy, cloud-like consistency. It should feel light and squishy, not sticky or overly stiff.
- Add final touches—If desired, fold in glitter, foam beads, or other decorative elements during the final kneading phase. These additions create visual interest and add textural variety to your finished product.
The entire process typically takes 10-15 minutes from start to finish. The transformation from separate ingredients to cohesive, fluffy slime is genuinely satisfying to witness and experience.
Pro Tips for Perfect Results
Experienced slime makers have discovered several techniques that consistently produce exceptional cloud slime. Implementing these pro tips will elevate your results:
- Use warm water if needed—If your mixture seems too stiff, slightly warm hands help make kneading easier. Never add water directly to the slime, as this creates a sticky mess.
- Don’t rush the activator—Adding activator too quickly results in slime that’s too firm and loses its fluffy quality. Patience is essential for achieving that perfect cloud-like texture.
- Fold rather than stretch—Cloud slime benefits from folding motions rather than the stretching technique used with traditional slime. Fold the mixture over itself repeatedly to maintain airiness.
- Room temperature matters—Work in a space that’s neither too hot nor too cold. Extreme temperatures affect how the ingredients interact and can compromise your final product.
- Invest in quality shaving cream—The type and brand of shaving cream significantly impacts your results. Experiment with different brands to find your favorite.
- Mix your colors first—Add food coloring to the glue before incorporating the shaving cream. This ensures even color distribution throughout your slime.
- Keep your hands slightly moist—Slightly damp (not wet) hands prevent the slime from sticking excessively while you’re kneading. A quick rinse under cool water does the trick.
Troubleshooting Common Issues
Even with careful attention, sometimes cloud slime doesn’t turn out perfectly on the first attempt. Here are solutions to common problems:
Slime is too sticky: You haven’t added enough activator. Continue adding liquid starch in small increments while kneading until the desired consistency develops. Remember that the slime will firm up slightly as you continue working it.
Slime is too stiff: You’ve added too much activator or used an overly concentrated formula. While you can’t reverse this completely, adding a small amount of glue and re-kneading can help restore some elasticity. For your next batch, reduce the activator amount by about 25%.
Slime lost its fluffiness: Over-kneading or using too little shaving cream causes this issue. When making your next batch, reduce kneading time and increase the shaving cream proportion. You can also try storing your slime in an airtight container, which helps preserve fluffiness.
Color isn’t even: Ensure you’re mixing the food coloring thoroughly into the glue before adding shaving cream. If uneven coloring persists, knead the slime longer to distribute pigment evenly throughout.
Slime smells unpleasant: This usually indicates the activator has begun to break down. Store your slime in an airtight container and refresh it with a drop or two of essential oil if desired.
Creative Variations and Flavors
Once you’ve mastered the basic cloud slime recipe, explore these creative variations to keep your slime-making adventures fresh and exciting:
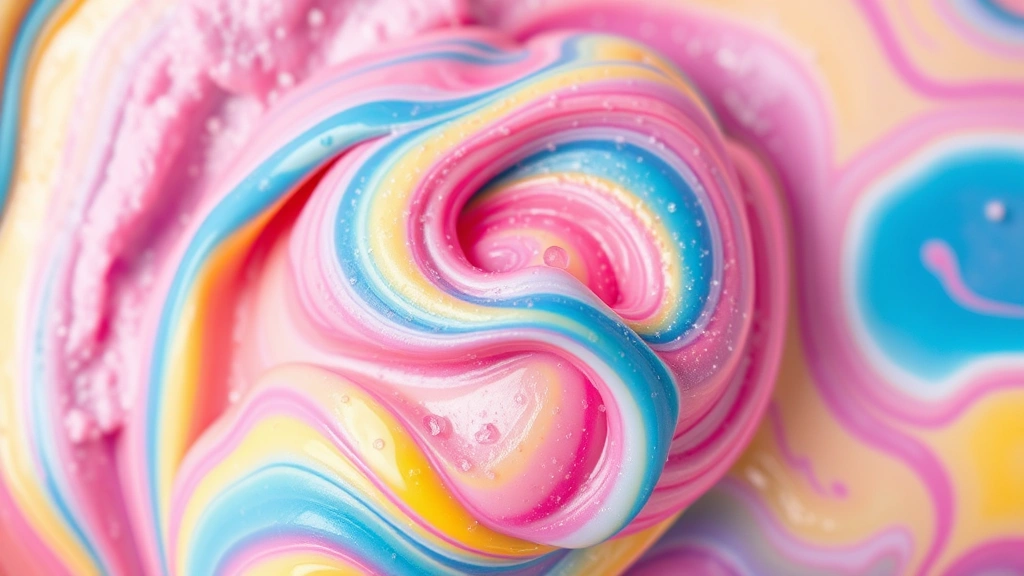
Rainbow Cloud Slime: Divide your base mixture into several bowls and color each batch differently. Layer the different colors together before the final kneading phase to create a beautiful rainbow effect.
Scented Varieties: Beyond vanilla, try almond extract, peppermint oil, lemon essential oil, or lavender oil. Each scent creates a unique sensory experience. You might also enjoy making healthy dessert recipes that complement your slime’s scent profile.
Metallic and Shimmer Versions: Add mica powder or liquid metallic food coloring to create shimmering cloud slime that catches the light beautifully.
Texture-Enhanced Slime: Mix in foam beads, glitter, or even edible pearl dust for varied tactile experiences. These additions work particularly well if you’re creating slime as a sensory tool.
Themed Batches: Create seasonal versions—pastels in spring, bright colors in summer, earth tones in fall, and cool blues and silvers in winter. This approach keeps your slime-making aligned with seasonal activities.
If you enjoy sensory play and tactile experiences, you might also appreciate making banana smoothie recipes or breakfast quiche recipes that offer different textures and sensations.
Storage and Shelf Life
Proper storage significantly extends the life and quality of your cloud slime. Here’s what you need to know:
Container Selection: Store your slime in an airtight container, such as a plastic storage tub with a secure lid or a resealable plastic bag. Airtight storage prevents the slime from drying out and maintains its fluffy texture.
Storage Location: Keep slime in a cool, dry place away from direct sunlight. Avoid storing it near heating vents, air conditioning units, or windows where temperature fluctuations occur.
Shelf Life: Properly stored cloud slime typically lasts 2-4 weeks before it begins to break down. The exact duration depends on the specific ingredients you used and environmental conditions.
Signs of Deterioration: If your slime develops an unpleasant odor, becomes excessively sticky, or develops mold, it’s time to discard it and make a fresh batch.
Refreshing Old Slime: If your slime has lost some of its appeal but isn’t yet expired, try adding a few drops of essential oil or kneading it with fresh glue and shaving cream to revitalize it.
For those interested in kitchen chemistry and sensory experiences, exploring gluten free dairy free recipes offers another avenue for understanding ingredient interactions and texture development. You might also enjoy protein powder recipes that involve similar mixing and texture-creation techniques.
FAQ
Is cloud slime safe for children?
Cloud slime made with the ingredients in this recipe is generally safe for children when used under adult supervision. However, avoid allowing young children to ingest the slime. If anyone has sensitive skin, apply lotion beforehand or wear gloves while playing. Always wash hands after play sessions.
Can I make cloud slime without liquid starch?
Yes, you can use borax solution as an alternative activator. Mix one teaspoon of borax with one cup of warm water, then use this solution instead of liquid starch. Add it gradually to your slime mixture the same way you would with liquid starch. Some people also report success with contact lens solution containing boric acid, though results vary.
Why is my cloud slime not fluffy?
The most common reason is insufficient shaving cream in the original mixture. Ensure you’re using at least one full cup of shaving cream. Additionally, over-kneading can compress the air bubbles that create fluffiness. Try reducing kneading time on your next batch.
Can I use gel food coloring instead of liquid?
Liquid food coloring works best because it distributes evenly without adding excess moisture. Gel coloring can work but requires thorough mixing and may slightly alter the slime’s consistency. Start with a small amount and adjust as needed.
How long can I play with cloud slime?
Cloud slime remains enjoyable for extended play sessions—typically 30 minutes to an hour per sitting. If the slime begins to feel sticky or loses its fluffiness during play, return it to its storage container to rest for a few hours.
Is this cloud slime recipe edible?
While the ingredients are non-toxic, cloud slime is not intended for consumption. The activators and additives make it unsuitable for eating. This is a craft project rather than an edible creation. If you’re interested in creating edible sensory experiences, try healthy granola recipes that offer interesting textures.
Can I make cloud slime without glue?
Glue is essential for creating cloud slime’s characteristic texture. Without it, you won’t achieve the desired consistency or fluffy quality. Glue provides the base that combines with shaving cream and the activator to create proper cloud slime.
What’s the best age to make cloud slime?
Children as young as five or six can participate in cloud slime making with close adult supervision. Older children and teenagers can create it independently. The activity teaches basic chemistry concepts while providing sensory engagement and creative expression.
Why does my cloud slime smell bad?
Unpleasant odors typically develop as the slime ages or when activators begin breaking down. Store your slime in airtight containers and replace batches every 2-4 weeks. Adding a few drops of essential oil can temporarily improve the scent.
Can I add candy or food items to cloud slime?
While you could technically add items like sprinkles or edible glitter, it’s not recommended since cloud slime isn’t food-safe. The risk of accidental ingestion makes it safer to stick with non-food decorative items like regular glitter and foam beads.


