
Easy Fudge Recipe: Grandma’s Secret to Homemade Chocolate Bliss
There’s something magical about biting into a piece of homemade fudge that melts on your tongue with rich, velvety chocolate goodness. My grandmother’s easy fudge recipe has been passed down through our family for decades, and today, I’m sharing her closely guarded secret with you. This isn’t complicated candy-making—it’s straightforward, foolproof, and absolutely delicious. Whether you’re a seasoned baker or someone who’s never made candy before, this recipe will have you creating restaurant-quality fudge in your own kitchen within minutes.
What makes this fudge recipe so special isn’t just the ingredients (though quality matters), but the technique. Grandma always said the secret to perfect fudge lies in patience, proper temperature control, and knowing exactly when to stop beating the mixture. Over the years, I’ve refined her method slightly, but the soul of the recipe remains unchanged. The result is fudge so smooth, so creamy, and so chocolatey that your family will wonder where you ordered it from.
Why Make Homemade Fudge Instead of Buying Store-Bought
Making fudge at home offers several compelling advantages over purchasing it from a store. First, you control every single ingredient that goes into your candy. Store-bought fudge often contains preservatives, additives, and artificial flavors that can detract from the pure chocolate experience. When you make it yourself, you can choose premium cocoa powder, real butter, and quality chocolate without any fillers or unnecessary chemicals.
Second, homemade fudge is significantly more economical. A batch of this easy fudge recipe costs just a few dollars to produce but yields enough pieces to cost only pennies per serving compared to expensive specialty candy shops. Third, there’s an undeniable satisfaction in creating something delicious from scratch. The aroma alone—rich chocolate mingling with butter and vanilla—will fill your kitchen with warmth and comfort.
Additionally, making fudge allows you to customize the recipe to your preferences. Prefer dark chocolate? Use a higher percentage cocoa powder. Want extra nuttiness? Add your favorite nuts. This flexibility means you can create personalized gifts that store-bought options simply cannot match. If you enjoy other homemade creations, you’ll appreciate the rewarding nature of candy-making.
Ingredients and Essential Tools
For the Fudge:
- 2 cups granulated sugar
- ¾ cup unsweetened cocoa powder (high-quality Dutch-processed if possible)
- ½ teaspoon salt
- 1 cup whole milk or evaporated milk
- 4 tablespoons unsalted butter
- 1 teaspoon vanilla extract
- Optional: ½ cup chopped nuts (walnuts, pecans, or almonds)
Essential Tools:
- Heavy-bottomed saucepan (2-3 quart capacity)
- Candy or instant-read thermometer (crucial for success)
- Wooden spoon for stirring
- 8×8 inch baking pan or similar
- Parchment paper or butter for greasing
- Mixer or hand mixer (optional but helpful)
The thermometer is non-negotiable for this recipe. Grandma used to rely on the cold-water test, and while that works, a thermometer removes all guesswork. It’s an inexpensive investment that guarantees success every single time you make fudge. Make sure it reads accurately by testing it in boiling water first.
Step-by-Step Instructions for Perfect Fudge
Step 1: Prepare Your Pan
Line your 8×8 inch baking pan with parchment paper, allowing some overhang on the sides for easy removal later. If you prefer, you can butter the pan thoroughly instead. This step prevents sticking and makes cutting your fudge into perfect squares much easier. Set the prepared pan aside at room temperature—you don’t need to refrigerate it yet.
Step 2: Combine Dry Ingredients
In your heavy-bottomed saucepan, whisk together the sugar, cocoa powder, and salt. Make sure the cocoa powder is completely broken up and evenly distributed throughout the sugar. This prevents lumps from forming in your final fudge. Whisk for about one minute, ensuring a uniform mixture. High-quality Dutch-processed cocoa powder will give you a deeper, more sophisticated chocolate flavor than natural cocoa.
Step 3: Add Milk and Begin Heating
Pour the milk into your dry mixture slowly while stirring constantly with a wooden spoon. This prevents lumps from forming. Once all the milk is incorporated, place the saucepan over medium heat. Stir frequently as the mixture heats, ensuring the sugar dissolves completely. You should see steam rising from the pan after about 3-4 minutes.
Step 4: Monitor Temperature Carefully
Insert your candy thermometer into the mixture, making sure it doesn’t touch the bottom of the pan. Continue stirring occasionally as the temperature rises. The mixture will bubble gently as it cooks. You’re aiming for the soft-ball stage, which registers between 234°F and 240°F on your thermometer. This typically takes 15-20 minutes depending on your stove’s heat output. Do not leave the pan unattended—candy-making requires attention.
Step 5: Remove from Heat and Cool Slightly
Once your mixture reaches 238°F (right in the middle of the soft-ball range), remove the saucepan from heat immediately. Do not stir at this point. Let the mixture cool to approximately 110°F, which will take about 15-20 minutes. You can speed this process slightly by placing the saucepan in a larger bowl filled with cool water, but don’t rush it. This cooling phase is crucial—it allows the sugar crystals to form properly, creating that signature creamy fudge texture.
Step 6: Add Butter and Vanilla
Once the mixture has cooled to around 110°F, add the butter and vanilla extract. Don’t stir yet—just let them sit on top of the warm mixture for about one minute. This allows them to soften slightly. Then, using a wooden spoon or electric mixer on low speed, begin beating the mixture vigorously. This is where the magic happens.
Step 7: Beat Until Fudge Forms
Beat the mixture for 3-5 minutes if using an electric mixer, or 5-8 minutes by hand. You’ll notice the mixture’s color changing from glossy to matte as you beat. The consistency will thicken, and the mixture will become harder to stir. When the fudge reaches the proper consistency, it should look slightly grainy and hold peaks when you lift the spoon. This is the critical moment—stop beating as soon as it reaches this stage. Over-beating creates grainy, unpleasant fudge; under-beating results in soft, sticky fudge.
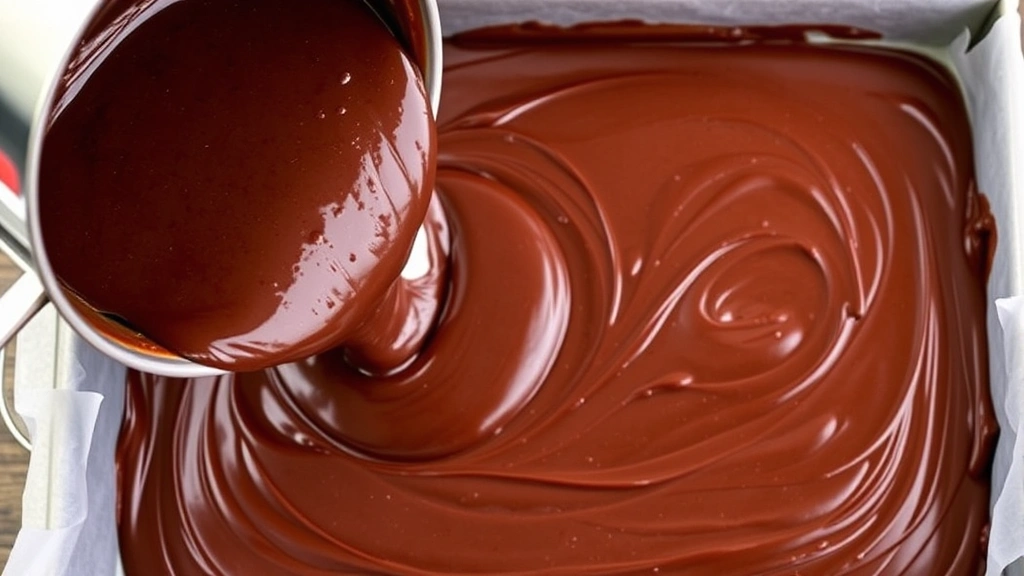
Step 8: Pour and Set
Working quickly, pour the fudge mixture into your prepared pan, spreading it evenly with a spatula. If you’re adding nuts, fold them in during the beating stage rather than after pouring. Let the fudge sit at room temperature for at least 4 hours, or preferably overnight, until it’s completely set and firm. You can speed this process by refrigerating for 2-3 hours, but room temperature setting often produces superior texture.
Troubleshooting Common Fudge Problems
Grainy or Crystalline Texture
If your fudge turned out grainy, you likely beat it too long or at too high a temperature. The sugar crystals grew too large during beating. For your next batch, stop beating as soon as the mixture thickens and becomes slightly matte. Additionally, ensure your thermometer reading was accurate—temperatures above 240°F can cause graininess.
Fudge Too Soft or Won’t Set
Soft fudge indicates you didn’t reach a high enough temperature during cooking. Next time, ensure your thermometer reaches 238°F before removing from heat. If your fudge is too soft even after setting overnight, you can remelt it, recook to the proper temperature, and try again. This is one of the wonderful things about fudge—failures are usually salvageable.
Fudge Too Hard or Crumbly
Hard, crumbly fudge means the mixture cooked to too high a temperature, entering the hard-ball stage (250°F+) instead of soft-ball. Use your thermometer religiously, and remove the pan from heat the moment it reaches 238°F. There’s no salvaging overly hard fudge, so precision is essential.
Separation or Oily Appearance
If your fudge looks oily or separated, the cocoa butter separated from the sugar mixture. This usually happens when the mixture is beaten at the wrong temperature or when inferior cocoa powder is used. Ensure you’re using quality cocoa powder and that your mixture has cooled to approximately 110°F before beating.
Creative Variations on Grandma’s Easy Fudge Recipe
Peanut Butter Fudge
Add ½ cup creamy peanut butter during Step 6, mixing it in thoroughly before beating. This creates a wonderful marbled effect and adds protein to your treat. Peanut butter and chocolate is a timeless combination that elevates this easy fudge recipe into something special.
Espresso-Chocolate Fudge
Dissolve 1 tablespoon instant espresso powder in the milk before adding it to the dry ingredients. This deepens the chocolate flavor and adds a subtle coffee note that sophisticated palates will appreciate. It’s perfect for after-dinner treats.
Mint Chocolate Fudge
Replace vanilla extract with ½ teaspoon peppermint extract in Step 6. For extra intensity, add ¼ teaspoon additional peppermint extract. Some people like to dip finished pieces in white chocolate infused with peppermint for an elegant presentation.
Salted Caramel Fudge
Make a batch of salted caramel separately, then swirl it into the fudge after pouring into the pan. Use a toothpick to create marbling patterns. The sweet caramel against rich chocolate creates a flavor profile that’s absolutely irresistible. If you enjoy making other homemade confections, you might also appreciate learning ways to minimize waste in your kitchen projects.
White Chocolate Fudge
Substitute white chocolate for cocoa powder and reduce sugar to 1½ cups. White chocolate fudge is sweeter and creamier, perfect for those who prefer milder chocolate flavors. This variation pairs beautifully with raspberry or lemon flavoring.
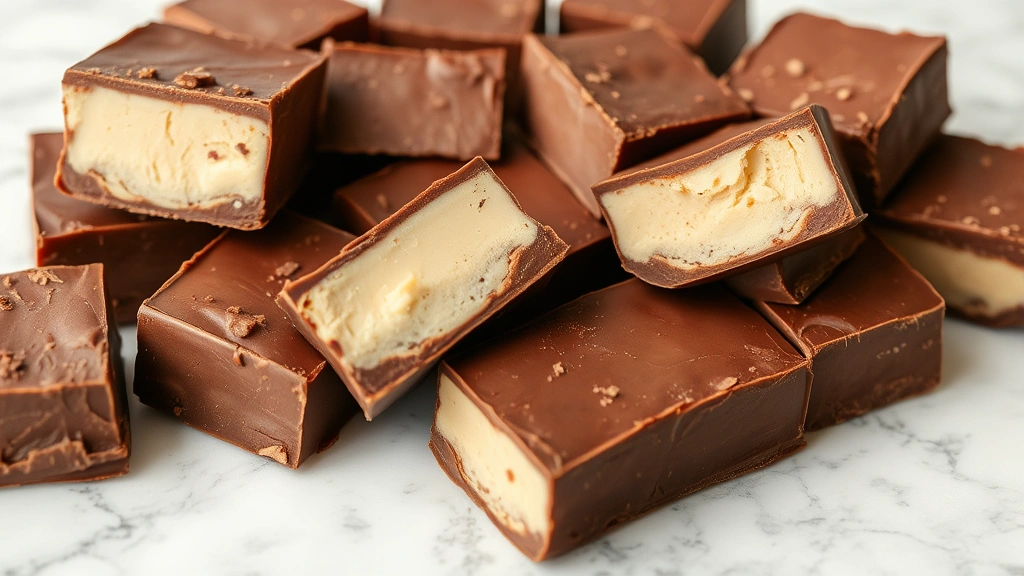
Proper Storage and Shelf Life
Once your fudge has completely set, cut it into approximately 1-inch squares using a sharp knife dipped in hot water (the heat prevents sticking). Store your fudge in an airtight container at room temperature for up to two weeks. Layer pieces with parchment paper to prevent sticking.
For longer storage, refrigerate fudge in an airtight container for up to one month, or freeze for up to three months. When removing from refrigeration or freezer, allow fudge to come to room temperature before opening the container to prevent condensation. Properly stored fudge actually improves slightly over a few days as flavors meld together.
Fudge makes an exceptional gift when wrapped in decorative paper or placed in a charming box. Homemade fudge gifts are far more impressive than store-bought alternatives and cost a fraction of the price. Consider making flavored variations for different recipients—you’re giving something truly personal and delicious.
Serving Suggestions and Pairing Ideas
Serve fudge at room temperature for the best texture and flavor. Cold fudge from the refrigerator will be harder and won’t melt as pleasantly on your tongue. If you’ve refrigerated your fudge, remove pieces 10-15 minutes before serving.
Pair fudge with coffee, hot chocolate, or tea for an elegant afternoon treat. The rich chocolate complements these beverages beautifully. For wine pairings, try a ruby port, dessert wine, or even a bold red wine—the tannins cut through the sweetness wonderfully.
Crumble fudge pieces over vanilla ice cream for an instant sundae, or incorporate small pieces into brownie batter before baking. Fudge pairs wonderfully with nuts, dried fruit, and other chocolates. If you’re hosting a dinner party, consider serving fudge alongside other homemade treats for an impressive dessert spread.
For breakfast enthusiasts, fudge makes a decadent addition to coffee time. Pair a piece with quick breakfast recipes for a sweet start to your day, though moderation is advised given the richness of this treat.
Frequently Asked Questions About Homemade Fudge
Can I use sweetened cocoa powder instead of unsweetened?
No, sweetened cocoa powder will make your fudge excessively sweet and throw off the recipe’s balance. Unsweetened cocoa powder is essential. Dutch-processed cocoa powder is preferred for its deeper flavor and smoother texture, but regular unsweetened cocoa powder works acceptably.
What if I don’t have a candy thermometer?
While possible, I strongly recommend investing in a thermometer—they cost under $10 and guarantee success. If you must use the cold-water test, drop a small amount of hot fudge mixture into cold water. It should form a soft ball that flattens slightly when removed from water. This requires practice and is less reliable than a thermometer.
Can I use margarine instead of butter?
Butter is preferable for superior flavor and texture. Margarine contains water content that can interfere with proper fudge formation. If you must use margarine, use only the stick variety, never the tub.
Why did my fudge separate into layers?
Layering typically indicates temperature inconsistency during cooking or beating. Ensure your thermometer is accurate and that you’re beating at the proper temperature (around 110°F). Stir more frequently during the cooking phase to ensure even heating.
Can I make this recipe in larger batches?
Yes, you can double or even triple this recipe, but use a larger saucepan and monitor temperature carefully. Larger batches take longer to cool, which can affect texture. Ensure your thermometer can accommodate the larger volume without touching the pan bottom.
Is this fudge recipe vegan-friendly?
This traditional recipe contains butter and milk, making it unsuitable for vegans. However, you can create a vegan version by substituting vegan butter and coconut milk or almond milk. The texture may differ slightly, but results are generally satisfactory.
What external resources help with candy-making techniques?
The King Arthur Baking Company offers excellent candy-making guides and ingredient information. Serious Eats provides scientifically-backed baking and candy articles. The International Association of Culinary Professionals maintains resources for home cooks seeking to improve their techniques. For ingredient sourcing, The Spruce Eats offers comprehensive ingredient guides and substitution advice.
How do I know when fudge has reached the soft-ball stage?
Soft-ball stage occurs between 234°F and 240°F on your thermometer. At this temperature, the sugar mixture has concentrated enough to form candy but not so much that it becomes hard or brittle. This precise range is why a thermometer is invaluable.
Can I add alcohol to fudge?
Yes, alcohol can be substituted for vanilla extract or added in addition to it. Bourbon, rum, or Irish cream liqueur work beautifully. Use the same quantity as vanilla extract, understanding that some alcohol will evaporate during cooking but some will remain.
Grandma’s easy fudge recipe represents decades of kitchen experience condensed into a simple, reliable method. Whether you’re making fudge for the first time or you’re a seasoned candy maker, this recipe delivers consistent, delicious results. The key is following the temperature guidelines precisely, beating the mixture at the right moment, and respecting the process. Your family will wonder where you learned to make such incredible candy—and now you can share Grandma’s secret with them too.


