Oven Brisket Perfection: BBQ Champ Tips for Tender, Juicy Results
Mastering brisket recipe oven techniques transforms this challenging cut into restaurant-quality perfection without needing a smoker or outdoor grill. Professional barbecue champions know that low-and-slow cooking in your home oven yields incredibly tender, flavorful results that rival traditional pit methods. Whether you’re preparing for a special dinner or hosting a backyard gathering, understanding the science and technique behind oven brisket cooking elevates your culinary skills and impresses every guest at your table.
The beauty of cooking brisket in your oven lies in precise temperature control and consistent heat circulation. Unlike outdoor smoking, which depends on weather conditions and constant monitoring, oven cooking provides reliability and reproducibility. This comprehensive guide reveals insider secrets from barbecue competition winners, detailed step-by-step instructions, troubleshooting advice, and professional techniques that guarantee succulent results every single time you prepare this magnificent cut of beef.
Understanding Brisket Cuts and Selection
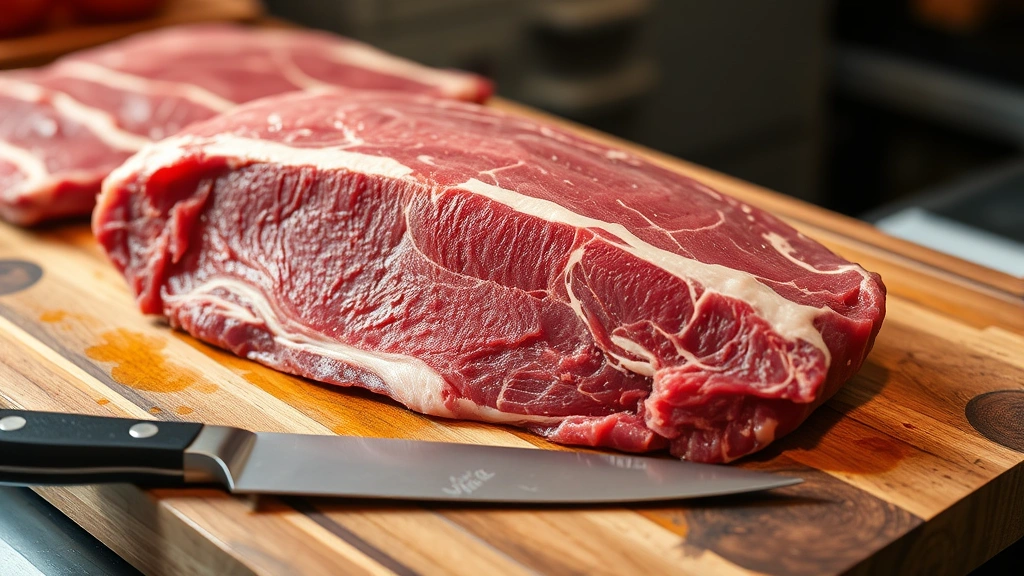
Successful oven brisket cooking begins at the butcher counter with selecting the right cut. The whole packer brisket consists of two distinct muscles: the flat and the point. The flat is leaner with consistent thickness, making it ideal for slicing, while the point contains more marbling and fat, perfect for shredding or cubing. Competition pitmasters often prefer whole packer briskets weighing 12 to 16 pounds because they cook more evenly and retain moisture better than smaller cuts.
When examining brisket at your butcher, look for vibrant red color with white fat marbling throughout the meat. Avoid cuts with excessive browning or dark spots, which indicate older meat. Ask your butcher to leave approximately one-quarter inch of fat cap on the surface—this protective layer bastes the meat during cooking and prevents drying. The fat renders slowly, infusing the meat with incredible flavor and keeping it moist through the extended cooking process.
Quality matters significantly when investing time in a long cook. Source your brisket from a reputable butcher who understands quality beef grading. Prime grade beef contains superior marbling compared to Choice grade, though Choice remains an excellent and more economical option. Visit Serious Eats for detailed beef grading information and sourcing recommendations.
Essential Preparation and Trimming
Proper preparation dramatically impacts final results when cooking brisket in the oven. Begin by removing the brisket from refrigeration 30 to 45 minutes before cooking to allow the meat to reach room temperature. This ensures even cooking throughout the thick muscle. While the meat rests on the counter, trim excess fat using a sharp boning knife, leaving that protective quarter-inch cap intact. Remove any hard, waxy fat deposits and silverskin (the tough connective tissue) from the underside.
Pat the brisket completely dry using paper towels—moisture on the surface prevents proper browning and smoke ring formation. Some competition cooks use a thin coating of yellow mustard as a binder before applying dry rubs; the mustard dissolves during cooking but helps seasonings adhere to the meat. This is a secret technique used by championship teams that shouldn’t be overlooked.
Position your oven rack in the lower third of your oven to ensure even heat distribution around the entire brisket. Place a heavy-bottomed roasting pan with a fitted lid on the rack and preheat your oven to 225°F to 250°F. A reliable oven thermometer is essential—many home ovens run 25 to 50 degrees off from their display temperature, which ruins brisket texture if not accounted for.
Creating Championship Dry Rubs
The dry rub is your foundation for incredible flavor development. Championship barbecue competitors use carefully balanced spice combinations that complement beef’s natural richness without overpowering it. A classic competition rub combines kosher salt, coarse black pepper, paprika, garlic powder, onion powder, brown sugar, and cayenne pepper in specific proportions that create complexity and depth.
Here’s a proven champion-level dry rub recipe that delivers exceptional results:
- Kosher salt: 3 tablespoons (the base that seasons throughout)
- Coarse black pepper: 2 tablespoons (provides bite and complexity)
- Paprika: 2 tablespoons (adds color and subtle sweetness)
- Garlic powder: 1 tablespoon (concentrated garlic flavor)
- Onion powder: 1 tablespoon (aromatic sweetness)
- Brown sugar: 1 tablespoon (caramelizes and enhances crust)
- Cayenne pepper: ½ teaspoon (adds heat and complexity)
- Smoked paprika: 1 tablespoon (mimics smoky flavor from outdoor cooking)
Mix all ingredients in a small bowl and apply generously to all surfaces of the brisket, rubbing the mixture into the meat. Use approximately 2 to 3 tablespoons of rub per pound of meat. Some pitmasters apply the rub the night before, allowing flavors to penetrate the muscle fiber. Others prefer applying rub 30 minutes before cooking for a fresher spice profile. Both methods work—choose based on your preference and schedule.
For those interested in quick and easy recipes, consider preparing your dry rub in advance and storing it in an airtight container for future brisket cooks. This saves preparation time and ensures consistency across multiple cooks.
Low and Slow Oven Cooking Method
Place your seasoned brisket fat-side up in the preheated roasting pan. Add approximately one cup of beef broth or water to the pan bottom—this creates steam that keeps the meat moist and tender. Some cooks add sliced onions, garlic cloves, and fresh herbs like rosemary and thyme to the liquid for additional flavor development. Cover the pan tightly with aluminum foil or a fitted lid and place it in your preheated 225°F to 250°F oven.
The cooking time depends on brisket weight and thickness, but expect approximately 1 to 1.5 hours per pound at 225°F. A 14-pound brisket typically requires 14 to 21 hours of cooking time. This seems extensive, but the low temperature allows collagen and connective tissue to break down slowly into gelatin, creating the tender, melt-in-your-mouth texture that defines championship brisket.
After the first four to five hours, resist the urge to open the oven door frequently. Each time you open it, you release heat and extend cooking time. If you must check progress, do so quickly and only once every couple of hours. The brisket doesn’t need turning or basting—the enclosed environment keeps it moist and cooks it evenly from all sides.
Monitor the internal temperature using a reliable meat thermometer. Insert the probe into the thickest part of the flat muscle, avoiding fat deposits. The brisket is tender when the internal temperature reaches 190°F to 205°F. This temperature range indicates complete collagen conversion and optimal tenderness. Some pitmasters prefer 203°F for maximum tenderness, while others stop at 195°F for slightly firmer texture that slices cleanly.
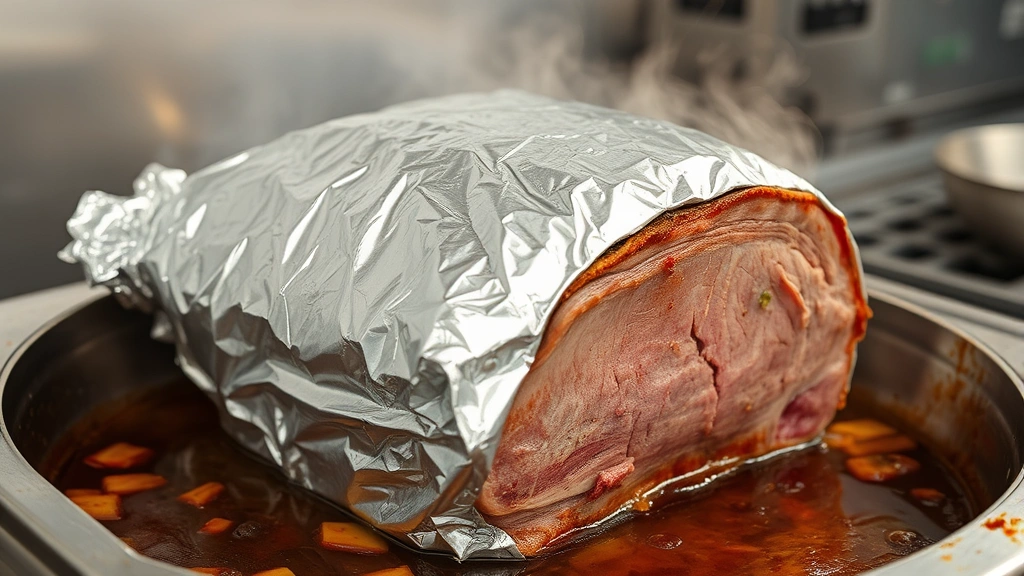
The Texas Crutch Wrapping Technique
Around the 8 to 10-hour mark, when the brisket’s internal temperature reaches approximately 165°F to 170°F, many championship cooks employ the “Texas Crutch” wrapping technique. This method involves removing the brisket from the roasting pan and wrapping it tightly in heavy-duty aluminum foil along with a small amount of liquid—typically apple juice, beef broth, or butter mixed with brown sugar.
The wrapping serves multiple purposes: it accelerates cooking during the final hours (sometimes called “the stall” when temperature plateaus around 150°F to 170°F), it traps steam that further tenderizes the meat, and it prevents the exterior from drying out. Some competition cooks add a stick of butter and ½ cup of brown sugar to the foil wrap, creating a luxurious braising liquid that adds incredible depth to the finished brisket.
Return the wrapped brisket to the oven and continue cooking until the internal temperature reaches your target (190°F to 205°F). The wrapped method typically reduces remaining cooking time by 25 to 30 percent compared to unwrapped cooking. This technique is particularly valuable when you’re short on time or need to coordinate the brisket’s completion with other menu items.
For those planning meals with multiple components, understanding timing helps coordinate everything perfectly. Consider pairing your oven brisket with summer salad recipes for lighter side dishes that complement rich, savory brisket beautifully.
Resting and Slicing Mastery
Once the brisket reaches target temperature, remove it from the oven and resist the temptation to slice immediately. Resting is absolutely critical—it allows muscle fibers to relax and reabsorb juices that have been pushed toward the center during cooking. Without proper resting, slicing releases these juices, resulting in dry meat despite perfect cooking.
Keep the brisket wrapped in foil and place it in an insulated cooler or wrapped in towels for at least 20 to 30 minutes. Championship pitmasters often rest brisket for 45 to 60 minutes, which allows the temperature to drop slightly while maintaining heat. This extended rest further relaxes muscle fibers and improves slicing texture.
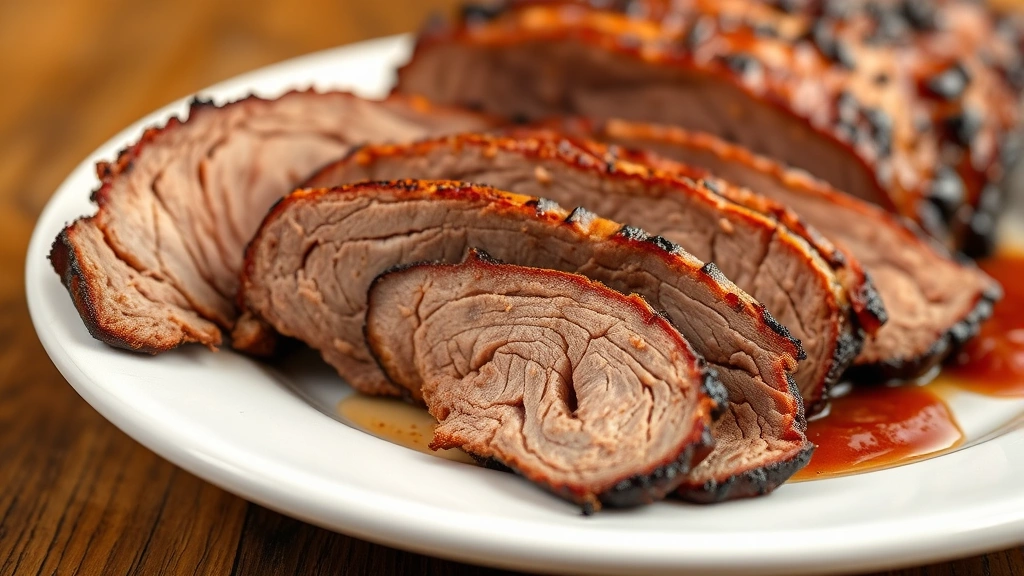
When ready to slice, place the brisket on a clean cutting board with a meat fork to steady it. Identify the grain direction—the flat and point have different grain directions, so you may need to slice each section separately. Use a sharp carving knife or brisket slicer with a long blade, and slice against the grain in quarter-inch to half-inch thick pieces. Slicing against the grain shortens muscle fibers, making each slice tender and easy to chew.
Reserve all pan drippings and any liquid from the foil wrap—this is liquid gold for creating an incredible pan sauce or serving alongside the sliced brisket. Strain the liquid through a fine-mesh sieve to remove solids, then skim excess fat from the surface if desired, though many cooks leave the fat for added richness.
Serving Suggestions and Pairings
Championship-style oven brisket deserves equally impressive side dishes and accompaniments. Serve sliced brisket with the pan drippings spooned over top, allowing the sauce to soak into the meat. Offer additional condiments like barbecue sauce, hot sauce, or spicy mustard for guests to customize their plates.
Traditional sides that pair beautifully with brisket include creamy coleslaw (which provides brightness against rich meat), baked beans (especially those prepared with brisket drippings), cornbread, and pickled vegetables. These sides cut through the richness and provide textural variety to the meal. For lighter options, consider food waste reduction tips that maximize leftover brisket use—it makes extraordinary sandwiches, tacos, and hash the next day.
Beverage pairings enhance the dining experience significantly. Red wines like Cabernet Sauvignon or Zinfandel complement brisket’s rich, savory profile. For non-wine options, cold beer (particularly amber ales or stouts) provides excellent balance. Those seeking sophisticated pairings might explore wine and meat pairing guides for detailed recommendations.
If you’re planning a larger gathering, consider complementing your oven brisket with best seafood recipes for guests with different protein preferences. This ensures everyone at your table finds something absolutely delicious.
Store leftover brisket in an airtight container in the refrigerator for up to four days. The meat actually improves as flavors meld and the fat further distributes throughout. Reheat gently in a low oven (275°F) wrapped in foil with a bit of beef broth to restore moisture and temperature without drying the meat. Frozen brisket keeps for up to three months, making it an excellent make-ahead option for entertaining.
FAQ
What’s the difference between oven brisket and smoked brisket?
Oven brisket cooks in controlled, moist heat that renders fat and collagen efficiently, while smoked brisket develops a smoke ring and smoky flavor from wood smoke. Both methods produce tender results when cooked low and slow. Oven brisket is more accessible for home cooks without smokers, while smoked brisket offers distinctive flavor that’s difficult to replicate indoors. The Texas Crutch wrapping technique mimics some smoking characteristics by creating a humid cooking environment.
Can I cook brisket at higher temperatures to save time?
While higher temperatures (300°F to 325°F) reduce cooking time to 6 to 8 hours, they produce less tender results with less developed flavor. The low-and-slow method (225°F to 250°F) allows adequate time for collagen conversion to gelatin and flavor development through the Maillard reaction. Championship cooks universally recommend patience—the 14 to 21 hours required for a full packer brisket is necessary for optimal texture and taste.
How do I prevent brisket from drying out?
Maintain consistent temperature, keep the pan covered with foil or a fitted lid, add liquid to the cooking pan, use the Texas Crutch wrapping technique during the final hours, and rest the meat properly before slicing. Never skip the resting period—this is the most critical factor for retaining juices. Proper resting ensures each slice remains moist and tender despite the extended cooking process.
What’s the ideal internal temperature for brisket?
Most pitmasters target 190°F to 205°F for optimal tenderness. At 190°F, the meat is quite tender with slightly more structure for clean slicing. At 205°F, the meat is maximally tender and nearly falling apart. Choose 190°F to 195°F if you prefer slices that hold their shape, or 200°F to 205°F for maximum tenderness and fork-shredding capability.
Can I cook brisket overnight in the oven?
Yes, absolutely. Many home cooks start brisket in the evening and let it cook overnight at 225°F. Set an alarm to check the temperature around hour 12 to 14, depending on brisket size. This overnight cooking method works perfectly for weekend entertaining—you wake to nearly finished brisket that just needs final temperature checks and resting. Ensure your oven has reliable temperature control and preferably a digital thermometer with an alert feature.
What if my brisket isn’t tender after reaching target temperature?
Continue cooking even if the internal temperature exceeds 205°F. Some briskets, particularly large ones or those with unusual grain structure, require extended cooking to fully break down collagen. Increase the temperature slightly to 260°F to accelerate the final tenderizing phase. The brisket will tell you when it’s ready—a fork inserted into the flat muscle should meet minimal resistance.
How do I create a bark (crispy exterior) when cooking in the oven?
Oven cooking doesn’t naturally create bark like smoking does, but you can develop a crust by searing the brisket in a hot skillet before oven cooking. Sear the fat cap and sides for 2 to 3 minutes per side in a smoking hot cast-iron skillet, then transfer to the roasting pan for low-and-slow cooking. This Maillard reaction creates a flavorful crust that partially develops during the oven cook as well.


