Cake Popsicles Recipe: Easy & Kid-Friendly Guide
Cake popsicles are a delightful dessert that combines the joy of cake with the fun of a frozen treat on a stick. These bite-sized confections are perfect for parties, celebrations, or whenever you want to impress your family with a homemade sweet treat. Unlike store-bought versions, homemade cake popsicles let you control the ingredients, customize flavors, and create something truly special that kids absolutely love.
This comprehensive guide walks you through every step of making professional-looking cake popsicles at home, from baking the cake to dipping and decorating. Whether you’re a seasoned baker or a complete beginner, you’ll find these treats surprisingly simple to create. The best part? Most of the process can be done in advance, making them perfect for meal prep or party planning.
What Are Cake Popsicles?
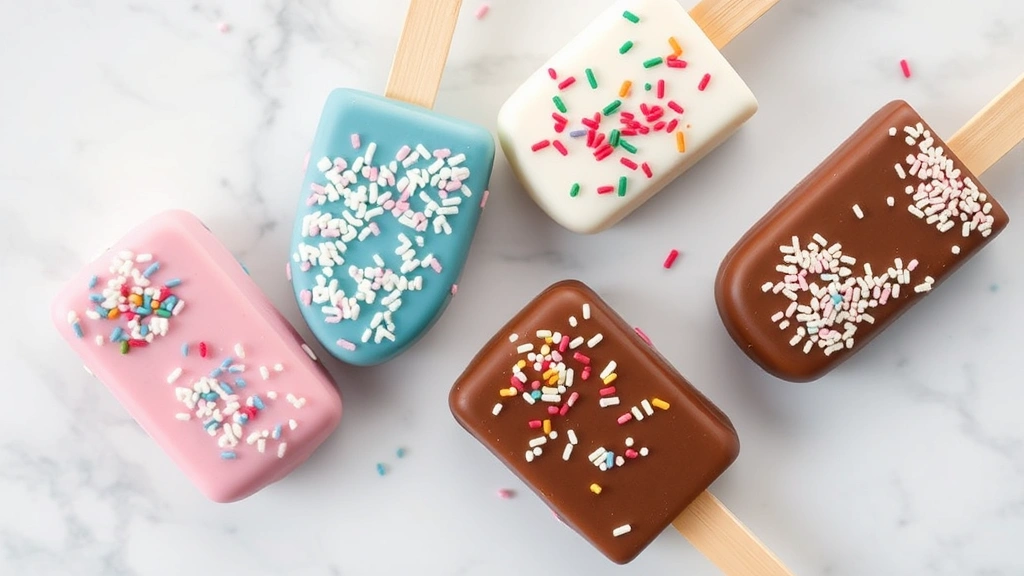
Cake popsicles are crumbled cake mixed with frosting, formed into balls, chilled, dipped in chocolate or candy coating, and served on a stick. They’re essentially a more portable and elegant version of cake balls, offering a complete dessert experience in one bite-sized package. The combination of tender cake crumbs and creamy frosting creates a texture that’s neither too dense nor too light—it’s the Goldilocks of desserts.
The beauty of cake popsicles lies in their versatility. You can use any cake flavor you love, pair it with complementary frostings, and decorate them however your imagination allows. Kids adore them because they’re fun to eat, while adults appreciate the sophisticated presentation. They’ve become increasingly popular at weddings, baby showers, and birthday parties because they’re both delicious and visually stunning.
Making cake popsicles teaches fundamental baking skills while being forgiving enough for first-time bakers. The process involves no complex techniques—just mixing, shaping, and dipping. Once you master the basic method, you’ll find yourself creating batches regularly for various occasions.
Essential Equipment and Ingredients
Equipment You’ll Need
- Cake pop molds or lollipop sticks – Traditional wooden or plastic sticks work perfectly
- Mixing bowls – At least two for combining cake and frosting
- Food processor or fork – For crumbling the cake into fine pieces
- Baking sheets – For chilling your shaped popsicles
- Parchment paper – To prevent sticking during freezing
- Shallow bowls or mugs – For holding melted chocolate for dipping
- Microwave or double boiler – For melting chocolate coating
- Decorating supplies – Sprinkles, edible glitter, or drizzle tools
- Thermometer – Optional but helpful for chocolate temperature
Ingredients for Basic Cake Popsicles
- One 9-inch cake – Homemade or store-bought (about 2-3 cups crumbled)
- 1 cup frosting – Any flavor (store-bought or homemade)
- 1 pound chocolate coating – Candy melts, chocolate chips, or compound chocolate
- Lollipop sticks – Approximately 24-30 sticks
- Optional toppings – Sprinkles, nuts, cocoa powder, or edible pearls
Step-by-Step Instructions
Step 1: Prepare Your Cake
Start by baking a standard cake using your favorite recipe or a box mix. Vanilla, chocolate, and funfetti are excellent choices for beginners. Once the cake cools completely—this is crucial—crumble it into fine pieces using a food processor or by hand with a fork. You want the crumbles to be relatively uniform in size, about the texture of wet sand. Larger chunks will make shaping difficult, so take time with this step. If you have leftover cake from another occasion, this is the perfect way to use it.
Step 2: Mix Cake and Frosting
Place your crumbled cake in a large mixing bowl. Add your frosting gradually, starting with three-quarters of a cup. Mix thoroughly using a spatula or wooden spoon, breaking up any clumps as you go. The mixture should resemble wet sand—moist enough to hold together when pressed, but not so wet that it’s sticky. Add frosting incrementally until you reach the perfect consistency. This is where you can customize flavors; try homemade frosting variations for unique taste combinations.
Step 3: Shape Into Balls
Using a cookie scoop or your hands, form the mixture into balls about the size of a walnut. Place each ball on a parchment-lined baking sheet. You should get approximately 24-30 popsicles from a standard cake. Make sure the balls are as uniform as possible in size so they freeze evenly and look consistent. If your hands get sticky, rinse them in cold water and dry them between shaping batches.
Step 4: Freeze the Balls
Refrigerate the shaped balls for at least 2 hours, or preferably overnight. This step is essential—frozen balls are much easier to dip and hold their shape better. You can freeze them for up to two weeks at this stage, making this a great do-ahead step for party planning. Transfer them to an airtight container after the initial freezing if storing long-term.
Step 5: Prepare Your Coating
Melt your chocolate coating according to package directions. Candy melts work best for beginners because they’re formulated to be thin and pourable without adding oil. If using regular chocolate chips, add a small amount of coconut oil or shortening (about 1 teaspoon per cup of chocolate) to thin it out. The coating should be warm and fluid but not hot—around 110-115°F is ideal. Too-hot chocolate will crack as it cools on the popsicles.
Step 6: Insert Sticks
Remove the frozen balls from the freezer. Dip the tip of each lollipop stick into the melted chocolate coating, then push it about halfway into each ball. Return the stick-inserted balls to the freezer for 10-15 minutes. This ensures the stick is securely anchored before you dip the entire popsicle.
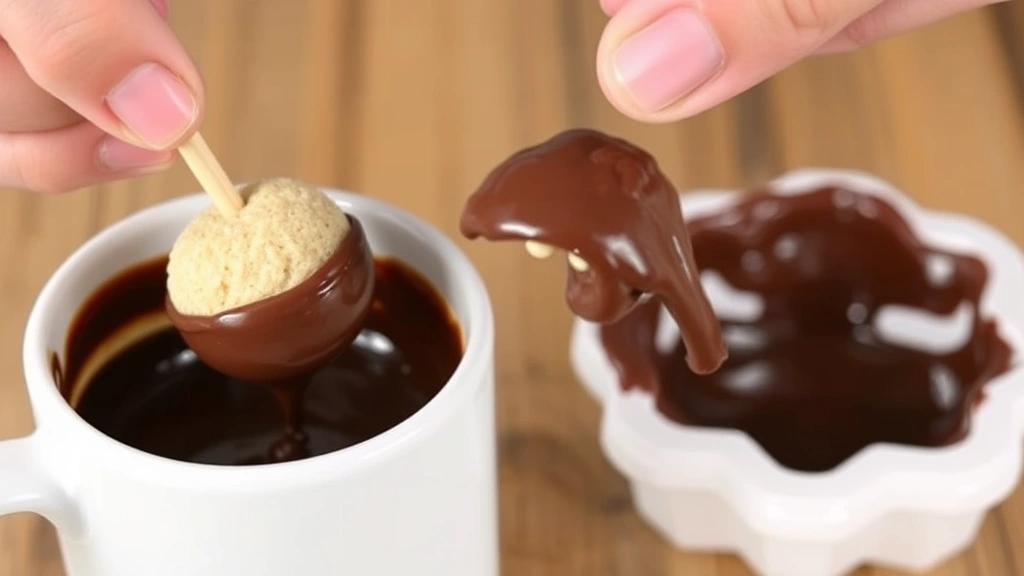
Step 7: Dip in Coating
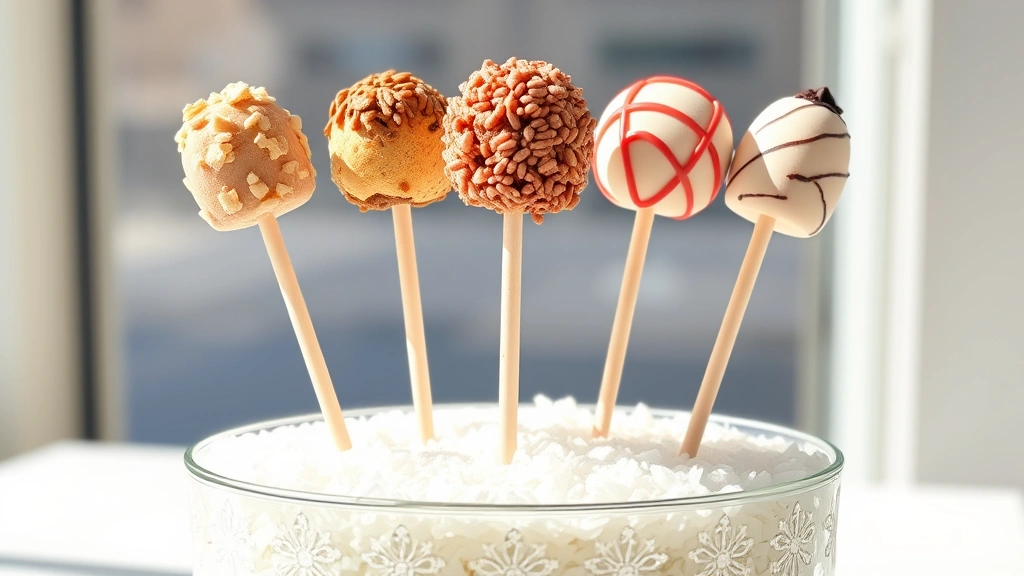
Once the sticks are set, remove the popsicles from the freezer in batches (keep the rest frozen). Holding the stick, dip each ball into the melted coating, rotating to ensure complete coverage. Gently tap the stick against the edge of the bowl to remove excess coating. Work quickly so the frozen ball doesn’t melt completely. Place the freshly dipped popsicle into a styrofoam block or cup holder to cool.
Step 8: Decorate
While the coating is still wet, immediately add sprinkles, edible glitter, or other toppings if desired. Once the coating dries (about 5-10 minutes), it won’t accept new decorations. You can also add a second coat of different-colored chocolate for striped effects, or drizzle contrasting chocolate over the set coating for elegant designs.
Flavor Variations and Customization
Classic Flavor Combinations
Chocolate Cake + Vanilla Frosting + Chocolate Coating – A timeless trio that’s always a crowd-pleaser. The vanilla frosting provides sweetness while the chocolate elements add depth.
Vanilla Cake + Strawberry Frosting + White Chocolate Coating – Perfect for spring celebrations and adds a fruity element. Consider using fruit preserves mixed into the frosting for intense strawberry flavor.
Funfetti Cake + Vanilla Frosting + Pastel Coating – Ideal for children’s parties with built-in sprinkles in the cake itself. Add pastel-colored candy melts for a cohesive look.
Lemon Cake + Cream Cheese Frosting + White Chocolate Coating – A sophisticated option that works well for adult gatherings and afternoon tea parties.
Advanced Flavor Experimentation
Don’t limit yourself to basic combinations. Try red velvet cake with cream cheese frosting, carrot cake with cinnamon frosting, or pumpkin cake with spiced frosting. Each season offers inspiration—peppermint for winter, lavender for spring, or salted caramel for fall. The key is ensuring your frosting and cake flavors complement rather than clash.
Storage and Shelf Life
Properly stored cake popsicles last remarkably well. Keep finished popsicles in an airtight container in the refrigerator for up to 5 days, or freeze them for up to 2 months. The chocolate coating protects the cake from drying out, making them more shelf-stable than regular cake. For parties, you can prepare them several days in advance, then simply remove them from the freezer 10-15 minutes before serving so they’re at the perfect eating temperature.
If you’re traveling with cake popsicles, keep them cool in an insulated container with ice packs. They’ll maintain their quality during car trips to picnics or gatherings. The frozen state actually helps them travel well since they won’t shift or crumble as easily as unfrozen cake.
Troubleshooting Tips
Problem: Sticks Won’t Stay in Balls
This happens when the coating is too warm or the ball isn’t frozen solid enough. Ensure balls are frozen for at least 2 hours before inserting sticks. Also, make sure you’re using the chocolate-stick method—dip the stick in chocolate first, then insert. Let this anchor set in the freezer before dipping the entire popsicle.
Problem: Coating Cracks or Chips
Chocolate coating cracks when there’s too large a temperature difference between the frozen ball and the warm coating. Let balls warm slightly (5 minutes at room temperature) before dipping, and ensure your coating isn’t too hot. Target a coating temperature around 110-115°F.
Problem: Mixture Won’t Hold Together
You haven’t added enough frosting. Add more frosting in small increments and mix thoroughly. The mixture should feel like dense, moist clay. If it’s too dry, it will crumble when you try to shape it.
Problem: Popsicles Are Too Sweet
Use less frosting in your mixture—try reducing it to 3/4 cup instead of 1 cup. You can also balance sweetness by using dark chocolate coating instead of milk chocolate, or by adding a pinch of salt to the cake-frosting mixture.
Problem: Coating Won’t Adhere Properly
The balls are too warm or too cold. Frozen balls should be quite cold but not ice-hard—about 10 minutes out of the freezer is ideal. Also ensure your coating is warm enough to flow smoothly but not so hot it melts the ball instantly.
FAQ
Can I Use Store-Bought Cake?
Absolutely! Store-bought cake works perfectly. Simply crumble it and proceed with the recipe. This makes cake popsicles an excellent way to repurpose leftover birthday or celebration cakes.
What’s the Best Chocolate for Coating?
Candy melts are ideal for beginners because they’re designed to thin easily and set smoothly. Compound chocolate works similarly. If using real chocolate, you’ll need to temper it or add coconut oil to achieve the right consistency.
How Long Do Cake Popsicles Last?
Refrigerated cake popsicles last 5 days, while frozen ones keep for 2 months. The chocolate coating acts as a protective seal, keeping the cake fresh longer than uncoated cake.
Are Cake Popsicles Gluten-Free?
They can be! Use gluten-free cake and ensure your frosting is gluten-free certified. The process remains identical—the ingredients simply change.
Can I Make Cake Popsicles Without a Food Processor?
Yes. Use a fork to crumble the cake finely, working in batches if necessary. It takes longer but produces the same result. The goal is fine, uniform crumbles rather than large chunks.
What If I Don’t Have Lollipop Sticks?
You can serve cake popsicles without sticks—they become cake balls. Present them in cupcake liners or on a decorative platter. They’re equally delicious and require less work.
Can Kids Help Make These?
Cake popsicles are extremely kid-friendly! Children can help crumble cake, mix frosting, shape balls, and decorate. The only step requiring adult supervision is melting the chocolate for dipping.
How Do I Make Them Vegan?
Use vegan cake, vegan frosting, and vegan chocolate coating. Many brands now offer these alternatives. The process is identical—only the ingredients change. Explore dietary modification techniques for comprehensive guidance on ingredient substitutions.
Can I Prepare Cake Popsicles Days in Advance?
Yes! This is one of their biggest advantages. Prepare and freeze the shaped balls up to 2 weeks ahead. Dip them in coating 3-5 days before serving. This makes them perfect for party planning—you can spread the work across several days.
What Frosting Works Best?
American buttercream (butter, powdered sugar, and milk) is ideal because it’s firm enough to hold the mixture together while soft enough to mix easily. Cream cheese frosting also works well. Avoid whipped frostings, which are too light and airy.
Cake popsicles represent the perfect intersection of homemade quality and impressive presentation. With this guide, you now have all the knowledge needed to create professional-looking treats that taste absolutely delicious. Start with basic chocolate-covered vanilla popsicles, then experiment with flavors and decorations. Soon you’ll be whipping up batches for every occasion, delighting both kids and adults with these irresistible treats. Happy baking!


