Perfect Caramel Icing? Grandma’s Secret Recipe
There’s something magical about caramel icing that transforms even the simplest cake into a showstopper. My grandmother guarded her caramel icing recipe like a precious heirloom, and after years of watching her work her magic in the kitchen, I finally understand why. This isn’t just any frosting—it’s a silky, buttery creation that strikes the perfect balance between sweet and slightly salty, with a depth of flavor that store-bought versions simply cannot match. The secret lies not just in the ingredients, but in understanding the science behind caramelization and the precise techniques that prevent crystallization and ensure a smooth, luxurious texture.
When I first attempted to recreate Grandma’s caramel icing without her guidance, I failed spectacularly. My first batch turned grainy and separated, my second was too runny, and my third scorched before I even removed it from the heat. But persistence paid off. Through careful observation, note-taking, and a few kitchen disasters, I cracked the code. Now I’m sharing every detail—the temperatures to watch for, the exact timing, the stirring techniques, and the troubleshooting tips—so you can create this legendary frosting in your own kitchen.

Why Caramel Icing Deserves a Spot in Your Recipe Collection
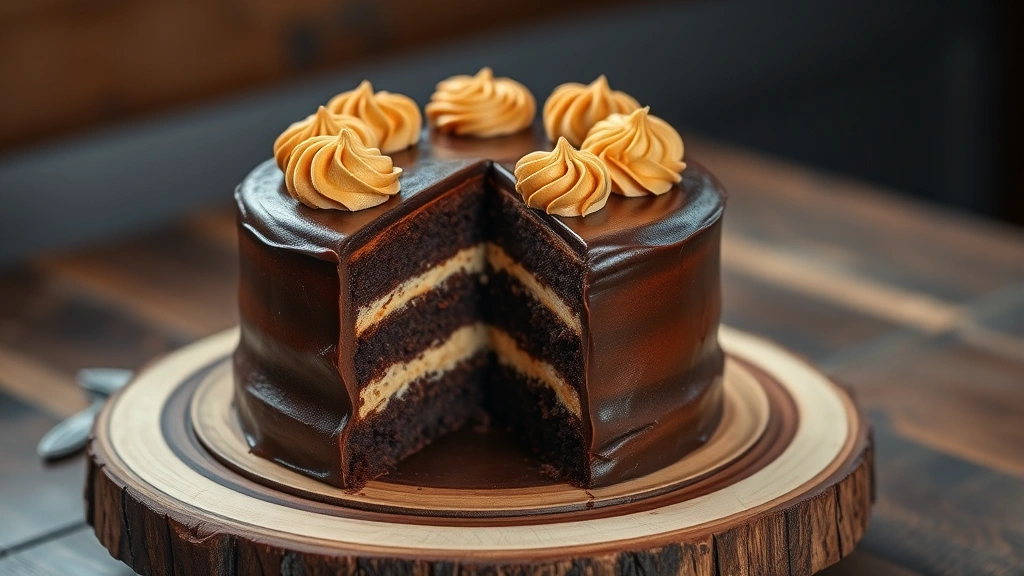
Caramel icing represents the intersection of technique and tradition. Unlike buttercream frostings that rely on whipped butter and powdered sugar, true caramel icing starts with caramelized sugar—a process that requires attention, timing, and respect for heat. The result is incomparably richer and more complex. This frosting pairs beautifully with chocolate cakes, vanilla layers, or even carrot cake. It’s equally stunning piped onto cupcakes or spread generously between cake layers.
My grandmother learned this recipe from her mother, who made it for special occasions and celebrations. Over the decades, it became the frosting of choice for birthdays, anniversaries, and holiday gatherings. The beauty of this particular version is its versatility. You can use it immediately while it’s pourable, let it cool slightly for a spreadable consistency, or whip it once cooled for a fluffier texture. This single recipe adapts to whatever your baking project demands.
Understanding how to make proper caramel icing also teaches valuable cooking fundamentals. You’ll learn about sugar chemistry, temperature control, and emulsification—skills that transfer to countless other recipes. Once you master this frosting, you’ll feel confident tackling other advanced recipes like fruit preserves, where sugar management is equally critical.
Essential Ingredients and Why Each One Matters
The magic of this caramel icing recipe lies in its simplicity and the quality of its components. You need just five ingredients, but each plays a specific role in achieving that perfect texture and flavor.
- Butter (1 cup or 2 sticks): Use unsalted, high-quality butter at room temperature. Butter provides richness and helps emulsify the caramel with the other ingredients. Cold butter will seize the mixture; too-warm butter creates a greasy frosting.
- Brown sugar (1 cup, packed): This is your caramel base. Brown sugar contains molasses, which adds depth and prevents the frosting from being one-dimensionally sweet. Measure by packing it firmly into your measuring cup.
- Granulated sugar (½ cup): This creates the actual caramel through dry-heat caramelization. The combination of brown and granulated sugar creates a more nuanced flavor than either alone.
- Heavy cream (½ cup): Room temperature cream stops the caramelization process and creates a creamy base. Cold cream can cause splattering; warm cream incorporates more smoothly.
- Vanilla extract (1 teaspoon): This adds warmth and complexity. Use pure vanilla, not imitation, as the flavor difference is noticeable in this delicate frosting.
Optional but highly recommended: a pinch of sea salt (⅛ to ¼ teaspoon) enhances the caramel flavor and creates that coveted sweet-salty balance that modern caramel recipes celebrate.
Step-by-Step Instructions for Perfect Results
Preparation (5 minutes): Gather all ingredients and place your softened butter in a large mixing bowl. Have a measuring cup with the cream ready nearby. Set your stand mixer with the paddle attachment within reach. Having everything prepared before you start cooking ensures you won’t scramble while managing hot caramel.
Step 1: Create the Caramel Base
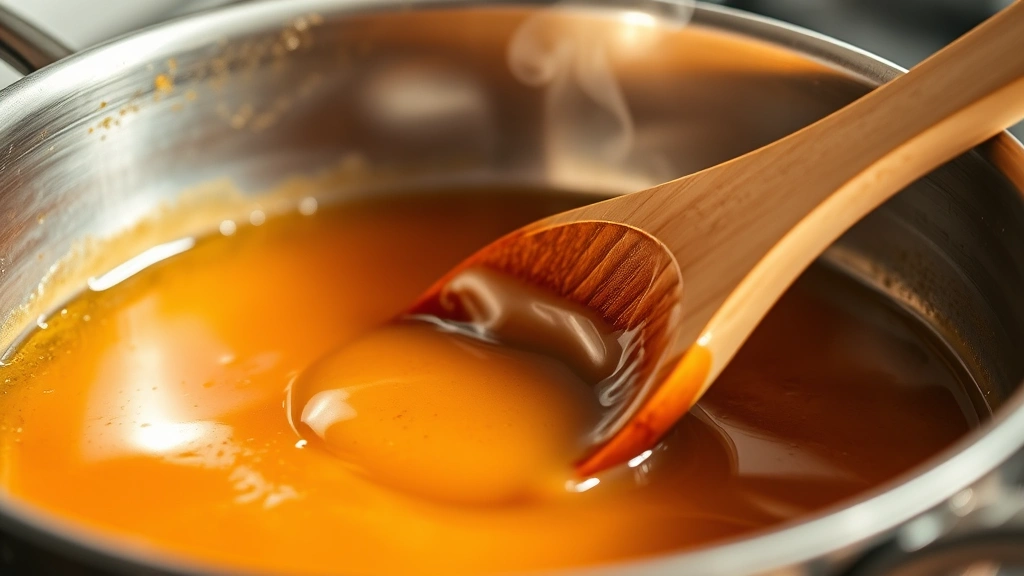
In a heavy-bottomed saucepan (stainless steel or aluminum, not non-stick), combine the granulated sugar and brown sugar. Do not add any liquid. Cook over medium heat, stirring occasionally with a wooden spoon. The sugar will clump initially, then begin to melt. This dry-caramelization method prevents crystallization because you’re not dissolving the sugar in water first.
Watch the sugar carefully. It will transform from white to light amber in about 8-10 minutes. This is the critical moment. Amber caramel provides the ideal flavor—dark enough for depth but not so dark it becomes bitter. Use this caramel color reference guide to understand the visual stages.
Step 2: Add the Cream
Once your caramel reaches light amber, remove the pan from heat and carefully pour the room-temperature cream into the hot caramel. It will bubble and steam dramatically—this is normal. Stir constantly with a wooden spoon until the bubbling subsides and the mixture is smooth. If any sugar crystals have formed on the sides of the pan, use a wet pastry brush to dissolve them.
Step 3: Cool the Caramel
Let the caramel cool in the pan for about 5 minutes, then transfer it to a bowl. Allow it to cool to room temperature, approximately 20-30 minutes. This step is non-negotiable. Adding hot caramel to soft butter will cause separation and greasiness. Test the temperature by touching the outside of the bowl—it should feel barely warm.
Step 4: Combine with Butter
Place your softened butter in the mixing bowl and beat on medium speed for 2-3 minutes until pale and fluffy. This incorporates air and prepares the butter to accept the caramel. Gradually pour the cooled caramel into the whipping butter while the mixer runs on medium speed. Pour slowly—about a tablespoon every 10 seconds—to ensure proper emulsification.
Step 5: Final Adjustments
Once all caramel is incorporated, add vanilla extract and salt (if using). Beat on medium-high speed for 2-3 minutes until the frosting is light, fluffy, and has a spreadable consistency. If it seems too soft, refrigerate for 15 minutes and beat again. If it’s too thick, add cream one teaspoon at a time while mixing.
Temperature Guide and Timing Essentials
Temperature control is absolutely crucial when making caramel icing. Here’s what you need to know:
- Caramel cooking temperature: Your caramel should reach 350-360°F (175-182°C), which is the light amber stage. Use a reliable candy/deep-fry thermometer. If you don’t have one, watch for the color change from golden to light amber—this happens quickly, sometimes in seconds.
- Cream temperature: Ideally 65-70°F (18-21°C). This is room temperature for most kitchens. If your cream is cold from the refrigerator, let it sit out for 10 minutes.
- Butter temperature: Should be 65-70°F (18-21°C) as well. This means it’s soft enough to indent with your finger but still holds its shape. Ideally, remove it from the refrigerator 30-45 minutes before starting.
- Total cooking time: 12-15 minutes for the caramel itself, plus 30-40 minutes for cooling and mixing. Plan accordingly if you’re working on a deadline.
Temperature precision prevents the common issue of separation, where the frosting looks oily or has a grainy texture. Invest in a good instant-read thermometer—it’s invaluable for baking projects like homemade bread as well.
Common Mistakes and How to Avoid Them
Grainy or Crystallized Frosting: This happens when sugar crystals form during cooking. Prevent it by using a wet pastry brush to dissolve any sugar crystals on the pan’s sides and by never stirring the caramel once it starts to liquefy—only stir while it’s still mostly solid. If crystallization occurs, start over; there’s no reliable fix.
Separated or Greasy Frosting: This results from temperature mismatches. The caramel was too hot when added to the butter, or the butter was too cold or too warm. The frosting may be salvageable: place the bowl in an ice bath for 5 minutes, then beat vigorously. If that fails, start with fresh butter and slowly drizzle the broken frosting into it while beating.
Burnt or Bitter Caramel: You overcooked the sugar. Light amber is your target; dark amber tastes acrid. Set a timer for 8 minutes and start checking at the 7-minute mark. Remove from heat the instant it reaches the right color—residual heat continues cooking it slightly.
Too-Soft Frosting: The caramel wasn’t cooled sufficiently before mixing. Next time, allow more cooling time. To salvage this batch, refrigerate for 30 minutes and beat again, or add a tablespoon of powdered sugar while mixing.
Too-Thick Frosting: Over-beating or insufficient cream can cause this. Add heavy cream one teaspoon at a time while mixing on low speed until you reach the desired consistency.
Storage and Make-Ahead Tips
One of the best features of this caramel icing is its make-ahead capability. Store it in an airtight container in the refrigerator for up to two weeks. When you’re ready to use it, remove it 30 minutes before frosting to bring it to spreadable consistency, then beat briefly with an electric mixer to restore its fluffy texture.
You can also freeze caramel icing for up to three months. Portion it into ice cube trays, freeze solid, then transfer to freezer bags for easy storage. Thaw at room temperature for 2-3 hours, then beat to combine. This technique works beautifully if you frost cakes regularly and want to minimize last-minute work.
For frosted cakes, cover them loosely with plastic wrap and store at room temperature if you’re serving within 24 hours. For longer storage, refrigerate the frosted cake and remove it 30 minutes before serving so the frosting softens slightly. This is similar to how you’d store cakes topped with other delicate frostings like those on desserts requiring careful temperature management.
Pro tip: If you’re making this frosting for a special occasion, prepare it the day before. The flavors develop and meld overnight, creating an even more complex, delicious result. This aging technique is borrowed from professional pastry kitchens and truly elevates your final product.
FAQ
Can I make caramel icing without a candy thermometer?
Yes, but it’s riskier. Watch for the color change from golden to light amber—this is your visual cue. The transition happens quickly, sometimes in just seconds, so stay focused. Once you’ve made it a few times with a thermometer, you’ll develop an intuition for the right moment to stop cooking.
What if my caramel seizes when I add the cream?
Don’t panic. Seizing occurs when caramel cools too quickly. Remove the pan from heat, let it cool for 2-3 minutes, and try again with room-temperature cream added more slowly. If it’s still seized, place the pan in a warm water bath for a minute to gently reheat it, then try incorporating the cream again.
Can I use salted butter instead of unsalted?
You can, but reduce or eliminate the salt in the recipe. Salted butter typically contains ¼ teaspoon salt per stick, so two sticks would have ½ teaspoon already. Since the recipe calls for just ⅛ to ¼ teaspoon additional salt, you’d likely skip the extra salt entirely when using salted butter.
How do I know when the caramel is the right color?
Light amber should resemble the color of brewed tea or honey held up to light. It should be noticeably darker than brown sugar but not as dark as chocolate. If you’re unsure, err on the lighter side—you can always make another batch if it’s too light, but you can’t fix burnt caramel.
Can I double this recipe?
Absolutely. Double all ingredients and use a larger, heavy-bottomed saucepan. The cooking time remains similar since you’re still heating the same mass of sugar. However, be extra careful with the cream addition since there’s more hot caramel that will bubble more vigorously.
What cakes pair best with caramel icing?
Chocolate cakes are the classic pairing, but caramel icing also works beautifully on vanilla, spice cake, carrot cake, and even cake-based desserts with savory elements. The rich, buttery frosting complements almost any cake flavor.
Can I pipe this frosting?
Yes, but the consistency matters. For piping, you want it slightly thicker than for spreading. Refrigerate for 20-30 minutes before transferring to a piping bag. Use a large round or star tip for the best results, and work quickly since the frosting will soften as you pipe.
Why did my frosting break during mixing?
Breaking (separation) typically occurs from temperature mismatches or from adding caramel too quickly. If this happens, start with fresh room-temperature butter and drizzle the broken frosting into it very slowly while beating on medium speed. The new butter can often rescue the broken batch.


