Cherry Cobbler Recipe: Grandma’s Secret to Pure Comfort
There’s something truly magical about a homemade cherry cobbler fresh from the oven—the bubbling fruit filling, the golden-brown topping, and that unmistakable aroma of cinnamon and cherries wafting through your kitchen. This cherry cobbler recipe has been passed down through generations, and today I’m sharing my grandmother’s secret techniques that make this dessert absolutely unforgettable. Unlike store-bought versions, homemade cherry cobbler captures the essence of summer in every bite, with a perfectly balanced filling and a buttery biscuit topping that’ll have everyone asking for seconds.
My grandmother always said that the key to an exceptional cherry cobbler lies not just in quality ingredients, but in understanding the science behind each component. The fruit filling needs the right balance of sweetness and tartness, the topping must achieve that ideal texture—crispy on the outside yet tender within—and the baking requires precise timing. After years of perfecting this recipe alongside her in the kitchen, I’ve learned her tricks for achieving cobbler perfection every single time. Whether you’re a seasoned baker or someone who rarely ventures into the kitchen, this guide will walk you through every step to create a cherry cobbler that tastes like it came straight from a grandmother’s kitchen.
Ingredients You’ll Need
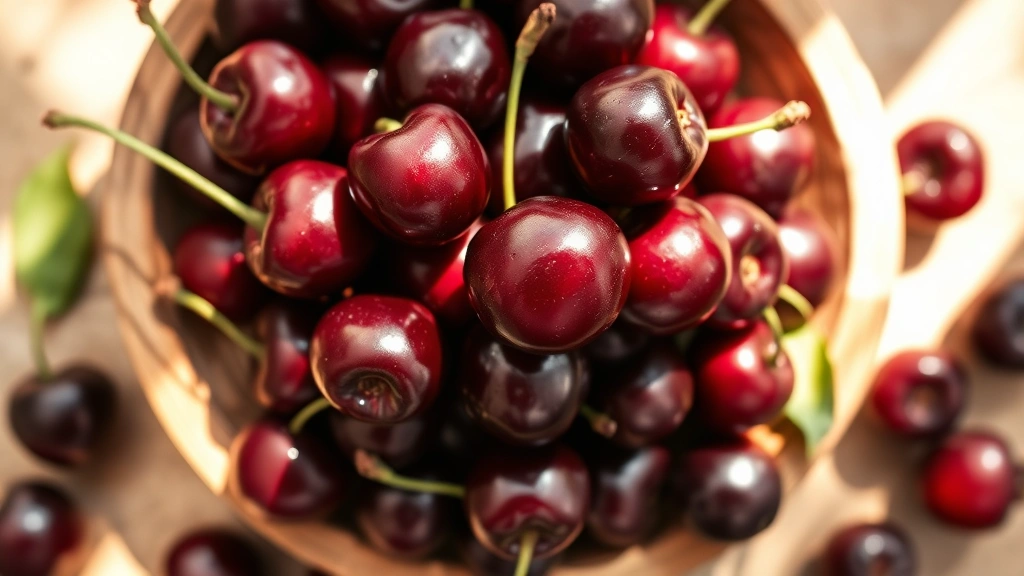
The foundation of any great cherry cobbler begins with understanding your ingredients. Fresh or frozen cherries work equally well—frozen actually provides consistent results year-round, which is why grandma always kept a stash in her freezer. For a standard 9×13 inch cobbler serving 8-10 people, you’ll need:
- Cherries: 6-7 cups fresh or frozen (about 2 pounds), pitted and halved
- Granulated sugar: 3/4 cup for the filling
- Brown sugar: 2 tablespoons for depth of flavor
- Cornstarch: 2 tablespoons to thicken the filling
- Lemon juice: 2 tablespoons for brightness
- Vanilla extract: 1 teaspoon
- Ground cinnamon: 1/2 teaspoon
- Ground nutmeg: 1/4 teaspoon
- Salt: 1/4 teaspoon
For the Topping:
- All-purpose flour: 1 1/2 cups
- Granulated sugar: 1/3 cup
- Baking powder: 1 1/2 teaspoons
- Salt: 1/2 teaspoon
- Cold unsalted butter: 6 tablespoons, cubed
- Whole milk: 2/3 cup
- Almond extract: 1/4 teaspoon (optional but recommended)
The quality of your cherries makes an enormous difference. If using fresh cherries, look for ones that are deep red to burgundy in color—these indicate higher sugar content and better flavor. When selecting frozen cherries, choose unsweetened varieties so you can control the sugar level in your cobbler. This attention to ingredient quality is one of grandmother’s most important lessons.
Preparing the Cherry Filling
The filling is where the magic truly happens in a cherry cobbler. This is your opportunity to create a perfectly balanced mixture of sweet, tart, and aromatic notes. Start by placing your pitted cherries in a large mixing bowl. If you’re using frozen cherries, there’s no need to thaw them first—this actually helps prevent excess liquid from accumulating.
In a separate small bowl, whisk together the granulated sugar, brown sugar, cornstarch, cinnamon, nutmeg, and salt. The brown sugar adds a subtle molasses note that elevates the flavor profile beyond a simple cherry dessert. The cornstarch is crucial—it will absorb the cherry juices and create a filling that’s thick enough to hold together when served, yet still juicy and luscious.
Pour the dry mixture over your cherries and gently fold everything together using a rubber spatula. Be careful not to crush the cherries; you want them to maintain their shape. Add the lemon juice and vanilla extract, stirring gently until everything is evenly combined. Let this mixture sit for 15-20 minutes at room temperature. During this time, the cherries will begin releasing their juices, and the cornstarch will start to absorb them, creating the perfect consistency for your cobbler.
Here’s grandmother’s secret: she always tastes the filling at this point and adjusts the sweetness if needed. Some cherry varieties are naturally more tart than others, so having a taste of your filling allows you to add a bit more sugar if necessary. This personalization step ensures your cherry cobbler tastes exactly how you want it.
While the filling rests, preheat your oven to 375°F (190°C). Butter a 9×13 inch baking dish thoroughly, making sure to coat the bottom and sides completely. This prevents sticking and helps achieve those delicious caramelized edges. Pour the cherry filling into the prepared baking dish, spreading it evenly. If there’s excess liquid at the bottom, don’t worry—that’s normal and will create a beautiful sauce.
Creating the Perfect Cobbler Topping
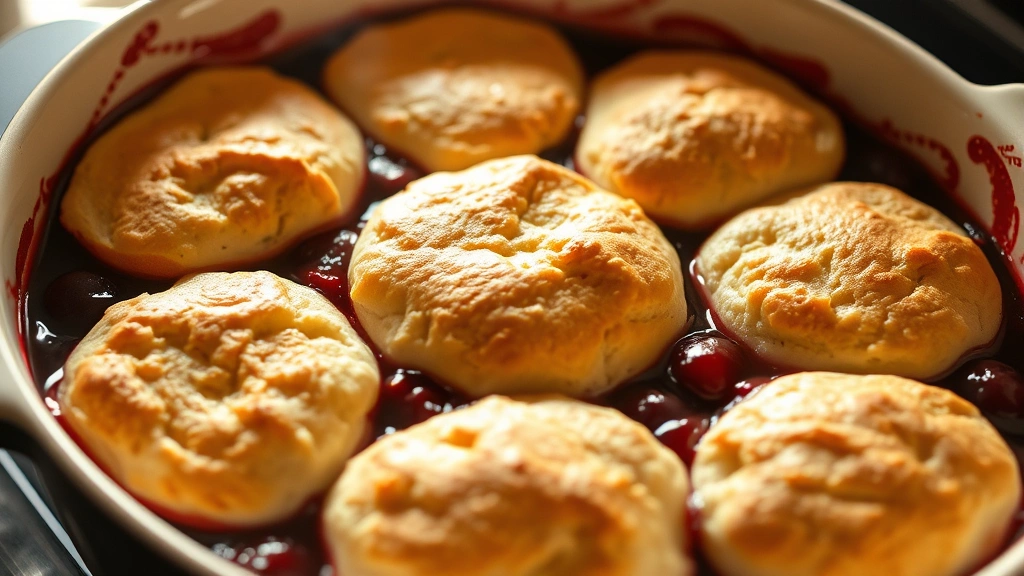
The topping is what distinguishes a cobbler from other fruit desserts. Unlike a pie with its continuous crust, a cobbler features individual biscuit-like portions that bake on top of the fruit. This creates a wonderful contrast between the tender filling below and the golden-brown, slightly crispy exterior of the topping.
Begin by whisking together your flour, sugar, baking powder, and salt in a medium bowl. These dry ingredients form the base of your biscuit topping. In a separate bowl, combine the milk and almond extract. The almond extract adds a subtle depth that complements cherry beautifully—this is another of grandmother’s signature touches.
Cut the cold butter into small cubes and add it to your flour mixture. Using a pastry cutter, two knives, or your fingertips, work the butter into the flour until the mixture resembles coarse breadcrumbs. This step is absolutely critical. The small pockets of butter throughout the dough will create steam as the cobbler bakes, resulting in a lighter, more tender topping. If your hands are warm, work quickly; if the butter warms too much, your topping will be dense and heavy.
Pour the milk mixture into the flour mixture and stir gently with a fork until just combined. The dough should be slightly sticky and shaggy—this is exactly what you want. Overmixing develops gluten, which results in a tough topping, so resist the urge to blend it into a smooth batter.
Drop spoonfuls of the biscuit dough onto the cherry filling, leaving small gaps between the portions. This isn’t meant to be a continuous crust; the gaps allow steam to escape and create those beautiful, rustic edges. Don’t worry about covering every inch of the filling—those exposed cherry portions will bubble up beautifully around the biscuits during baking.
Assembly and Baking
Now comes the moment you’ve been waiting for. Place your assembled cherry cobbler on a baking sheet—this is a practical step that catches any filling that bubbles over, saving your oven from a mess. Bake for 40-45 minutes, until the biscuit topping is golden brown and the fruit filling is bubbling around the edges.
The exact baking time depends on several factors: your oven’s accuracy, the depth of your filling, and even the temperature of your ingredients when you assembled everything. Start checking around the 35-minute mark. The cobbler is done when the topping is a beautiful golden-brown color and you can see the cherry filling actively bubbling at the edges of the baking dish.
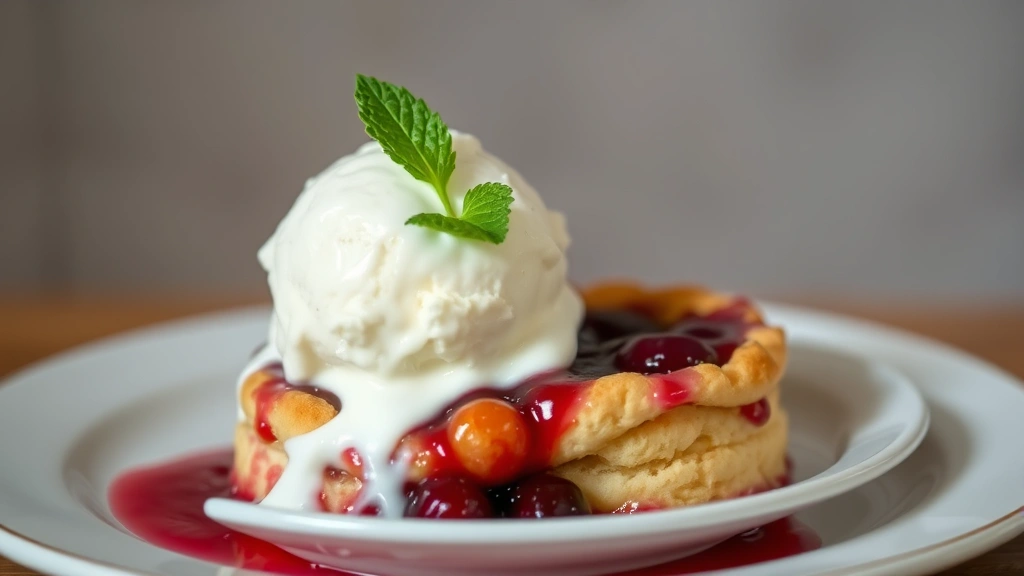
Remove the cobbler from the oven and let it rest for 10-15 minutes before serving. This resting period allows the filling to set slightly, making it easier to serve without having it run all over the plate. However, you want to serve it while still warm—this is when the flavors are most vibrant and the texture of the biscuit topping is at its best.
For an elegant presentation, dust the warm cobbler lightly with powdered sugar or serve each portion with a dollop of whipped cream or a scoop of vanilla ice cream. The contrast between the warm cobbler and cold ice cream is absolutely divine.
Grandma’s Secret Tips
After decades of making cherry cobbler, my grandmother developed several techniques that consistently produce outstanding results. First, she always keeps her butter in the freezer until the moment she needs it. Cold butter is essential for achieving that perfect flaky texture in the topping.
Second, grandmother never skips the resting time for the filling. Those 15-20 minutes aren’t just busy work—they’re when the cornstarch begins its magic, thickening the cherry juices and ensuring your cobbler won’t be runny.
Third, she recommends using a combination of both granulated and brown sugar. The brown sugar adds complexity and a subtle caramel note that elevates the entire dessert. This is especially important when using frozen cherries, which can sometimes taste slightly flat compared to fresh ones.
Fourth, grandmother always bakes her cobblers in the lower third of the oven. This ensures the bottom of the biscuit topping bakes through completely, achieving that perfect golden-brown color without the top burning.
Finally, she emphasizes the importance of not overbaking. Once the topping is golden and the filling is bubbling, it’s done. Overbaking can result in a dry cobbler, so set a timer and check regularly during the final minutes of baking.
Flavor Variations
While the classic cherry cobbler is perfection, grandmother’s kitchen was always a place of culinary exploration. There are several delicious ways to adapt this recipe while maintaining its essential character.
Mixed Berry Version: Replace half the cherries with raspberries, blackberries, or blueberries. The combination creates a more complex flavor profile and beautiful color variation. Reduce the sugar slightly, as mixed berries tend to be sweeter than cherries alone.
Cherry-Almond: Add 1/2 teaspoon of almond extract to the filling and sprinkle 1/3 cup of sliced almonds over the biscuit topping before baking. The almond flavor pairs magnificently with cherry and adds textural interest.
Spiced Cherry: Increase the cinnamon to 3/4 teaspoon and add 1/8 teaspoon of ground cloves to the filling. This creates a warmer, more autumnal version perfect for fall gatherings. This variation also works beautifully with complementary desserts like other comfort food recipes that embrace warming spices.
Cherry-Bourbon: For an adult version, add 2 tablespoons of bourbon or cherry liqueur to the filling mixture. This adds sophistication and depth to the dessert.
Ginger-Cherry: Add 1/2 teaspoon of ground ginger and 1/4 teaspoon of fresh ginger (finely minced) to the filling. The ginger provides a subtle spicy note that makes the cherry flavor pop.
Storage and Serving
Cherry cobbler is best enjoyed fresh from the oven, but it keeps beautifully for several days. Store leftover cobbler in an airtight container in the refrigerator for up to 4 days. To reheat, cover it loosely with foil and warm in a 325°F oven for about 15-20 minutes until heated through.
You can also freeze unbaked cobblers for up to 3 months. Assemble your cobbler completely, wrap it tightly in plastic wrap and then foil, and freeze. When you’re ready to bake it, add 10-15 minutes to the baking time and bake directly from frozen.
For serving, cherry cobbler pairs wonderfully with vanilla ice cream, whipped cream, or even Greek yogurt for a lighter option. A drizzle of caramel sauce over the top adds extra indulgence. Some people enjoy serving it with a small glass of dessert wine or a cup of coffee.
The beauty of cherry cobbler is its versatility. It’s equally at home at a casual family dinner as it is at an elegant dinner party. Grandmother always said that homemade desserts, more than anything else, communicate love and care to those who eat them. This cherry cobbler recipe carries that message in every delicious bite.
If you’re looking to expand your dessert repertoire, consider exploring homemade techniques that emphasize quality ingredients. The same philosophy that makes an excellent cherry cobbler applies to all your cooking endeavors.
FAQ
Can I use canned cherries for this recipe?
While fresh or frozen cherries are ideal, you can use canned cherries in a pinch. Drain them thoroughly and reduce the sugar in the filling to 1/2 cup, as canned cherries are typically packed in syrup. The texture and flavor won’t be quite as vibrant as with fresh or frozen cherries, but the result will still be delicious.
What’s the difference between a cobbler, a crisp, and a crumble?
A cobbler features a biscuit or cake-like topping that resembles individual dumplings. A crisp has a topping made from oats, flour, butter, and brown sugar that bakes into a crunchy layer. A crumble is similar to a crisp but typically includes nuts. This cherry cobbler recipe is specifically a cobbler because of its distinctive biscuit topping.
Can I make this cobbler in a cast iron skillet?
Absolutely! A 10-inch cast iron skillet works perfectly for this recipe. The cast iron distributes heat beautifully and creates wonderfully caramelized edges. Preheat the skillet in the oven, then carefully pour in the filling and drop on the topping. The baking time may be slightly shorter due to the superior heat conduction of cast iron, so watch carefully.
Why is my cobbler filling runny?
The most common cause is insufficient cornstarch or not allowing the filling to rest long enough before baking. Make sure you’re using the full 2 tablespoons of cornstarch and allowing at least 15 minutes for it to absorb the cherry juices. If your cherries released an unusual amount of liquid, you can always add an extra teaspoon of cornstarch mixed with a tablespoon of water.
Can I prepare the cobbler ahead of time?
Yes! You can assemble the entire cobbler several hours ahead of time and store it, covered, in the refrigerator. Bake it directly from the refrigerator, adding 5-10 minutes to the baking time. This makes cobbler perfect for entertaining, as you can do most of the work ahead.
What should I serve with cherry cobbler?
Vanilla ice cream is the classic choice, but whipped cream, Greek yogurt, or even a vanilla custard sauce work beautifully. For a lighter option, serve it with a dollop of whipped mascarpone cheese. Some people enjoy it with a scoop of cherry ice cream for double the cherry flavor.


