Crispy Chicharrones? Grandma’s Secret Method for Perfect Pork Rinds
There’s something magical about biting into a perfectly crispy chicharrón—that satisfying crunch that echoes through your mouth, followed by the rich, savory flavor of rendered pork fat and seasoning. My grandmother has been making chicharrones the traditional way for over fifty years, and her technique has been passed down through three generations of our family. What most home cooks don’t realize is that achieving that ideal texture requires patience, precision, and understanding the science behind pork skin transformation.
Chicharrones, also known as pork rinds or pork cracklings, are a beloved snack across Latin America, Spain, and increasingly in kitchens worldwide. Unlike store-bought versions that often taste stale or overly greasy, homemade chicharrones made using grandma’s method deliver an incomparable quality that justifies the minimal effort required. The secret isn’t exotic ingredients or complicated techniques—it’s about respecting the process and knowing exactly when your pork skin has reached that perfect golden-brown state of crispy perfection.
In this comprehensive guide, I’ll share the exact steps my grandmother taught me, along with the science behind why this method works so consistently. Whether you’re a seasoned home cook or tackling chicharrones for the first time, you’ll discover that creating restaurant-quality results at home is entirely achievable.
Understanding Pork Skin Structure: Why This Matters
Before you begin making chicharrones, it’s essential to understand what you’re actually cooking. Pork skin is composed of three distinct layers: the epidermis (outer layer), the dermis (thick middle layer containing collagen), and the hypodermis (the layer connecting to fat). When heat is applied correctly, water evaporates from these layers, collagen breaks down into gelatin, and the remaining structure becomes incredibly light and crispy.
The magic of grandma’s method lies in the two-stage cooking process that addresses each layer differently. The first stage removes moisture gradually, while the second stage creates the dramatic expansion and crisping that makes chicharrones so addictive. This is why rushing the process or attempting to cook at excessively high temperatures from the start typically results in burnt exteriors and chewy interiors.
Understanding this science also explains why some batches turn out better than others. Pork skin thickness varies depending on the cut and the animal’s age. My grandmother always adjusts her second-stage temperature and timing based on visual cues rather than relying solely on preset times. This intuitive approach comes from decades of experience, but you’ll develop the same instinct after making a few batches.
Selecting Your Pork Skin: The Foundation of Success
The quality of your final chicharrones depends almost entirely on the quality of your starting ingredient. You’ll need pork skin, ideally with a thin layer of fat still attached. Most butchers can provide this if you ask specifically—don’t settle for skin that’s been sitting in a display case for days. Fresh pork skin should have a pale pink color and feel slightly moist to the touch.
Request skin that’s approximately one-quarter to one-half inch thick. Thinner skin crisps faster but requires more attention, while thicker skin takes longer but is more forgiving. For beginners, aim for the middle range. Ask your butcher to remove any excess hair and to keep the fat layer attached—this fat renders during cooking and contributes significantly to flavor and texture.
Plan to use one to two pounds of pork skin for a standard batch. This quantity yields enough chicharrones for a family gathering or to keep on hand for snacking throughout the week. Store your pork skin in the coldest part of your refrigerator and use it within two days of purchase for optimal results.
The Two-Stage Cooking Process: Grandma’s Signature Technique
This is where grandma’s method truly distinguishes itself from other approaches. Rather than attempting to achieve crispiness in a single cooking stage, we use two distinct temperatures and techniques. This methodical approach guarantees consistent results and eliminates the guesswork that frustrates home cooks.
Stage One: Low and Slow Water Removal (The Render)
Begin by cutting your pork skin into manageable pieces—roughly two to three inches square works well. Pat the pieces thoroughly dry with paper towels; any surface moisture will interfere with proper cooking. Place the dried skin pieces in a large, heavy-bottomed pot or Dutch oven. Do not add any oil or fat at this stage; the pork skin contains sufficient fat that will render during cooking.
Set your heat to medium-low and allow the skin to cook undisturbed for approximately 30 to 45 minutes. During this phase, you’ll notice fat beginning to accumulate in the bottom of the pot, and the skin will gradually change color from pale pink to light golden. The key is patience and low heat—rushing this stage by increasing temperature will result in the exterior cooking faster than the interior can release moisture, leaving you with tough, chewy chicharrones.
Stir occasionally to ensure even cooking, but avoid constant stirring. Every 10 to 15 minutes, give the mixture a gentle stir to redistribute the pieces. The fat should be gently simmering, not boiling vigorously. If you see aggressive bubbling, reduce the heat further. This stage is complete when the skin pieces have turned a light golden-brown color and feel significantly lighter than when you started—the majority of moisture has been driven off.
Stage Two: High-Heat Crisping (The Finish)
Once the first stage is complete, carefully drain most of the rendered fat into a separate container (save this for cooking or other culinary applications—it’s liquid gold). Leave just enough fat in the pot to coat the bottom, approximately two to three tablespoons. This remaining fat will help achieve that final crispy texture without allowing the chicharrones to dry out completely.
Increase your heat to medium-high. The skin pieces should begin to sizzle almost immediately. Now comes the critical part: watch carefully and stir frequently. The chicharrones will go from golden to deep golden-brown relatively quickly at this temperature. The entire second stage typically takes 10 to 15 minutes, depending on your stovetop’s power and the thickness of your skin pieces.
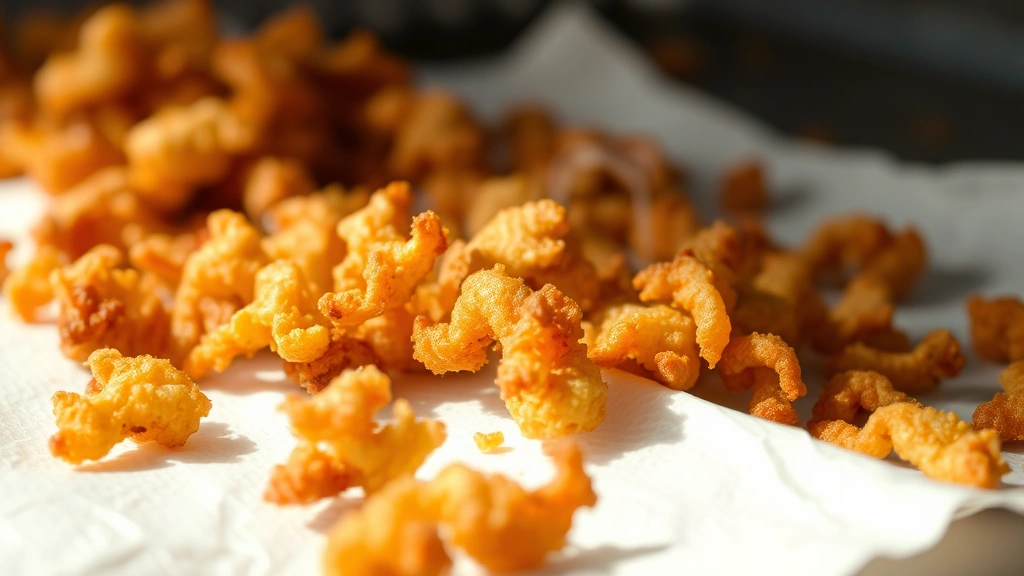
You’re looking for pieces that have expanded slightly and achieved a deep golden-brown color with some darker spots. They should make a crispy sound when you move them around the pot. Once you hear that distinctive crackle and see the color you’re after, immediately transfer the chicharrones to a paper towel-lined plate or colander to drain excess fat.
Temperature Control and Timing: The Science of Precision
Temperature control is absolutely critical when making chicharrones. Unlike making homemade pasta, which can tolerate slight variations in technique, chicharrones demand consistency. Invest in a reliable instant-read thermometer to monitor your oil temperature throughout both cooking stages.
During stage one, your oil temperature should remain between 250°F and 300°F. If it climbs above 300°F, the exterior will brown before the interior has properly dried, resulting in an undesirable texture. If it drops below 250°F, the cooking process stretches unnecessarily long, and you risk the fat becoming rancid from extended heating.
For stage two, increase the temperature to between 350°F and 375°F. This higher heat causes rapid moisture evaporation and creates the dramatic puffing and crisping action that makes chicharrones so satisfying. Most home cooks find that 360°F represents the sweet spot—hot enough for proper crisping but not so hot that the exterior burns before the interior finishes cooking.
Keep in mind that your stovetop’s actual temperature may differ from what your dial indicates. Professional cooks always verify with a thermometer rather than relying on dial settings. This single practice will transform your results from inconsistent to reliably excellent.

Seasoning and Flavor Variations: Beyond Plain Chicharrones
Once your chicharrones have drained and are still warm, seasoning is straightforward. My grandmother’s basic approach involves sprinkling with fine sea salt while the pieces are still hot—the salt adheres better to warm food and distributes more evenly. Use approximately one-half teaspoon of salt per pound of cooked chicharrones, adjusting to your preference.
Beyond simple salt, the variations are limitless. Consider these options for flavoring your homemade chicharrones:
- Lime and chili: Combine salt with ground dried chilies (such as guajillo or ancho) and lime zest for a bright, spicy version
- Garlic and herb: Mix salt with garlic powder, dried oregano, and ground cumin for a savory profile
- Spicy barbecue: Toss warm chicharrones with a mixture of paprika, cayenne pepper, and a touch of honey powder
- Umami-rich: Combine salt with nutritional yeast and MSG for an intensely savory experience
- Cajun-inspired: Mix salt with cayenne, paprika, garlic powder, onion powder, and black pepper
Apply seasonings while the chicharrones are still warm—the residual heat helps flavors adhere and develop. For wet seasonings like lime juice, apply them just before serving to prevent the chicharrones from becoming soggy. This is where understanding texture becomes crucial; you’ve worked hard to achieve crispiness, so protect it by avoiding moisture until the moment of consumption.
For serving alongside dips or complementary dishes, consider pairing with homemade salad dressings or green goddess dressing for a sophisticated appetizer presentation. The cooling, herbaceous qualities of these accompaniments provide excellent contrast to the rich, salty chicharrones.
Storage and Serving Suggestions: Maintaining Crispiness
Proper storage is essential for maintaining the crispiness you’ve worked to achieve. Once completely cooled, transfer chicharrones to an airtight container with a paper towel lining the bottom. The paper towel absorbs any residual moisture that might otherwise soften the chicharrones. Store at room temperature for up to five days, or refrigerate for up to two weeks.
To revive chicharrones that have begun to soften, place them on a baking sheet and warm in a 300°F oven for five to ten minutes. This gentle reheating drives off accumulated moisture without burning the pieces. Avoid using a microwave, which will steam the chicharrones and destroy their texture.
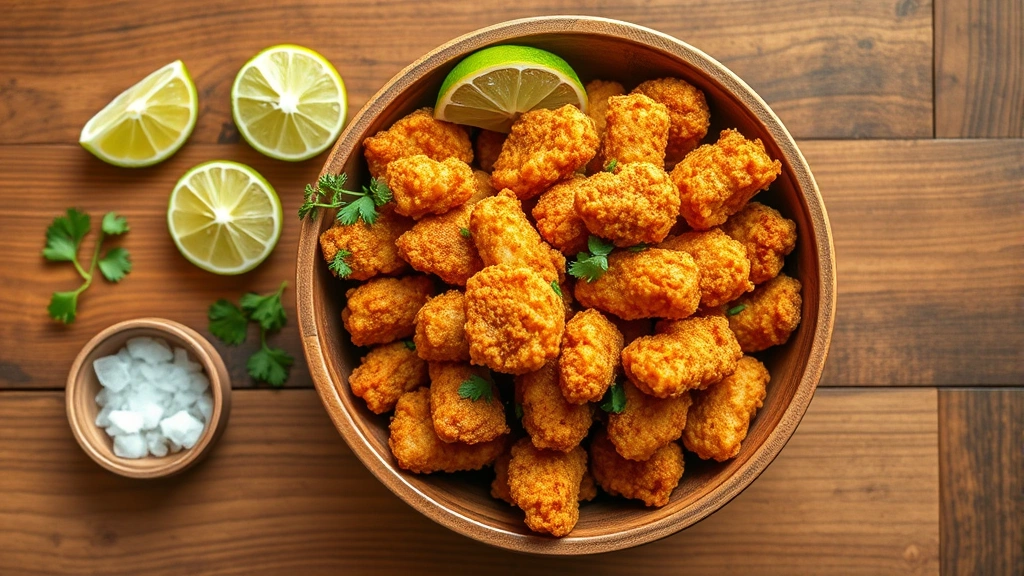
Chicharrones are incredibly versatile. Serve them as a standalone snack with cold beverages, crumble them over soups for added texture and richness, or use them as a protein-rich topping for salads. In Latin American cuisine, they’re traditionally served with homemade pickles or fresh lime wedges to cut through the richness.
For entertaining, arrange chicharrones on a wooden board alongside fresh cilantro, lime wedges, and a small bowl of fleur de sel for guests to add additional seasoning as desired. This presentation celebrates the craft involved in making chicharrones and invites guests to customize their experience.
When serving at parties, keep chicharrones in a low oven (200°F) until serving time rather than leaving them exposed to air, which gradually softens them through moisture absorption. This simple step ensures your guests experience them at their absolute best.
Making chicharrones using grandma’s two-stage method transforms what might seem like a simple snack into a demonstration of culinary technique and respect for ingredients. The patience required during the low-temperature render phase and the attention demanded during the high-heat finish combine to create results that rival professional preparations. Once you’ve mastered this foundational recipe, you’ll understand why my grandmother has been making the same recipe for decades—it works every single time, and the results are consistently exceptional.
The beauty of this method extends beyond just the final product. You’ll develop an intuitive understanding of how heat transforms protein and fat, knowledge that improves your cooking across countless other dishes. You’ll appreciate the rendered pork fat as a byproduct that becomes invaluable for cooking beans, roasting vegetables, or making roasted garlic with extraordinary flavor. Most importantly, you’ll create a connection to culinary tradition that makes homemade food taste fundamentally different from anything store-bought.
FAQ
Can I use pork skin with the skin removed from pork belly?
Yes, absolutely. Pork belly skin works excellently for chicharrones. The fat layer attached to belly skin renders beautifully and contributes wonderful flavor. The technique remains identical to using dedicated pork skin.
What should I do with the rendered pork fat?
Rendered pork fat, called lard, is incredibly valuable in the kitchen. Store it in the refrigerator in an airtight container where it keeps for several months. Use it for sautéing vegetables, making pie crust, roasting potatoes, or cooking beans. It adds authentic flavor to countless dishes.
Why are my chicharrones coming out tough instead of crispy?
Toughness typically indicates insufficient moisture removal during stage one. Ensure you’re cooking at a low enough temperature (250-300°F) for long enough (30-45 minutes minimum). Additionally, verify you’re not overcrowding the pot; pieces need space to cook evenly.
Can I make chicharrones in the oven instead of on the stovetop?
Yes, oven-baking works well. Spread pork skin on a baking sheet and bake at 275°F for 45-60 minutes for stage one, then increase to 375°F for 10-15 minutes for stage two. You won’t get quite as much rendered fat this way, so you may want to brush pieces lightly with pork fat before the second stage.
How do I know when chicharrones are fully cooked?
Properly cooked chicharrones should be light golden-brown, feel very light and crispy when you bite into them, and make a distinct crunching sound. They shouldn’t feel greasy or taste overly fatty. If you’re unsure, remove one piece and let it cool for a minute before tasting.
Can I use a deep fryer instead of a pot?
A deep fryer works well for stage two, but stage one really benefits from the slower, gentler heat of a pot on the stovetop. If you use a fryer for stage two, ensure your oil temperature is accurate and watch carefully to prevent over-browning.
What’s the difference between chicharrones and chicharrón prensado?
Chicharrón prensado is pressed chicharrones—the cooked pieces are pressed together while still warm, then cooled to create a solid sheet that can be broken into pieces. The cooking method is identical; the difference is in post-cooking preparation. Prensado offers interesting texture contrasts with some crispy and some slightly chewier sections.


