
Crispy Fingerling Potatoes? Chef’s Secret Method
Fingerling potatoes are a chef’s dream ingredient—their elongated shape, waxy texture, and naturally buttery flavor make them perfect for creating restaurant-quality side dishes at home. But achieving that elusive golden, crispy exterior while maintaining a creamy interior requires more than just tossing them in a pan with oil. Professional chefs have perfected techniques that transform these humble potatoes into showstopping components that elevate any meal. This guide reveals the secrets that separate mediocre roasted potatoes from the crispy, caramelized masterpieces you find in high-end restaurants.
The journey to perfectly crispy fingerling potatoes begins with understanding the science behind potato texture. The starch molecules in fingerling potatoes undergo a process called the Maillard reaction when exposed to high heat, creating complex flavors and that coveted golden-brown crust. However, achieving this requires proper technique, timing, and ingredient selection. Whether you’re preparing them as a side for your favorite mac and cheese recipe or as a standalone dish, mastering this method will transform your cooking.
Selecting and Preparing Your Fingerling Potatoes
The foundation of exceptional crispy fingerling potatoes begins with selection. Not all fingerlings are created equal, and choosing the right variety makes a significant difference in your final result. Look for fingerlings that are relatively uniform in size—ideally between 2 to 3 inches long. This uniformity ensures even cooking throughout your batch, preventing some potatoes from becoming mushy while others remain undercooked.
When shopping, examine the potatoes for firm texture and unblemished skin. Avoid any with soft spots, sprouting eyes, or wrinkled areas, as these indicate older potatoes that may have degraded starch content. The waxy varieties like Russian Banana, French Fingerling, or Peruvian Purple are excellent choices because their lower starch content creates a creamier interior while still developing a crispy exterior. These varieties contain approximately 16-17% starch compared to russets at 20%, making them ideal for this application.
Preparation is equally crucial. Rinse your fingerlings thoroughly under cold running water, using a soft brush or cloth to remove any soil without damaging the delicate skin. Pat them completely dry with paper towels—moisture is the enemy of crispiness. Any remaining water will create steam during cooking, preventing proper browning and crust formation. This drying step might seem minor, but it’s the difference between soggy and spectacular potatoes.
For fingerlings, you have the option to leave the skin intact or peel them partially. Professional chefs often use a technique called “checkering”—making shallow cuts along the length of the potato in a crosshatch pattern. This increases surface area for browning and creates visual appeal. Alternatively, leaving the skin completely intact provides additional texture and nutritional value. The choice depends on your presentation goals and personal preference.
The Pre-Cook Method: Why Parboiling Matters
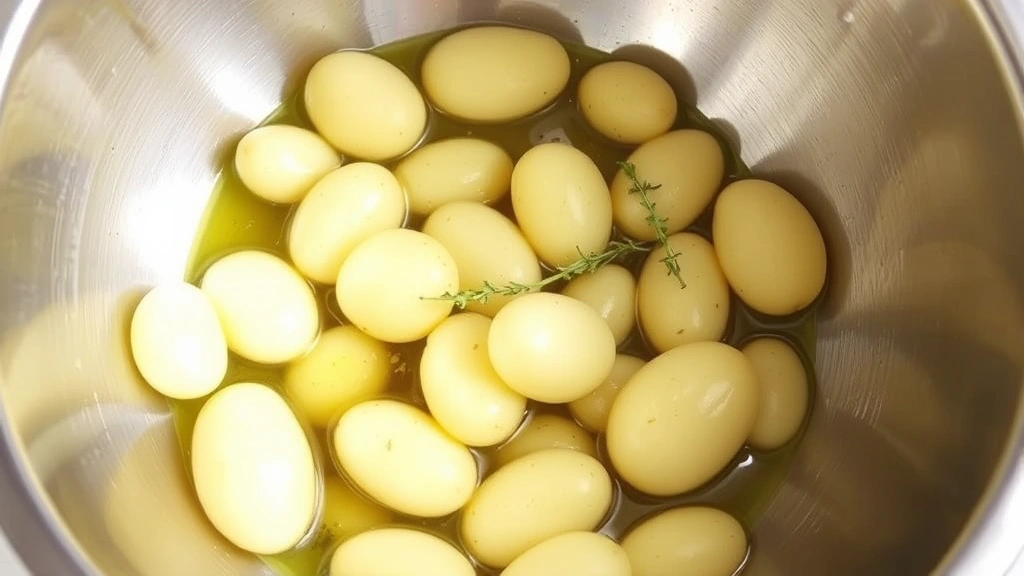
This is where many home cooks go wrong, and where professional technique diverges dramatically from intuition. The secret to achieving both crispy exteriors and creamy interiors lies in parboiling—a preliminary cooking step that sounds counterintuitive but produces superior results. Parboiling partially cooks the potatoes in salted water before roasting, accomplishing several critical objectives.
Fill a large pot with cold water and add approximately 1 tablespoon of kosher salt per quart of water. This salted water seasons the potatoes from the inside out, distributing flavor evenly throughout the flesh. Place your prepared fingerlings in the cold water and bring to a gentle boil over medium-high heat. This gradual temperature increase is important—starting with cold water allows the heat to penetrate evenly, preventing the exteriors from breaking apart while the centers remain hard.
The parboiling duration is critical: aim for 10 to 12 minutes until the potatoes are fork-tender but still hold their shape. You want them cooked approximately 70-80% of the way through. Insert a knife or fork into the thickest potato—it should meet slight resistance, not slide through effortlessly. This partially cooked state is perfect because the potatoes are soft enough to develop a proper crust but still firm enough to handle the high roasting temperature without falling apart.
Once parboiled, drain the potatoes thoroughly in a colander. Here’s another pro tip: let them steam in the colander for 2-3 minutes. This evaporates surface moisture and begins to dry the exterior, which is essential for crispiness. Some chefs even toss the drained potatoes in the colander with the lid on for a minute, creating a gentle tumbling action that roughens the surface and increases the contact area for browning.
Oil Selection and Temperature Control
The type of oil you use profoundly affects both flavor and the ability to achieve true crispiness. Professional kitchens typically use oils with high smoke points—the temperature at which an oil begins to break down and smoke. For crispy fingerling potatoes, you need an oil that can withstand temperatures of 425-450°F without degrading.
Extra virgin olive oil, while delicious, has a smoke point around 375°F and should be avoided for high-heat roasting. Instead, opt for refined oils with superior heat tolerance. Avocado oil (smoke point 520°F), refined coconut oil (450°F), or even standard vegetable or canola oil (400°F) are excellent choices. Many professional chefs prefer a combination: they use a neutral oil for roasting then finish with a drizzle of quality extra virgin olive oil or herb-infused oil after cooking for maximum flavor.
The amount of oil matters as well. You need enough to coat the potatoes generously—approximately 3-4 tablespoons per pound of fingerlings. This quantity allows for proper browning and prevents sticking, but you’re not deep frying. Toss the parboiled, dried potatoes with your chosen oil, ensuring every surface is coated evenly. Some chefs add minced garlic, fresh rosemary, or thyme at this stage, allowing the herbs to infuse into the oil during roasting.
Temperature control is where precision becomes essential. Preheat your oven to 425°F, and critically, preheat your roasting pan or baking sheet in the oven for 5-10 minutes before adding the potatoes. This initial high temperature creates immediate contact heat that begins the Maillard reaction instantly. When you place room-temperature or cool potatoes directly onto a hot pan, the temperature differential creates a sear that locks in moisture and develops color.
The Roasting Process: Heat, Timing, and Technique
Carefully remove your preheated roasting pan from the oven and immediately spread the oil-coated fingerlings in a single layer. Resist the urge to crowd the pan—each potato should have contact with the hot surface. Crowding creates steam, which prevents browning. If necessary, use two pans or roast in batches. Spread the potatoes cut-side down if you’ve made the checkering cuts, as this maximizes the surface area in direct contact with heat.
Roast at 425°F for approximately 20-25 minutes without stirring. This patience is crucial—moving the potatoes around prevents them from developing that beautiful golden crust. At the 20-minute mark, check for color development. You’re looking for a deep golden-brown to light caramel color on the cut sides and visible browning on the rounded sides.
Once the initial browning has occurred, reduce the oven temperature to 375°F and continue roasting for another 8-12 minutes, stirring occasionally. This lower temperature phase ensures the interiors finish cooking without the exteriors burning. The total roasting time is typically 30-35 minutes, though this varies based on potato size and your specific oven’s characteristics.
A professional technique employed in high-end restaurants involves tossing the potatoes halfway through the lower-temperature phase with fresh herbs, minced garlic, and a touch of fleur de sel or finishing salt. This addition of fresh seasonings at the end prevents herb burning while adding vibrant flavor. Some chefs finish with a knob of butter, which adds richness and helps the seasonings adhere to the crispy surface.
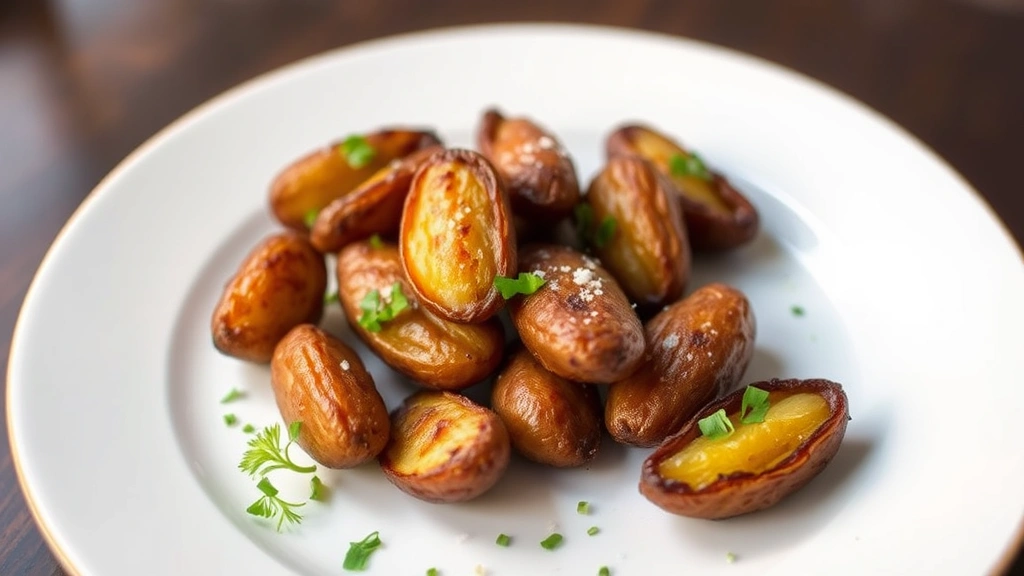
The potatoes are done when they’re deep golden-brown on all sides and a fork easily pierces the flesh with minimal resistance. The exterior should feel crispy and sound slightly crackly when you tap them together. This is the ideal texture—not soft and yielding, but with genuine structural crispness that shatters slightly when you bite through the skin.
Seasoning Strategies for Maximum Flavor
Seasoning fingerling potatoes requires a nuanced approach. The parboiling step with salted water provides foundational seasoning, but strategic additional seasoning elevates the dish significantly. The timing and type of seasoning make substantial differences in the final flavor profile.
Kosher salt is preferable to table salt for roasted potatoes because its larger crystals distribute more evenly and provide better textural contrast. Season the potatoes immediately after they emerge from the oven while they’re still hot—the heat opens the pores of the skin, allowing salt to penetrate more effectively. A finishing salt like Maldon sea salt, applied just before serving, adds a sophisticated mineral complexity and textural element.
Fresh herbs are transformational. Rosemary, thyme, and oregano are classic choices that complement potatoes beautifully. For the most vibrant herb flavor, add fresh herbs during the final 5-10 minutes of roasting or immediately after removing from the oven. Dried herbs can be added earlier with the oil, allowing their flavors to infuse throughout cooking. Many chefs use a combination: dried herbs during roasting for background flavor and fresh herbs at the end for brightness.
Garlic deserves special attention. Whole garlic cloves roasted alongside the potatoes become sweet and mellow, providing subtle flavor. Minced garlic added during roasting can burn and become bitter if added too early. The optimal technique involves adding minced garlic only during the final 5 minutes of cooking or tossing it with the finished potatoes along with a drizzle of quality olive oil.
For more adventurous flavor profiles, consider finishing the potatoes with grated Parmesan cheese, crispy bacon pieces, or a drizzle of truffle oil. These additions should be applied immediately after roasting when the potatoes are still hot, allowing flavors to meld. This approach transforms your crispy fingerlings from a simple side into a sophisticated dish worthy of pairing with elegant mac and cheese or serving as a standalone feature.
Paprika, smoked or sweet, adds color and depth without overwhelming the natural potato flavor. Cayenne pepper provides subtle heat. Garlic powder and onion powder should be used sparingly, as they can become overpowering in concentrated form. The philosophy of professional seasoning is restraint—enhance and highlight the potato’s natural flavors rather than masking them.
Troubleshooting Common Problems
Even with proper technique, issues sometimes arise. Understanding the cause helps you adjust for next time. If your potatoes emerge soft and lacking crispiness, several factors might be responsible. Insufficient oven temperature is a common culprit—if your oven runs cool, you may need to increase the temperature by 25°F. Using an oven thermometer reveals whether your oven’s displayed temperature matches the actual temperature.
Moisture is another common issue. If the potatoes are steaming rather than browning, you may not have dried them adequately after parboiling, or you may have crowded the pan preventing proper air circulation. Ensure your oven racks are positioned to allow hot air to circulate freely around the pan. Consider rotating the pan halfway through cooking if your oven has hot spots.
Uneven browning suggests uneven potato sizes or uneven heat distribution in your oven. Sort potatoes by size before cooking, roasting similarly-sized potatoes together. If one section of your oven runs hotter, position potatoes accordingly, or rotate the pan more frequently. Some ovens benefit from using the convection setting, which circulates hot air and promotes more even browning.
Potatoes that are crispy outside but still hard inside indicate insufficient parboiling time or too-high roasting temperature. Increase parboiling time by 2-3 minutes next time, or reduce roasting temperature slightly and extend cooking time. The goal is to balance the two phases—parboiling prepares the interior, while roasting develops the exterior.
If edges are burning while centers remain undercooked, your oven temperature is too high. Reduce by 25°F and extend cooking time slightly. This is particularly common in convection ovens or ovens with strong top heating elements. Using a lower oven rack position can help if your oven has uneven heating from above.
Potatoes sticking to the pan indicate insufficient oil or inadequate pan preheating. Ensure your pan is hot enough to hear a sizzle when the potatoes make contact, and verify you’ve used enough oil to coat generously. Some chefs prefer cast iron or heavy stainless steel pans because they retain heat better than lighter aluminum.
For those interested in exploring best healthy food recipes, fingerling potatoes are an excellent nutritious choice. They contain more resistant starch than regular potatoes, which supports digestive health. The skin contains most of the fiber and nutrients, so leaving it intact maximizes nutritional value while contributing to the desirable texture.
FAQ
Can I prepare fingerling potatoes ahead of time?
Yes, the parboiling step can be completed up to 4 hours ahead. After parboiling and drying, store the potatoes in an airtight container in the refrigerator. Allow them to reach room temperature for 20 minutes before roasting to ensure even cooking. Some chefs prefer cooking potatoes completely, then reheating them in a 400°F oven for 5-8 minutes to re-crisp the exterior before serving.
What’s the difference between fingerling potatoes and regular potatoes?
Fingerlings are smaller, longer potatoes with a waxy texture and naturally buttery flavor. They contain less starch than russets, making them ideal for roasting because they maintain their shape while still developing crispy exteriors. Their elongated form also creates more surface area for browning, making them perfect for this preparation method.
Can I use frozen fingerling potatoes?
Fresh potatoes are strongly recommended for this recipe. Frozen potatoes have undergone cellular breakdown from freezing, which affects texture. If using frozen fingerlings, skip the parboiling step and roast directly from frozen, increasing cooking time by 10-15 minutes. The results won’t be as exceptional as fresh potatoes.
How do I prevent potatoes from sticking to the pan?
Preheat your pan thoroughly, use sufficient oil, and resist stirring during the initial high-temperature roasting phase. A well-seasoned cast iron pan or quality stainless steel pan works best. If sticking occurs, loosen potatoes with a spatula before attempting to move them.
Can I use an air fryer for crispy fingerling potatoes?
Yes! Parboil as directed, then air fry at 400°F for 12-15 minutes, shaking the basket halfway through. Air fryers create excellent crispiness with less oil. Adjust timing based on your specific air fryer model, as they vary significantly in heat output.
What serving size should I prepare?
Plan approximately 1/3 to 1/2 pound of fingerling potatoes per person as a side dish. For a featured presentation, increase to 3/4 pound per person. The recipe scales easily—simply maintain the same oil-to-potato ratio and cooking times.
Can I make these with different seasonings?
Absolutely. The base technique remains constant, but seasonings are endlessly customizable. Try curry powder, cumin, and cilantro for Indian-inspired flavors, or za’atar for Mediterranean notes. Cajun spices, Italian seasoning, or even cinnamon and nutmeg for a sweet preparation all work beautifully with properly executed crispy potatoes.


