How to Make a Ginger Bug: Complete Fermentation Guide
A ginger bug is a living, breathing fermented starter culture that transforms simple ingredients into a fizzy, probiotic-rich base for beverages. This traditional fermentation technique has been used for centuries to create naturally carbonated drinks without relying on commercial yeast or carbonation equipment. The process is remarkably forgiving, making it perfect for home fermenters of all skill levels who want to explore the world of homemade fermented beverages.
What makes a ginger bug so special is its ability to capture wild yeasts and beneficial bacteria from your environment, creating a dynamic fermentation starter that grows stronger each day. Unlike store-bought sodas loaded with artificial ingredients, a ginger bug produces naturally sweetened, tangy, and effervescent drinks that are genuinely good for your gut health. Whether you’re interested in making ginger ale, ginger beer, or using it as a base for creative flavor combinations, this guide will walk you through every step of the process.
What Is a Ginger Bug?
A ginger bug is essentially a fermented starter culture made from ginger, sugar, and water that captures wild yeasts and beneficial bacteria naturally present in your kitchen environment. The term “bug” refers to the living microorganisms—primarily wild yeasts like Saccharomyces cerevisiae and lactic acid bacteria—that develop during fermentation. This starter becomes increasingly active and flavorful as you feed it daily over the course of one to two weeks.
The science behind ginger bug fermentation is fascinating. The ginger provides natural compounds with antimicrobial properties that help create an environment favoring beneficial fermentation organisms while inhibiting harmful pathogens. The sugar serves as food for the microbes, while water acts as the medium. As fermentation progresses, the yeasts consume sugars and produce carbon dioxide and alcohol, while bacteria produce lactic acid, creating that characteristic tangy flavor and natural carbonation.
Unlike commercial sodas or even some quick breakfast recipes that rely on added ingredients, your ginger bug is completely natural and customizable. You control the sweetness level, intensity of ginger flavor, and any additional botanicals you want to incorporate.
Ingredients and Equipment Needed
Creating a successful ginger bug requires minimal ingredients and equipment, which is part of its charm. Here’s everything you’ll need to get started:
Essential Ingredients:
- Fresh ginger root (about 1 ounce per day during feeding)
- Organic cane sugar or coconut sugar (white sugar works, but organic is preferred)
- Filtered or dechlorinated water (chlorine can inhibit fermentation)
Optional but Recommended:
- Citrus juice (lemon or lime for added flavor and acidity)
- Whole spices (cardamom, cloves, star anise for complexity)
- Fresh turmeric for additional health benefits
Equipment Needed:
- One quart-sized glass jar (preferably wide-mouth for easy access)
- Cheesecloth or coffee filter for covering the jar
- Rubber band to secure the cloth cover
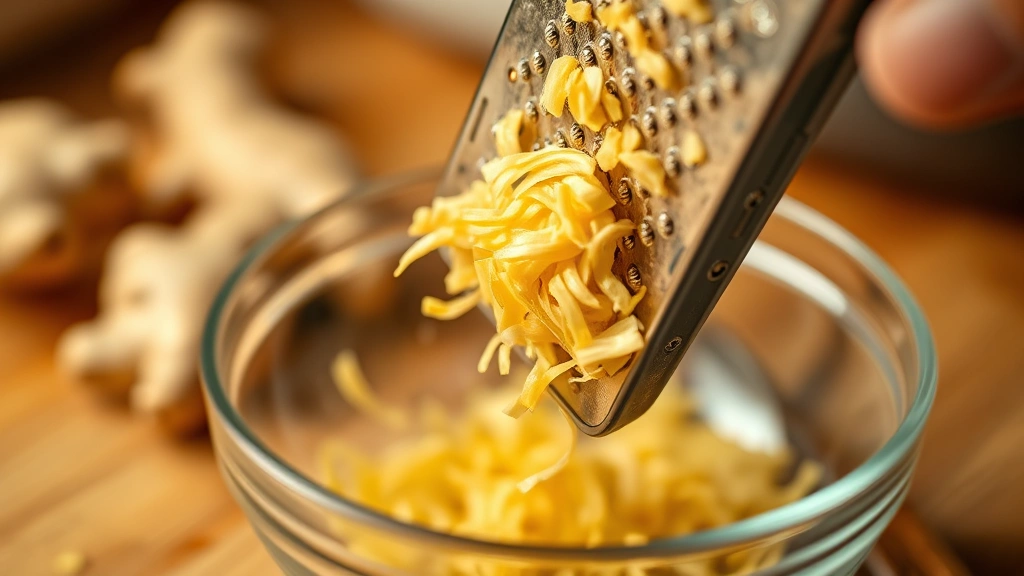
- Small knife or microplane for grating ginger
- Wooden spoon or non-metal utensil for stirring
- Thermometer (optional but helpful for monitoring temperature)
- Small glass bottles for storing finished ginger bug starter
Glass is essential because it’s inert and won’t interact with the acidic fermentation environment. Avoid metal utensils for stirring, as they can react with the fermentation byproducts. A cloth cover allows airflow while preventing dust and debris from contaminating your culture.
Step-by-Step Ginger Bug Fermentation Guide
Creating your first ginger bug is straightforward. Follow these steps carefully to establish a healthy, vigorous starter:
Day 1: Starting Your Culture
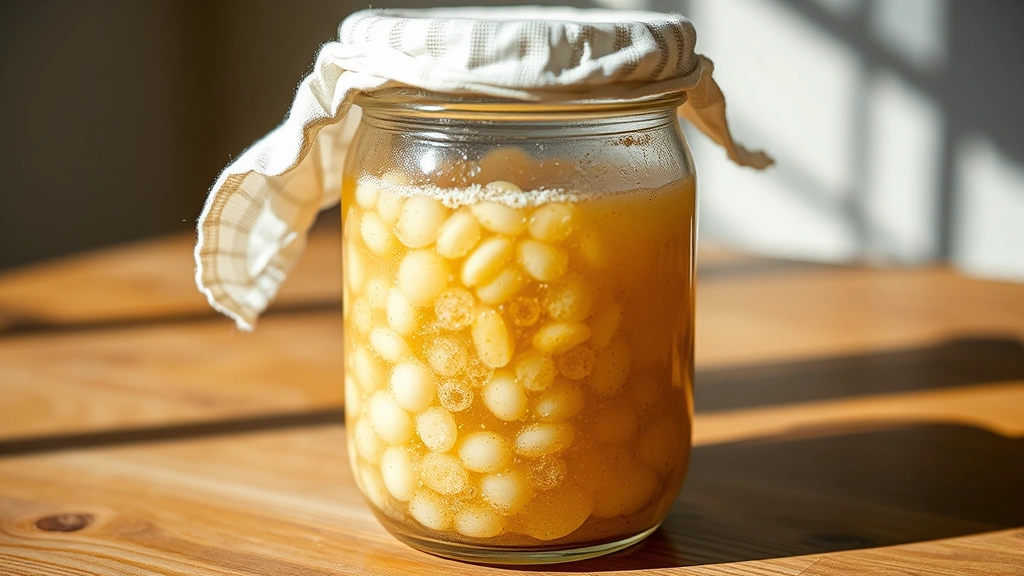
Begin by adding your initial ingredients to a clean glass jar. Combine 2 tablespoons of finely grated fresh ginger, 2 tablespoons of sugar, and 1 cup of filtered water. Stir thoroughly until the sugar dissolves completely. Cover the jar loosely with cheesecloth secured with a rubber band. This allows oxygen to flow in—essential for the initial fermentation phase—while keeping out contaminants. Place your jar in a warm location, ideally between 68-75°F (20-24°C), away from direct sunlight.
The first day won’t show dramatic activity, but this is normal. You’re essentially creating an invitation for wild microorganisms to colonize your culture. The ginger’s natural compounds are already beginning to work their antimicrobial magic, creating an environment that favors beneficial fermentation organisms.
Days 2-7: The Feeding Phase
Each day for the next week, you’ll add the same amount of ginger and sugar: 2 tablespoons of grated ginger and 2 tablespoons of sugar, plus 1/4 cup of water. Stir well and cover again. By day 3 or 4, you should notice bubbling or fizzing when you stir—this is your ginger bug becoming active. The mixture may develop a slightly yeasty aroma, similar to bread dough.
During days 5-7, fermentation should be noticeably vigorous. You might see a thin layer of sediment forming at the bottom and possibly a white foam or film on top, depending on your environment. The white film, called kahm yeast, is harmless and actually indicates healthy fermentation. If you prefer a cleaner appearance, you can skim it off, though it’s not necessary.
Temperature consistency is crucial during this phase. If your kitchen is cooler than ideal, place the jar near (not on) a warm location like the top of the refrigerator. Conversely, if it’s very warm, move it to a slightly cooler spot. Dramatic temperature fluctuations can stress your culture.
Daily Feeding Process Explained
Understanding the daily feeding ritual helps you create the strongest possible starter. Each day, before adding fresh ingredients, observe your ginger bug. It should show signs of activity: bubbling when stirred, a pleasant fermented aroma, and perhaps a slightly separated appearance where liquid and solids aren’t completely mixed.
The Feeding Routine:
- Use a wooden or plastic spoon to gently stir your ginger bug, incorporating any settled sediment
- Grate fresh ginger on a microplane or fine grater—consistency matters more than exact measurement
- Add 2 tablespoons of grated ginger and 2 tablespoons of sugar to the jar
- Pour in 1/4 cup of filtered water
- Stir thoroughly until sugar dissolves
- Cover with cheesecloth and secure with rubber band
- Note the date and time in a fermentation journal (optional but helpful)
Perform this feeding at approximately the same time each day if possible. Consistency helps regulate fermentation activity. If you miss a day occasionally, don’t worry—your ginger bug is resilient. Simply resume your regular schedule.
By day 8-10, your ginger bug should be very active, showing vigorous bubbling within hours of feeding. At this point, you have two options: continue feeding for another few days if you want an even stronger starter, or begin using it to make your first batch of fermented beverages.
Using Your Ginger Bug to Make Beverages
Once your ginger bug is active and bubbly, it’s ready to work its magic creating delicious fermented drinks. The most common application is making ginger ale or ginger beer, though creative cooks often experiment with variations.
Basic Ginger Ale Recipe:
- Strain 1 cup of active ginger bug through cheesecloth into a measuring cup, reserving the solids for continued feeding
- In a large pot, combine 2 cups of water, 1/2 cup of sugar, and 1 tablespoon of freshly grated ginger
- Heat gently until sugar dissolves, then cool completely to room temperature
- Add juice from one lemon and the reserved ginger bug liquid
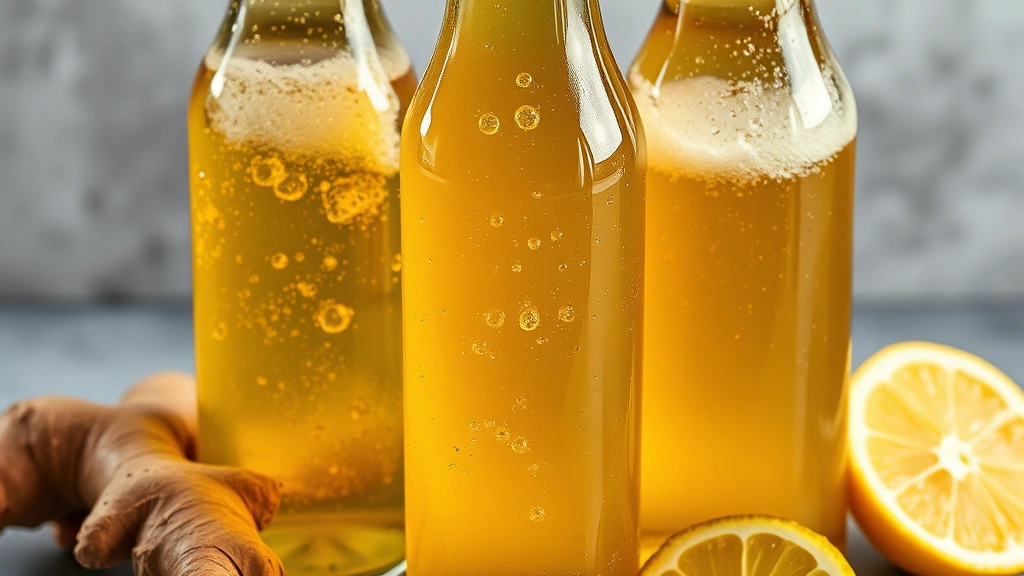
- Pour into clean glass bottles, leaving about 2 inches of headspace
- Cap tightly and leave at room temperature for 24-48 hours for secondary fermentation
- Refrigerate and open carefully—carbonation builds pressure
The secondary fermentation is where the magic happens. The remaining yeasts and bacteria in your ginger bug culture consume the fresh sugar you’ve added, producing carbon dioxide that carbonates your beverage naturally. This is why bottle type matters—you need vessels that can safely contain pressure. Swing-top bottles or sturdy beer bottles work excellently.
For a spicier version more akin to traditional ginger beer, increase the ginger to 2 tablespoons and add warming spices like 1/4 teaspoon of cayenne pepper or a pinch of cloves. The possibilities for customization are nearly endless, much like experimenting with crumble topping recipe variations.
Troubleshooting Common Issues
Even experienced fermenters encounter occasional challenges. Here’s how to address common ginger bug problems:
No Bubbling After Day 5
If your ginger bug shows no signs of fermentation by day 5, the environment may be too cold. Move the jar to a warmer location and ensure you’re using filtered water without chlorine. Some tap water contains enough chlorine to inhibit fermentation. Also verify your ginger is fresh—old, dried-out ginger has fewer active compounds and microorganisms on its surface.
Mold Development
True mold (fuzzy growth in various colors) indicates contamination and means you should discard your batch and start fresh. However, don’t confuse mold with kahm yeast, which appears as a thin white film. Kahm yeast is harmless and common in fermentation. If you see true mold, ensure your cheesecloth cover isn’t allowing debris to settle on the surface, and verify you’re using clean jars and utensils.
Unpleasant or Off Odors
A slightly yeasty or vinegary smell is normal and desirable. However, if your ginger bug smells putrid or rotten, discard it and start over. This indicates pathogenic bacterial growth rather than beneficial fermentation. This typically happens due to contamination from non-sterile equipment or water containing chlorine or other inhibitors.
Weak Carbonation in Final Beverage
If your finished ginger ale isn’t fizzy enough, your ginger bug may not be vigorous enough yet. Extend the feeding period an additional 2-3 days before making beverages. Alternatively, increase the sugar content in your secondary fermentation mixture, as yeasts need adequate food to produce gas. Also ensure your bottles are sealed tightly and kept at room temperature during secondary fermentation.
Creative Flavor Variations and Ideas
Once you’ve mastered the basic ginger bug, experimentation becomes the fun part. Here are creative applications:
Spiced Ginger Bug Beverages
During the initial feeding phase, add whole spices to your jar: 2-3 cardamom pods, 1-2 cloves, and a small piece of star anise. These aromatics infuse your culture with complex flavors that carry through to finished beverages. This approach works similarly to how bakers create sophisticated flavors in coconut cookies recipe variations.
Turmeric Ginger Bug
Replace half your daily ginger feeding with fresh turmeric root. Turmeric adds earthy notes and additional anti-inflammatory compounds. The resulting beverages have a golden hue and subtle pepper notes that pair beautifully with lemon.
Fruit-Infused Secondary Fermentation
During secondary fermentation, add fruit juice or fresh fruit to your bottles. Try apple juice, pomegranate juice, or fresh berries. The fruit sugars feed your culture while adding flavor complexity. Strain out any fruit solids before drinking.
Herbal Additions
Incorporate dried herbs like chamomile, ginger, or mint into your secondary fermentation bottles. The extended fermentation time extracts herbal essences while the culture adds subtle complexity.
Botanical Infusions
Add edible flowers like hibiscus or rose petals to finished beverages for both visual appeal and delicate floral notes. Hibiscus creates a beautiful pink-hued drink with subtle tartness.
Storage and Long-Term Maintenance
With proper care, a ginger bug starter can remain active and useful for years, becoming more established and reliable over time.
Daily Use and Feeding Schedule
If you’re using your ginger bug regularly to make beverages, maintain daily feedings. This keeps your culture vigorous and ensures consistent fermentation strength. The rhythm of daily feeding becomes meditative for many home fermenters—a small daily ritual that connects you to living food systems.
Weekly Storage (Reduced Feeding)
If you don’t plan to make beverages weekly, you can reduce feeding to once per week. Simply give your ginger bug a single feeding of 1 tablespoon ginger, 1 tablespoon sugar, and 2 tablespoons water. Store in the refrigerator between feedings. Cold temperatures dramatically slow fermentation, allowing your culture to survive longer without food. Before using a refrigerated ginger bug to make beverages, bring it to room temperature and feed it daily for 2-3 days to reactivate it.
Long-Term Preservation
Some fermenters create backup cultures by dividing their established ginger bug into multiple jars. This provides insurance against accidental contamination or loss. Keep one jar as your primary culture and maintain 1-2 backup jars in the refrigerator.
Traveling with Ginger Bug
If you’re traveling for more than a week, you have options. You can feed your ginger bug before leaving, then refrigerate it. It will survive 3-4 weeks in cold storage without feeding. Alternatively, share a portion of your culture with a friend who can maintain it while you’re away, then resume your own culture when you return.
Reviving a Neglected Culture
If your ginger bug has been sitting untended for weeks or even months, it may appear dead but can often be revived. Remove any discolored liquid from the top, then begin daily feedings. Within 3-5 days of consistent feeding, fermentation activity usually resumes. If after one week of daily feeding you see no signs of life, your culture has likely died and you’ll need to start fresh.
Frequently Asked Questions
How long does it take to make a ginger bug?
You can begin using your ginger bug to make beverages after 7-10 days of daily feeding. However, many experienced fermenters continue feeding for 2-3 weeks to develop a stronger, more reliable culture. The longer you establish your starter before first use, the more predictable your fermentation results will be.
Can I use ground ginger instead of fresh?
Fresh ginger is strongly preferred because it contains live microorganisms on its surface and more active flavor compounds. Ground ginger has been dried and often heat-treated, reducing microbial populations. If you must use ground ginger, increase the amount to 3 tablespoons daily to compensate, but results may be less reliable.
What type of sugar is best?
Organic cane sugar works beautifully because it often contains more microorganisms naturally present on sugar cane. Coconut sugar is also excellent. Regular white sugar works but may require slightly longer fermentation times. Avoid artificial sweeteners entirely—they don’t ferment and won’t support your culture. Brown sugar works but may impart molasses notes some prefer to avoid.
Is ginger bug fermentation safe?
Yes, when proper techniques are followed. The acidic environment created by fermentation, combined with ginger’s natural antimicrobial properties, prevents harmful pathogens from thriving. The key is using clean equipment, filtered water, and recognizing signs of true contamination (fuzzy mold, foul odors) versus normal fermentation byproducts.
Can children drink ginger bug beverages?
Yes, ginger bug beverages are safe for children. The fermentation process produces minimal alcohol—typically less than 0.5% ABV, similar to kombucha. The beneficial probiotics actually support digestive health. However, some children may find the carbonation or ginger spice overwhelming, so start with diluted versions.
How does ginger bug compare to commercial sodas?
Ginger bug beverages contain live beneficial bacteria and yeasts, whereas commercial sodas are pasteurized, killing all microorganisms. Your homemade versions contain no artificial sweeteners, preservatives, or colorants. The probiotic content supports gut health, similar to how fermented foods benefit digestion. Additionally, you control sweetness levels precisely.
Can I use chlorinated tap water?
Chlorine inhibits fermentation by killing beneficial microorganisms. Use filtered water, or let tap water sit uncovered for 24 hours to allow chlorine to evaporate before using. This simple step significantly improves fermentation success rates, particularly if you live in an area with heavily chlorinated water.
What’s the white film on my ginger bug?
That’s kahm yeast, a harmless and actually beneficial byproduct of fermentation. It indicates your culture is establishing well. You can skim it off if you prefer a cleaner appearance, or leave it—it will eventually incorporate into your culture. Only be concerned if you see fuzzy, colored mold growth rather than this thin white film.
How can I make my ginger bug ferment faster?
Increase temperature slightly—fermentation accelerates in warmer environments (72-75°F is ideal). Ensure you’re using fresh ginger with plenty of surface microorganisms. Feed consistently at the same time daily. Some fermenters add a pinch of organic unflavored yogurt during initial feedings to introduce additional beneficial bacteria, though this is optional. Patience typically yields better results than rushing.
Can I make ginger bug without sugar?
Technically no—the microorganisms need sugar as their food source. However, you can create a less-sweet version by using less sugar during secondary fermentation, allowing the culture itself to consume most of the sugar. The resulting beverages will be less sweet but still delicious, and some prefer this less-sugary approach.


