Gluten-Free Cake Recipe: Proven Delicious & Moist Every Time
Baking a gluten-free cake doesn’t mean compromising on taste, texture, or that satisfying crumb structure you love. For years, home bakers struggled with dense, crumbly results when ditching traditional wheat flour. Today, with the right techniques and ingredient combinations, you can create gluten-free cakes that rival—and sometimes surpass—their gluten-containing counterparts. This comprehensive guide walks you through everything you need to know about crafting the perfect gluten-free cake, from understanding flour blends to mastering moisture retention and achieving that coveted tender crumb.
Whether you’re baking for dietary restrictions, exploring new culinary techniques, or simply curious about alternative baking methods, this proven recipe delivers consistent, delicious results. We’ll explore the science behind gluten-free baking, troubleshoot common mistakes, and provide you with a foolproof vanilla cake recipe that serves as the foundation for endless flavor variations.
Why Gluten-Free Baking Matters
Gluten serves a critical structural function in traditional baking. This protein network traps air bubbles and provides elasticity, allowing cakes to rise properly and maintain their shape. When you remove gluten, you’re essentially removing your primary structural support system. Understanding this challenge is the first step toward success.
Beyond dietary necessity, gluten-free baking has become a legitimate culinary technique. Professional pastry chefs and King Arthur Baking Company have invested significant resources in developing superior gluten-free formulations. The result? Cakes with better crumb structure, superior moisture retention, and authentic flavor that appeal to everyone—not just those avoiding gluten.
Many home bakers find that once they master gluten-free techniques, they prefer the results. Gluten-free cakes often stay moist longer, have a more tender crumb, and showcase flavors more clearly because they’re not masked by dense, chewy gluten networks.
Understanding Gluten-Free Flour Blends
The foundation of any successful gluten-free cake is the flour blend. Using 100% rice flour or almond flour alone won’t work—you need a strategic combination that replaces gluten’s structural properties while maintaining proper hydration and texture.
All-Purpose Gluten-Free Flour Blends: Commercial blends like Bob’s Red Mill 1-to-1 or King Arthur Gluten-Free all-purpose flour already contain starches, binders, and sometimes xanthan gum. These are convenient and reliable for most applications. The advantage: consistency and predictability. The disadvantage: they may not perform optimally for every cake style.
Custom Flour Blend Formula: For ultimate control, create your own: combine 40% brown rice flour, 30% tapioca starch, 20% potato starch, and 10% buckwheat flour (despite the name, it’s gluten-free). This blend provides structure, lightness, and neutral flavor. Add xanthan gum at 1 teaspoon per cup of flour blend to replace gluten’s binding properties.
Specialty Flours: Almond flour adds moisture and richness but can overpower delicate flavors. Coconut flour absorbs tremendous liquid—use sparingly. Sorghum flour contributes earthiness. Teff flour adds subtle nuttiness. Experiment with small percentages (5-15%) to customize flavor profiles.
Essential Ingredients & Their Roles
Xanthan Gum or Psyllium Husk: These binders replace gluten’s structural function. Xanthan gum (most common) creates elasticity and prevents crumbling. Use 1 teaspoon per cup of gluten-free flour. Psyllium husk offers similar benefits with slightly different texture. If your flour blend already contains xanthan gum, don’t add more—it’ll create a gummy cake.
Eggs: Crucial for structure and moisture. Use room-temperature eggs for better incorporation. The proteins in eggs coagulate during baking, providing lift and structure. Most gluten-free cakes benefit from extra eggs compared to traditional recipes—this compensates for gluten’s binding power.
Fat (Butter or Oil): Beyond flavor, fat keeps gluten-free cakes moist. Gluten-free starches can dry out quickly without sufficient fat. Use quality butter or a neutral oil. For best results, cream butter with sugar thoroughly—this incorporates air and ensures even distribution.
Liquid (Milk, Buttermilk, or Yogurt): Gluten-free flours absorb liquid differently than wheat flour. You’ll typically need slightly more liquid. Acidic liquids (buttermilk, yogurt) improve texture and add subtle tang. They also react with baking soda to create lift.
Leavening Agents: Both baking powder and baking soda are essential. Baking soda reacts with acidic ingredients immediately, creating lift during mixing. Baking powder provides sustained lift during baking. Use aluminum-free baking powder to avoid metallic aftertaste.
Salt: Enhances flavor and strengthens gluten-free structure. Don’t skip this—it’s not just seasoning.
Sugar: Beyond sweetness, sugar affects texture. It hygroscopic properties help retain moisture. Brown sugar (with molasses) adds moisture and subtle flavor compared to white sugar.
Our Proven Gluten-Free Cake Recipe
Ingredients:
- 1¾ cups all-purpose gluten-free flour blend (or custom blend)
- 1 teaspoon xanthan gum (omit if blend contains it)
- 1½ teaspoons baking powder (aluminum-free)
- ½ teaspoon baking soda
- ½ teaspoon salt
- ½ cup unsalted butter, softened
- 1 cup granulated sugar
- 3 large eggs, room temperature
- 1 teaspoon vanilla extract
- ½ cup whole milk or unsweetened almond milk
- ½ cup plain Greek yogurt or sour cream
- Zest of 1 lemon (optional, adds brightness)
Instructions:
- Preheat and Prepare: Preheat oven to 350°F (175°C). Grease a 9-inch round cake pan with cooking spray and line the bottom with parchment paper. This prevents sticking—crucial with gluten-free cakes. Let all ingredients reach room temperature.
- Combine Dry Ingredients: In a medium bowl, whisk together gluten-free flour blend, xanthan gum (if needed), baking powder, baking soda, and salt. Whisk thoroughly for 30 seconds to ensure even distribution. Uneven leavening distribution causes dense spots.
- Cream Butter and Sugar: In a large bowl, beat softened butter and sugar together for 3-4 minutes until light and fluffy. This step is non-negotiable—proper creaming incorporates air, creating lift and tender crumb. Scrape down bowl sides frequently.
- Incorporate Eggs: Add eggs one at a time, beating well after each addition (about 30 seconds per egg). This gradual incorporation ensures emulsification and even distribution. The mixture should look pale and slightly thick.
- Add Vanilla and Zest: Beat in vanilla extract and lemon zest (if using). Mix for 15 seconds until fully incorporated.
- Combine Wet and Dry: In a small bowl, whisk together milk and Greek yogurt until smooth. Alternate adding dry ingredients and wet mixture to the butter mixture, beginning and ending with dry ingredients. Add in three additions of dry and two of wet: dry, wet, dry, wet, dry. Mix on low speed until just combined after each addition. Overmixing develops gluten-like networks in gluten-free starches, creating toughness.
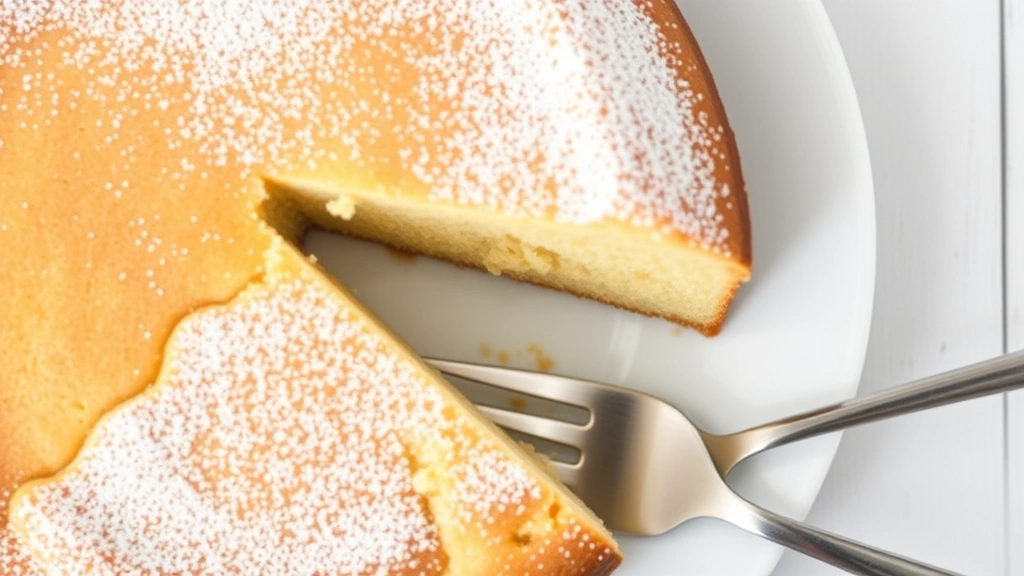
- Pour and Bake: Pour batter into prepared pan. Tap pan gently on counter 3-4 times to release large air bubbles. Bake for 28-32 minutes until a toothpick inserted in the center comes out with a few moist crumbs (not completely clean—gluten-free cakes continue setting as they cool).
- Cool Properly: Let cake cool in pan for 15 minutes, then turn out onto a wire rack. Cool completely (at least 2 hours) before frosting. Gluten-free cakes are delicate when warm and need proper cooling to set.
Yield: One 9-inch round cake (8-10 servings)
Nutrition (per serving): Approximately 280 calories, 12g fat, 38g carbohydrates, 3g protein, 1g fiber
Technique & Baking Tips for Success
Room Temperature Ingredients: This cannot be overstated. Cold ingredients don’t incorporate smoothly, leading to lumps and uneven texture. Remove eggs, butter, and dairy from refrigeration 30 minutes before baking.
Don’t Overmix: Unlike traditional baking where slight overmixing is forgivable, gluten-free batters are sensitive. Overmixing develops starch networks that create toughness. Mix until just combined—small lumps are acceptable and preferable to overmixing.
Use an Oven Thermometer: Gluten-free cakes are sensitive to temperature fluctuations. Many home ovens run hot or cool. An accurate thermometer ensures proper baking temperature. Underbaking leaves gummy centers; overbaking creates dryness.
Invest in Quality Pans: Dark, thin pans conduct heat too quickly and can burn edges. Use light-colored aluminum pans or professional-grade steel. Avoid glass, which heats unevenly.
Level Your Pans: Use an oven thermometer to confirm your oven sits level. Uneven ovens cause uneven cake rising and browning.
Tent with Foil if Browning Too Fast: If cake edges brown significantly before the center is done, loosely tent with aluminum foil for the final 5-10 minutes.
Test for Doneness Carefully: Gluten-free cakes should have a few moist crumbs on a toothpick, not be completely clean. The residual carryover cooking as the cake cools will finish setting the center. Overbaking causes dryness.
For those interested in advanced baking techniques, explore how professional bakers approach Serious Eats’ comprehensive baking science to deepen your understanding of chemical reactions in baking.
Flavor Variations & Customization
Chocolate Gluten-Free Cake: Replace ¼ cup flour blend with unsweetened cocoa powder. Increase milk to ⅔ cup. Reduce sugar to ¾ cup. Add 1 teaspoon instant espresso powder to deepen chocolate flavor. Follow the same technique.
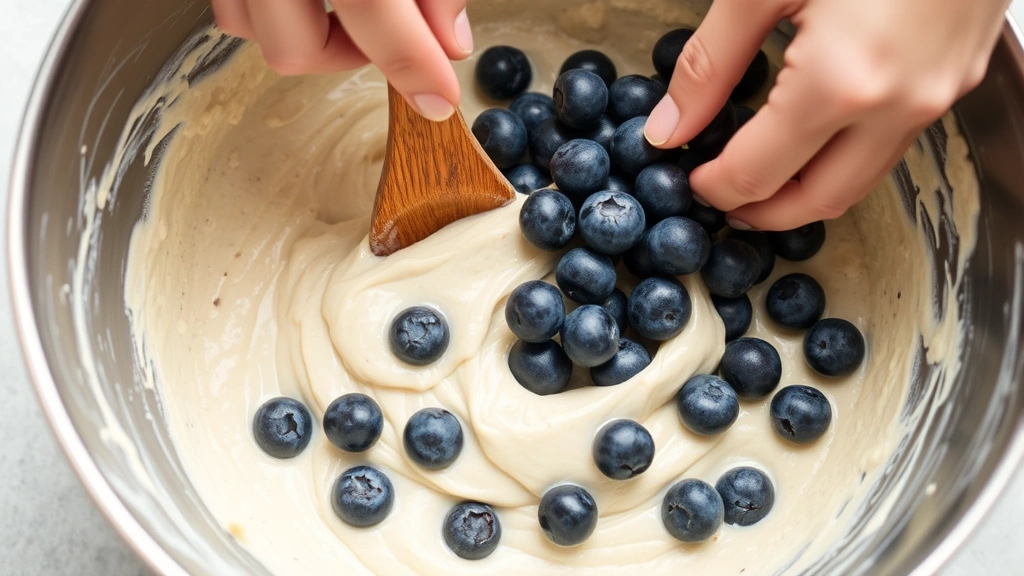
Lemon Blueberry: Use the full lemon zest from the base recipe. Fold in 1 cup fresh blueberries gently after combining wet and dry ingredients. Dust pan with rice flour before adding batter to prevent blueberry sticking.
Strawberry: Reduce milk to ⅓ cup. Add ½ cup strawberry puree (fresh or frozen, thawed and drained). Increase baking soda to ¾ teaspoon to balance acidity.
Vanilla Bean: Replace vanilla extract with 1 vanilla bean, split lengthwise, seeds scraped out. Add seeds to the butter-sugar mixture. This creates elegant specks and superior flavor complexity.
Almond: Replace ¼ cup flour blend with almond flour. Replace milk with almond milk. Add ½ teaspoon almond extract. This creates a delicate, refined crumb.
These variations pair beautifully with complementary dishes. Consider serving alongside Christmas cocktail recipes for festive gatherings, or create a complete dessert menu featuring pickled red onion recipe as an unexpected savory palate cleanser between courses.
Common Problems & Solutions
Dense, Heavy Crumb: Causes include overmixing, too much xanthan gum, or insufficient creaming of butter and sugar. Solution: Mix minimally, verify xanthan gum amount (1 teaspoon per cup flour), and cream butter-sugar for full 3-4 minutes.
Gummy Center: Underbaking or too much liquid. Solution: Bake until a toothpick shows a few moist crumbs but mostly clean. Reduce milk by 1-2 tablespoons if batter seems very wet.
Dry Cake: Overbaking, insufficient fat, or too much flour. Solution: Bake to proper doneness (a few moist crumbs), ensure you’re using correct flour measurements (weigh if possible), and verify fat content is adequate.
Sunken Center: Oven temperature too low or underbaking. Solution: Verify oven temperature with thermometer. Bake until edges pull slightly from pan sides and toothpick test shows proper doneness.
Uneven Rising: Uneven oven temperature or uneven batter distribution. Solution: Use oven thermometer. Tap pan firmly on counter before baking to release large air bubbles. Rotate pan halfway through baking.
Gritty Texture: Inadequate mixing of dry ingredients or settling of starches. Solution: Whisk dry ingredients thoroughly for 30 seconds. Don’t let batter sit before baking—bake immediately after combining.
Bitter Aftertaste: Too much baking soda or low-quality baking powder with aluminum. Solution: Measure baking soda precisely. Use aluminum-free baking powder exclusively.
Storage & Shelf Life
Room Temperature Storage: Wrap cooled cake tightly in plastic wrap. Store at room temperature for up to 2 days. Gluten-free cakes stay moist longer than traditional cakes due to starch properties, but they do stale gradually.
Refrigerator Storage: Wrap tightly and refrigerate for up to 5 days. Cold temperatures slow staling significantly. Bring to room temperature before serving for optimal flavor and texture.
Freezer Storage: Wrap completely (plastic wrap, then foil) and freeze for up to 3 months. Freeze unfrosted cake layers for best results. Thaw at room temperature for 2-3 hours before frosting or serving. Frosted cakes can be frozen for up to 2 months.
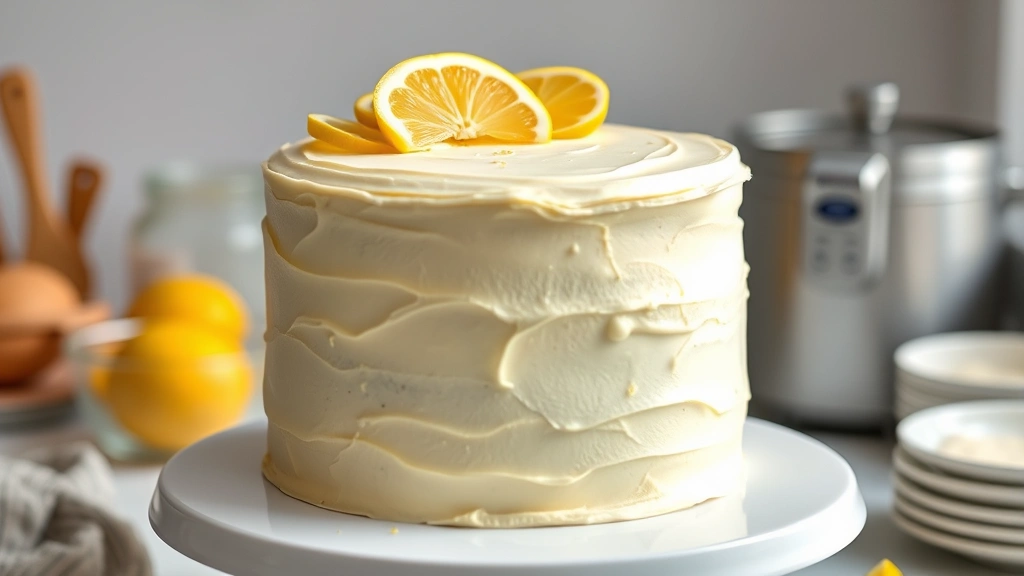
Frosting Considerations: Buttercream frosting works excellently with gluten-free cakes. Apply frosting to completely cooled cake to prevent melting and sliding. Cream cheese frosting also pairs beautifully—its tang complements the delicate crumb.
Individual Slices: Wrap individual slices tightly in plastic wrap, then foil. Freeze for convenient grab-and-go portions. Thaw at room temperature for 1-2 hours.
FAQ
Can I substitute all-purpose gluten-free flour for regular flour in any recipe?
Not directly. Gluten-free flours have different absorption rates and lack gluten’s structural properties. Recipes need adjustment for liquid content, leavening, and sometimes additional binders. The recipe in this guide has been specifically formulated for gluten-free success—follow it rather than adapting traditional recipes directly.
What’s the difference between gluten-free flour blends?
Each brand formulates differently. Some include xanthan gum (Bob’s Red Mill 1-to-1); others don’t (King Arthur Gluten-Free). Some emphasize different starches. Read labels carefully and don’t add xanthan gum if your blend already contains it. If switching brands, you may need to adjust liquid content slightly.
Can I make this recipe dairy-free?
Yes. Replace milk with non-dairy milk (oat, almond, or coconut work well). Replace Greek yogurt with non-dairy yogurt or applesauce. You may need to increase liquid by 1-2 tablespoons since applesauce absorbs differently than yogurt. Replace butter with coconut oil or dairy-free butter in equal amounts.
Why does my gluten-free cake taste like gluten-free cake?
This often indicates too much xanthan gum (creating a gummy taste) or use of inferior gluten-free flour blends. Ensure you’re not exceeding 1 teaspoon xanthan gum per cup of flour. Use high-quality flour blends. Adding extracts (vanilla, almond, lemon) masks any slight off-flavors.
Can I use this recipe for cupcakes?
Absolutely. Divide batter among lined muffin cups, filling two-thirds full. Bake at 350°F for 16-18 minutes until a toothpick shows a few moist crumbs. Cupcakes may bake slightly faster than layer cakes due to smaller size. Check at 15 minutes.
Is this recipe suitable for people with celiac disease?
Yes, provided you use certified gluten-free ingredients. Verify that your flour blend, baking powder, and all other ingredients carry gluten-free certification. Avoid cross-contamination by using dedicated baking equipment and work surfaces.
What’s the best frosting for gluten-free cake?
Buttercream frosting (butter, powdered sugar, vanilla, milk) works beautifully. Cream cheese frosting provides tangy contrast. Whipped cream frosting offers lightness. Avoid overly heavy frostings that might compress the delicate gluten-free crumb. The cake’s tender structure supports most frostings well.
Can I make this recipe egg-free?
It’s challenging because eggs provide crucial structure and moisture. You could try replacing each egg with 1 flax egg (1 tablespoon ground flaxseed mixed with 3 tablespoons water, let sit 5 minutes) plus ¼ cup applesauce. Results will differ from the original recipe. You may need to increase xanthan gum to ½ teaspoon per cup flour and add ½ teaspoon baking powder.
Why is my gluten-free cake crumbly?
Insufficient binding, too much flour, or inadequate moisture causes crumbling. Ensure you’re measuring flour correctly (weigh if possible). Verify xanthan gum amount. Don’t reduce milk or yogurt. Ensure eggs are at room temperature for proper incorporation.


