Table of Contents
Introduction
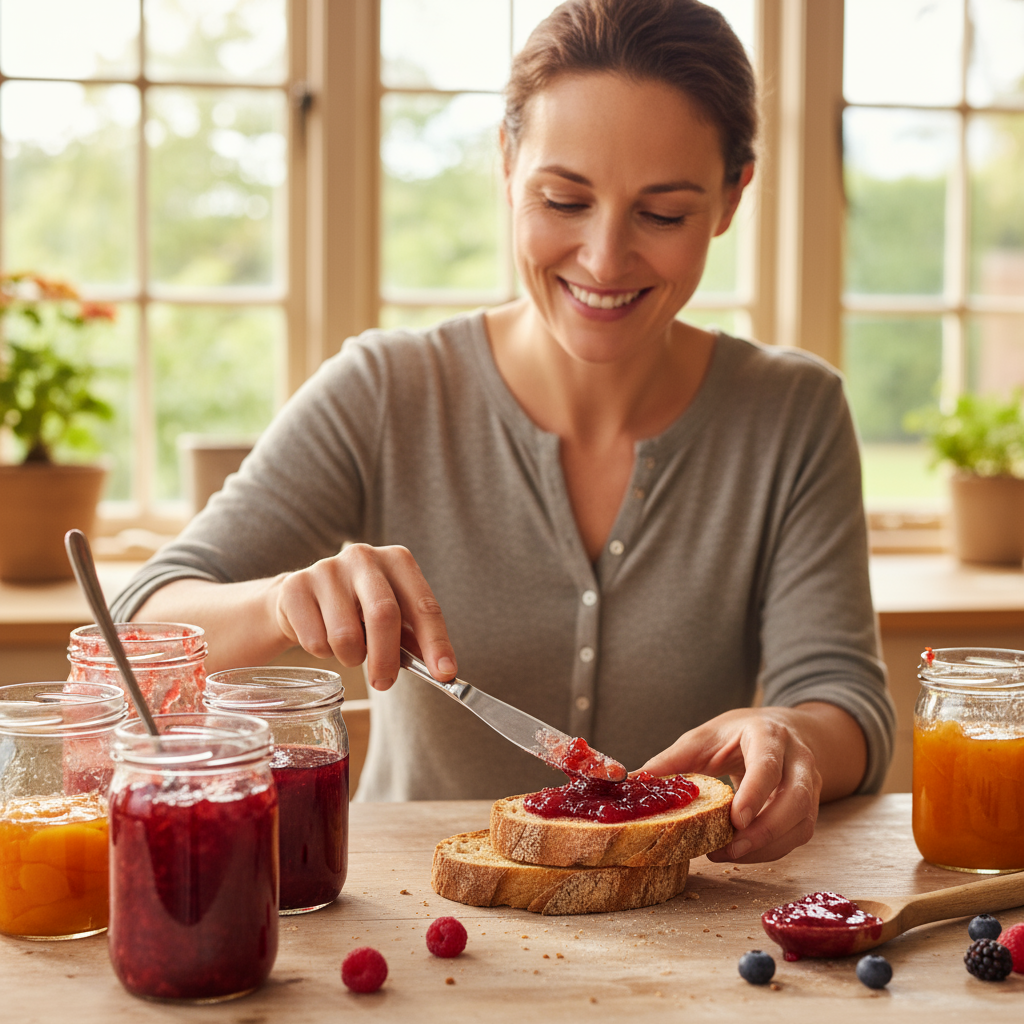
Picture this: you’re spreading a thick layer of your own homemade jam on warm toast, and that first bite hits you with pure, concentrated fruit flavor. No weird aftertaste. No unpronounceable ingredients. Just you, fresh fruit, and a little kitchen magic.
That’s exactly what got me hooked on making jam at home. Sure, you can grab a jar off the grocery store shelf, but have you ever read those labels? Sometimes there are more chemicals than actual fruit! When you make it yourself, you know exactly what’s going in there. Plus, there’s something deeply satisfying about transforming a pile of fresh strawberries or peaches into jars of golden goodness. You get to control the sweetness, experiment with flavor combinations, and honestly? It’s way easier than you think. The key is understanding your ingredients like fresh fruits, sugar, and pectin—once you get the hang of these basics, you’re golden.
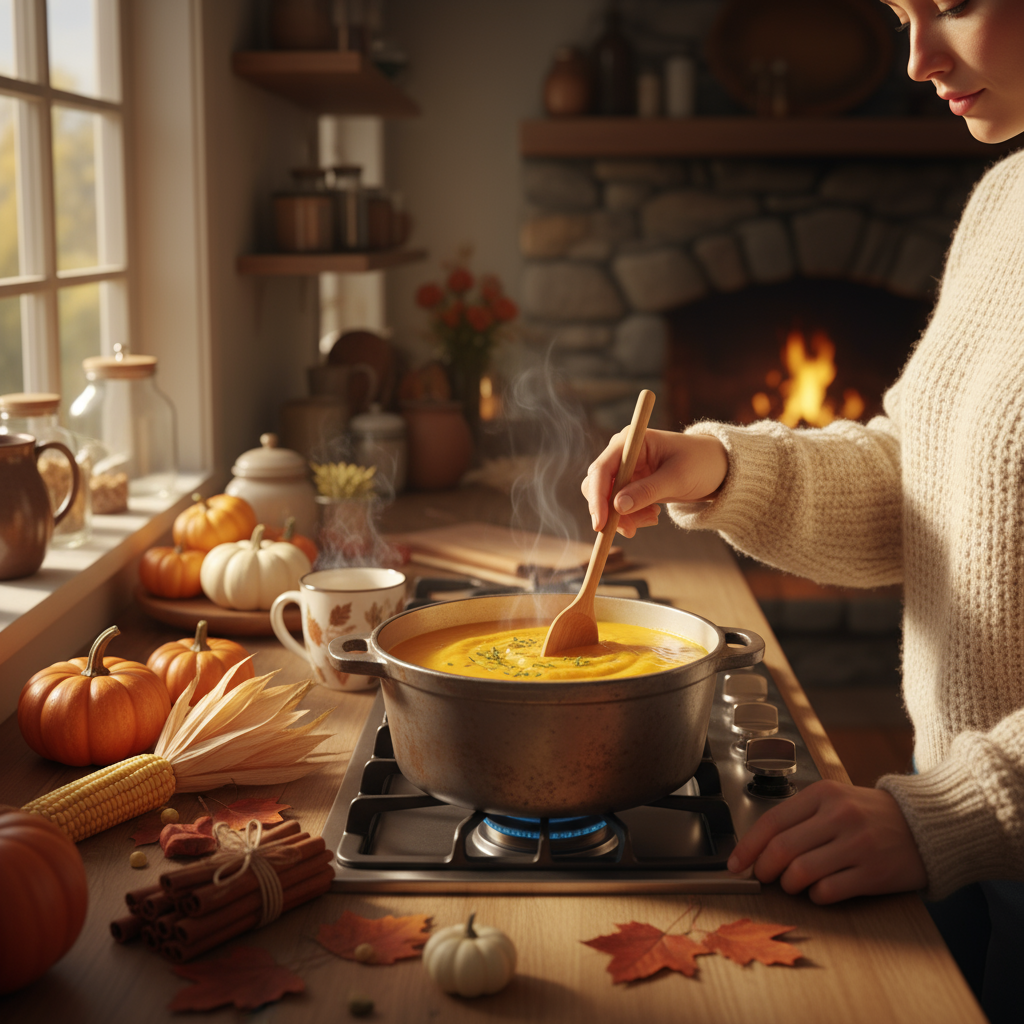
Now, let’s talk equipment. Don’t worry—you don’t need to invest in fancy gadgets. A good-sized pot, a wooden spoon, measuring cups, and a reliable thermometer will get you started. The real game-changer? Learning how to store your creations properly. Trust me, there’s nothing worse than opening a jar of jam only to find it’s gone bad. That’s where airtight jars and proper sterilization methods become your best friends. Get these fundamentals down, and you’ll be making jam like a pro.
Here’s what I love most about jam-making: it opens up a whole world of possibilities. Suddenly you’re thinking about which fruits are in season, how your homemade strawberry jam would taste on fresh-baked bread, or whether that batch of apricot preserves would make the perfect gift. It connects you to the seasons in a way that’s both practical and deeply satisfying. You’re not just making jam—you’re embracing a slower, more intentional way of cooking that our grandparents would definitely approve of.
What You’ll Learn in This Guide
I’m going to walk you through everything you need to know to start making incredible jams at home. Whether you want to preserve summer’s best fruits or create your own signature blends, we’ll cover it all.
- Understanding Homemade Jam: What makes homemade jam special, the simple science behind it, and why your kitchen-made version beats store-bought every time.
- Essential Ingredients and Equipment: The must-have ingredients (fruit, sugar, pectin, lemon juice) and the basic tools that’ll make your jam-making smooth and successful.
- Step-by-Step Jam Making Process: From prepping your fruit to nailing that perfect consistency—I’ll show you exactly how to do it with foolproof techniques.
- Storage and Tips for Success: How to keep your jams fresh and delicious, plus insider tips to avoid rookie mistakes and take your flavors to the next level.
Ready to dive in? We’re going to cover everything from picking the right fruit to mastering those crucial cooking techniques. By the time we’re done, you’ll have the confidence to preserve any flavor that catches your fancy. Your friends and family are going to be seriously impressed. And if you’re interested in expanding your homemade repertoire, you might want to check out how to make homemade sauces—they pair beautifully with fresh jams for the ultimate from-scratch kitchen.
Whether you’re trying to capture peak-season berries or searching for that perfect homemade gift, jam-making hits that sweet spot between science and creativity. It’s approachable enough for beginners but rewarding enough to keep you experimenting for years.
So, ready to transform your kitchen into a jam-making haven? Let’s do this!
Want to know what turns ordinary fruit into that perfect jar of jam sitting in your pantry? It’s not magic—though it might feel like it the first time you nail the perfect batch. Making homemade jam is one of those kitchen skills that seems intimidating until you realize it’s really just fruit, sugar, and a little patience working together. Sure, there’s some technique involved. You’ll need to pick the right ingredients, get your timing down, and master a few simple tricks. But here’s the thing: once you understand how these elements work together, you’ll be creating jams that taste fresher and more vibrant than anything you can buy at the store. We’re going to walk through everything you need to know—from setting up your kitchen to storing your finished jars. Ready to turn your kitchen into a jam-making paradise?
Essential Ingredients and Equipment for Homemade Jam
Let’s start with the stars of the show: your ingredients. Fresh fruit is everything here—and I mean everything. When you choose ripe, seasonal fruits, you’re getting natural sweetness and flavor that no amount of sugar can replicate. Whether you’re working with fresh berries from the farmer’s market or frozen fruit from your freezer stash, understanding what makes each type tick will make all the difference in your final product. Now, about sugar—it’s not just there to make things sweet. This ingredient pulls double duty as a preservative, helping your jam stay fresh for months. Pretty clever, right?
Then there’s pectin, your secret weapon for getting that perfect spreadable texture. Think of it as nature’s thickening agent—some fruits have it naturally, others need a little help. And don’t forget the lemon juice. That bright splash of acid doesn’t just balance out all that sweetness; it actually helps your jam set properly. It’s like having a chemistry assistant in your kitchen.
Equipment-wise, you don’t need anything fancy, but you do need the right tools. A large, heavy-bottomed pot will give you even cooking (no burnt spots, thank you very much). Wooden spoons won’t scratch your pot or react with acidic fruit. Good measuring tools keep your ratios on point, and a reliable thermometer takes the guesswork out of cooking temperatures. Trust me on this one—guessing never ends well with jam.
Storage containers matter just as much as everything else. Those sterilized jars with tight-fitting lids? They’re your jam’s best friend for staying fresh and contamination-free. Get your sterilization game down pat, and you’ll have jams that taste amazing months later. And here’s a pro tip: if you’re already into preserving, check out how to preserve herbs—those same preservation skills will make your jams even more interesting with custom herb blends.
Key Aspects of Ingredients and Tools
Ready to get specific? Here’s what really matters when it comes to ingredients and equipment:
- Fresh Fruits Selection: Go for ripe, seasonal fruit whenever possible—you’ll get better flavor and need less sugar to make it taste amazing. Don’t be afraid to mix different fruits either. Some of the best jams come from unexpected combinations that you probably won’t find in any store.
- Sugar and Pectin Balance: Here’s where things get interesting. Sugar preserves your jam and affects texture, but you don’t want to go overboard. Pectin (whether store-bought or natural) helps everything set up nicely, especially with low-pectin fruits. Learning this balance is what separates okay jam from incredible jam.
- Lemon Juice Use: This little addition is working harder than you think. It brightens the flavor, helps activate pectin, and prevents your sugar from crystallizing. That tangy punch you taste? That’s the lemon juice making everything else taste better.
- Essential Equipment: You need pots that heat evenly, spoons that won’t react with fruit, measuring tools you can trust, and thermometers that actually work. Oh, and sterilization equipment—because nobody wants their beautiful jam to spoil because of contaminated jars.
Once you’ve got your ingredients and equipment sorted, you can start experimenting with confidence. When problems come up (and they will), you’ll know how to fix them. If you enjoy learning about kitchen tools and techniques, you might find how to make homemade pasta helpful too—lots of the same principles apply to different kitchen projects.
Now that we’ve covered the building blocks, let’s talk about the actual process. Making jam involves several key steps that each affect your final result. From prepping your fruit the right way to knowing exactly when your jam is done cooking, every stage matters. You’ll learn to recognize the signs that tell you your jam is ready—no more guessing games. Ready to dive into the step-by-step process?
Step-by-Step Jam Making Process and Storage Tips
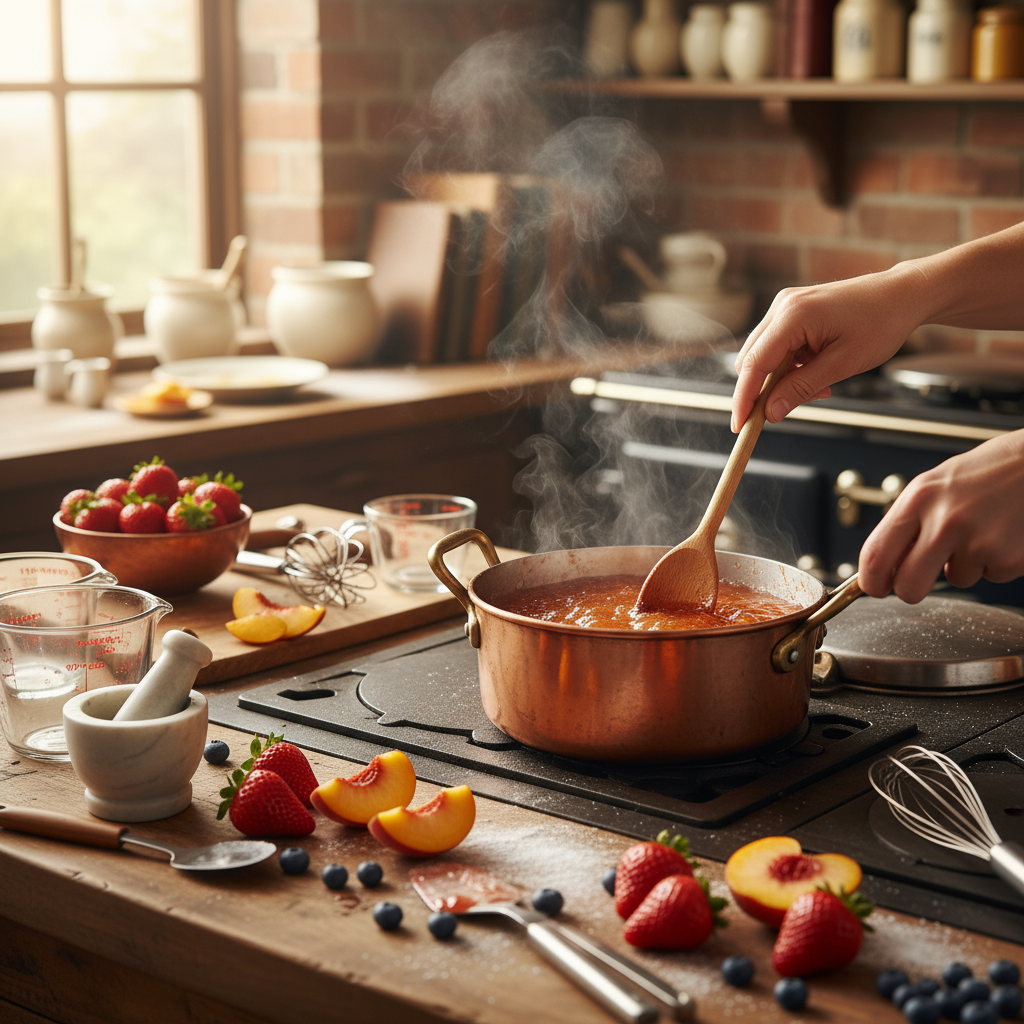
Here’s where the magic happens. Making jam isn’t complicated, but each step builds on the last one. Start with clean, properly prepped fruit—wash everything thoroughly, remove stems and seeds, and cut pieces to a consistent size. Why? Because even prep means even cooking, and even cooking means better texture and no bitter surprises. When you combine your ingredients, follow your recipe measurements carefully (this isn’t the time to wing it), then cook at the right temperature while stirring regularly. Nobody wants burnt jam stuck to the bottom of their pot.
The trickiest part? Knowing when your jam is actually done. The plate test is your best friend here—put a small spoonful of hot jam on a chilled plate, and if it wrinkles when you push it with your finger, you’re golden. Too soft? Keep cooking. This little test will save you from runny disappointment or over-cooked jam that’s lost its fresh fruit flavor.
Storage is where many people drop the ball, and it’s such a shame because you’ve done all the hard work already. Pour your hot jam into sterilized jars immediately—this heat kills any lingering bacteria and creates that satisfying “pop” when the lids seal as they cool. Store your sealed jars somewhere cool and dark, and they’ll keep their amazing taste and color for months. Once you open a jar, it goes in the fridge where it’ll stay fresh for weeks. Want to keep some for even longer? The freezer works beautifully for homemade jam.
Keep an eye on your stored jams too. Any weird colors, fuzzy growth, or off smells mean it’s time to toss that jar. Better safe than sorry, right?
Key Steps and Storage Considerations
Let’s break down the process so you can nail it every time:
- Preparing Fruit Properly: Wash everything well to get rid of dirt and pesticides. Cut or crush your fruit evenly, and remove anything that might make your jam bitter—seeds, stems, bruised spots. Your future self will thank you for taking time with this step.
- Cooking and Stirring Techniques: Follow recipe ratios closely, stir frequently to prevent sticking, and use your thermometer to hit the right temperature. Consistent stirring and proper heat control are what separate smooth, even jam from lumpy, burnt disappointment.
- Testing Consistency: Master the plate test—a small amount of jam on a chilled plate should wrinkle when pushed if it’s ready to set. Learn to read these visual and texture cues, and you’ll know exactly when to stop cooking and start jarring.
- Storage Best Practices: Sterilize everything with boiling water or in the oven. Fill jars with hot jam, seal immediately, and let them cool completely before storing. Keep sealed jars in a cool, dark place and refrigerate after opening. Simple steps that make all the difference in shelf life and safety.

There’s something magical about making your own jam—and I’m not being dramatic here. When you’re working with fresh, seasonal fruit and just a handful of simple ingredients (think ripe fruit, sugar, pectin, and a splash of lemon juice), you’re in complete control. No weird preservatives or artificial flavors like you’ll find in store-bought jars. Plus, you probably already have most of the equipment you need sitting in your kitchen right now. A large pot, some measuring tools, and you’re basically ready to go. The whole process—from prepping your fruit to getting that perfect consistency, testing it, and storing it properly—isn’t nearly as complicated as people think.
But here’s what I love most about homemade jam: it’s yours. Want to mix strawberries with a hint of basil? Go for it. Prefer your apricot jam a little less sweet? You’re the boss. Every batch becomes this little experiment where you can tweak flavors and find exactly what makes your taste buds happy. And once you nail down those storage techniques (sterilizing jars isn’t rocket science, promise), you’ll have jars of summer sunshine sitting in your pantry all winter long. Trust me, there’s no better feeling than gifting a jar of something you made yourself.
Ready to expand your from-scratch kitchen game? You should definitely check out our guide on how to make homemade sauces—it pairs perfectly with jam-making and you’ll be amazed at how much money you’ll save. While you’re at it, learning how to preserve herbs will open up a whole new world of flavor combinations for your preserves. And if you’re anything like me and hate throwing food away, our food waste reduction tips will help you make the most of every ingredient.
Keep experimenting in that kitchen of yours! Each jar you fill is a little victory—proof that you can create something delicious with your own two hands. Need more inspiration? Browse through our healthy food recipes to keep things fresh and exciting. Remember, your kitchen is your playground. Every “oops” moment is just practice, and every success builds your confidence. Now go make some jam!
Frequently Asked Questions
-
How long does homemade jam last?
- Typically lasts up to one year when properly stored in sterilized jars.
-
Can I use frozen fruit to make jam?
- Yes, frozen fruit can be used but may affect texture slightly.
-
Do I need special equipment to make jam?
- Basic kitchen tools are sufficient, but certain equipment can make the process easier.
-
How can I prevent my jam from spoiling?
- Proper sterilization and storage in airtight jars help extend shelf life.