How to Make Mead at Home: Expert Guide
Mead, often called the drink of the gods, is one of humanity’s oldest fermented beverages, predating beer and wine by centuries. This honey-based alcoholic drink has experienced a remarkable renaissance among home fermenters and craft beverage enthusiasts worldwide. Making mead at home is more accessible than you might think, requiring only basic ingredients, patience, and attention to detail.
Whether you’re interested in traditional still mead, sparkling varieties, or fruit-infused melomel, this comprehensive guide will walk you through every step of the process. From selecting the right honey to bottling your finished product, you’ll learn the techniques that professional meadmakers use to create exceptional results in your own kitchen.
Understanding Mead Fundamentals
Before diving into your mead recipe, it’s essential to understand what makes mead unique among fermented beverages. Mead is fundamentally an alcoholic beverage produced by fermenting honey with water and yeast. The ratio of honey to water, yeast selection, and fermentation conditions directly influence the final product’s flavor profile, alcohol content, and aging potential.
The beauty of mead lies in its incredible versatility. You can create traditional dry meads with minimal residual sweetness, or sweet meads that retain significant honey flavor. By adding fruits, spices, or herbs during fermentation, you create variations called melomel (fruit mead), metheglin (spiced mead), or hippocras (herb-infused mead). This flexibility makes mead an ideal project for both beginners and experienced fermenters.
Understanding the science behind fermentation helps you make informed decisions throughout the process. Yeast consumes sugars from honey and converts them into alcohol and carbon dioxide. The original gravity (initial sugar content) determines the potential alcohol yield, typically ranging from 8% to 20% ABV depending on your ingredients and yeast selection. Most home mead makers target 12-14% ABV for balanced, drinkable results.
Essential Equipment and Ingredients
Successful mead making begins with proper equipment. You don’t need expensive specialized gear—many home fermenters start with items found in most kitchens. However, investing in quality fermentation vessels and monitoring tools significantly improves your results.
Primary Equipment Needed:
- Glass carboy or food-grade plastic bucket (minimum 1-gallon capacity)
- Airlock and rubber stopper (fits your fermentation vessel)
- Hydrometer for measuring gravity and alcohol content
- Large stainless steel pot (for heating water)
- Thermometer (preferably with a range of 40-110°F)
- Sanitizing solution (Star San or similar no-rinse sanitizer)
- Siphoning equipment and bottling wand
- Glass bottles with caps or corks
- Cheesecloth or fine mesh strainer
Core Ingredients for Basic Mead:
- Honey: 3 pounds per gallon of finished mead (adjust for desired strength)
- Water: Filtered or dechlorinated water is ideal
- Yeast: Wine yeast (Lalvin D-47 or EC-1118) or mead-specific strains
- Yeast nutrient: Diammonium phosphate (DAP) or complete nutrient blend
- Acid blend: Optional, for balancing pH and flavor
The quality of your honey dramatically impacts your finished mead. Raw, unpasteurized honey from local beekeepers often produces superior results compared to commercial blended honey. Different honey varieties—clover, wildflower, orange blossom, or buckwheat—impart distinct flavor characteristics. Experiment with various types to discover your preferences.
Preparing Your Ingredients
Preparation is crucial for successful fermentation. Begin by sanitizing all equipment thoroughly. Use your no-rinse sanitizer according to package directions, ensuring every surface that contacts your mead is sterilized. This prevents contamination from wild yeasts or bacteria that could spoil your batch.
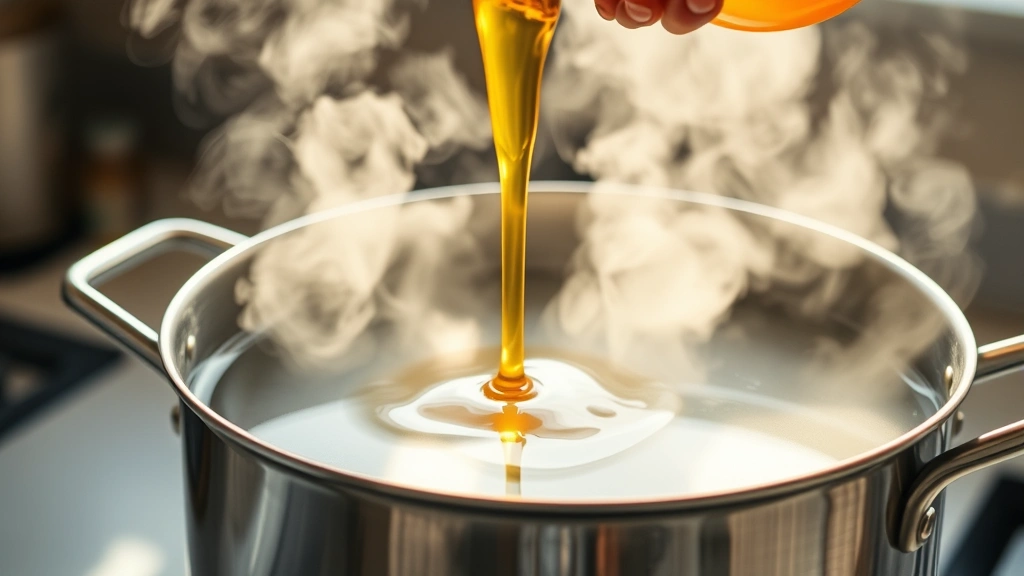
Water Preparation: If your tap water contains chlorine or chloramines, let it sit uncovered for 24 hours to allow these chemicals to dissipate, or use filtered water. Heat approximately 2.5 gallons of water to 160°F (71°C) in your large pot. This temperature is sufficient to pasteurize the water without creating off-flavors.
Honey Dissolution: Slowly add your honey to the hot water while stirring gently. Avoid vigorous stirring, which introduces excess oxygen and can create unwanted flavors. Continue heating until the mixture reaches 160°F, then maintain this temperature for 15-20 minutes. This gentle heating process removes some impurities (called the “trub”) that settle as sediment.
Cooling: Allow your honey-water mixture to cool to room temperature (68-72°F). This cooling process typically takes 2-3 hours. You can speed cooling by placing your pot in an ice bath, but avoid rapid temperature changes that might introduce contamination. Once cooled, transfer the mixture to your sanitized fermentation vessel.
Yeast Preparation: Rehydrate your yeast 15 minutes before pitching by mixing it with a small amount of room-temperature water. This awakens dormant yeast cells and improves fermentation vigor. Add your rehydrated yeast to the cooled must (honey-water mixture) and gently stir to distribute evenly.
Nutrient Addition: Add your yeast nutrient according to package directions. Honey lacks the nitrogen compounds that yeast needs for healthy fermentation, making nutrient addition essential for preventing stuck fermentations. Many experienced mead makers use a staged nutrient approach, adding portions at different fermentation stages.
Fermentation Process
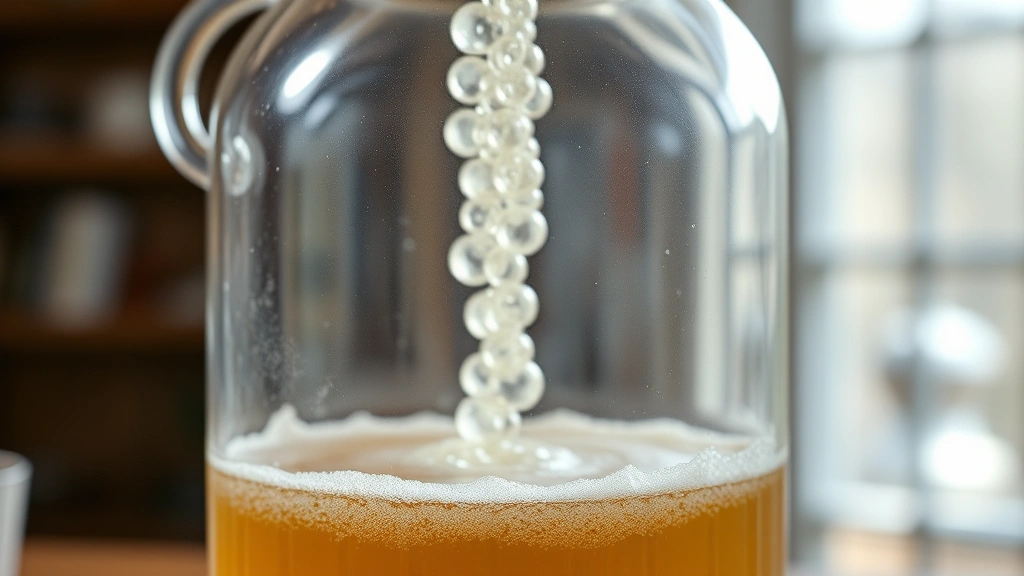
Once your yeast is pitched, secure your airlock onto the fermentation vessel. The airlock allows carbon dioxide produced during fermentation to escape while preventing oxygen and contaminants from entering. You should observe active bubbling within 24-48 hours, indicating healthy fermentation.
Fermentation Stages: Mead fermentation typically progresses through three distinct phases. The initial vigorous fermentation lasts 3-7 days, characterized by rapid yeast activity and CO2 production. During this phase, maintain consistent temperature between 65-72°F. Temperature fluctuations stress yeast and can produce undesirable flavors.
The secondary fermentation phase extends from week two through week four. Fermentation visibly slows, with less frequent airlock activity. This is normal—yeast is still working but at a reduced rate. During this phase, consider adding additional yeast nutrient if fermentation appears to be stalling.
The final maturation phase can last several weeks to months. Airlock activity becomes minimal or stops entirely. At this point, your mead has likely reached its target gravity, meaning fermentation is complete. Take a gravity reading to confirm—if readings remain stable over three days, fermentation has finished.
Monitoring Fermentation: Use your hydrometer to track fermentation progress. Record the original gravity reading before pitching yeast. Check gravity readings every few days during active fermentation, and weekly once fermentation slows. The difference between original gravity and final gravity determines your mead’s alcohol content using the formula: (OG – FG) × 131 = approximate alcohol percentage.
Temperature Control: Consistent temperature is crucial for quality mead. Fluctuations above 75°F can stress yeast and produce “hot” alcohol flavors, while temperatures below 62°F slow fermentation dangerously. Consider using a temperature-controlled fermentation chamber or placing your vessel in an insulated cooler with temperature regulation.
Avoiding Common Issues: One frequent problem is premature oxidation. Minimize headspace in your fermentation vessel and avoid opening it unnecessarily. Another issue is fermentation sticking before reaching target gravity. Combat this by maintaining proper temperature, using quality yeast, and ensuring adequate nutrient addition.
Monitoring and Troubleshooting
Successful mead making requires vigilance and problem-solving skills. Understanding what’s normal and what indicates trouble helps you intervene appropriately.
Normal Fermentation Signs: Active bubbling in the airlock, slight cloudiness from suspended yeast, and sediment accumulation at the vessel bottom are all normal. A layer of foam or krausen on the surface during vigorous fermentation is expected and will settle as fermentation progresses.
Off-Odors: Some sulfur smell during active fermentation is normal—yeast produces hydrogen sulfide as a byproduct. This smell typically dissipates within 1-2 weeks. However, persistent vinegar or acetone odors indicate contamination or serious fermentation problems requiring intervention.
Stuck Fermentation: If fermentation stalls before reaching target gravity, several solutions exist. Gently warm your fermentation vessel to 70°F if temperature has dropped. Add more yeast nutrient, particularly the nitrogen portion. As a last resort, pitch fresh yeast after rousing the existing yeast by gently swirling the vessel (avoid introducing oxygen).
Clarity Issues: Mead often remains cloudy throughout fermentation. This cloudiness is primarily yeast and tannin particles that will eventually settle. Avoid racking (transferring to a new vessel) prematurely—allow at least 2-3 months for primary clarification. For faster clarification, some mead makers use fining agents like bentonite or isinglass according to package directions.
Infection Prevention: Contamination typically manifests as fuzzy mold growth, unusual colors, or persistent vinegar smell. Prevention through proper sanitization is infinitely easier than treating infection. If contamination occurs, discard the batch rather than risking illness or ruining subsequent batches.
Bottling and Storage
Once fermentation completes and your mead has clarified sufficiently, it’s ready for bottling. Clarity doesn’t need to be perfect—slight haze is acceptable and will improve with additional aging.
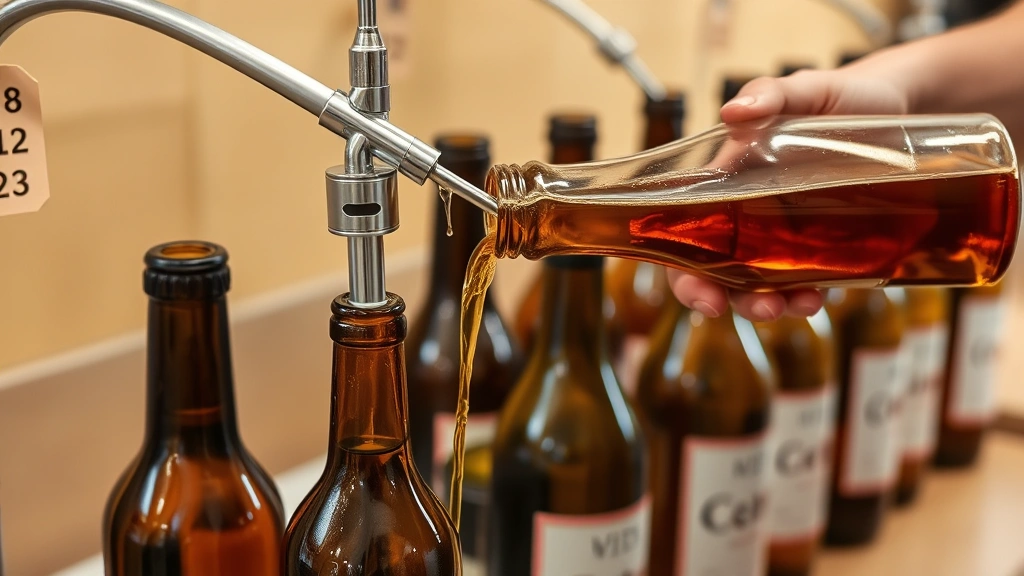
Racking Before Bottling: Siphon your mead from the primary fermentation vessel into a clean, sanitized secondary vessel or directly into bottles, leaving the sediment layer behind. This racking process removes yeast and other solids that could create off-flavors during storage. If you prefer crystal-clear mead, rack into a secondary vessel and allow 2-4 additional weeks for further settling before final bottling.
Bottling Process: Use your bottling wand and siphon to fill sanitized bottles to within one inch of the top. For still mead, use regular wine bottles with corks or screw caps. If you prefer carbonated mead, use beer bottles with crown caps and add a small amount of honey or sugar per bottle (called priming) to generate carbonation during bottle conditioning.
Labeling: Create labels indicating your mead type, honey variety used, fermentation start date, and alcohol content. This documentation helps you track batches and remember successful recipes for future batches.
Storage Conditions: Store your bottled mead in a cool, dark location between 50-65°F. Consistent temperature is more important than absolute temperature—fluctuations cause expansion and contraction that can push corks out or create leakage. A basement, wine refrigerator, or cool closet works perfectly. Avoid direct sunlight, which degrades color and flavor compounds over time.
Aging Potential: One of mead’s greatest advantages is its excellent aging potential. While some meads are drinkable within 3-6 months, most improve significantly with 1-3 years of aging. Complex spiced meads and fruit meads benefit from extended aging, allowing flavors to marry and mellow. Some traditional meads continue improving for decades when stored properly.
For those interested in exploring fermented beverages beyond mead, consider how similar principles apply to other projects. Understanding fermentation fundamentals will enhance your ability to create quality best seafood recipes that incorporate wine or mead pairings, or to explore other craft fermentation projects.
The satisfaction of creating mead from simple ingredients—honey, water, and yeast—is immeasurable. Each batch teaches valuable lessons about fermentation science and flavor development. As you gain experience, you’ll develop preferences for specific honey varieties, yeast strains, and fermentation techniques that produce your ideal mead.
Many home mead makers eventually explore variations once they master the basics. Creating a successful mead recipe foundation allows you to experiment confidently with additions like fruit, spices, or herbs. Some popular variations include traditional dry mead, sweet dessert mead, fruit melomels featuring berries or stone fruits, and spiced metheglin variations. Each variation follows the same fundamental process with ingredient adjustments.
For additional technical knowledge about fermentation science, the Fermentation Culture Institute provides excellent educational resources. The Homebrewers Association also maintains comprehensive guides applicable to mead making. For ingredient sourcing and quality selection, consult the National Honey Board for honey variety information and sourcing recommendations.
FAQ
How long does mead take to ferment?
Primary fermentation typically takes 2-4 weeks, but complete fermentation may extend 6-8 weeks. Many mead makers recommend aging bottled mead for 3-6 months before drinking, though some meads improve for years.
Can I make mead without yeast nutrient?
While technically possible, nutrient addition significantly improves fermentation reliability and final flavor. Honey lacks nitrogen compounds essential for yeast health, making nutrient addition highly recommended for consistent results.
What’s the difference between mead and wine?
Wine ferments from fruit sugars while mead ferments from honey sugars. This fundamental difference creates distinct flavor profiles. Mead typically has a rounder, more complex flavor compared to wine’s fruit-forward character.
Can I use regular baker’s yeast for mead?
Baker’s yeast is not recommended for mead. Wine yeast or mead-specific strains like Lalvin D-47 are superior choices, producing better flavor profiles and more complete fermentation. Wine yeast also tolerates higher alcohol levels better than baker’s yeast.
How should I choose honey for my mead?
Raw, local honey from beekeepers produces superior results compared to commercial blended varieties. Different honey types—clover, wildflower, orange blossom—impart distinct characteristics. Experiment with various types to discover your preferences and develop signature mead recipes.
What’s the ideal fermentation temperature?
Most mead ferments best between 65-72°F. Temperatures above 75°F stress yeast and produce off-flavors, while temperatures below 62°F slow fermentation excessively. Consistent temperature is more important than the absolute value.
How do I know when fermentation is complete?
Fermentation is complete when gravity readings remain stable (within 0.002 points) over three consecutive days. Most mead reaches final gravity between 0.990-1.020 depending on honey type and fermentation conditions.
Can I bottle mead before fermentation finishes?
Bottling before fermentation completion risks bottle explosions from carbon dioxide pressure. Always wait for fermentation to fully complete and gravity readings to stabilize before bottling.


