Ninja Creami Recipes: Tried and Tested Guide
The Ninja Creami has revolutionized how home cooks create frozen desserts, smoothie bowls, and icy beverages without the traditional ice cream maker hassle. Whether you’re a dessert enthusiast or health-conscious smoothie lover, this innovative machine transforms liquid mixtures into creamy, scoopable treats in minutes. From fruity sorbets to protein-packed frozen drinks, the possibilities are nearly endless once you understand the machine’s core functions and freezing techniques.
This comprehensive guide walks you through everything you need to know about creating restaurant-quality frozen treats at home. We’ll explore the science behind the Creami’s unique blade technology, share tested recipes across multiple categories, and provide troubleshooting tips that actually work. Whether you’re making desserts for weeknight cravings or impressing guests at summer gatherings, these Ninja Creami recipes deliver consistent, delicious results every time.
Understanding Your Ninja Creami Machine
Before diving into specific healthy food recipes, understanding how your Ninja Creami works is essential for success. The machine features multiple blade settings—each designed for different frozen treat textures. The Slushi blade creates icy, granular textures perfect for frozen cocktails and beverages. The Sorbet blade produces smooth, dense results ideal for fruit-based frozen treats. The Gelato blade mimics traditional Italian gelato with a creamy, dense consistency. The Lite Ice Cream blade works with lower-fat mixtures, while the regular Ice Cream blade handles richer, higher-fat bases.
The freezing process is equally important as the blending. Most Creami recipes require a minimum of 24 hours in the freezer, though 30-36 hours produces optimal results. The liquid mixture must freeze solid enough for the machine’s unique circular blades to process it properly. Using the correct container size matters significantly—most recipes work best in the tall 16-24 ounce Ninja containers specifically designed for the machine. Attempting to use standard containers often results in uneven freezing or incompatibility with the blade mechanism.
Temperature consistency in your freezer affects results dramatically. A freezer maintaining a steady 0°F (-18°C) ensures proper texture development. Fluctuating temperatures or frequent door openings can create ice crystal buildup, resulting in grainy rather than creamy textures. Understanding these foundational elements transforms you from a casual user to someone who consistently produces professional-quality frozen treats.
Classic Creami Ice Cream Recipes
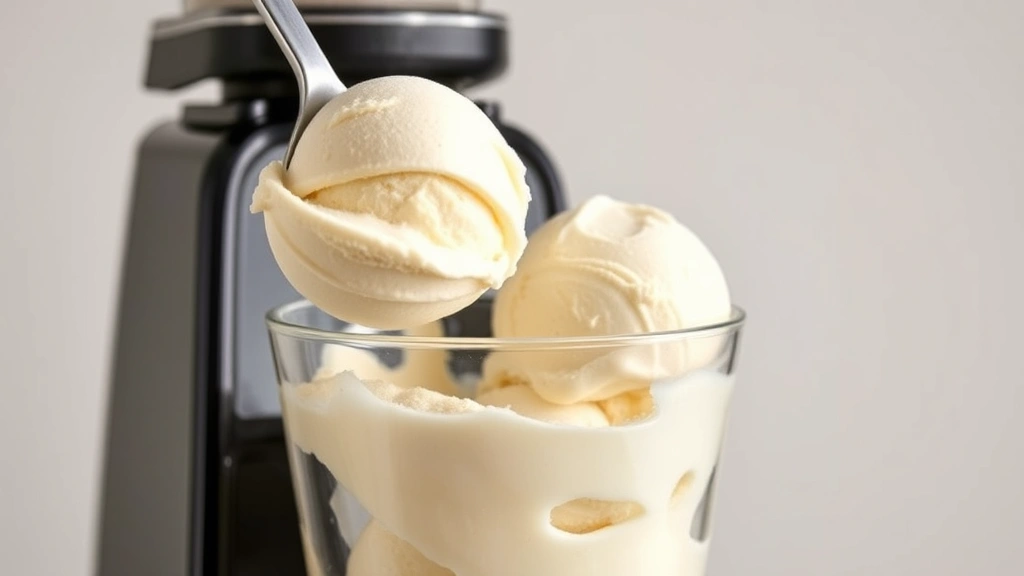
The foundation of any Creami enthusiast’s repertoire includes classic vanilla and chocolate ice creams. These timeless flavors showcase the machine’s ability to transform simple ingredients into silky, scoopable perfection. Start with a basic vanilla custard base: combine 1 cup heavy cream, 1 cup whole milk, 3/4 cup granulated sugar, 5 egg yolks, and 2 teaspoons vanilla extract. Heat the milk and cream to 160°F, then slowly whisk into beaten egg yolks while maintaining constant stirring. This pasteurization step ensures food safety while developing a luxuriously smooth base. Cool the mixture completely before pouring into Creami containers and freezing for 30 hours.
Chocolate lovers should try a rich dark chocolate version using high-quality cocoa. Whisk 2 ounces finely chopped dark chocolate with 1/2 cup hot cream until completely smooth, then fold into your prepared custard base. The key is dissolving chocolate thoroughly before freezing—any undissolved pieces create gritty texture issues. For a less labor-intensive approach, you can substitute 2 tablespoons of quality cocoa powder mixed with a tablespoon of hot water, creating a smooth chocolate slurry before incorporating into your base.
Salted caramel ice cream represents the next level of classic flavor complexity. Prepare a caramel by melting 1 cup sugar in a heavy-bottomed saucepan over medium heat, swirling occasionally but never stirring directly. Once amber-colored, remove from heat and add 6 tablespoons butter and 1/2 cup heavy cream—the mixture will bubble dramatically, so step back briefly. Stir in 1 teaspoon fleur de sel, then cool completely before folding into your vanilla custard base. This recipe demonstrates how adding complementary flavors elevates simple ice cream into something memorable.
Coffee ice cream appeals to breakfast enthusiasts and afternoon snackers alike. Dissolve 3 tablespoons instant espresso powder in 2 tablespoons hot water, creating a concentrated coffee liquid. Whisk this into your vanilla custard base along with an additional 1/2 teaspoon vanilla extract for complexity. The espresso powder dissolves completely during freezing, distributing coffee flavor evenly throughout your finished product. Consider pairing this with our quick breakfast recipes for an afternoon pick-me-up dessert.
Fruity Sorbet and Slushi Creations
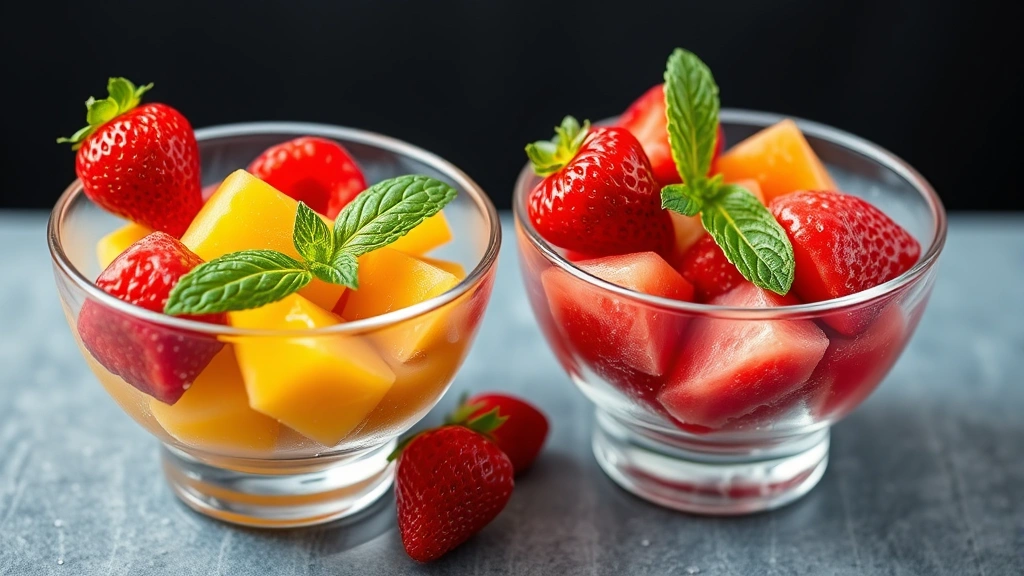
Fruit-based sorbets showcase the Creami’s versatility beyond creamy ice cream. Strawberry sorbet requires minimal ingredients: puree 2 cups fresh strawberries with 1 cup water, 3/4 cup sugar, and 2 tablespoons fresh lemon juice. The lemon juice brightens strawberry flavor while preventing the sorbet from tasting overly sweet or one-dimensional. Strain the mixture through fine mesh to remove seeds if desired, though this step is optional for rustic texture. Freeze in Creami containers for 30 hours, then process using the Sorbet blade setting.
Mango sorbet transports you to tropical locations with its naturally vibrant color and intense flavor. Blend 2 cups fresh mango chunks (or high-quality frozen mango), 1 cup coconut water, 1/2 cup sugar, and 1 tablespoon fresh lime juice. The coconut water adds nutritional value and subtle sweetness while keeping the mixture at ideal freezing consistency. Unlike strawberry sorbet’s lighter texture, mango’s natural pectin creates a denser, more custard-like result when processed.
Watermelon slushi recipes appeal to summer entertaining and casual gatherings. Blend 3 cups fresh watermelon chunks, 1 cup fresh lime juice, 1/2 cup sugar, and 1/4 cup water. This mixture freezes into a bright, icy treat perfect for the Slushi blade setting, creating granular texture that melts refreshingly on your palate. The high water content prevents dense freezing, ensuring proper Slushi blade function. Serve immediately after processing for the most refreshing experience.
Pineapple passion fruit sorbet combines tropical flavors into something sophisticated enough for dinner party service. Blend 1.5 cups fresh pineapple chunks, 1 cup passion fruit puree, 1/2 cup sugar, and 1/4 cup white rum or skip the alcohol for family-friendly versions. The passion fruit’s tartness balances pineapple’s natural sweetness, creating complexity that develops throughout freezing. Process with the Sorbet blade for dense, spoonable results that showcase fruit quality.
Protein-Packed Smoothie Bowl Recipes
Health-conscious cooks appreciate how Ninja Creami recipes can deliver nutrition without sacrificing indulgence. Protein-packed smoothie bases freeze into creamy treats that satisfy both taste buds and fitness goals. A basic Greek yogurt foundation combines 1 cup plain Greek yogurt, 1 cup unsweetened almond milk, 1 scoop vanilla protein powder, 1 tablespoon honey, and 1 teaspoon vanilla extract. This base freezes beautifully and processes into creamy, spoonable smoothie bowls that taste like dessert while providing substantial protein content.
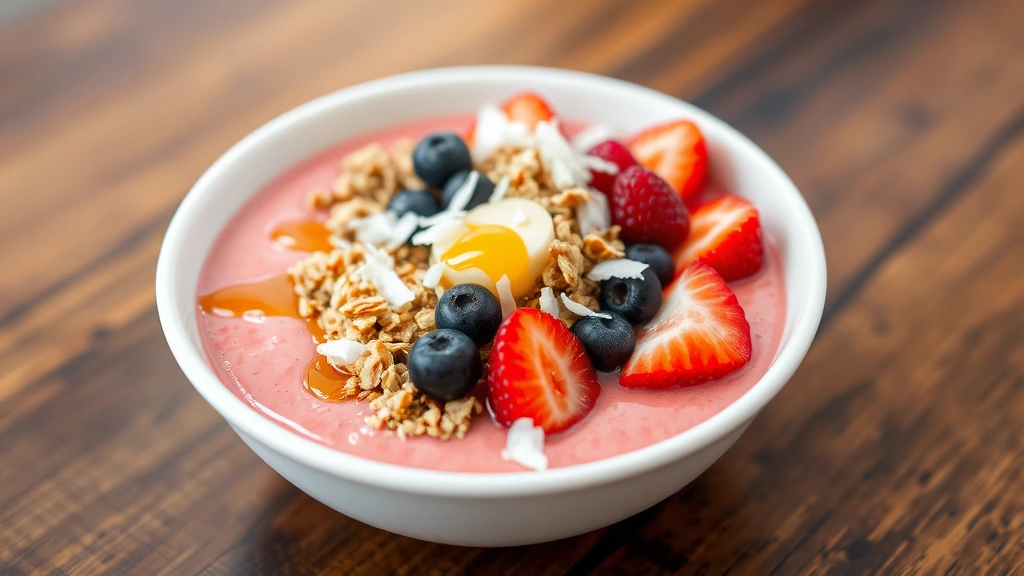
Strawberry protein bowls build on this foundation by adding 1 cup fresh strawberries blended with the yogurt mixture. The fruit adds natural sweetness, reducing added sugar requirements. Top your finished smoothie bowl with granola, coconut flakes, and additional fresh berries for textural contrast. This approach aligns perfectly with our philosophy on nutritious and delicious meals that don’t compromise on flavor.
Chocolate peanut butter protein bowls satisfy dessert cravings while delivering macro nutrients. Combine 1 cup Greek yogurt, 1 cup unsweetened almond milk, 2 tablespoons natural peanut butter, 2 tablespoons unsweetened cocoa powder, 1 scoop chocolate protein powder, and 1 tablespoon honey. Blend until completely smooth—peanut butter must fully incorporate to prevent texture issues. The cocoa powder adds depth while keeping added sugar minimal. Process with the Lite Ice Cream blade for optimal texture with protein-forward bases.
Acai berry protein bowls recreate popular smoothie shop favorites at home. Combine 1 cup frozen acai puree, 1/2 cup Greek yogurt, 1/2 cup almond milk, 1 scoop vanilla protein powder, 1 tablespoon honey, and 1/2 cup mixed berries. The acai’s natural tartness creates complexity while the protein powder ensures substantial satiety. This recipe demonstrates how frozen fruit bases work beautifully in Creami applications, often requiring slightly less liquid than fresh fruit versions.
Tropical and Exotic Flavors
Adventurous cooks explore beyond traditional flavors with tropical and exotic Ninja Creami recipes. Coconut lime sorbet captures beachside refreshment in frozen form. Combine 1 can full-fat coconut milk, 1 cup fresh lime juice, 1/2 cup sugar, and 1/4 cup water. The coconut milk creates richness while lime provides bright acidity. Process with the Sorbet blade for a dense, creamy result that tastes like vacation in a bowl.
Lychee rose water sorbet offers sophisticated, delicate flavors perfect for special occasions. Blend 2 cups fresh lychee fruit (or canned in light syrup, drained), 1 cup water, 1/2 cup sugar, 2 tablespoons fresh lemon juice, and 1/2 teaspoon rose water. Rose water requires restraint—too much creates perfume-like flavors—so start with 1/4 teaspoon and adjust to preference. This recipe showcases how the Creami handles more delicate flavor profiles beautifully.
Matcha green tea frozen treats appeal to wellness enthusiasts and adventurous palates. Whisk 2 tablespoons high-quality matcha powder with 1/4 cup hot water until completely smooth, then combine with 1 cup almond milk, 1/2 cup Greek yogurt, 1/4 cup honey, and 1/2 teaspoon vanilla extract. The matcha’s earthy notes pair beautifully with subtle sweetness. Process with the Lite Ice Cream blade for creamy results that deliver matcha’s nutritional benefits alongside delicious flavor.
Turmeric golden milk frozen desserts combine wellness trends with Creami versatility. Blend 1 cup coconut milk, 1/2 cup almond milk, 1 teaspoon turmeric powder, 1/2 teaspoon ginger powder, 1/4 teaspoon cinnamon, pinch of black pepper, and 3 tablespoons honey. The spice combination creates warming, complex flavors while turmeric provides anti-inflammatory compounds. This recipe works best with the Sorbet blade setting for optimal texture development.
Pro Tips for Perfect Results
Achieving consistent success with Ninja Creami recipes requires understanding several technical considerations. Temperature management matters significantly—allow frozen mixtures to sit at room temperature for 3-5 minutes before processing. This brief thaw softens the exterior just enough for blade engagement while maintaining internal freezing. Attempting to process rock-hard frozen mixtures can strain the machine and produce uneven texture.
Sugar content directly impacts freezing behavior and final texture. Recipes with insufficient sugar won’t freeze solid, while excessive sugar prevents proper freezing. Most Creami recipes work optimally with sugar ratios between 12-16% of total liquid weight. This balance prevents both rock-hard and slushy results. If your mixture freezes too hard, it likely contains excessive sugar or insufficient liquid—adjust accordingly in future batches.
Alcohol content requires special consideration in Creami recipes. Ethanol freezes at lower temperatures than water, so alcohol-containing mixtures need longer freezing times and may require increased sugar content. A general rule: limit alcohol to 15% of total liquid volume. Frozen cocktails work beautifully with the Slushi blade, creating granular textures that melt refreshingly.
Container preparation prevents sticking and ensures smooth processing. Lightly spray Creami containers with cooking spray before pouring mixtures, or simply ensure containers are completely dry before filling. Moisture on container interiors can create uneven freezing. Always leave approximately 1/2 inch headspace at the container top—frozen mixture expands slightly during the freezing process.
Blade selection determines your final texture, making this choice crucial. The Ice Cream blade creates dense, creamy results perfect for custard-based mixtures. The Sorbet blade produces smooth, spoonable textures ideal for fruit purees and non-dairy bases. The Slushi blade creates granular, icy textures for frozen beverages. The Gelato blade produces ultra-dense results for gelato-style treats. Understanding which blade suits your base mixture ensures optimal results consistently.
Storage extends Creami treat enjoyment beyond immediate consumption. Frozen treats keep beautifully in Creami containers for up to 2 weeks, though flavor quality remains optimal within the first week. Transfer processed treats to freezer-safe containers if you need freezer space—they’ll keep for several weeks. Thaw slightly before re-processing if texture becomes too hard during storage.
Experimentation drives innovation with Ninja Creami recipes. Once you master basic techniques, try combining unexpected flavors—lavender lemon sorbet, black sesame ice cream, or cardamom rose water frozen treats. Keep detailed notes about sugar ratios, freezing times, and blade settings that work best for your preferences. Your personal Creami journal becomes an invaluable resource for consistent success.
Consider these applications beyond traditional desserts: frozen coffee bases create energizing breakfast treats, while easy dinner recipes sometimes conclude with homemade frozen treats. Savory applications exist too—frozen gazpacho or tomato water bases create sophisticated palate cleansers between courses. The machine’s versatility extends far beyond sweet applications once you embrace creative thinking.
FAQ
How long should I freeze Ninja Creami mixtures before processing?
Most Ninja Creami recipes require 24-30 hours of freezing, though 36 hours produces optimal results. The extended freezing time allows complete solidification necessary for proper blade function. Shorter freezing periods may result in slushy texture rather than creamy consistency. Check your mixture by gently shaking the container—if liquid moves freely, additional freezing time is needed. Fully frozen mixtures should feel solid throughout with no liquid movement.
Can I use regular ice cream as a Creami base?
Store-bought ice cream can work with the Creami, though homemade bases typically produce superior texture. Commercial ice cream contains stabilizers and emulsifiers that sometimes create overly dense results when processed. If using store-bought ice cream, allow it to soften slightly before processing, or try the Gelato blade setting for best results. Homemade ice cream bases give you complete control over texture and ingredient quality.
What’s the best way to clean my Ninja Creami?
Most Creami components are top-rack dishwasher safe, though hand-washing extends equipment life. The blade assembly requires careful attention—hand wash with warm soapy water and a soft sponge to preserve blade sharpness. Never soak the motor base or electrical components. Clean immediately after use before mixtures dry and harden on surfaces. Regular maintenance ensures your machine operates optimally for years of delicious frozen treats.
Why is my Creami mixture freezing too hard?
Overly hard freezing typically results from insufficient sugar or liquid content. Sugar acts as a freezing point depressant, keeping mixtures slightly softer. Increase sugar content by 1-2 tablespoons per batch if experiencing rock-hard results. Alternatively, add 1-2 tablespoons of alcohol—even vodka, which has minimal flavor—to prevent excessive hardening. Some freezers run colder than others, so adjustments may be necessary based on your specific appliance.
Can I make Ninja Creami recipes without eggs?
Absolutely. While traditional custard-based ice cream uses eggs for richness and texture, egg-free versions work beautifully. Substitute with full-fat Greek yogurt, condensed milk, or additional heavy cream to achieve creaminess without eggs. Coconut milk creates excellent egg-free bases, as does mascarpone cheese. These alternatives eliminate food safety concerns while producing creamy results that rival traditional custard-based ice creams.
What external resources help me master Creami techniques?
The Serious Eats food science section explains the chemistry behind frozen dessert texture development. King Arthur Baking Company provides detailed ingredient guidance for frozen applications. Culinary School Online offers professional frozen dessert technique courses. Modernist Cuisine explores advanced frozen dessert science for ambitious cooks. These resources deepen your understanding of why certain techniques produce specific results.


