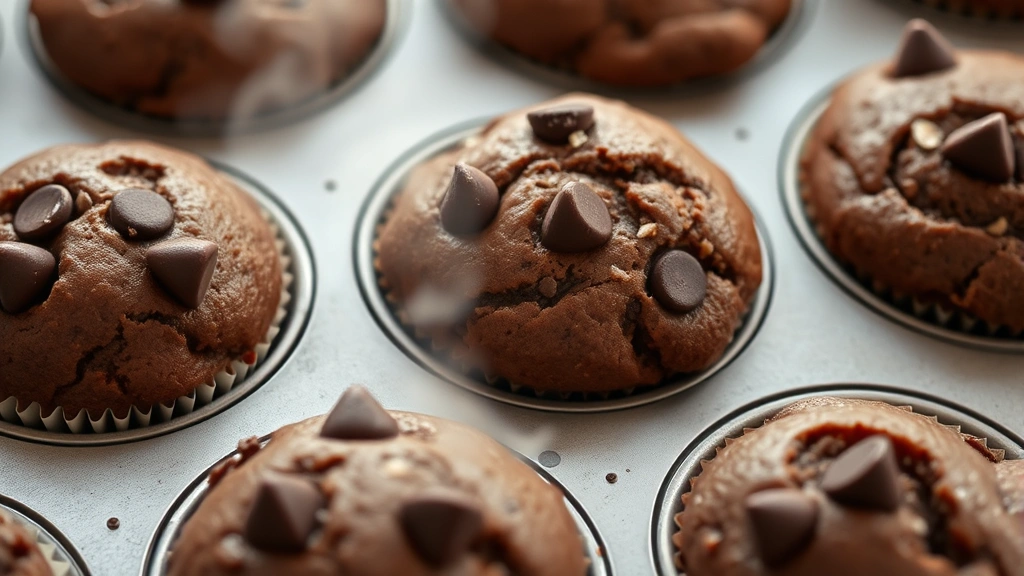
Olympic Village Chocolate Muffins: Proven Recipe
The legend of Olympic Village chocolate muffins has captivated bakers and chocolate lovers for decades. These aren’t just any muffins—they’re the iconic treats that supposedly fueled athletes during the Olympic Games, featuring an irresistibly moist crumb and rich chocolate flavor that keeps people coming back for more. Whether you’re preparing breakfast for your family or looking to recreate a piece of Olympic history, this proven recipe delivers consistent results that rival the legendary versions.
What makes these muffins truly special is their perfect balance of texture and taste. The combination of quality chocolate, proper mixing technique, and precise ingredient ratios creates muffins with a tender interior and subtle crispy edges. This comprehensive guide walks you through every step, from ingredient selection to troubleshooting common issues, ensuring your Olympic Village chocolate muffins turn out absolutely perfect every single time.
What Are Olympic Village Chocolate Muffins?
Olympic Village chocolate muffins are a legendary bakery item that gained fame as the signature treat served in Olympic athlete villages during various Games. The story goes that these muffins became so popular among competing athletes that demand far exceeded supply. The original recipe features a remarkably simple ingredient list that somehow produces extraordinary results—a testament to the power of quality ingredients and proper technique.
These muffins are distinguished by their dense yet tender crumb, generous chocolate flavor, and the way they stay moist for days after baking. Unlike many chocolate muffins that dry out quickly, the Olympic version maintains its appeal through careful moisture management and the right fat ratios. The recipe has been passed down, modified, and celebrated by home bakers worldwide, with countless variations claiming to capture the authentic Olympic experience.
The appeal extends beyond mere nostalgia. These muffins deliver genuine chocolate satisfaction without being overly sweet or greasy. They’re substantial enough to serve as a complete breakfast item, yet refined enough to accompany coffee at any time of day. The recipe has proven so reliable that it appears in numerous cookbooks and food blogs, each claiming their version is closest to the original.
Essential Ingredients Breakdown
Creating authentic Olympic Village chocolate muffins starts with understanding each ingredient’s role. This isn’t a recipe where substitutions work seamlessly—precision matters.
Dry Ingredients
- All-purpose flour (2 cups): Provides structure and gluten development. All-purpose flour works better than cake flour here because it creates the proper crumb structure these muffins are known for. Don’t use bleached flour if you prefer avoiding additives.
- Unsweetened cocoa powder (3/4 cup): The foundation of chocolate flavor. Dutch-processed cocoa creates darker, more sophisticated chocolate notes compared to natural cocoa powder. Quality matters significantly here—invest in a good brand like King Arthur Baking Company or similar.
- Baking soda (1 1/2 teaspoons): Creates rise and reacts with acidic ingredients. This amount is crucial for achieving the proper muffin rise without creating a bitter aftertaste.
- Salt (1/2 teaspoon): Enhances chocolate flavor and balances sweetness. Use fine sea salt rather than table salt for better distribution.
- Granulated sugar (1 1/2 cups): Provides sweetness and moisture retention. The sugar content is what keeps these muffins tender and moist long after baking.
Wet Ingredients
- Vegetable oil (1/2 cup): Oil creates a more tender crumb than butter alone. The liquid fat distributes evenly, preventing dense spots and ensuring consistent texture throughout.
- Large eggs (2): Provide structure, moisture, and richness. Room temperature eggs blend more smoothly into the batter, creating a uniform mixture.
- Plain Greek yogurt or sour cream (1 cup): Adds moisture and tang that amplifies chocolate flavor. This ingredient is what elevates these muffins above standard versions. The acidity reacts with baking soda, creating lift and tender crumb.
- Vanilla extract (2 teaspoons): Deepens chocolate notes without adding vanilla flavor. Pure vanilla extract works best—avoid imitation varieties.
- Hot water or hot coffee (1/2 cup): Blooms the cocoa powder, intensifying chocolate flavor. Coffee actually works better than water because it enhances chocolate without adding coffee taste.
Optional Additions
- Chocolate chips (1 cup) for extra chocolate pockets
- Espresso powder (1 teaspoon) to deepen chocolate notes
- Chopped dark chocolate (4 ounces) for premium texture
Step-by-Step Baking Instructions
Success with Olympic Village chocolate muffins depends on following the mixing method carefully. This isn’t a one-bowl recipe, and the sequence matters.
Preparation Phase
- Preheat your oven to 375°F (190°C). Position the rack in the center of your oven for even heat distribution. If you have a convection oven, reduce temperature by 25°F.
- Prepare your muffin tin. Use paper liners or grease the cups thoroughly with cooking spray. Chocolate batter can stick stubbornly, so don’t skip this step.
- Gather all ingredients and measure them precisely. This recipe requires accuracy. Use a kitchen scale if possible—it’s far more reliable than volume measurements.
Dry Ingredient Mixture
- Combine flour, cocoa powder, baking soda, and salt in a large mixing bowl. Whisk these together thoroughly for 30 seconds. This ensures even distribution of leavening agents, preventing pockets of bitterness from concentrated baking soda.
- Add granulated sugar and whisk again for 15 seconds. Breaking up any sugar clumps now prevents streaks in the finished muffins.
- Create a well in the center of the dry mixture. This helps incorporate wet ingredients more evenly without overmixing.
Wet Ingredient Mixture
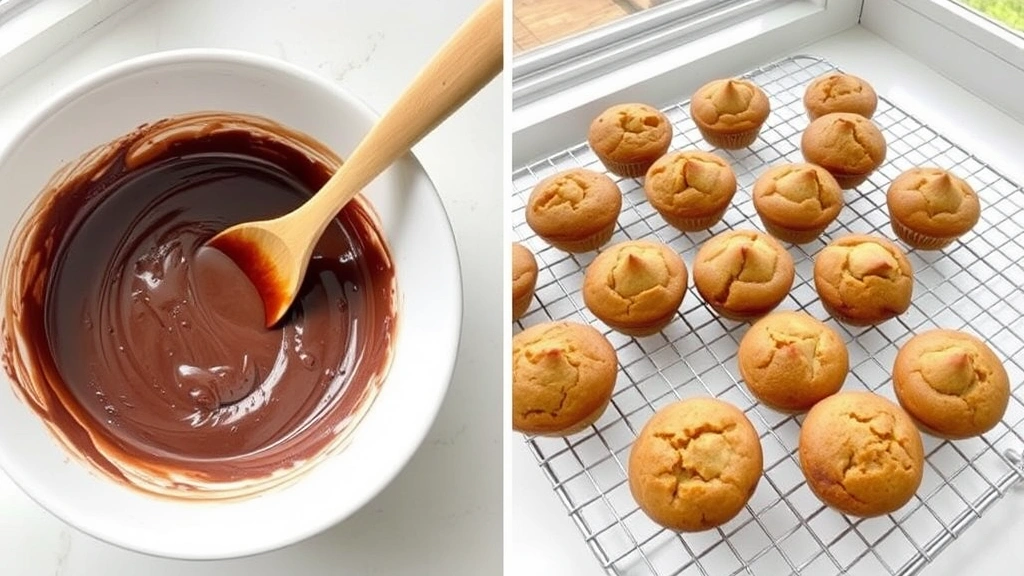
- Pour hot water or coffee over the cocoa powder in a separate bowl. Let it sit for 30 seconds, then stir until completely smooth. This blooming process fully hydrates cocoa particles and intensifies chocolate flavor dramatically.
- Add oil, eggs, Greek yogurt, and vanilla extract to the cocoa mixture. Whisk until completely combined and smooth. The mixture should look like thick chocolate sauce.
Combining Wet and Dry
- Pour the wet mixture into the well in the dry ingredients. Using a spatula or wooden spoon, fold the ingredients together gently. Stir until just combined—about 15-20 strokes. Overmixing develops gluten, resulting in tough, dense muffins.
- If using chocolate chips, fold them in gently at the end. Reserve a handful of chips to sprinkle on top before baking for visual appeal.
- The batter should look thick and chunky, not smooth. Lumps are acceptable and even desirable. Smooth batter indicates overmixing.
Filling and Baking
- Divide batter evenly among muffin cups using a cookie scoop or spoon. Fill each cup about 2/3 full. This allows room for muffins to rise without overflowing.
- Sprinkle reserved chocolate chips on top of each muffin. Press them down gently so they stay attached during baking.
- Bake for 20-23 minutes, until a toothpick inserted into the center comes out with a few moist crumbs. Don’t overbake—the muffins continue cooking slightly after removal from the oven. The tops should look set but still slightly soft.
- Remove from oven and let cool in the pan for 5 minutes. This allows the structure to set without the muffins becoming dry.
- Transfer muffins to a wire cooling rack. Cool completely before storing or serving. They’ll be delicate while warm.
Pro Tips for Perfect Results
Experienced bakers know that small adjustments make the difference between good muffins and exceptional ones. These tips come from testing dozens of batches.
Temperature Matters
Bring all ingredients to room temperature before mixing. Cold eggs and yogurt won’t incorporate smoothly, creating dense pockets. Remove eggs and yogurt from the refrigerator 30 minutes before baking. Room temperature ingredients blend seamlessly, creating uniform batter and consistent texture throughout.
Cocoa Powder Quality
Don’t settle for grocery store cocoa powder. Premium brands like Ghirardelli or Lindt make noticeably superior muffins. Dutch-processed cocoa creates richer, more sophisticated chocolate flavor. The investment in quality cocoa powder returns exponentially in the finished product.
The Blooming Technique
Blooming cocoa powder in hot liquid is non-negotiable. This process hydrates cocoa particles fully, releasing flavor compounds that remain locked in dry powder. Skip this step and your muffins will taste flat and one-dimensional. The extra 30 seconds of wait time creates dramatically better chocolate flavor.
Oven Temperature Accuracy
Invest in an oven thermometer. Most home ovens run 25-50°F off their displayed temperature. Muffins baked in ovens that are too hot brown on the outside while remaining raw inside. Too-cool ovens produce dense, pale muffins. A simple thermometer solves this common problem.
Proper Mixing Discipline
Resist the urge to overmix. The batter should look slightly lumpy and rough. Smooth batter indicates overdeveloped gluten, which creates tough, dense muffins. Use a gentle folding motion rather than vigorous stirring. Think “combine” rather than “mix thoroughly.”
Cooling Process
Allow muffins to cool completely on a wire rack before storing. Trapped steam creates soggy bottoms. A wire rack allows air circulation underneath, preventing moisture buildup. This step is crucial for maintaining the texture you worked hard to achieve.
Variations and Flavor Combinations
The basic Olympic Village chocolate muffin recipe serves as an excellent foundation for creative variations. Each modification maintains the signature moist crumb while introducing new flavor dimensions.
Double Chocolate Version
Add 4 ounces of chopped dark chocolate (60% cacao or higher) to the wet ingredients after blooming the cocoa powder. The melted chocolate creates pockets of intense chocolate flavor throughout. This variation transforms already-excellent muffins into truly decadent treats suitable for special occasions.
Espresso-Enhanced Chocolate
Dissolve 1 teaspoon of espresso powder in the hot water before adding it to the cocoa powder. Espresso doesn’t add coffee flavor—it amplifies chocolate notes exponentially. This subtle modification appeals to serious chocolate lovers seeking maximum depth of flavor.
Mint Chocolate Muffins
Add 1/2 teaspoon of peppermint extract (use sparingly—it’s potent) and fold in 1/2 cup of mini chocolate chips mixed with 1/4 teaspoon of crushed peppermint candies. The cooling sensation of mint contrasts beautifully with rich chocolate. This variation works particularly well during winter months.
Orange-Chocolate Fusion
Replace vanilla extract with 1 teaspoon of orange extract and add 1 tablespoon of orange zest to the wet ingredients. The citrus notes brighten the chocolate flavor without creating a flavor clash. This combination works especially well if you enjoy complementary flavor pairings.
Almond-Chocolate Muffins
Replace 1/4 cup of flour with almond flour and add 1/2 teaspoon of almond extract. Almond adds subtle nuttiness that enhances chocolate without overwhelming it. The almond flour also creates a slightly different crumb structure—slightly more tender and delicate.
Gluten-Free Adaptation
Substitute all-purpose flour with a high-quality gluten-free blend (like King Arthur’s or Bob’s Red Mill). Add 1/4 teaspoon of xanthan gum to improve texture. The baking time remains the same, though you should check earlier as gluten-free muffins sometimes bake slightly faster. The results are nearly indistinguishable from wheat versions.
Storage and Make-Ahead Guide
Room Temperature Storage
Store cooled muffins in an airtight container at room temperature for up to 4 days. The muffins actually improve slightly on day two as flavors meld and moisture distributes evenly. Line the container bottom with parchment paper to prevent sticking.
Refrigerator Storage
Place cooled muffins in an airtight container and refrigerate for up to one week. Refrigeration extends shelf life but can make the crumb slightly denser. Warm muffins briefly in a 300°F oven for 5 minutes before serving to restore optimal texture.
Freezing for Long-Term Storage
Freeze cooled muffins in a freezer-safe container or zip-top bag for up to three months. Thaw at room temperature for 1-2 hours before serving, or microwave individual muffins for 20-30 seconds. Frozen muffins thaw to nearly original quality, making this an excellent strategy for batch baking.
Make-Ahead Batter
Prepare the dry ingredients the night before and store in an airtight container. Combine wet ingredients just before baking. This approach saves morning time while ensuring maximum freshness. Don’t mix wet and dry ingredients more than a few hours ahead—the baking soda loses effectiveness over time.
Freezing Unbaked Muffins
Fill muffin cups with batter, place the entire tin in the freezer for 2 hours until solid, then pop muffins into a freezer bag. Bake directly from frozen, adding 3-5 minutes to the baking time. This method lets you enjoy fresh-baked muffins on demand without the full preparation time.
Reheating Instructions
Warm muffins in a 300°F oven for 5-7 minutes to restore moisture and texture. Microwave reheating works in a pinch but can create rubbery texture—use 20-30 seconds only. Toasting them briefly in a toaster oven creates a slightly crispy exterior while keeping the interior moist.
FAQ
Why are my muffins dense and heavy?
Dense muffins result from overmixing the batter. Stir just until ingredients combine—lumps are fine. Additionally, ensure your baking soda hasn’t expired. Old leavening agents can’t provide proper rise. Finally, check your oven temperature with a thermometer. Ovens that run cool produce dense results.
Can I use butter instead of oil?
You can substitute butter for oil using a 1:1 ratio, but results differ slightly. Oil creates a more tender, consistently moist crumb. Butter creates a slightly firmer texture with more pronounced butter flavor. If using butter, melt it and cool it slightly before adding to wet ingredients.
What’s the difference between natural and Dutch-processed cocoa powder?
Natural cocoa powder is more acidic and creates brighter chocolate flavor. Dutch-processed cocoa has been treated with alkali, creating darker color and more sophisticated, less bitter flavor. For Olympic Village muffins, Dutch-processed creates superior results. However, if using natural cocoa, increase baking soda slightly (add 1/4 teaspoon) because natural cocoa is more acidic.
How do I know when muffins are done baking?
Insert a toothpick into the center of the largest muffin. It should come out with a few moist crumbs clinging to it, not completely clean and not wet. The tops should look set but still slightly soft to the touch. Overbaked muffins become dry. Remember, they continue cooking slightly after removal from the oven.
Can I use applesauce instead of Greek yogurt?
Applesauce works but creates different results. Use equal parts applesauce (1 cup), but reduce the eggs to 1 large egg. Applesauce creates slightly less tender crumb and more pronounced moisture. The muffins will be slightly less rich but still delicious. This substitution works well if you’re avoiding dairy.
Why do my muffins have a dome top that cracks?
Cracked dome tops indicate overfilled muffin cups. Fill only 2/3 full, leaving room for expansion. High oven temperature also causes aggressive rise and cracking. Ensure your oven temperature is accurate. Additionally, slightly less baking soda (reduce by 1/4 teaspoon) can moderate rise if you consistently experience this issue.
Can I make mini muffins with this recipe?
Yes, fill mini muffin cups about 3/4 full and reduce baking time to 12-15 minutes. Check starting at 12 minutes. Mini muffins bake faster because of their smaller size. Everything else remains the same. Mini versions are excellent for portion control and make great gifts.
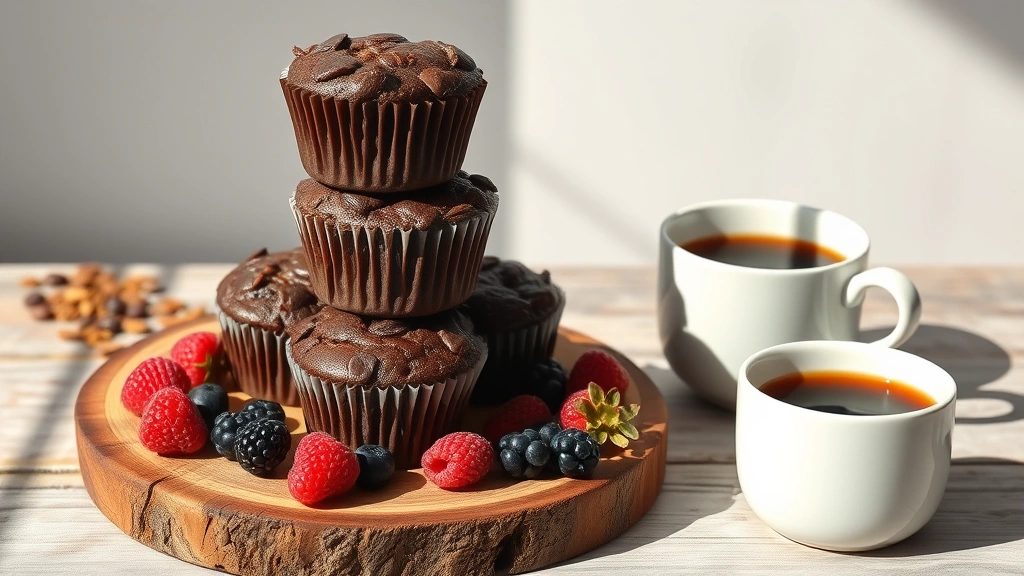
What should I serve with Olympic Village chocolate muffins?
These muffins pair beautifully with strong coffee, espresso, or hot chocolate. For breakfast, serve alongside fresh fruit, Greek yogurt, or a simple green salad. They’re substantial enough to serve as the main breakfast item. Some people enjoy them with a spread of almond butter or honey. The complementary flavor pairings are nearly endless.
How do I prevent muffins from sticking to paper liners?
Use high-quality paper liners specifically designed for muffins. Spray liners lightly with cooking spray before filling. Allow muffins to cool for 5 minutes in the pan before peeling away liners. If they still stick, try silicone baking cups instead of paper—they work remarkably well and are reusable.
Can I add nuts to this recipe?
Absolutely. Add up to 1 cup of chopped walnuts, pecans, or almonds. Fold them in gently at the end, just before dividing batter into muffin cups. Toast the nuts lightly before adding for enhanced flavor. Nuts add wonderful texture contrast to the moist crumb.
Is there a vegan version of this recipe?
Yes, substitute eggs with flax eggs (2 tablespoons ground flaxseed mixed with 6 tablespoons water, let sit 15 minutes) and use non-dairy Greek yogurt or coconut yogurt. Everything else remains the same. The results are nearly identical to traditional versions. Check out resources from The Kitchn for additional vegan baking techniques.
What’s the best way to gift these muffins?
Place cooled muffins in a decorative box lined with parchment paper or a small gift bag. Include a note about storage instructions. Muffins stay fresh for several days at room temperature, making them excellent gifts for friends, coworkers, or neighbors. They’re appreciated far more than store-bought alternatives.


