How to Make Paper Mache: Expert Tips and Techniques
Paper mache is a versatile and creative craft that has been used for centuries to create decorative objects, masks, sculptures, and functional items. Despite its French name meaning “chewed paper,” this ancient technique is far more refined than it sounds. Whether you’re a seasoned crafter or a curious beginner, understanding the fundamentals of paper mache will open up endless possibilities for artistic expression. The beauty of this craft lies in its simplicity—you need just a few basic ingredients and some patience to transform ordinary paper into stunning three-dimensional creations.
The magic of paper mache happens through the combination of paper strips and adhesive paste, which work together to create a strong, moldable material. When properly executed, paper mache can rival more expensive materials in durability and aesthetic appeal. This guide will walk you through everything you need to know about creating the perfect paper mache recipe, from mixing the paste to applying techniques that produce professional-quality results.
Understanding Paper Mache Basics
Paper mache is fundamentally a papier-mâché technique that involves layering strips of paper with an adhesive paste over a form or mold. The process creates a lightweight yet sturdy structure that can be painted, decorated, and finished in countless ways. The technique has ancient roots, with evidence of paper mache being used in China as early as the second century BCE, and later becoming popular in Persia, India, and eventually Europe during the Renaissance period.
The strength of paper mache comes from the interlocking fibers of paper combined with the binding properties of the adhesive. When multiple layers are applied and allowed to dry completely, they fuse together into a solid form. This makes paper mache ideal for creating everything from decorative bowls and masks to architectural elements and large-scale sculptures. Unlike working with materials like cast iron cookware, paper mache requires minimal equipment and can be done in any home workspace.
Understanding the science behind paper mache helps you troubleshoot problems and achieve better results. The paper provides structural support through its cellulose fibers, while the paste acts as a binding agent. The key is achieving the right consistency in your paste and allowing adequate drying time between layers. Most successful paper mache projects use between 5 to 10 layers, depending on the desired thickness and durability.
Essential Materials and Ingredients
Before you begin your paper mache project, gather all necessary materials. Having everything prepared will streamline your workflow and produce better results. The beauty of paper mache is that most ingredients are inexpensive and commonly found in households or easily purchased from craft and grocery stores.
Paper Materials: The type of paper you choose affects the final texture and strength of your project. Newspaper is the most economical choice and works well for most applications. Tissue paper creates a smoother finish but tears more easily. Brown kraft paper offers excellent strength. Magazine pages provide color but may bleed. Paper towels work but are more expensive. The best approach is often combining different paper types—use newspaper for structural layers and smoother paper for finishing layers.
Adhesive Base Ingredients: The most common base for paper mache paste is flour, which is inexpensive and creates a strong bond. All-purpose flour works perfectly. You’ll also need water to create the paste consistency. Some recipes call for salt to prevent mold growth. Cornstarch can be substituted for flour if you have allergies or preferences. White glue (like PVA) offers an alternative to flour-based pastes and creates a stronger final product.
Additional Supplies: You’ll need a mixing bowl for combining your paste, a whisk or mixing spoon, scissors for cutting paper into strips, a container for your paste (wide and shallow works best), and a work surface protected with plastic or newspaper. A rolling pin helps smooth out air bubbles. Masking tape secures your base form. Having these items ready before starting prevents interruptions during the creative process, similar to how proper preparation is essential when learning how to make homemade pasta.
Classic Flour Paste Recipe
The traditional flour paste recipe is the foundation of most paper mache projects. This simple combination creates an effective adhesive that’s safe, non-toxic, and produces excellent results. The recipe is flexible, allowing you to adjust consistency based on your specific needs and preferences.
Basic Flour Paste Formula:
- Combine 1 cup of all-purpose flour with 2 cups of cold water in a mixing bowl
- Stir thoroughly to break up lumps and create a smooth mixture
- Gradually add 3 cups of boiling water while stirring constantly
- Continue stirring until the mixture reaches a smooth, lump-free consistency
- Optional: add 2 tablespoons of salt to inhibit mold growth during drying
- Allow the paste to cool before using
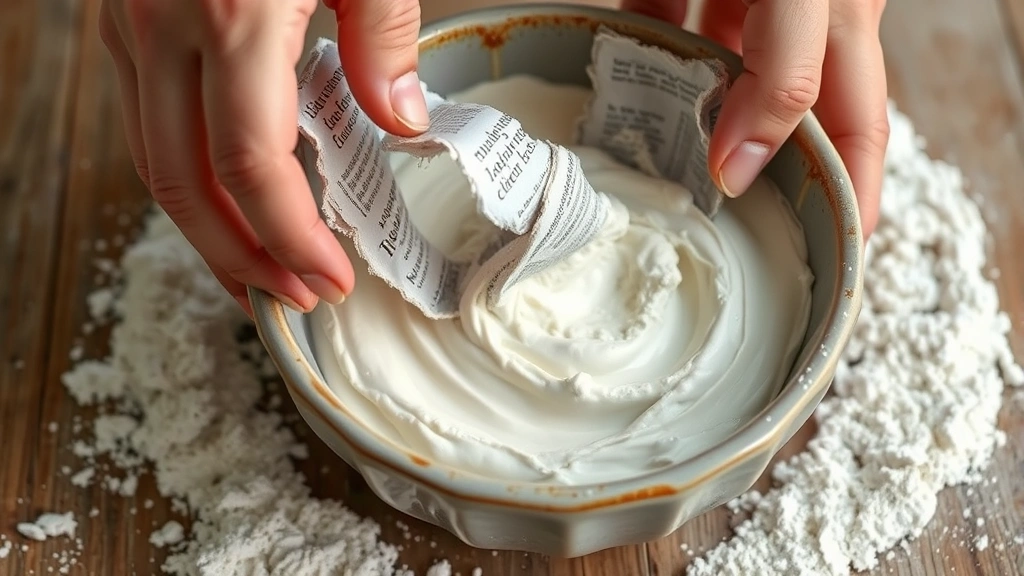
Consistency Guidelines: The paste should be thick enough to coat paper strips but thin enough to spread easily. It should resemble pancake batter—not too thick that it clumps, not too thin that it drips. If your paste is too thick, add water gradually. If it’s too thin, mix in a bit more flour. The consistency affects how smoothly your layers apply and how quickly they dry.
Paste Storage: Homemade flour paste keeps for several days in an airtight container in the refrigerator. Before each use, stir well as separation may occur. If mold develops (indicated by dark spots or odor), discard the paste and make a fresh batch. Adding salt significantly extends shelf life. Some crafters make large batches and freeze portions for future projects.
Temperature Considerations: Warm paste spreads more easily and dries faster, but cool paste is easier to handle and less likely to tear delicate paper. Experiment with different temperatures to find your preference. Room temperature paste offers a good compromise for most applications.
Advanced Adhesive Formulas
Beyond the basic flour paste, several advanced formulas offer specific advantages for different projects. These recipes build on fundamental principles while incorporating additional ingredients for enhanced performance.
Starch-Based Paste: Cornstarch creates a smoother, more refined paste than flour. Mix 2 tablespoons of cornstarch with 1 cup of cold water, then add to 2 cups of boiling water while stirring. This produces a clearer paste that won’t show through light-colored paper. The resulting finish is slightly glossier, making it ideal for decorative projects where appearance matters.
White Glue Formula: Combine equal parts white craft glue and water for a stronger, faster-drying adhesive. This paste creates a more durable final product and dries to a harder finish. However, it’s more expensive than flour-based options and can be messier to work with. This formula works exceptionally well for projects that will experience handling or outdoor exposure.
Wheat Paste Recipe: Mix 1 part wheat flour with 4 parts water, then heat while stirring until thickened. This creates a particularly strong bond and was historically used for wallpapering. The higher gluten content in wheat flour provides superior adhesion. This option is excellent for large-scale projects or items requiring exceptional durability.
Papier-Mâché Medium: Commercial paper mache mediums are available and offer consistent quality. These pre-mixed formulas eliminate guesswork and often include additives for faster drying and mold prevention. While more expensive, they’re convenient for crafters who prefer standardized results. Many professional artists use these products for their reliability.
Paste Additives: Several additions improve paste performance. Linseed oil adds flexibility and water resistance. Food coloring makes it easier to see which areas you’ve covered. Essential oils like lavender or tea tree oil prevent mold naturally. A small amount of honey improves workability and extends drying time slightly, allowing more time for smoothing layers.
Step-by-Step Application Technique
Proper application technique is crucial for creating strong, smooth paper mache projects. Following these steps carefully will significantly improve your results and reduce frustration.
Preparation Phase: Start by preparing your base form. This could be a balloon, cardboard armature, wire frame, or any sturdy structure. Cover sharp edges with tape to prevent tearing paper. If using a balloon, inflate it to your desired size and secure it with tape if needed. For cardboard bases, tape all seams and rough spots. Your form should be clean and free of loose materials.
Paper Preparation: Cut or tear newspaper into strips approximately 1 to 2 inches wide and 4 to 6 inches long. The strip size affects the final texture—smaller strips create smoother surfaces, while larger strips work faster but may show edges. Tear rather than cut newspaper for softer edges that blend better. Having strips pre-cut before starting prevents interruptions and keeps your hands cleaner.
First Layer Application: Pour your paste into a shallow container. Working with one strip at a time, dip it into the paste, ensuring both sides are coated. Use your fingers to squeeze out excess paste—too much paste extends drying time and can cause wrinkles. Smooth the strip onto your form, working out air bubbles with your fingers or a rolling pin. Overlap each strip slightly with the previous one, ensuring complete coverage. This first layer is critical, so work carefully and methodically.
Building Subsequent Layers: Apply at least 5-7 additional layers, alternating paper direction between layers (horizontal, then vertical, etc.). This criss-cross pattern creates strength in multiple directions. Smooth each layer thoroughly before adding the next. You’ll notice the form becoming progressively stiffer. Some crafters use different paper types for each layer to track coverage—newspaper, then white paper, then newspaper again, and so on.
Surface Smoothing: After every 2-3 layers, smooth the surface thoroughly using a rolling pin or your hands. This removes air pockets and creates a more uniform surface. Work gently to avoid tearing the wet paper. This step is essential for professional-looking results and shouldn’t be rushed.
Final Layer Finishing: The last 1-2 layers should use smoother paper like white paper or tissue paper. These finishing layers create a clean surface for painting or decoration. Apply them with the same care as previous layers but pay extra attention to smoothing and alignment.

Drying and Curing Process
Proper drying is absolutely critical to paper mache success. Rushing this phase causes weak projects that may crack or fail. Drying time depends on several factors including layer thickness, humidity, temperature, and paste type.
Drying Timeline: Between each layer, allow at least 1-2 hours of drying time. You can test readiness by touching the surface—it should feel dry to the touch but may still be slightly cool. In humid conditions, allow extra time. After your final layer, allow 24-48 hours of complete drying before removing from the form or adding decoration. Larger projects may require up to one week for thorough drying.
Optimal Drying Conditions: Dry your project in a warm, well-ventilated area away from direct sunlight. Excessive heat can cause warping or cracking. Air circulation is more important than temperature. Pointing a fan toward your project (not directly at it) improves drying. Avoid humid environments like bathrooms. If you live in a humid climate, consider using a dehumidifier. Some crafters place projects near (not too close to) a heat source like a radiator.
Testing for Complete Dryness: Before declaring your project fully dry, perform these tests: tap the surface—it should sound hollow and solid, not damp. Press gently—there should be no give or soft spots. The weight should feel consistent throughout. Any damp areas should dry completely before proceeding. Incomplete drying can cause paint to bubble or peel later.
Curing Period: Even after the project feels dry, allow an additional curing period of 2-3 days before heavy handling or painting. This allows moisture deep within the layers to evaporate completely. During curing, keep the project in good conditions—warm, dry, and well-ventilated. This patience investment pays off in durability and finish quality.
Removing the Base Form: Once completely dry, carefully remove your base form. If using a balloon, simply pop it and pull it away. For cardboard bases, carefully cut and peel away the form. If the form is glued on, it may remain as part of the structure. Be gentle during removal to avoid damaging your paper mache shell.
Finishing and Decorating Methods
Once your paper mache project is completely dry, the real fun begins. Finishing techniques transform your creation from a plain paper object into a polished artwork. The finishing phase allows unlimited creative expression, similar to the decorative possibilities when preparing breakfast food recipes with various toppings and presentations.
Sanding and Smoothing: Before painting, lightly sand the surface with fine-grit sandpaper (220 grit or higher) to remove rough spots and create a smooth base for paint. Sand gently in circular motions, creating even coverage. Wipe away dust with a damp cloth and allow to dry completely. This step is optional but significantly improves the final appearance. Heavy sanding can damage your project, so use a light touch.
Primer Application: Applying primer creates a uniform base for paint and improves color vibrancy. Use acrylic primer or gesso, applying thin, even coats. Two light coats work better than one heavy coat. Primer also seals the paper, making it less absorbent and helping paint adhere better. Allow complete drying between coats.
Paint Selection: Acrylic paint works best for paper mache due to its quick drying time, water-based cleanup, and excellent color selection. Apply thin coats, allowing drying between applications. Tempera paint also works but is less durable. Oil paint is not recommended due to adhesion issues. Some artists use spray paint for smooth, even coverage, though brush application offers more control.
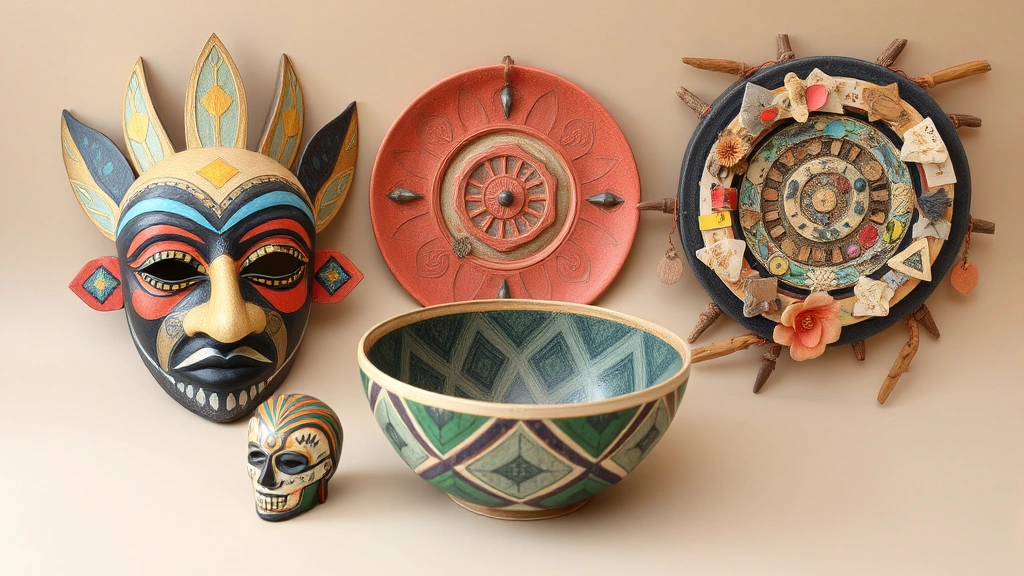
Decorative Techniques: Once your base color is applied, add details using various methods. Dry brushing creates texture. Sponge painting adds patterns. Stencils allow precise designs. Decoupage involves gluing decorative paper or images to the surface. Glazing with thinned paint creates depth. Metallic paints and leaf gilding add elegance. The possibilities are truly endless.
Protective Sealants: Seal finished projects with clear varnish or polyurethane to protect the paint and increase durability. Matte, satin, or gloss finishes are available depending on your preference. Apply thin, even coats, allowing drying between applications. For outdoor projects, use UV-protective sealant to prevent fading and weathering. Sealed projects are more water-resistant and easier to clean.
Special Effects: Create additional interest through various finishing techniques. Crackle medium creates an aged appearance. Texture paste adds dimensional interest. Glitter, beads, or found objects can be embedded. Natural materials like twine, fabric, or feathers add tactile elements. Fluorescent or glow-in-the-dark paints create unique effects. These embellishments transform simple projects into statement pieces.
Troubleshooting Common Issues
Even experienced crafters encounter occasional problems. Understanding common issues and their solutions helps you overcome challenges and improve your technique. Most problems are easily preventable with proper technique and patience.
Cracking and Splitting: This usually results from drying too quickly or uneven drying. Prevent this by allowing adequate drying time between layers, maintaining consistent temperature, and avoiding direct heat sources. If cracks appear, sand them smooth and fill with spackling compound or additional paper mache paste, then sand and paint. Future projects benefit from slower, more controlled drying.
Wrinkled or Bumpy Surface: Wrinkles occur from excess paste or inadequate smoothing. Prevent this by squeezing out excess paste from each strip and smoothing thoroughly after application. If wrinkles appear, allow complete drying, then sand smooth. Use smaller paper strips for smoother surfaces. The final layers should always be smoothed carefully.
Mold or Mildew Growth: This happens in humid conditions or when drying is too slow. Prevent by adding salt to your paste, ensuring good air circulation, and using a dehumidifier if necessary. If mold appears, allow complete drying and paint over with mold-inhibiting primer. Future projects benefit from faster drying conditions and salt addition to paste.
Weak or Brittle Structure: This results from insufficient layers or inadequate adhesive. Ensure you’re applying at least 5-7 layers for most projects. Use enough paste to create good adhesion without excess. If your finished project feels weak, reinforce it by adding additional layers of paper mache to the interior or exterior.
Paint Not Adhering: Primer is essential for good paint adhesion. If paint peels, ensure you’ve used primer and that the surface is clean and dry. Rough sanding between primer and paint improves adhesion. Allow complete drying of primer before painting. Use quality acrylic paint designed for crafts rather than house paint.
Uneven Drying: Thick areas dry slower than thin areas, potentially causing warping. Prevent by maintaining even layer thickness throughout your project. Allow extra drying time for thick sections. Turning your project occasionally ensures even air exposure. Well-ventilated drying areas help tremendously.
Many paper mache issues can be prevented through proper technique and patience. Don’t rush any phase of the process. This methodical approach mirrors the careful attention required when exploring best seafood recipes, where attention to detail produces superior results. Additionally, learning proper Greek recipes techniques demonstrates the value of following established methods carefully.
FAQ
How long does a paper mache project take from start to finish?
A typical small project takes 3-5 days when accounting for layering time, drying between layers, complete drying after the final layer, and decoration time. Large projects can take 1-2 weeks. The timeline depends on your specific project size, complexity, and environmental drying conditions. Planning ahead prevents rushing, which compromises quality.
Can I use paper mache outdoors?
Yes, but outdoor paper mache requires special preparation. Use waterproof adhesive like white glue-based paste. Apply multiple coats of waterproof sealant. Use UV-protective clear coat to prevent fading. Place finished projects under cover or bring them inside during heavy rain. Outdoor exposure significantly reduces the lifespan of paper mache unless properly protected.
What’s the best paper to use for smooth finishes?
White tissue paper or coffee filters create the smoothest finishes. Use these for your final 2-3 layers after building structure with newspaper. Smaller paper strips also contribute to smoother surfaces. Thorough smoothing between layers is equally important as paper choice for achieving professional-looking results.
Can I make paper mache without flour?
Absolutely. White glue mixed with water creates excellent adhesive. Cornstarch paste works well. Commercial paper mache mediums are available. Wheat paste, if you have wheat flour, creates particularly strong bonds. Each alternative has different properties, so choose based on your project requirements and available materials.
How do I make my paper mache project waterproof?
Apply multiple coats of waterproof sealant or polyurethane after painting. Use a waterproof adhesive like white glue-based paste during construction. Ensure complete paint coverage with no exposed paper. Allow thorough drying of all coats. For items that will hold water, consider applying sealant to the interior as well. Proper sealing is essential for water-resistant projects.
Is paper mache safe for children?
Yes, paper mache using flour paste and acrylic paint is very safe for children under supervision. It’s non-toxic and requires no special safety equipment. Adult supervision is recommended for young children, particularly around paste preparation (hot water) and paint application. This makes paper mache an excellent craft activity for families, similar to preparing fall recipes together as a family activity.
What if my paste is too thick or too thin?
If too thick, add water gradually while stirring until reaching proper consistency. If too thin, add flour or cornstarch gradually. The consistency should resemble pancake batter—spreadable but not runny. Making small adjustments prevents over-correcting. Keep extra paste ingredients nearby during your project for quick consistency adjustments.
Can I paint paper mache with watercolors?
Watercolor is not ideal for paper mache. The porous surface absorbs water unevenly, creating blotchy results. Acrylic paint is far superior due to its adhesion properties and water resistance when dry. If you prefer watercolor, apply a primer first and use a sealant after painting, though results won’t be as durable as with acrylic paint.


