Ultimate Roast Duck Recipe: Chef’s Guide to Crispy Skin and Juicy Meat
Roasting a duck at home might seem intimidating, but with the right techniques and understanding of the bird’s unique properties, you’ll create restaurant-quality results that rival any fine dining establishment. Unlike chicken, duck requires specific handling methods to achieve that coveted crispy, golden skin while keeping the meat tender and succulent. This comprehensive guide walks you through every step, from selection to plating, ensuring your roast duck becomes the centerpiece of an unforgettable meal.
Whether you’re preparing a special dinner for two or impressing a gathering of friends, mastering the roast duck recipe opens doors to sophisticated entertaining. The key lies in patience, proper preparation, and understanding how heat transforms the duck’s fat layer into liquid gold. Let’s explore the techniques that separate mediocre duck from exceptional poultry that’ll have your guests asking for seconds.

Selecting and Preparing Your Duck
The foundation of an exceptional roast duck recipe begins with choosing the right bird. Look for ducks that weigh between 4 to 6 pounds—this size ensures even cooking and optimal meat-to-skin ratio. Pekin ducks, the most common variety available in supermarkets, offer excellent flavor and a good balance of meat and fat. Muscovy ducks, while leaner, deliver richer, more intense poultry flavor that some chefs prefer for special occasions.
When selecting your duck, examine the skin for blemishes or discoloration. The flesh should appear pink, never gray or brown. Ask your butcher to remove the giblets, neck, and any excess fat pockets from the cavity—this step saves you time and ensures better heat circulation during roasting. If purchasing a frozen duck, allow 24 to 48 hours for thawing in the refrigerator, never at room temperature, to prevent bacterial growth.
Pat the duck completely dry with paper towels before beginning any preparation. Moisture is the enemy of crispy skin, so don’t skip this crucial step. Remove any pinfeathers by plucking them with tweezers or scraping with a small knife. Trim excess skin around the neck opening, but leave enough to fold under the bird for presentation.
The Dry Brine Method
Unlike wet brining, which can make poultry skin soggy, the dry brine method uses salt to enhance flavor while drawing out moisture that allows skin to crisp beautifully. This technique separates home cooks from those achieving true professional results. Begin by combining coarse sea salt with aromatics—try mixing 2 tablespoons of salt with 1 teaspoon each of ground white pepper, five-spice powder, and garlic powder.
Rub this mixture thoroughly inside and outside the duck, paying special attention to the legs, thighs, and the area between skin and meat. The salt penetrates the meat over time, breaking down proteins and distributing flavor evenly throughout. Place your seasoned duck on a wire rack set over a baking sheet, uncovered, and refrigerate for at least 24 hours, ideally 48 hours. During this time, the salt draws moisture to the surface where it evaporates, creating the perfect conditions for crispy skin.
This dry brine period is also ideal for preparing your aromatics. Stuff the cavity with halved lemon, fresh thyme sprigs, and bay leaves. These aromatics perfume the meat from within while you cannot taste them directly—they’re about creating an aromatic environment that enhances every bite. If you’re planning to make food waste reduction tips work for your kitchen, save the neck and wing tips for making duck stock.
Rendering Fat for Crispy Skin
Duck fat is liquid gold in the culinary world, and rendering it properly is essential to achieving crispy, crackling skin. Remove your duck from the refrigerator 30 minutes before roasting to bring it to room temperature—this ensures even cooking throughout. Using a sharp knife, score the duck skin in a crosshatch pattern, cutting through the fat layer but not into the meat. Make cuts about half an inch apart, angling your knife at 45 degrees for the most attractive presentation.
Place the duck breast-side up on a roasting rack in your preheated 450°F oven. Immediately reduce heat to 350°F and begin the roasting process. The initial high heat jump-starts fat rendering, while the lower temperature allows gentle cooking. Roast for approximately 20 minutes per pound, basting with rendered fat every 20 minutes. This basting step is non-negotiable—it keeps skin moist while fat crisps, and it distributes heat evenly.
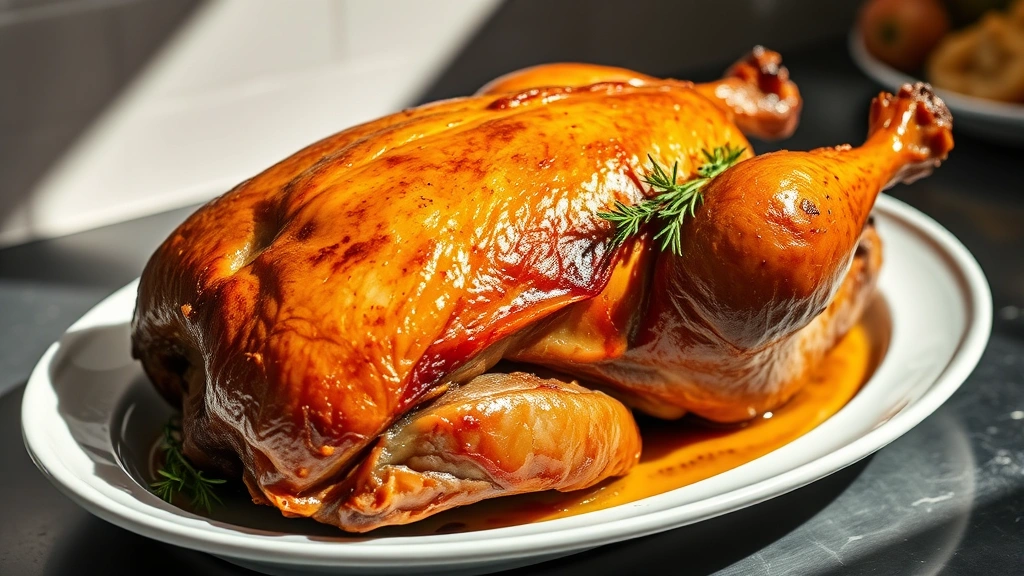
About 45 minutes before the duck finishes roasting, increase oven temperature to 425°F. This final blast of heat crisps the skin to perfection while the meat remains juicy. The duck is done when a meat thermometer inserted into the thickest part of the thigh (without touching bone) reads 165°F. At this point, the skin should be mahogany brown and sound crackling when you press it gently.
As the duck roasts, you’ll notice significant fat accumulation in the pan. Save this precious rendered duck fat—it’s perfect for roasting vegetables, cooking potatoes, or even preparing breakfast. Strain it through cheesecloth and store in an airtight container in the refrigerator for up to three months.
The Perfect Roasting Technique
Professional chefs understand that roasting duck requires active engagement, not passive cooking. The two-temperature method—starting high and finishing high with a moderate middle section—creates the ideal balance. Position your oven rack in the lower third, allowing heat to circulate fully around the bird. Use a heavy-bottomed roasting pan that conducts heat evenly; flimsy pans create hot spots that cook unevenly.
Water in the bottom of your pan isn’t necessary and can actually create steam that prevents skin crisping. Instead, let the fat render into the pan naturally. Every 20 minutes, use a baster to pull this hot fat over the duck’s skin, focusing on the legs and thighs which take longer to cook than the breast. This basting step, while time-consuming, is what separates adequate roast duck from spectacular roast duck.
If you’re preparing healthy chili recipe concepts for your dinner party, consider that duck pairs beautifully with bold, spiced sides. The duck’s richness balances perfectly against acidic, warming flavors. Monitor your oven temperature with an oven thermometer if your oven runs hot or cold—consistency matters tremendously with poultry.
For a 5-pound duck, expect total roasting time of 1 hour 40 minutes to 2 hours. Create a simple aromatics bed in your roasting pan using halved onions, carrot chunks, and celery pieces. These vegetables absorb dripping fat and create a flavorful base for pan sauce, plus they’re edible once softened and caramelized.
Resting and Carving
Resting your roasted duck is absolutely critical and often overlooked by home cooks. Once the duck reaches proper temperature, remove it from the oven and transfer to a warm serving platter. Loosely tent it with foil and rest for 15 to 20 minutes. During this rest period, carryover cooking continues gently while muscle fibers relax, redistributing juices throughout the meat. Skipping this step results in dry, stringy meat regardless of how perfectly you roasted it.
While the duck rests, make your pan sauce. Pour off excess fat from your roasting pan, leaving about 2 tablespoons. Place the pan over medium-high heat on your stovetop. Add 1 cup of duck or chicken stock, scraping the browned bits from the bottom with a wooden spoon—this process, called deglazing, extracts maximum flavor. Simmer for 5 minutes, then strain through a fine-mesh sieve into a small saucepan. Season with salt, pepper, and a splash of red wine or sherry vinegar for brightness.
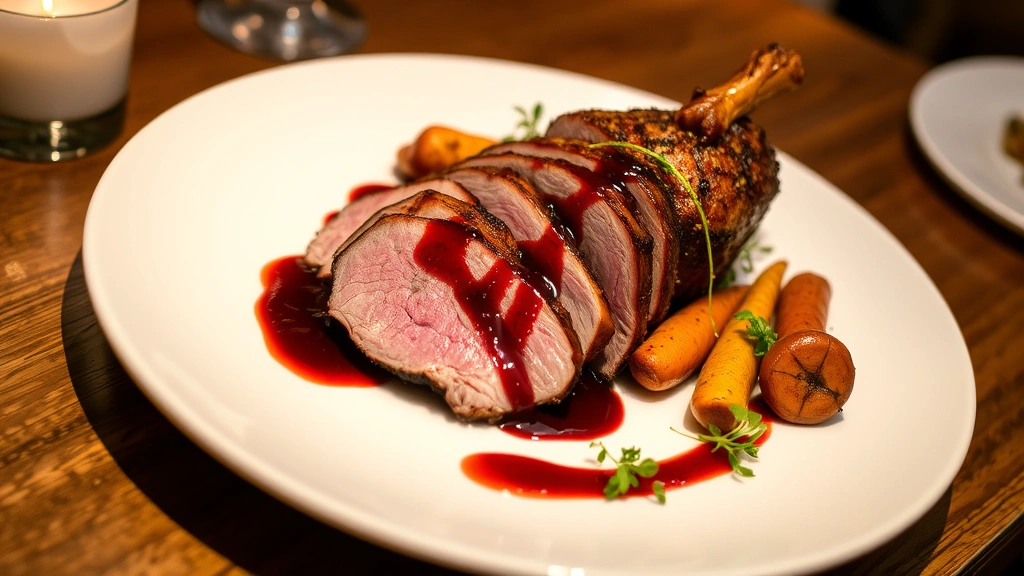
Carving duck differs from carving chicken due to the bird’s smaller frame and denser meat structure. Using a sharp carving knife, remove the legs by pulling one leg away from the body and cutting through the thigh joint. Separate the thigh from the drumstick by cutting through the connecting tissue. Remove the wings by pulling them away and cutting through the shoulder joint. Finally, carve the breast meat by slicing parallel to the breastbone in thin, attractive slices.
Arrange your carved duck on a warm platter, keeping pieces of the same type together for visual appeal. Drizzle with your prepared sauce and garnish with fresh herbs—thyme and chives work beautifully. The contrast between the crackling skin and tender meat, enhanced by the silky sauce, creates a dining experience that justifies the time investment.
Sauces and Side Dishes
While the pan sauce provides essential moisture, consider preparing a complementary sauce that echoes sophisticated flavor profiles. Orange sauce is the classic choice, combining fresh orange juice with a touch of honey and a pinch of cayenne. Simmer orange juice with your pan drippings, add a teaspoon of cornstarch mixed with water to thicken slightly, and finish with a knob of cold butter for silky richness.
Cherry gastrique offers another elegant option—this sweet-tart reduction combines cherry juice or wine with vinegar and a touch of sugar. The acidity cuts through duck’s richness perfectly, and the fruity notes complement the meat’s deep flavor. Some chefs prefer red wine reduction with shallots and thyme, which adds complexity without overwhelming the duck’s natural taste.
Side dishes should balance duck’s richness with lighter, brighter elements. Roasted root vegetables—parsnips, carrots, and potatoes—cooked in reserved duck fat become irresistibly crispy and flavorful. Wilted greens like spinach or chard dressed with garlic and lemon juice provide acidic contrast. If you enjoy exploring diverse cuisines, quick and easy pasta recipes can be adapted with duck confit, creating an elevated weeknight meal.
Consider a simple salad with bitter greens, thinly sliced radishes, and a Dijon vinaigrette served alongside your carved duck. The freshness and slight bitterness cleanse the palate between bites, allowing you to fully appreciate each component. For a more substantial meal, creamed celery root or potato purée provides comfort while maintaining elegance.
Common Issues and Solutions
Even experienced cooks encounter challenges with roast duck, so understanding common problems empowers you to troubleshoot effectively. If your skin isn’t crispy despite proper technique, the duck likely wasn’t dry enough before roasting or your oven temperature was too low. Ensure your duck has been air-dried in the refrigerator for at least 24 hours, and verify your oven temperature with a reliable thermometer.
Undercooked meat, particularly in the thighs, results from insufficient roasting time or uneven oven temperature. Remember that duck is safe to eat at 165°F in the thigh but many chefs prefer taking it to 170°F for better texture. Use a meat thermometer religiously—it’s your insurance policy against dry or undercooked results.
If your pan catches fire from rendered fat, don’t panic. Carefully remove the pan from the oven using thick oven mitts, set it on your stovetop away from open flames, and allow the flames to burn out naturally. You can also cover the pan with a baking sheet to smother flames. This is why positioning your oven rack low is important—it creates distance between the duck and heating elements.
Uneven cooking, where one leg is done while the other isn’t, usually indicates uneven oven heat or improper positioning. Rotate your roasting pan halfway through cooking if you notice browning is uneven. Some ovens have hot spots; identify yours early in the roasting process and adjust accordingly.
If you’re concerned about food safety and want to explore vintage grandma recipes that have stood the test of time, remember that traditional poultry preparation methods have been refined over generations for good reason. Duck has lower bacterial contamination risk than chicken, but proper handling remains essential.
FAQ
How far in advance can I prepare a roast duck?
You can dry brine your duck up to 48 hours in advance, which actually improves the final result. Don’t stuff the cavity more than 4 hours before roasting. Prepare your sauce components in advance, but assemble the final sauce only after roasting. The entire roasting and resting process should happen the same day you’re serving, as duck is best enjoyed fresh.
Can I cook duck breast-side down initially?
Some chefs prefer starting breast-side down to render leg fat more thoroughly, then flipping halfway through. This method works well but requires careful flipping and additional basting. The breast-side-up method described here is more forgiving and still produces excellent results with proper technique.
What’s the difference between roast duck and duck confit?
Roast duck is quickly cooked at high temperature, creating crispy skin and pink meat. Duck confit involves slow-cooking duck legs in their own fat for hours, creating extremely tender, rich meat. They’re completely different preparations suited to different occasions.
Is duck safe to eat medium-rare?
Unlike chicken, duck breast can be safely served medium-rare since the meat is denser and less prone to bacterial contamination. Many chefs prefer duck breast at 140-145°F for optimal tenderness. However, thighs and legs should reach 165°F minimum for food safety.
Where can I find whole ducks for roasting?
Most supermarkets carry frozen Pekin ducks year-round in the poultry section. For fresh ducks or specialty breeds like Muscovy or Moulard, check specialty butcher shops, Asian markets, or order from online poultry suppliers. Farmers markets often have excellent options in duck season (fall and winter).
How do I store leftover roast duck?
Refrigerate leftover duck meat and skin separately in airtight containers for up to 3 days. Duck reheats beautifully—warm it gently in a low oven with a splash of stock to restore moisture. Save your bones for making rich duck stock, which elevates soups and sauces. The rendered fat stores indefinitely in the refrigerator and becomes more valuable than the original duck.
What wine pairs best with roast duck?
Pinot Noir is the classic pairing, with its earthy notes and moderate tannins complementing duck’s richness. Burgundy, Côtes du Rhône, or aged Beaujolais also work wonderfully. White wine lovers should try fuller-bodied options like white Burgundy or Alsatian wines. Avoid light, delicate wines that get overwhelmed by duck’s intensity.


