Sopapilla Cheesecake Delight: Grandma’s Recipe
There’s something magical about combining two beloved desserts into one unforgettable treat. Sopapilla cheesecake is the perfect marriage of crispy, cinnamon-sugar-coated pastry and creamy, rich cheesecake filling. This dessert has become a family favorite across generations, and our grandmother’s version is nothing short of spectacular. With its layers of buttery crescent roll dough, silky cheesecake center, and caramelized cinnamon-sugar topping, this sopapilla cheesecake recipe delivers restaurant-quality results right in your own kitchen.
What makes this recipe truly special is its simplicity combined with impressive presentation. You don’t need advanced baking skills or exotic ingredients—just a few pantry staples and about two hours from start to finish. Whether you’re preparing dessert for a family gathering, impressing dinner guests, or simply treating yourself to something extraordinary, this sopapilla cheesecake will become your go-to recipe. Let’s explore how to create this showstopping dessert that tastes like it came straight from a professional bakery.
Understanding Sopapilla Cheesecake Basics
Before diving into the recipe, it’s helpful to understand what makes sopapilla cheesecake unique. Traditional sopapillas are fried pastries dusted with cinnamon and sugar, often served with honey for drizzling. A sopapilla cheesecake takes this concept and transforms it into a baked dessert that combines the crispy exterior with a creamy, luxurious filling. The result is a dessert that satisfies both texture and flavor cravings simultaneously.
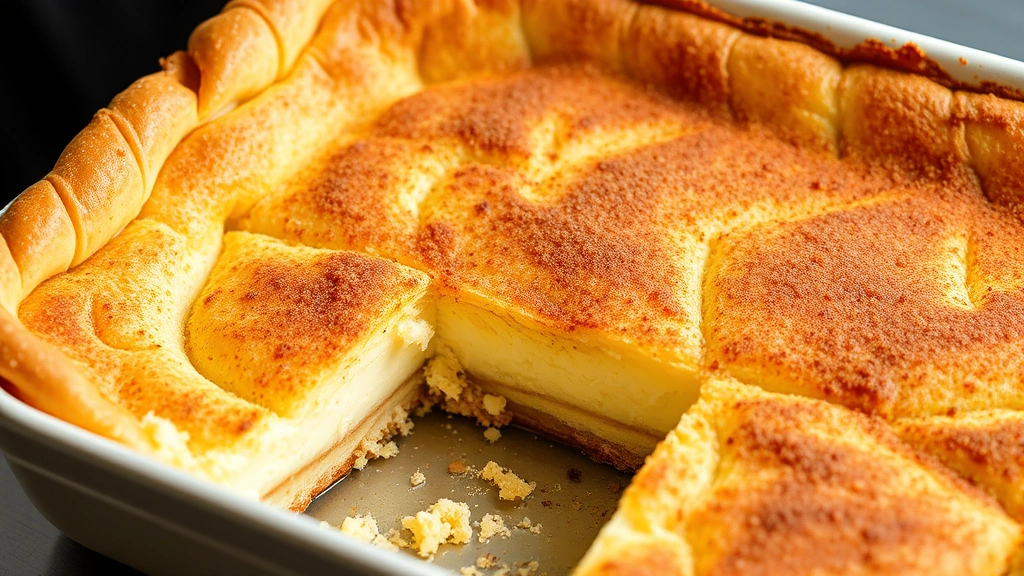
The beauty of this dessert lies in its three distinct layers: a crescent roll crust on the bottom, a smooth cheesecake middle, and a caramelized cinnamon-sugar layer on top. Each component plays a crucial role in creating the perfect bite. The crescent rolls provide structural support and a buttery foundation, the cheesecake offers richness and creaminess, and the topping delivers that signature cinnamon-sugar crunch that makes sopapillas so irresistible.
This recipe is forgiving and flexible, making it perfect for home bakers of all skill levels. Unlike traditional cheesecake, which requires precise temperature control and careful handling, sopapilla cheesecake is more straightforward. The crescent roll layers help insulate the filling, reducing the risk of cracks. Plus, the cinnamon-sugar topping hides any imperfections, making this an ideal dessert for building confidence in the kitchen.
Essential Ingredients You’ll Need
Gathering quality ingredients is the first step toward baking success. Here’s everything you’ll need for this sopapilla cheesecake recipe:
- Two 8-ounce cans refrigerated crescent roll dough – These form both the bottom crust and top layer of your dessert
- Two 8-ounce packages cream cheese – Room temperature for smooth mixing
- One cup granulated sugar – For sweetening the cheesecake filling
- One teaspoon vanilla extract – Enhances the flavor profile
- One quarter cup granulated sugar – For the cinnamon-sugar topping
- Two teaspoons ground cinnamon – The signature spice
- Four tablespoons unsalted butter – Melted for brushing the topping
- Optional: one quarter teaspoon nutmeg – Adds depth to the spice blend
Pro tip: Always use cream cheese at room temperature. Cold cream cheese creates lumps and prevents smooth mixing. Remove it from the refrigerator about 30 minutes before baking. Similarly, using fresh, high-quality cinnamon makes a noticeable difference in flavor compared to older spice jars that may have lost their potency.
Step-by-Step Preparation Guide
Proper preparation ensures your sopapilla cheesecake turns out perfectly every time. Begin by preheating your oven to 350°F (175°C). While the oven heats, prepare a 9×13-inch baking dish by lightly greasing it with butter or non-stick cooking spray. This prevents sticking and makes removal easier after baking.
Preparing the Bottom Crust: Open your first can of crescent roll dough and unroll it carefully. Instead of separating the triangles, press them together gently to form a solid sheet. Place this sheet in the bottom of your prepared baking dish, pressing it up the sides slightly. This creates a barrier between the filling and the baking dish, ensuring even baking and preventing soggy bottoms. You may have some overhang on the edges—that’s fine and will be incorporated into the final product.
Making the Cheesecake Filling: In a large mixing bowl, combine your room-temperature cream cheese and one cup of granulated sugar. Using an electric mixer on medium speed, beat these ingredients for about two to three minutes until the mixture is smooth, creamy, and free of lumps. Scrape down the sides of the bowl frequently to ensure all cream cheese is fully incorporated. Add the vanilla extract and mix for another 30 seconds until evenly distributed.
Spread this filling evenly over the crescent roll crust, making sure it reaches all corners of the baking dish. Use an offset spatula or the back of a spoon to create an even layer. The filling should be about half an inch thick, creating a substantial cheesecake layer that’s neither too thin nor too thick.
Adding the Top Crust: Open your second can of crescent roll dough and prepare it the same way as the first—unroll and press the triangles together to form a sheet. Carefully place this sheet over the cheesecake filling, pressing gently so it adheres slightly to the filling but doesn’t compress it. This top layer will rise and become golden during baking, creating that signature crispy exterior.
Baking Instructions and Timing
Baking time is critical for achieving the perfect texture. Place your assembled sopapilla cheesecake in the preheated 350°F oven for 35 to 40 minutes. You’ll know it’s done when the top crescent rolls are golden brown and the filling is set but still slightly jiggly in the very center when you gently shake the pan. The internal temperature should reach 160°F when measured with a meat thermometer in the center.
During baking, the crescent rolls will puff up beautifully, creating those desirable flaky layers. The cheesecake filling will set gradually, and the edges will firm up before the center. This is completely normal and exactly what you want. If the top is browning too quickly before the filling sets, cover the dessert loosely with aluminum foil for the last 10 minutes of baking.
Once baked, remove the sopapilla cheesecake from the oven and let it cool for about 10 minutes. This cooling period is important—it allows the structure to set slightly without becoming too firm, making it easier to apply the cinnamon-sugar topping without it sliding off.
Creating the Perfect Cinnamon-Sugar Topping
The cinnamon-sugar topping is what transforms this dessert from simple to spectacular. While your sopapilla cheesecake is still warm, prepare your topping mixture. In a small bowl, combine one quarter cup of granulated sugar with two teaspoons of ground cinnamon. Mix thoroughly to distribute the cinnamon evenly—you want consistent flavor in every bite.
Melt four tablespoons of unsalted butter in a small saucepan over low heat or in a microwave-safe bowl. Once melted and slightly cooled (about two minutes), use a pastry brush to apply the butter evenly over the entire top surface of the warm sopapilla cheesecake. Work quickly and gently to avoid disturbing the crescent roll layer, but ensure you cover as much surface area as possible.
Immediately after buttering, sprinkle the cinnamon-sugar mixture generously over the top, distributing it evenly from edge to edge. The warmth of the dessert will help the cinnamon-sugar adhere to the butter, creating a caramelized crust as it cools. If you prefer an extra-thick cinnamon-sugar layer, you can apply a second coat of butter and cinnamon-sugar while the first layer is still wet.
Allow the dessert to cool completely at room temperature for at least one hour before serving. This cooling period is crucial—it allows the layers to set properly and makes slicing cleaner and easier. You can also refrigerate it for a few hours or overnight if you prefer to serve it chilled, which many people find provides a more authentic cheesecake experience.
Serving and Storage Tips
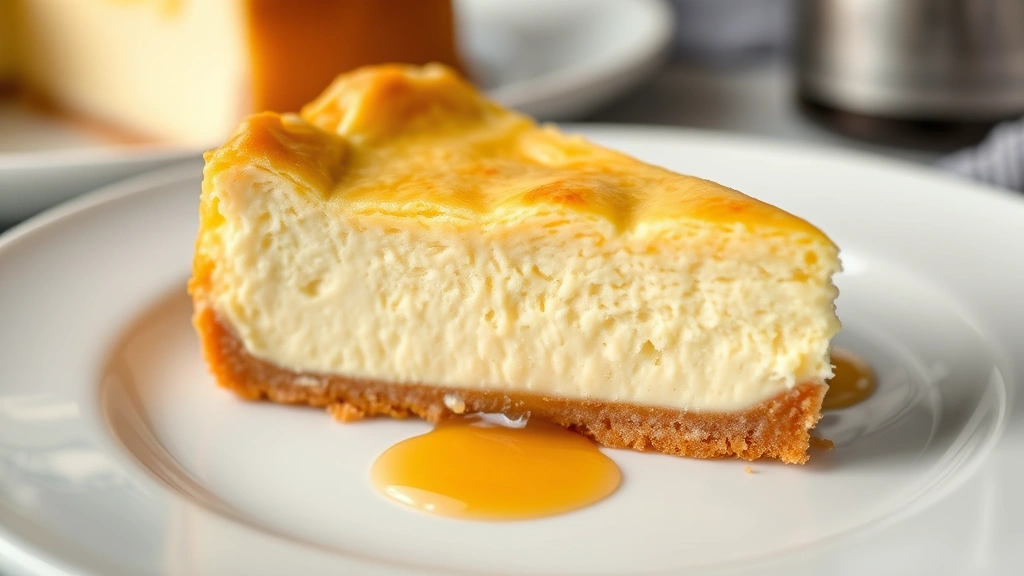
When you’re ready to serve your sopapilla cheesecake, use a sharp knife dipped in hot water and wiped clean between cuts. This technique prevents the filling from sticking to the knife and ensures clean, attractive slices. A 9×13-inch pan typically yields 12 to 15 generous servings, depending on how large you cut them.
For the ultimate presentation, serve each slice slightly chilled or at room temperature with optional accompaniments. A drizzle of honey over the top mimics traditional sopapillas and adds an extra layer of sweetness. Whipped cream provides a cool contrast to the warm spices, while a scoop of vanilla ice cream creates an indulgent treat. Some people also enjoy a light dusting of additional cinnamon sugar on individual servings for extra flair.
Storage Instructions: Cover leftover sopapilla cheesecake tightly with plastic wrap or aluminum foil and store it in the refrigerator for up to five days. The dessert actually improves after a day or two as the flavors meld together. For longer storage, you can freeze individual slices in an airtight container for up to three months. Thaw frozen slices in the refrigerator overnight before serving.
If you want to reheat your sopapilla cheesecake, place a slice on a microwave-safe plate and heat it for 20 to 30 seconds on medium power. This restores some of the warmth and makes the cinnamon-sugar topping slightly crispy again. Alternatively, you can warm slices in a 300°F oven for about five minutes for a more even reheating.
Variations and Customizations
One of the best aspects of this sopapilla cheesecake recipe is its versatility. While the classic version is absolutely delicious, creative variations allow you to personalize the dessert to your preferences and dietary needs.
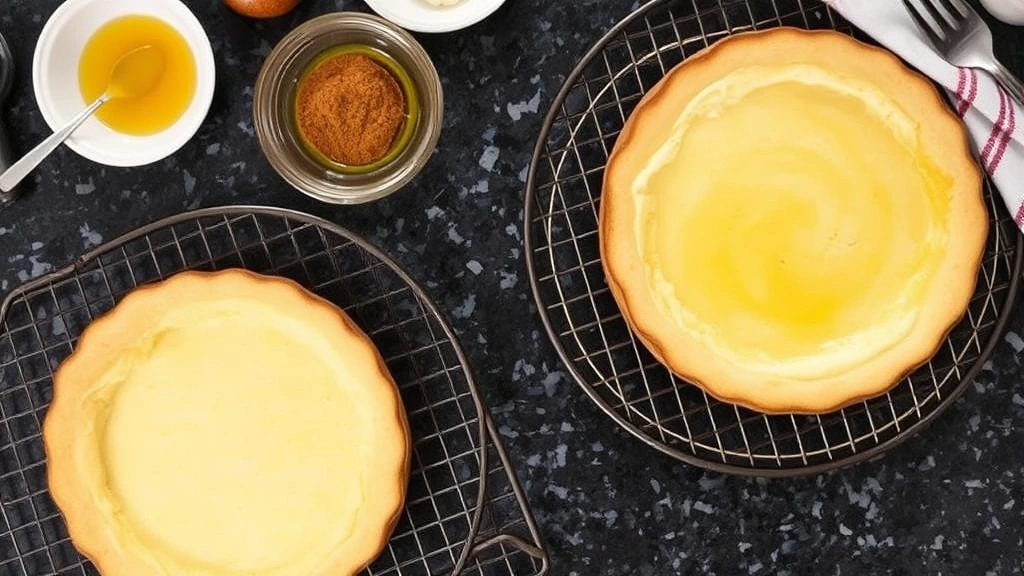
Honey Drizzle Version: Prepare a simple honey syrup by warming one half cup of honey with one tablespoon of butter and a pinch of cinnamon. After the cheesecake cools, drizzle this mixture over the top in decorative lines. This adds authentic sopapilla flavor and creates a stunning visual presentation.
Dulce de Leche Variation: Spread a thin layer of dulce de leche (about one quarter cup) over the bottom crescent roll crust before adding the cheesecake filling. This adds caramel notes and creates a more complex flavor profile. You can find dulce de leche in the international or baking aisle of most grocery stores, or learn how to make homemade sauces if you prefer making it from scratch.
Brown Sugar Cinnamon Version: Replace the granulated sugar in the topping with brown sugar for a deeper, more molasses-forward flavor. Brown sugar creates a slightly chewier texture in the cinnamon-sugar layer, which some people prefer over the crispness of white sugar.
Spiced Variation: Add one quarter teaspoon of nutmeg, one eighth teaspoon of ground cloves, and one eighth teaspoon of allspice to your cinnamon-sugar topping. These warm spices complement cinnamon beautifully and create a more sophisticated flavor profile reminiscent of pumpkin pie spices.
No-Bake Cheesecake Version: For a lighter alternative, prepare the crust as directed but use no-bake cheesecake filling instead. Whip room-temperature cream cheese with powdered sugar and fold in whipped cream. Spread over the bottom crust, add the top crust layer (unbaked), and refrigerate for four hours. This version has a mousse-like texture and requires no oven time.
Mini Individual Versions: Instead of making one large dessert, divide ingredients among a muffin tin lined with cupcake liners. Use small circles of crescent roll dough for crusts and tops. Bake at 350°F for 15 to 20 minutes. These individual sopapilla cheesecakes are perfect for parties or portion control and make impressive individual servings.
You can also experiment with different sauce recipes drizzled over the top, such as a simple cinnamon-honey glaze or even a caramel sauce for added richness. The foundation is solid enough to support various flavor additions without compromising the integrity of the dessert.
FAQ
Can I make sopapilla cheesecake ahead of time?
Absolutely! This dessert is actually better when made a day or two in advance. Prepare it completely, including the cinnamon-sugar topping, and refrigerate it covered. The flavors meld together beautifully overnight, and the texture becomes more set and easier to slice. You can prepare it up to five days in advance.
What if my cheesecake cracks on top?
Cracks are completely normal and nothing to worry about in this recipe. The crescent roll top layer and cinnamon-sugar topping cover any imperfections beautifully. However, if you’re concerned about cracking, ensure your cream cheese is fully room temperature before mixing, avoid overmixing the filling, and don’t overbake the dessert.
Can I use a different crust instead of crescent rolls?
Yes, you can substitute the crescent rolls with other options. A traditional graham cracker crust works well for the bottom layer, though you’ll lose some of the authentic sopapilla flavor. For the top, you could use phyllo dough for extra crispness or puff pastry for a more elegant presentation. Adjust baking time as needed based on your crust choice.
How do I prevent the bottom from becoming soggy?
The key to a non-soggy bottom is keeping the crescent roll crust intact as a barrier between the cheesecake filling and the baking dish. Don’t poke holes in it, and ensure it covers the entire bottom surface. You can also pre-bake the bottom crust at 375°F for five minutes before adding the filling to give it extra structure.
Can I make this dessert gluten-free?
Yes! Substitute the crescent roll dough with gluten-free crescent rolls, which are available at most grocery stores. The rest of the recipe remains the same. Ensure all other ingredients, including vanilla extract, are certified gluten-free if this is important for your dietary needs.
What’s the best way to serve this dessert?
Sopapilla cheesecake can be served warm, at room temperature, or chilled. Many people prefer it chilled because it’s easier to slice and the cheesecake texture is more pronounced. Serve with optional honey drizzle, whipped cream, or vanilla ice cream. For special occasions, dust individual servings with additional cinnamon sugar.
How long does sopapilla cheesecake last in the freezer?
Properly wrapped sopapilla cheesecake keeps in the freezer for up to three months. Wrap individual slices or the entire dessert tightly in plastic wrap and then aluminum foil to prevent freezer burn. Thaw in the refrigerator overnight before serving for best results.
Can I double this recipe for a larger gathering?
Yes, this recipe doubles easily. Use two 9×13-inch baking dishes and double all ingredients. Both dishes can bake simultaneously in the oven if you have the space. The baking time remains the same since you’re using the same pan size, just two of them.
What if I don’t have vanilla extract?
Vanilla extract adds subtle flavor but isn’t absolutely essential. You can omit it entirely, or substitute it with one quarter teaspoon of almond extract for a slightly different but equally delicious flavor profile. Some bakers also use a teaspoon of honey as a substitute for added sweetness and depth.
Is this dessert suitable for special diets?
This traditional recipe contains dairy and refined sugar, making it unsuitable for vegan or strict keto diets. However, you can adapt it using dairy-free cream cheese and crescent rolls, plus sugar substitutes, though texture results may vary. For dietary accommodations, test a small batch first before preparing for a large gathering.


