Sugar Cookie Frosting: Grandma’s Secret Recipe
There’s something magical about biting into a perfectly decorated sugar cookie with frosting so smooth and creamy it melts on your tongue. My grandmother has been making her legendary sugar cookie frosting for over fifty years, and I’m thrilled to finally share her closely guarded secrets with you. This isn’t just any frosting recipe—it’s a technique that transforms simple ingredients into silky perfection that holds its shape beautifully while tasting absolutely divine.
What makes Grandma’s recipe truly special is the combination of quality ingredients, precise ratios, and a few insider tricks that most bakers don’t know about. Whether you’re decorating cookies for the holidays, a special occasion, or simply because you love homemade treats, this frosting will elevate your baking game to professional levels. The best part? Once you master this recipe, you’ll use it again and again for all your sugar cookie creations.
What Makes Grandma’s Frosting Special
Grandma’s sugar cookie frosting stands apart from typical buttercream because of its unique texture and stability. Unlike heavy butter-based frostings, this recipe creates a frosting that’s light, spreadable, and absolutely delicious. The secret lies in understanding the science behind the ingredients and how they interact with one another.
The frosting achieves its signature silky texture through a careful balance of powdered sugar, butter, and dairy. Grandma always insisted on using real butter—never margarine or shortening—because it provides superior flavor and a better mouthfeel. The addition of heavy cream or milk creates the perfect consistency that’s neither too stiff nor too loose, making it ideal for both piping intricate designs and spreading smoothly over cookies.
What truly sets this frosting apart is its ability to set without becoming rock-hard. Many homemade frostings become difficult to bite through once they dry, but Grandma’s recipe maintains a pleasant texture that yields easily to your teeth while still holding its decorative shape. This is achieved through proper ingredient ratios and understanding how different components affect the final texture.
Ingredients You’ll Need
Before you begin, gather these essential ingredients for Grandma’s authentic sugar cookie frosting:
- 1 cup (2 sticks) unsalted butter – Room temperature is crucial for proper mixing
- 4-5 cups powdered sugar – Sifted to eliminate lumps and ensure smooth frosting
- 3-4 tablespoons heavy cream or whole milk – For achieving the perfect consistency
- 1 teaspoon vanilla extract – Pure vanilla is essential for authentic flavor
- ¼ teaspoon salt – Enhances the overall flavor profile
- Gel food coloring (optional) – For decorative designs and festive colors
Grandma always emphasized the importance of ingredient quality. She never used pre-sifted powdered sugar because it tends to clump. Instead, she sifted it fresh right before mixing, which made a noticeable difference in the final texture. She also preferred heavy cream over milk when she wanted a richer frosting, though milk works beautifully for a lighter version.
Equipment Essentials
Having the right tools makes the frosting-making process much easier and more enjoyable. Here’s what Grandma recommends:
- Electric mixer – A stand mixer or hand mixer both work well
- Medium mixing bowl – Large enough to accommodate all ingredients
- Flour sifter or fine mesh strainer – For sifting powdered sugar
- Rubber spatula – For scraping down bowl sides
- Piping bags and tips – For decorative application
- Offset spatula – Helpful for spreading frosting smoothly
Grandma’s kitchen wisdom extends to temperature control as well. She always ensured her butter was genuinely room temperature—not cold, not warm—because this affects how well it incorporates with other ingredients. If your kitchen is cold, leave the butter out for 30-45 minutes before starting.
Step-by-Step Instructions
Now for the most important part—the actual frosting-making process. Follow these steps carefully to replicate Grandma’s perfection:
Step 1: Prepare Your Ingredients
Sift your powdered sugar into a bowl and set aside. This step is non-negotiable according to Grandma—it ensures there are no lumps that could affect the frosting’s smoothness. If you don’t have a sifter, use a fine mesh strainer and press the powdered sugar through with the back of a spoon.
Step 2: Cream the Butter
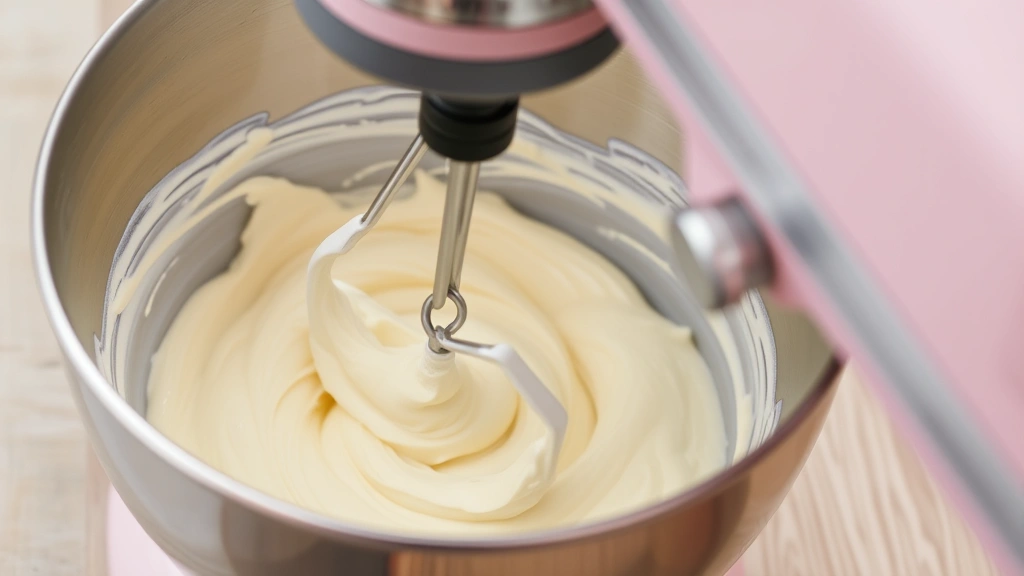
Place your room-temperature butter in a mixing bowl. Using an electric mixer on medium speed, beat the butter for approximately 2-3 minutes until it becomes pale, fluffy, and lighter in color. This process, called creaming, incorporates air into the butter and is essential for achieving the proper texture. Don’t skip this step or rush it—the extra air creates that light, fluffy frosting everyone loves.
Step 3: Add Powdered Sugar Gradually
With the mixer on low speed, gradually add your sifted powdered sugar, about one cup at a time. After each addition, mix until just combined before adding more. This prevents the powdered sugar from flying everywhere and ensures even distribution throughout the frosting. Grandma always said patience in this step determines the final quality.
Step 4: Add Liquid and Flavoring
Once all powdered sugar is incorporated, add your vanilla extract and salt. Then, add your heavy cream or milk one tablespoon at a time while mixing on low speed. Watch the consistency carefully—you want frosting that’s spreadable but holds its shape. Grandma’s rule of thumb: if it looks like it could be piped, it’s perfect.
Step 5: Final Mixing
Increase mixer speed to medium and beat for another 1-2 minutes until the frosting becomes light, fluffy, and absolutely smooth. This final beating incorporates additional air and creates that cloud-like texture that makes Grandma’s frosting so special. The frosting should look almost mousse-like at this point.
Coloring and Decorating Tips
One of the joys of sugar cookie decorating is creating beautiful, vibrant designs. Grandma has perfected the art of coloring frosting without affecting its consistency:
- Use gel food coloring – Gel colors are more concentrated than liquid colors, so you need less and they won’t thin out your frosting
- Add color gradually – Start with just a toothpick’s worth and mix thoroughly before adding more
- Mix thoroughly – Ensure color is completely distributed for even hue throughout
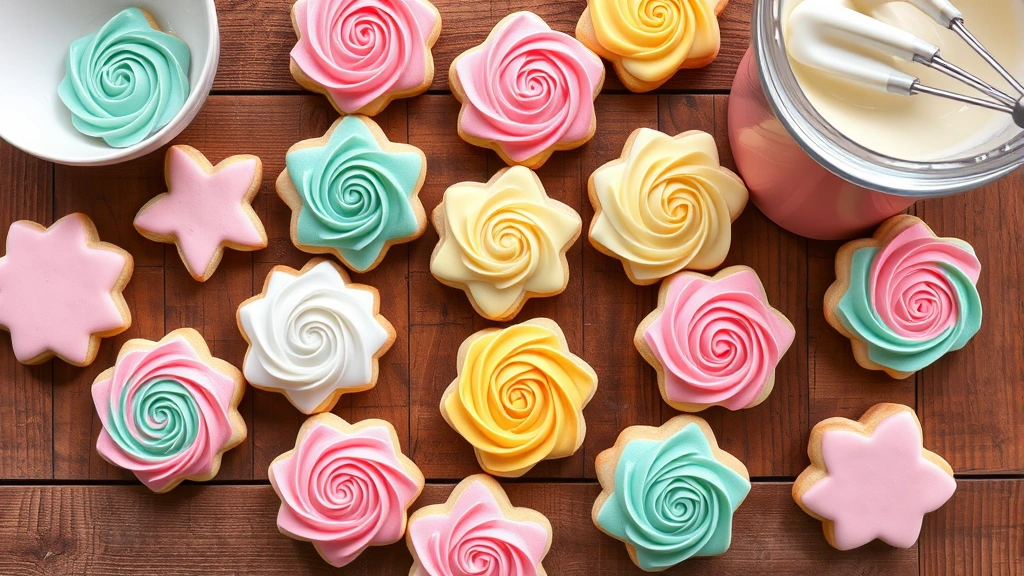
- Create ombre effects – Divide frosting into portions and color each differently for gradient designs
- Thin for flooding – Add a few drops of milk to create a thinner consistency for flooding cookie bases
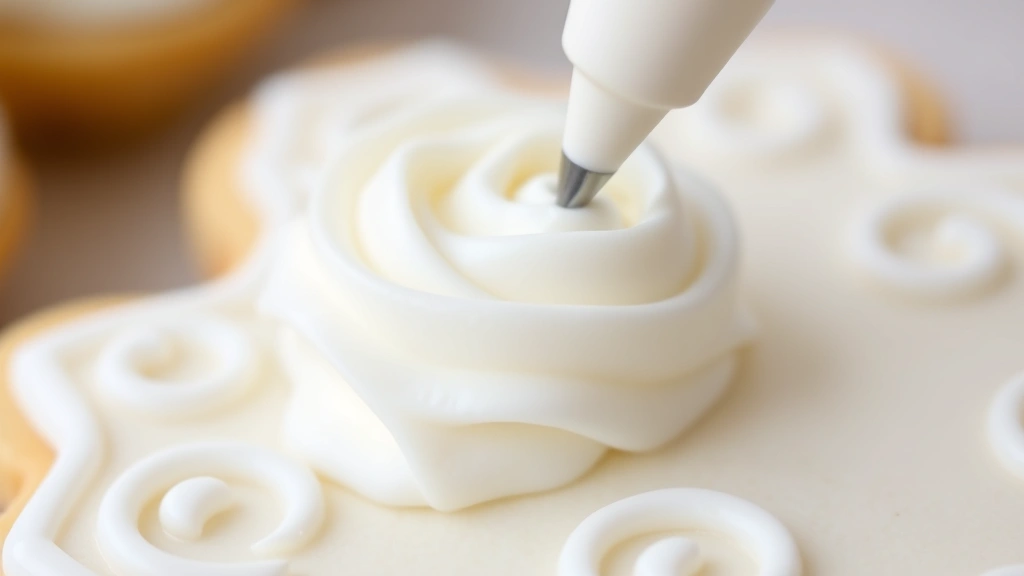
For piping details, Grandma recommends keeping your frosting at the consistency described above—thick enough to hold shape but spreadable. If you’re creating intricate piped designs, the frosting should be slightly stiffer than for spreading. If it becomes too thick while you work, add milk one drop at a time.
Storage and Shelf Life
Proper storage ensures your frosting stays fresh and ready to use. Grandma’s storage methods have been tested through decades:
- Room temperature – Frosting lasts up to 2 days when covered in an airtight container
- Refrigerator – Keeps for up to 2 weeks in an airtight container; bring to room temperature and re-whip before using
- Freezer – Freezes beautifully for up to 3 months in an airtight container; thaw in the refrigerator overnight, then re-whip
When frosting is stored in the refrigerator or freezer, it becomes quite firm. To restore it to perfect spreading consistency, let it come to room temperature, then beat it with an electric mixer on medium speed for 2-3 minutes. You might need to add a tablespoon of milk to achieve the ideal texture again.
Common Mistakes to Avoid
Even experienced bakers occasionally make frosting mistakes. Learn from common errors to ensure success:
Using cold butter: Cold butter won’t incorporate properly, resulting in a grainy, lumpy frosting. Always allow butter to reach room temperature first.
Not sifting powdered sugar: Lumps in powdered sugar create lumpy frosting that’s impossible to smooth out. Take the extra minute to sift.
Adding too much liquid: It’s easy to end up with frosting that’s too thin. Remember, you can always add more milk, but you can’t remove it. Add liquid gradually and test consistency frequently.
Over-mixing: While some mixing is necessary, excessive beating can cause the frosting to become grainy. Mix until smooth and fluffy, then stop.
Using liquid food coloring: Liquid colors thin out frosting significantly, affecting both consistency and taste. Gel colors are superior for this recipe.
Variations and Flavor Options
While Grandma’s classic vanilla version is perfection, she also created delicious variations for different occasions. Here are her favorite adaptations:
Almond Frosting: Replace vanilla extract with ½ teaspoon almond extract and ½ teaspoon vanilla extract. This creates a delicate, sophisticated flavor that pairs beautifully with decorated cookies.
Lemon Frosting: Replace vanilla with 1 teaspoon lemon zest and 1 tablespoon fresh lemon juice. Reduce milk slightly to account for the added liquid. This bright frosting is perfect for spring-themed cookies.
Cream Cheese Frosting: Replace ½ cup of butter with 4 ounces softened cream cheese. This creates a tangier frosting that’s less sweet and incredibly delicious.
Chocolate Frosting: Add 3 tablespoons unsweetened cocoa powder and an extra tablespoon of milk. Sift the cocoa powder with the powdered sugar to avoid lumps.
Peppermint Frosting: Replace vanilla with ½ teaspoon peppermint extract and add ¼ teaspoon crushed candy canes for texture and flavor. Perfect for holiday cookies.
If you’re interested in exploring more baking techniques, consider learning how to make homemade components from scratch, which teaches similar precision and ingredient understanding. You might also enjoy exploring easy dinner recipes for beginners to understand foundational cooking techniques that apply to baking as well.
For those interested in creating complete dessert menus, check out our guides on quick and easy pasta recipes for balancing your meal planning, or explore low carb dinner recipes if you’re watching your sugar intake in other meals.
FAQ
Can I make this frosting without an electric mixer?
Yes, though it requires more elbow grease. Use a whisk and beat vigorously for about 5-10 minutes during the creaming phase. The results won’t be quite as light and fluffy, but it will still taste wonderful.
What if my frosting is too thin?
Add more powdered sugar, one tablespoon at a time, mixing thoroughly between additions until you reach the desired consistency. This is easier than trying to remove liquid.
Why did my frosting become grainy?
Graininess usually results from either cold butter, unsifted powdered sugar, or over-mixing. Ensure all ingredients are room temperature and properly prepared before mixing.
Can I use margarine instead of butter?
Grandma strongly advises against this. Margarine contains more water and will result in a frosting with an inferior texture and flavor. Real butter is essential for authentic results.
How long does frosting stay fresh on decorated cookies?
Decorated cookies with this frosting stay fresh at room temperature for 3-5 days when stored in an airtight container. The frosting doesn’t dry out completely, maintaining a pleasant texture throughout.
Can I double this recipe?
Absolutely! Simply double all ingredients and follow the same steps. You may need to increase mixing time slightly to ensure everything incorporates properly.
Is this frosting suitable for wedding cookies?
Yes! Many professional bakers use similar recipes for wedding cakes and decorated cookies. The frosting’s smooth texture and ability to hold its shape make it perfect for elegant occasions.
Grandma’s sugar cookie frosting recipe has brought joy to countless family gatherings and special occasions. Now that you know her secrets, you’re ready to create beautiful, delicious decorated cookies that will impress everyone. Remember, baking is both science and art—follow the instructions carefully, but don’t be afraid to experiment with colors and flavors. Your cookies will be absolutely legendary.


