Easy Dutch Oven Bread? Home Baker Approved!
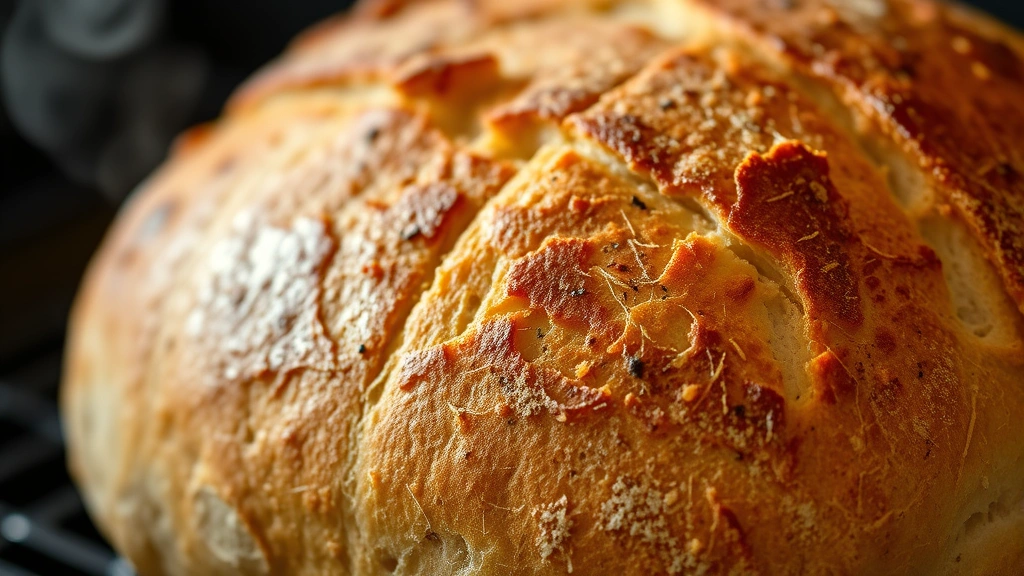
Dutch oven bread baking has revolutionized home baking, transforming it from an intimidating culinary art into an achievable weekend project. Whether you’re a seasoned baker or picking up flour for the first time, a Dutch oven creates the perfect environment for crusty, artisan-quality loaves right in your kitchen. The enclosed vessel traps steam during baking, creating that coveted crispy exterior and tender crumb that bakeries charge premium prices for.
The beauty of Dutch oven bread recipes lies in their simplicity. You need just four basic ingredients—flour, water, salt, and yeast—plus time and a reliable Dutch oven. No special equipment, no complicated techniques, and no need to schedule your life around a sourdough starter. This comprehensive guide walks you through everything from selecting your Dutch oven to troubleshooting common issues, ensuring your first loaf is as successful as your tenth.
Why Dutch Ovens Transform Your Bread
A Dutch oven is essentially a covered cast iron or enameled ceramic pot that creates a mini steam chamber inside your oven. When bread bakes, it needs steam during the initial stages to allow proper expansion—a process called oven spring. Without steam, your crust sets too quickly, preventing the bread from reaching its full volume and creating that signature crackly exterior.
Commercial bakeries use expensive steam-injection ovens to achieve this effect. Home bakers discovered that a simple Dutch oven replicates this environment perfectly. The lid traps moisture released by the dough itself, maintaining humidity for the first 20-30 minutes of baking. Once you remove the lid, the crust sets with beautiful scoring marks and that golden-brown color everyone loves.
Beyond steam management, Dutch ovens provide consistent heat distribution. Cast iron and ceramic both conduct heat evenly, preventing hot spots that create uneven browning. The enclosed environment also protects your bread from drafts and temperature fluctuations in your oven, resulting in more predictable, reliable results.
Essential Ingredients and Equipment
The Ingredients You’ll Need:
- Bread flour (3 cups or 400g): Higher protein content than all-purpose flour creates better structure
- Water (1.5 cups or 355ml): Room temperature works best for consistent fermentation
- Salt (1.5 teaspoons): Enhances flavor and controls yeast activity
- Active dry yeast or instant yeast (0.5 teaspoon): A tiny amount creates slow fermentation for deeper flavor
Equipment Essentials:
- Dutch oven (4-6 quart capacity): Cast iron or enameled ceramic both work. Lodge, Le Creuset, and Staub are reliable brands. Avoid non-enameled cast iron if you’re sensitive to iron taste
- Kitchen scale: Baking is chemistry—weight measurements are far more accurate than volume
- Mixing bowl: Any large bowl works; glass or ceramic shows dough development clearly
- Linen banneton or bowl lined with flour: Supports dough during final proof
- Bench scraper: Essential for handling sticky dough without frustration
- Scoring tool or sharp knife: Creates controlled cuts for expansion
For advanced techniques, consider exploring King Arthur Baking Company’s comprehensive baking guides and The Perfect Loaf’s detailed bread science resources.
Step-by-Step Beginner’s Dutch Oven Bread Recipe
Yield: One 1.5-pound loaf | Total Time: 24-48 hours (mostly hands-off)
Timeline Overview:
- Hour 0: Mix dough
- Hours 1-4: Bulk fermentation with stretches
- Hours 4-12 (or overnight): Cold retard in refrigerator
- Hour 13: Shape and final proof
- Hour 14: Score and bake
Step 1: Mix Your Dough (5 minutes active time)
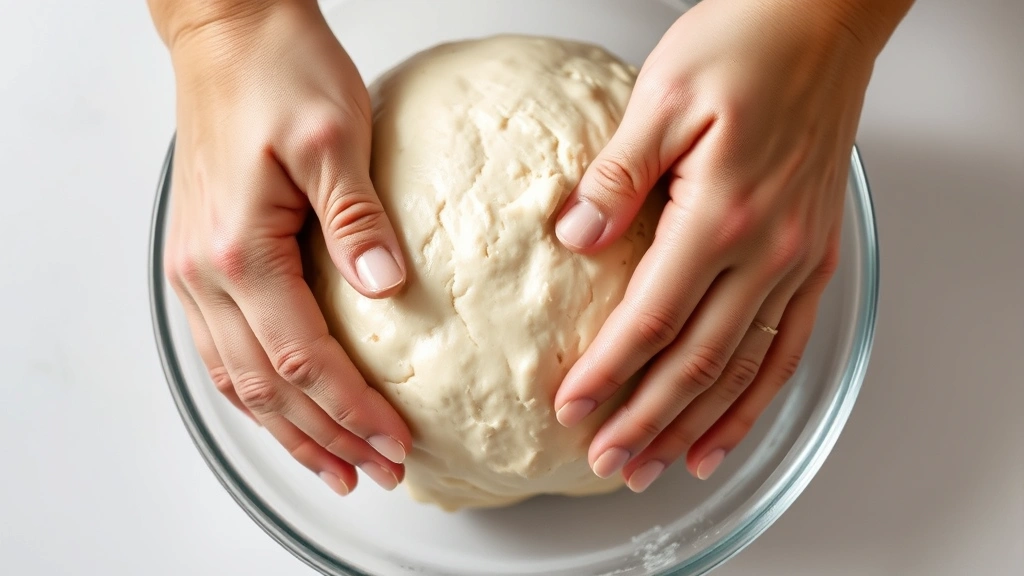
Combine 400g bread flour, 355ml room-temperature water, 7.5g salt, and 2.5g instant yeast in a large bowl. Mix until no dry flour remains—the dough will be shaggy and wet. This is normal and desired. Cover with a damp towel and let rest for 30 minutes. This autolyse period allows flour to fully hydrate, developing gluten naturally before you add salt.
Step 2: Bulk Fermentation (3-4 hours)
After the autolyse rest, begin performing stretch-and-folds. Wet your hand, grab one side of the dough, stretch it up, and fold it over the center. Rotate the bowl 90 degrees and repeat four times. This builds strength without kneading. Perform this sequence every 30 minutes for the first two hours. Your dough should become smoother and more elastic.
Between stretches, let dough rest undisturbed. You’ll notice it gradually increasing in volume, becoming airier and developing a slightly domed top. By the end of bulk fermentation, the dough should have increased by about 50% and feel light and bubbly when gently poked.
Mastering the Dough
Understanding dough development is crucial for Dutch oven bread success. Gluten—the protein network that gives bread structure—develops through hydration and mechanical action. Unlike traditional kneading, the stretch-and-fold method builds gluten gently while developing flavor through extended fermentation.
The Role of Fermentation:
Fermentation is where bread gets its personality. Long, slow fermentation (24-48 hours total) allows yeast and bacteria to develop complex flavors. This is why your grandmother’s bread tasted better than commercial bakery loaves—time creates flavor. The cold retard (refrigerating after shaping) slows yeast activity while allowing bacteria to continue developing sour, nutty, wheaty notes.
Temperature matters significantly. Warmer environments (75-78°F) speed fermentation, while cooler kitchens (65-70°F) slow it down. If your kitchen is cold, place dough in an oven with just the light on, or use a proofing box. If it’s hot, fermentation may complete faster—watch the dough’s appearance rather than relying solely on time.
Hydration and Extensibility:
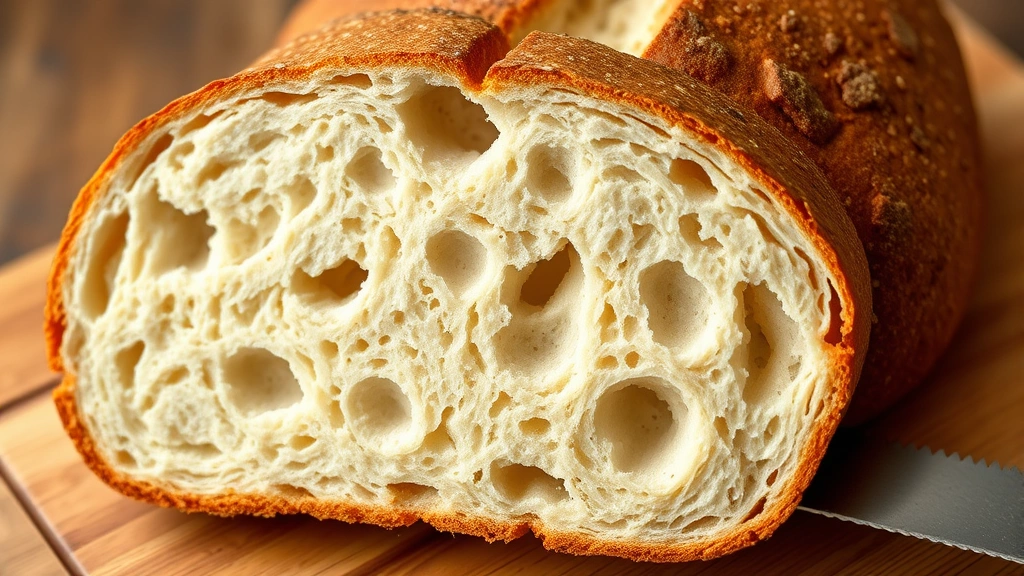
This recipe uses 88% hydration (water weight divided by flour weight), creating an open crumb with large, irregular holes. This dough is intentionally wet and sticky—don’t add extra flour or you’ll create a dense loaf. Wet hands and wet work surfaces become your friends. A bench scraper handles the dough far better than flour-dusted hands.
If you’re looking to pair your fresh bread with spreads, our guide to making homemade jams offers excellent accompaniment options that complement artisan loaves beautifully.
Shaping and Final Proof
Shaping Your Dough (10 minutes):
After bulk fermentation, turn dough onto a lightly floured surface. Pre-shape into a round by folding edges toward the center, then let rest for 20-30 minutes. This intermediate proof relaxes the gluten, making final shaping easier.
For the final shape, flip the dough seam-side up. Fold the top third down and press gently, then fold the left and right sides toward the center, slightly overlapping. Roll the dough toward you, creating tension on the surface. The goal is a taut, surface-tension-rich boule that will expand upward rather than spreading sideways during baking.
Place seam-side up in a floured banneton or bowl lined with a flour-dusted kitchen towel. The flour prevents sticking while supporting the dough’s shape during proof.
Cold Retard (8-16 hours in refrigerator):
Cover the banneton with plastic wrap and refrigerate overnight or longer. This cold fermentation is game-changing for home bakers. The cold slows yeast (preventing over-fermentation) while allowing flavor development to continue. Your dough will likely increase only slightly in the fridge—this is correct. The cold also firms up the dough, making it easier to score without deflating.
You can bake straight from the cold, or remove it 1-2 hours before baking for a slightly warmer dough. Both approaches work beautifully.
Baking Your Perfect Loaf
Preheat Your Dutch Oven (30 minutes):
Place your Dutch oven (with lid) in your oven and preheat to 500°F. This high initial temperature drives oven spring and creates that coveted dark crust. The preheating time ensures the pot reaches temperature throughout—cold spots create uneven baking.
Scoring Your Dough (2 minutes):
Carefully remove the hot Dutch oven (use oven mitts!) and flip your dough onto parchment paper. Score the top with a sharp knife or scoring tool, making a single confident cut at a 30-45 degree angle about 0.5 inches deep. This guides expansion and creates the classic ear—that crispy flap along the cut edge.
Loading and Baking:
Carefully transfer the parchment-lined dough into the screaming-hot Dutch oven. Place the lid on immediately. Bake at 500°F for 20 minutes with the lid on. This creates intense steam and oven spring.
After 20 minutes, reduce heat to 450°F and remove the lid. Bake for 25-30 additional minutes until the crust is deep golden brown. The entire baking time is 45-50 minutes. Don’t rush this—a pale loaf hasn’t developed full flavor.
Cooling:
Remove the bread and let cool on a wire rack for at least one hour before slicing. This allows the crumb to set properly. Slicing warm bread results in a gummy interior. I know it’s tempting, but patience rewards you with perfect slices.
Flavor Variations and Add-Ins
Once you’ve mastered the basic recipe, Dutch oven bread variations become endless. The foundation remains identical—only the additions change.
Whole Wheat Bread:
Replace 25% of bread flour with whole wheat flour (100g whole wheat, 300g bread flour). Whole wheat absorbs more water, so increase water to 370ml. The result is nuttier flavor and denser crumb. Whole wheat ferments slightly faster, so watch for 50% volume increase rather than timing.
Seeds and Nuts:
Toast 150g of mixed seeds (sunflower, pumpkin, sesame) or chopped nuts (walnuts, pecans) and fold into dough after the second stretch-and-fold. Seeds add texture and nutritional value. Toast them first for deeper flavor—raw seeds taste flat.
Herb and Cheese Variations:
Fold 100g grated Parmesan, 50g fresh rosemary (or 15g dried), and cracked black pepper into dough during bulk fermentation. The combination creates a savory loaf perfect for soups or alongside homemade crème fraîche for appetizers.
Olive and Sundried Tomato:
Add 150g pitted olives and 100g chopped sundried tomatoes during bulk fermentation. These additions create vibrant flavor and beautiful visual appeal. Pat tomatoes dry first to prevent excess moisture.
Enriched Dough (Brioche-Style):
For a richer, slightly sweet loaf, add 60g butter, 50g sugar, 2 eggs, and 7.5g salt to 400g flour and 250ml water. Enriched doughs require longer fermentation and slightly lower oven temperatures (475°F) to prevent over-browning. The result is a tender, golden loaf—imagine bread that’s part cake, completely irresistible.
Troubleshooting Common Issues
Dense, Gummy Crumb
This indicates under-baking or insufficient cooling time. Ensure your loaf reaches 205-210°F internal temperature (use an instant-read thermometer in the center). Also verify you’re cooling the bread completely before slicing—at least one hour. If your oven runs cool, increase baking time by 5 minutes.
Flat, Spreading Loaf with No Oven Spring
Over-fermentation is the culprit. Your dough reached peak fermentation before baking and couldn’t expand further. Reduce bulk fermentation time by 30 minutes, or shorten cold retard from 16 hours to 10 hours. Watch the dough rather than the clock—it should increase 50% during bulk fermentation, not 100%.
Pale, Thick Crust
Your oven temperature isn’t high enough or baking time is insufficient. Verify your oven temperature with an oven thermometer—many home ovens run 25 degrees cooler than displayed. Increase baking temperature to 500°F and ensure you’re baking until deep golden brown, not just light tan.
Overly Sour Flavor (Unwanted)
Long fermentation creates tang—great if you want it, problematic if you don’t. Reduce total fermentation time from 48 hours to 24-30 hours. Also try warmer fermentation temperatures (75-78°F) which speeds yeast relative to bacteria. More yeast activity and less bacterial activity equals milder flavor.
Overly Sweet Flavor (Unwanted)
Paradoxically, under-fermentation creates sweetness—yeast hasn’t consumed all the sugars. Extend bulk fermentation by 30 minutes or increase cold retard time. The longer fermentation allows yeast to consume more sugars, creating a more savory, complex loaf.
Crust Separates from Crumb
This indicates insufficient steam during the crucial first 20 minutes. Ensure your Dutch oven is fully preheated—30 minutes minimum. Also verify your lid fits snugly; if it’s loose, steam escapes. Some cooks place a baking sheet on top of the lid for extra seal.
Dough is Too Sticky to Handle
This is normal for 88% hydration dough. The solution isn’t adding flour (which ruins your bread) but using wet hands instead. Keep a bowl of water nearby and wet your hands frequently. A bench scraper becomes your best friend. If dough is genuinely unmanageable, slightly reduce water from 355ml to 340ml in your next batch.
FAQ
Can I use all-purpose flour instead of bread flour?
Yes, but results differ. Bread flour (12-14% protein) creates stronger gluten networks and better oven spring. All-purpose flour (10-12% protein) produces slightly denser, more tender crumb. The bread will still taste delicious—just with less dramatic scoring definition and slightly less volume.
What if I don’t have a Dutch oven?
You can create a steam chamber using a large stainless steel bowl inverted over your dough on a baking sheet, or use a covered roasting pan. The results won’t be quite as dramatic (less complete steam enclosure), but many bakers successfully use these alternatives. The key is trapping steam for the first 20-30 minutes of baking.
How long does homemade Dutch oven bread stay fresh?
Stored in a paper bag on the counter, your loaf stays fresh for 2-3 days. The crust will soften after the first day—this is normal. For longer storage, slice and freeze for up to three months. Thaw at room temperature or toast directly from frozen. Never refrigerate bread; cold temperatures accelerate staling.
Can I make the dough and bake it the same day?
Yes, though flavor suffers. Complete bulk fermentation at room temperature (4-6 hours instead of 8-12 with cold retard), shape, and do a 2-3 hour room-temperature final proof. The bread will be delicious but lack the complex, developed flavor of longer fermentation. For best results, plan for 24-48 hours total.
My dough is bubbly and risen, but it’s only been 2 hours. Should I still bake?
Watch the dough, not the clock. If it’s visibly risen 50% and passes the poke test (a gentle poke leaves a slight indentation that slowly springs back 75%), it’s ready to shape. Fermentation speed depends on room temperature, flour freshness, and yeast activity. Trust visual cues over timing.
Is Dutch oven bread healthier than store-bought?
Homemade Dutch oven bread contains no preservatives, dough conditioners, or additives. You control every ingredient. However, healthfulness depends on your flour choice and toppings. Whole wheat versions offer more fiber and minerals. The main advantage is knowing exactly what’s in your bread.
Can I make multiple loaves at once?
Yes! Make a double batch of dough (800g flour, 710ml water, 15g salt, 5g yeast). Shape into two loaves. You’ll need two Dutch ovens or bake sequentially. Bake the first loaf as directed, then reheat the Dutch oven for 10 minutes before baking the second. Both will be beautiful.
Why does my bread taste yeasty?
You’re likely using too much yeast or fermenting too quickly at warm temperatures. This recipe uses just 2.5g yeast for a reason—slow fermentation develops flavor. Reduce yeast to 1.5g and extend fermentation. Also ensure your kitchen isn’t warmer than 75°F. Slow is better than fast in bread baking.
Should I score my bread if it has toppings?
Score before adding toppings like seeds or herbs. A scored surface allows steam to escape in a controlled manner, creating that beautiful ear. Toppings on an unscored loaf create random bursts and less dramatic scoring definition.
Can I use instant yeast and active dry yeast interchangeably?
Yes, in equal amounts. Instant yeast is slightly more potent due to processing, but for home baking the difference is negligible. Use whichever you have on hand. Both work beautifully in Dutch oven bread.
Dutch oven bread baking transforms from intimidating to intuitive after your first successful loaf. The combination of simple ingredients, patient fermentation, and the Dutch oven’s steam-trapping magic creates results that rival professional bakeries. Start with the basic recipe, master the technique, then explore variations. Whether you’re baking for your family or impressing friends with fresh-baked artisan loaves, your Dutch oven is about to become your favorite kitchen tool.
For deeper dough science understanding, explore Serious Eats’ comprehensive bread science articles and Breadtopia’s extensive sourdough and yeast bread resources. These authoritative sources provide additional techniques and troubleshooting guidance for advancing your bread baking journey.


