
Juicy Thin Pork Chops? Family Favorite Recipe That Actually Works
Thin pork chops have a reputation for being dry and disappointing, but that doesn’t have to be your reality. With the right technique, temperature control, and a few strategic flavor additions, you can create incredibly juicy thin cut pork chop recipes that your entire family will request again and again. The secret lies in understanding how quickly thin meat cooks and respecting the science behind protein moisture retention.
Most home cooks overcook thin pork chops because they apply the same timing rules used for thicker cuts. A thin pork chop can go from perfectly cooked to rubbery in mere seconds. This recipe uses a combination of brining, proper searing, and precise internal temperature monitoring to ensure every bite delivers that coveted juicy tenderness. Whether you’re cooking weeknight dinners or preparing something special for guests, this approach will transform your thin pork chop game entirely.

Why Thin Pork Chops Deserve Your Attention
Thin pork chops, typically cut between one-quarter and one-half inch thick, offer several advantages over their thicker counterparts. They cook remarkably fast, making them ideal for busy weeknight meals when you need dinner on the table in under thirty minutes. This speed doesn’t mean sacrificing quality or flavor when you understand the proper techniques.
The real magic of thin pork chops lies in their ability to develop a beautiful, flavorful crust while maintaining a tender, juicy interior. Because they’re thin, they heat through evenly without requiring long cooking times that would dry out the meat. This actually makes them easier to cook properly than thicker cuts, provided you avoid the common pitfalls.
Additionally, thin pork chops are more economical than thicker cuts while still delivering excellent protein content. They’re perfect for summer potluck recipes or casual family dinners. You’ll find they absorb marinades and brines more effectively due to their increased surface-area-to-volume ratio, meaning more flavor throughout the meat.
Essential Ingredients and Equipment
For the Brine:
- 4 cups water
- 1/4 cup kosher salt
- 1/4 cup brown sugar
- 2 bay leaves
- 1 teaspoon black peppercorns
- 4 garlic cloves, smashed
- 2 sprigs fresh thyme
For Cooking:
- 4 thin-cut pork chops (about 1/2 inch thick)
- 2 tablespoons vegetable oil or butter
- 1 teaspoon kosher salt
- 1/2 teaspoon freshly ground black pepper
- 1/2 teaspoon garlic powder
- 1/2 teaspoon smoked paprika (optional but recommended)
Equipment You’ll Need:
- Large bowl or zip-top bag for brining
- Instant-read meat thermometer (absolutely essential)
- 12-inch skillet, preferably cast iron or stainless steel
- Tongs for turning meat
- Paper towels for drying
- Cutting board for resting
The meat thermometer is non-negotiable for success. It removes all guesswork and prevents overcooking, which is the primary culprit behind dry pork chops. Serious Eats has excellent resources on proper meat temperature monitoring.
The Brining Process That Changes Everything
Brining is the foundational technique that ensures your thin pork chops stay juicy. This process works through osmosis, allowing the meat to retain moisture during cooking. Don’t skip this step if you want restaurant-quality results at home.
Making Your Brine:
- Combine 4 cups water with 1/4 cup kosher salt in a large pot. Stir until the salt completely dissolves.
- Add 1/4 cup brown sugar, 2 bay leaves, 1 teaspoon black peppercorns, 4 smashed garlic cloves, and 2 sprigs fresh thyme.
- Bring the mixture to a boil, then remove from heat and let cool completely to room temperature.
- Once cooled, refrigerate the brine until it’s cold before submerging your pork chops.
Brining Your Pork Chops:
- Place your 4 thin pork chops in a large zip-top bag or bowl.
- Pour the cold brine over the meat, ensuring complete submersion.
- Refrigerate for 4 to 8 hours. Don’t brine longer than 12 hours, as the meat can become overly salty and mushy.
- Remove pork chops from the brine and pat them completely dry with paper towels. This step is crucial for achieving a proper sear.
- Let the dried pork chops sit at room temperature for 15-20 minutes before cooking.
The combination of salt and sugar in the brine works synergistically. Salt breaks down proteins, allowing them to retain moisture, while sugar adds subtle flavor and aids in browning. This is the same technique used by professional chefs for keto chicken recipes and other lean proteins.
Step-by-Step Cooking Technique
Preparation:
Pat your brined pork chops completely dry with paper towels. Any residual moisture will create steam instead of a proper sear. Season both sides generously with kosher salt, freshly ground black pepper, garlic powder, and smoked paprika if using. The paprika adds incredible depth without overpowering the natural pork flavor.
Getting Your Skillet Ready:
Heat your skillet over medium-high heat for 2-3 minutes. You want it hot enough that a drop of water sizzles immediately. Add 2 tablespoons of vegetable oil or butter. If using butter, wait until the foam subsides before adding your pork chops. The skillet temperature is critical—too hot and the outside burns before the inside cooks; too cool and you won’t develop the flavorful crust.
Searing Your Pork Chops:
- Once the oil shimmers or butter foams, carefully place your pork chops in the skillet. You should hear an immediate, satisfying sizzle.
- Resist the urge to move them. Let them cook undisturbed for 2-3 minutes, developing a golden-brown crust on the first side.
- Flip each chop carefully using tongs. Avoid piercing the meat with a fork, as this releases precious juices.
- Cook the second side for another 2-3 minutes. The total cooking time for thin pork chops is typically 4-6 minutes from start to finish.
Temperature Check:
This is where your instant-read thermometer becomes invaluable. Insert it horizontally into the thickest part of the pork chop without touching bone. Modern food safety guidelines recommend cooking pork to an internal temperature of 145°F (63°C), followed by a 3-minute rest. This temperature is significantly lower than the old recommendation of 160°F, and it results in noticeably juicier meat.
Remove your pork chops from the skillet when they reach 140-142°F. They’ll continue cooking during the resting period, reaching the safe 145°F temperature while retaining maximum juiciness.
Resting Period:
Place your cooked pork chops on a cutting board and tent them loosely with aluminum foil. Let them rest for at least 3 minutes. During this time, the residual heat finishes cooking the meat, and the muscle fibers relax, reabsorbing the juices. This resting period is absolutely crucial—skipping it means your carefully cooked juices run all over the plate instead of staying in the meat.
Flavor Variations and Pairing Ideas
Once you master the basic technique, thin cut pork chop recipes become incredibly versatile. Here are several flavor profiles that work beautifully:
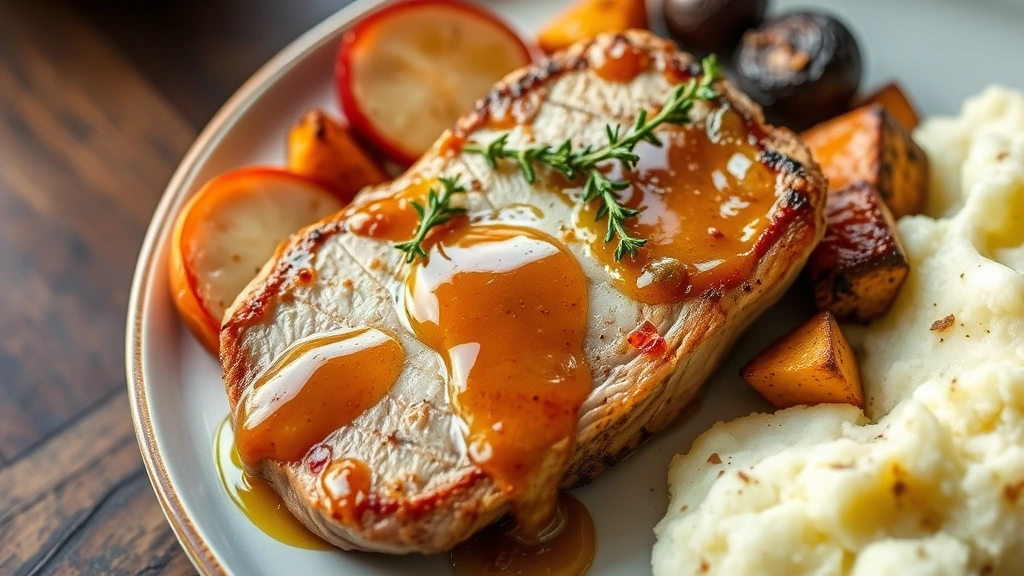
Apple-Cider Glaze:
After removing your pork chops, add 1/2 cup apple cider and 2 tablespoons butter to the hot skillet. Scrape up the browned bits, add a splash of Dijon mustard and fresh thyme, and simmer for 2 minutes. Drizzle over your rested pork chops for a classic pairing that complements the meat’s natural sweetness.
Asian-Inspired Marinade:
Create a marinade with 3 tablespoons soy sauce, 1 tablespoon rice vinegar, 1 tablespoon honey, 2 minced garlic cloves, and 1 teaspoon grated ginger. Brine your pork chops for 2-4 hours in this mixture instead of the traditional brine, then proceed with the cooking technique. Finish with a sprinkle of sesame seeds and sliced green onions.
Mediterranean Herb Crust:
Mix fresh rosemary, oregano, and thyme with minced garlic and olive oil. Rub this mixture onto your pork chops after patting them dry. The herbs create an aromatic crust while cooking. Serve alongside roasted vegetables or with a fresh lemon squeeze.
Balsamic and Fig:
Prepare a reduction by simmering 1/4 cup balsamic vinegar, 2 tablespoons fig jam, and a pinch of black pepper for 2-3 minutes. Drizzle this luxurious sauce over your rested pork chops. This pairing works exceptionally well for entertaining alongside seafood recipes or at upscale dinner parties.
These variations demonstrate that thin pork chops aren’t limited to simple preparations. They’re a canvas for creative flavor combinations while remaining quick and accessible for everyday cooking.
Common Mistakes and How to Avoid Them
Overcooking:
This is the most common error. Remember that pork cooks quickly at high heat. Use your thermometer religiously. Remove thin pork chops at 140-142°F and trust the carryover cooking during rest. Even 3-4 degrees of overcooking noticeably dries out thin meat.
Skipping the Brine:
Some home cooks attempt to save time by skipping the brining step. This invariably results in drier meat. Brining takes minimal active time—you’re primarily waiting. The moisture retention benefit is absolutely worth the planning ahead.
Wet Meat in the Skillet:
If your pork chops aren’t thoroughly dried after brining, they’ll steam instead of sear. Steaming produces pale, flavorless meat. Always pat them completely dry with paper towels and let them sit at room temperature briefly.
Wrong Skillet Temperature:
A skillet that’s not hot enough won’t develop a crust; one that’s too hot will burn the outside while the inside remains undercooked. Medium-high heat is the sweet spot for thin pork chops. You should hear a satisfying sizzle when the meat hits the pan.
Skipping the Rest:
Cutting into pork chops immediately after cooking releases all the juices onto the plate. Those juices contain tremendous flavor. Resting for just 3 minutes makes a remarkable difference in the final eating experience.
Using Old Spices:
Stale garlic powder and paprika won’t add the flavor impact you’re seeking. Check your spice cabinet’s dates and replace anything older than a year. Fresh spices elevate thin pork chop recipes from good to exceptional.
Understanding these common pitfalls prevents frustration and ensures consistent results. Every mistake teaches you something about the cooking process, making you a more confident cook.
For additional cooking technique guidance, consult resources from culinary experts who specialize in meat preparation. Check out Fresh Plate Daily Blog for more recipe inspiration and cooking tips that will expand your culinary repertoire.
FAQ
Can I use frozen thin pork chops?
Yes, but thaw them completely in the refrigerator before brining. Frozen meat won’t brine effectively and won’t cook evenly. Plan ahead and move your pork chops to the refrigerator 24 hours before cooking.
What’s the difference between brining and marinating?
Brining uses salt and sugar in water to change the meat’s protein structure, allowing moisture retention. Marinating adds flavor but doesn’t significantly impact moisture. For juicy results, brining is superior for lean proteins like thin pork chops.
Can I brine thin pork chops for longer than 8 hours?
Brining beyond 12 hours can make the meat mushy and overly salty. The optimal window is 4-8 hours for thin pork chops, which allows adequate moisture absorption without texture degradation.
What temperature should thin pork chops reach?
The USDA recommends 145°F (63°C) as the safe internal temperature. This is lower than older recommendations and results in juicier, more tender meat. Always use an instant-read thermometer to verify doneness.
How do I know when pork chops are done without a thermometer?
While not ideal, you can use the touch method—comparing the firmness of the meat to the fleshy area between your thumb and forefinger. However, a thermometer is inexpensive insurance against overcooking. Invest in one for consistent results.
Can I make this recipe with thick pork chops?
Absolutely. Increase brining time to 8-12 hours and cooking time to 8-12 minutes, checking temperature frequently. Thicker cuts benefit from lower heat to prevent burning the exterior before cooking the interior.
What side dishes pair well with thin pork chops?
Roasted vegetables, mashed potatoes, rice pilaf, and fresh salads all complement thin pork chops beautifully. Acidic sides like vinegar-based slaws or citrus preparations brighten the rich pork flavor.
Can I prepare the brine ahead of time?
Yes, make your brine up to 3 days in advance. Store it in the refrigerator in a sealed container. This makes meal planning easier—you can brine your pork chops whenever convenient during a 3-day window.


