
Egg Custard Pie Delight: Grandma’s Classic Recipe
There’s something truly magical about a homemade egg custard pie that takes you straight back to your grandmother’s kitchen. The silky, creamy filling combined with a buttery, golden crust creates a dessert that’s both elegant and comforting. This timeless treat has graced dinner tables and holiday celebrations for generations, and it’s easier to make than you might think. Whether you’re a seasoned baker or someone who’s just beginning to explore the world of pie-making, this classic egg custard pie recipe will become a treasured favorite in your collection.
The beauty of an egg custard pie lies in its simplicity and the quality of its ingredients. With just eggs, milk, sugar, butter, and a few essential seasonings, you can create a dessert that tastes like it took hours to prepare. The custard bakes directly in the crust, creating a tender, almost soufflé-like texture that melts on your tongue. Unlike many elaborate desserts, this pie requires minimal equipment and straightforward techniques, making it perfect for both weeknight dinners and special occasions.
Essential Ingredients for Perfect Custard
The foundation of an exceptional egg custard pie starts with quality ingredients. You’ll need one unbaked 9-inch pie crust (either homemade or store-bought), four large eggs, two cups of whole milk, one-third cup of granulated sugar, two tablespoons of unsalted butter (melted), one teaspoon of vanilla extract, and one-quarter teaspoon of nutmeg. Some traditional recipes also include a pinch of salt to enhance the overall flavor profile.
When selecting your ingredients, opt for fresh eggs with intact shells and milk that’s within its expiration date. The quality of these components directly impacts the texture and taste of your final pie. If you’re making your own crust from scratch, consider checking out our guide on quick breakfast recipes which includes techniques applicable to pastry preparation.
For the crust, a traditional pie shell works beautifully. If you prefer a pre-made option, thaw it according to package directions before filling. The pie crust serves as the edible vessel for your custard, so ensuring it’s properly prepared is crucial for success. Room temperature ingredients blend more smoothly, creating a more homogeneous custard filling without lumps or texture issues.

Preparing Your Pie Crust
Before you begin making the custard filling, your pie crust needs proper preparation. If using a frozen crust, remove it from the freezer about 15 minutes before you plan to fill it. This allows the crust to soften slightly, making it easier to work with without causing cracks. If you’re using a homemade crust, ensure it’s rolled out to fit your 9-inch pie dish perfectly, with slight overhang for crimping the edges.
Place your prepared pie crust in a 9-inch pie dish, pressing it gently against the bottom and sides. Crimp the edges decoratively using your thumb and forefinger or a fork to create a sealed border. This prevents the custard from seeping out during baking and creates an attractive presentation. Some bakers prefer to partially pre-bake (or “blind bake”) their crusts for 5-7 minutes at 375°F to prevent a soggy bottom, though this step is optional for custard pies since the filling isn’t overly wet.
For those interested in exploring more traditional baking techniques, our healthy crockpot recipes section also features dishes that benefit from proper preparation methods. Position your pie dish on a baking sheet for easy handling and to catch any drips during the baking process.
Creating the Silky Custard Filling
The custard filling is where the magic happens. In a large mixing bowl, crack your four eggs and whisk them together until well combined. Add the melted butter and vanilla extract, whisking until fully incorporated. The butter adds richness and helps create that tender, delicate texture custard pies are famous for.
In a separate bowl, combine the granulated sugar, salt, and nutmeg. Gradually pour this mixture into the egg mixture while whisking constantly to avoid creating lumps. The sugar should dissolve completely, and the mixture should appear smooth and pale yellow. Slowly add the milk while continuing to whisk gently. The key is avoiding the incorporation of excess air, which can lead to a foamy top or uneven baking.
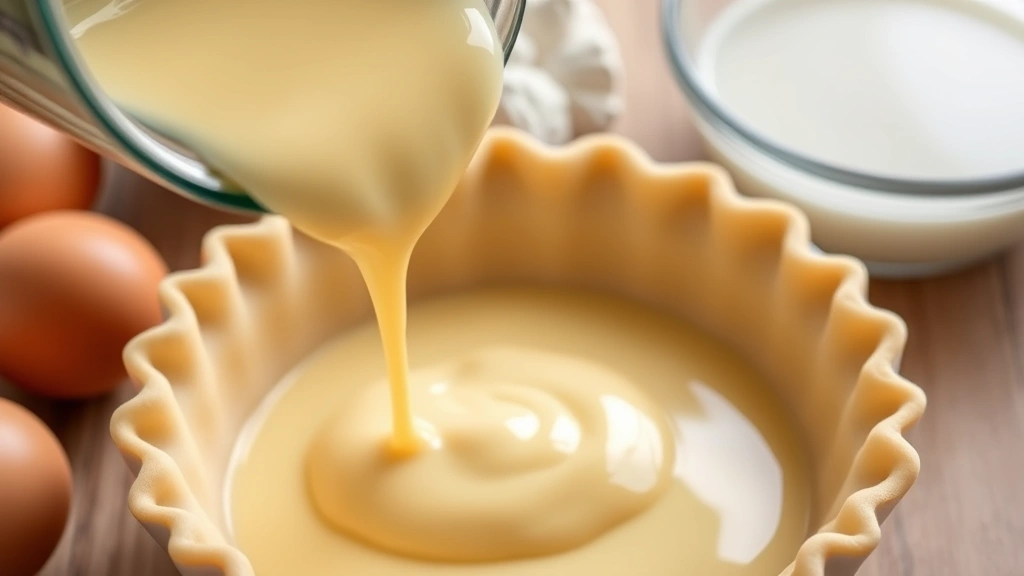
Once your custard mixture is complete, strain it through a fine-mesh sieve into another bowl. This crucial step removes any small bits of cooked egg white that may have formed during whisking and creates an incredibly smooth, silky texture. Pour the strained custard directly into your prepared pie crust, filling it to about three-quarters full. If you have excess custard, you can bake it separately in a small ramekin as a bonus treat.
The custard will be quite liquid at this stage, which is exactly what you want. During baking, the eggs will set and create that characteristic creamy texture. This is fundamentally different from other desserts like those in our beef stew recipe section, where cooking times and temperatures differ dramatically.
The Baking Process and Temperature Guide
Preheat your oven to 350°F (175°C). This moderate temperature is essential for even cooking without over-browning the crust or creating a rubbery custard. Place your filled pie on the prepared baking sheet and carefully transfer it to the oven. Bake for 40-50 minutes, until the custard is set but still slightly jiggly in the center when gently shaken.
The pie is done when a knife inserted about 1 inch from the edge comes out clean, but the very center should still wobble slightly. This residual heat will continue cooking the center as it cools, resulting in a perfectly creamy custard rather than an overcooked, rubbery filling. If the crust edges are browning too quickly, tent the pie with aluminum foil during the final 15-20 minutes of baking.
Different ovens vary in temperature accuracy, so start checking your pie around the 35-minute mark. The custard will puff up slightly during baking and may develop small cracks on the surface, which is completely normal and part of its charm. These imperfections add to the homemade appeal of this classic dessert.
Cooling, Chilling, and Serving Your Pie
Once your pie has reached the perfect doneness, remove it from the oven and place it on a wire cooling rack. Allow it to cool to room temperature for about 30 minutes. During this time, the custard continues to set and firm up. After reaching room temperature, transfer your pie to the refrigerator and chill for at least 2-3 hours, preferably overnight.
The chilling period is essential for several reasons. It allows the custard to fully set and develop its characteristic creamy texture, makes the pie easier to slice cleanly, and enhances the overall flavor as the ingredients meld together. Chilled custard pie is absolutely divine, though some people prefer serving it at room temperature for a slightly softer, more custard-like consistency.
When ready to serve, slice the pie into wedges using a sharp knife dipped in hot water and wiped clean between cuts. This prevents the filling from sticking to the knife and ensures clean, attractive slices. Serve plain or with a dollop of freshly whipped cream, a scoop of vanilla ice cream, or a sprinkle of additional nutmeg. For breakfast lovers, this pie pairs wonderfully with coffee and makes an excellent addition to our collection of quick breakfast recipes.
Pro Tips and Troubleshooting Guide
Achieving custard pie perfection requires attention to detail and understanding common pitfalls. If your pie develops a soggy bottom crust, try pre-baking the crust for 5-7 minutes before adding the custard filling. This creates a moisture barrier that keeps the crust crispy. Alternatively, ensure your oven rack is positioned in the lower-middle section, allowing the bottom to bake thoroughly.
If your custard filling appears curdled or grainy, the oven temperature was likely too high or the pie baked too long. Remember that the custard continues cooking after removal from the oven due to residual heat. It’s better to slightly underbake than overbake. If your pie isn’t setting properly, ensure you’re using the correct oven temperature and that your eggs are fresh.
For a nuttier flavor profile, try toasting your nutmeg in a dry skillet for 30 seconds before grating it fresh over the custard. This intensifies its aromatic qualities. If you’re making this pie for company, prepare it the day before to allow maximum chilling time and to reduce last-minute stress. Store your finished pie covered in the refrigerator for up to 3 days.
When combining ingredients, ensure everything is properly whisked but not over-whisked, as excessive air incorporation can lead to a fluffy, soufflé-like top that deflates as it cools. Some bakers prefer using an immersion blender for creating a perfectly smooth custard mixture without introducing air bubbles.
Popular Variations and Flavor Twists
While the classic egg custard pie recipe is perfection in its simplicity, creative variations can elevate this traditional dessert. A bourbon custard pie incorporates 2 tablespoons of bourbon whiskey into the custard mixture, adding depth and sophistication. For a coconut custard pie, replace half the milk with coconut milk and add one-half cup of shredded coconut to the filling.
A spiced custard pie variation includes cinnamon, allspice, and cloves alongside the nutmeg for warmth and complexity. For those seeking lighter options, a healthier custard pie can be made by substituting half the whole milk with unsweetened almond or oat milk and reducing sugar to one-quarter cup, though this will slightly alter the texture and sweetness.
Consider a browned butter custard pie for enhanced nuttiness. Brown your butter in a saucepan over medium heat until it develops a golden color and nutty aroma, then cool slightly before adding to your custard mixture. Some traditional recipes incorporate a meringue topping made from egg whites, though this requires additional baking time and skill to prevent weeping.
For breakfast enthusiasts, this custard pie concept works beautifully in savory applications, though you might explore our fingerling potatoes recipe or chicken and potatoes recipe for savory custard-based dishes. You could also try a maple custard pie by substituting one-quarter cup of the sugar with pure maple syrup for seasonal flair.
Those interested in exploring modern cooking techniques might consider how Instant Pot chicken breast recipes apply precision cooking methods, though traditional oven-baking remains ideal for custard pies.
FAQ
Can I make egg custard pie ahead of time?
Absolutely! Egg custard pie is an excellent make-ahead dessert. Prepare it completely and store it covered in the refrigerator for up to 3 days. You can also freeze unbaked custard pies for up to 1 month. If baking from frozen, add 10-15 minutes to the baking time.
Why is my custard pie watery after cooling?
This typically indicates underbaking. The custard needs sufficient time for the eggs to set properly. Ensure you’re baking at the correct 350°F temperature and checking doneness carefully. A slight jiggle in the very center is acceptable, but the majority should be set.
Can I use a store-bought crust?
Yes, store-bought pie crusts work wonderfully for this recipe. Both refrigerated and frozen versions are acceptable. Simply thaw according to package directions and prepare as directed in the recipe.
What’s the best way to prevent a soggy crust?
Pre-bake your pie crust for 5-7 minutes at 375°F before adding the custard filling. This creates a protective barrier and ensures a crispy bottom crust. Alternatively, position your oven rack in the lower-middle section for better bottom heat distribution.
Can I substitute milk with cream?
You can use half-and-half or light cream instead of whole milk for a richer custard. However, using heavy cream exclusively may result in an overly thick filling. A 1:1 ratio of milk to cream works well as a compromise.
How do I know when the custard is perfectly done?
Insert a knife about 1 inch from the edge. It should come out clean. The very center should still jiggle slightly when gently shaken. This slight underbaking accounts for carryover cooking as the pie cools.
Can I reduce the sugar content?
You can reduce sugar to one-quarter cup, though this will noticeably decrease sweetness. The sugar also affects texture and browning, so reducing it too much may impact results. Consider adding vanilla extract or other flavorings to compensate.
Is this pie suitable for freezing?
Yes, baked and cooled custard pie freezes well for up to 1 month. Wrap it tightly in plastic wrap and aluminum foil. Thaw in the refrigerator overnight before serving. Quality may slightly diminish, but it remains delicious.
What’s the difference between custard pie and cream pie?
Custard pie bakes with the custard filling directly in the crust, while cream pie typically has a pre-baked crust filled with a separately prepared custard or cream filling. Custard pie is simpler and more traditional.
Can I make mini custard pies in muffin tins?
Yes! Use small pie crust squares or circles in a muffin tin. Reduce baking time to 15-20 minutes. This variation is perfect for portion control and makes an elegant individual dessert presentation.


