Spice Up Dishes: Best Chili Seasoning Recipe
There’s nothing quite like the warmth and complexity of a homemade chili seasoning recipe that transforms ordinary dishes into something extraordinary. Store-bought seasoning blends often contain fillers, preservatives, and excessive sodium that can overshadow the natural flavors of your ingredients. By crafting your own chili seasoning at home, you gain complete control over the blend’s intensity, heat level, and flavor profile—ensuring every dish tastes exactly how you want it.
This comprehensive guide walks you through creating the perfect chili seasoning blend from scratch. Whether you’re preparing a classic chili con carne, seasoning roasted vegetables, or adding depth to soups and stews, this versatile mixture becomes your secret weapon in the kitchen. We’ll explore the essential spices, optimal proportions, storage techniques, and creative applications that will elevate your cooking to restaurant-quality results.
The beauty of making your own chili seasoning lies in its flexibility and freshness. Unlike pre-packaged options sitting on shelves for months, your homemade blend maintains vibrant flavors and aromatic qualities that instantly enhance any dish. Let’s dive into the world of spice blending and discover how simple it is to create a seasoning that becomes a staple in your culinary repertoire.
Essential Spices for Chili Seasoning
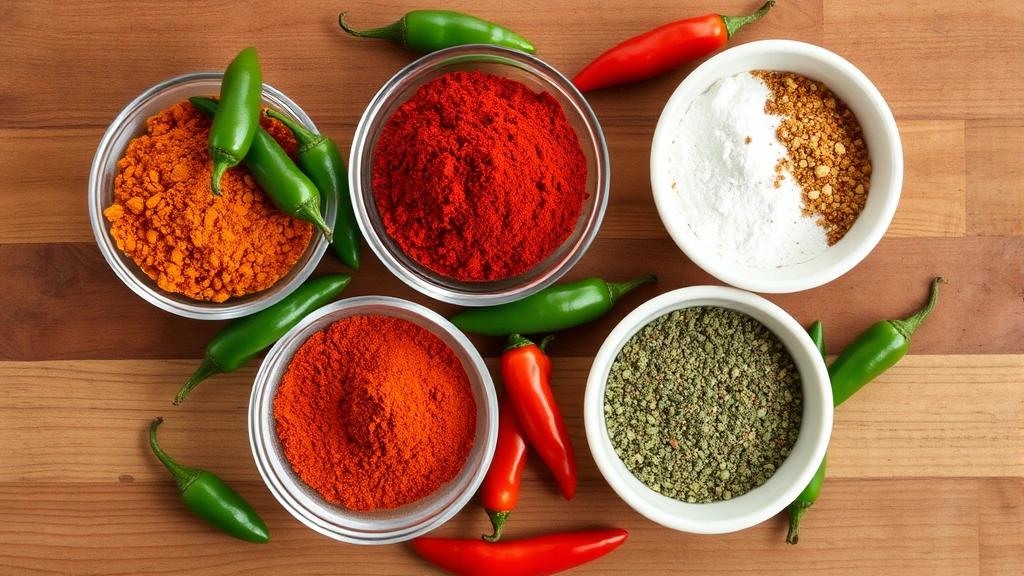
Understanding each component of your chili seasoning blend is crucial for achieving the perfect balance. The foundation begins with chili powder, which provides the characteristic red color and mild heat. Quality chili powder comes from dried chili peppers and forms the backbone of any respectable chili seasoning recipe. Look for deep red varieties that smell vibrant and fresh rather than dusty or muted.
Cumin brings an earthy, warm undertone that deepens the complexity of your blend. This spice has been used in culinary traditions across Mexico, India, and the Middle East for centuries. Ground cumin releases its essential oils more readily than whole seeds, making it ideal for seasoning blends. Paprika adds sweetness and smokiness depending on whether you choose sweet, hot, or smoked varieties. Hungarian paprika and Spanish smoked paprika offer distinctly different flavor profiles worth exploring.
Garlic powder and onion powder contribute savory depth without adding moisture to your blend. These dehydrated aromatics dissolve seamlessly into dishes and provide umami-rich flavors that make people wonder what secret ingredient you’ve used. Oregano, preferably Mexican oregano for authentic chili seasoning, adds herbaceous notes and slight pepperiness. Mexican oregano differs from Mediterranean oregano in its more citrusy, less minty profile—a crucial distinction for this application.
Cayenne pepper controls the heat level of your blend. Even a small amount significantly increases spiciness, so add cautiously if you prefer milder seasoning. Black pepper provides sharp bite and complexity, while salt acts as a flavor amplifier and preservative. Some blends include cinnamon in small quantities for subtle warmth and sweetness, particularly effective in Southwestern-inspired chili seasonings. Coriander adds citrusy notes that brighten the overall profile without overwhelming other spices.
Homemade Chili Seasoning Recipe
Ingredients for Basic Chili Seasoning (makes approximately 1/3 cup):
- 3 tablespoons chili powder
- 2 tablespoons ground cumin
- 1 tablespoon paprika (sweet or smoked)
- 2 teaspoons garlic powder
- 2 teaspoons onion powder
- 1 teaspoon dried oregano (preferably Mexican)
- 1 teaspoon black pepper
- ½ teaspoon cayenne pepper (adjust to taste)
- ½ teaspoon ground coriander
- ¼ teaspoon ground cinnamon
- ½ teaspoon salt (or omit if using in salted dishes)
Instructions:
- Gather all your dried spices and measure them carefully into a small mixing bowl. Accuracy matters when creating seasoning blends, as small variations significantly impact the final flavor.
- Whisk all ingredients together thoroughly, ensuring even distribution of each spice. Pay particular attention to the cayenne pepper and cinnamon, which should be evenly dispersed to prevent hot or overly sweet pockets.
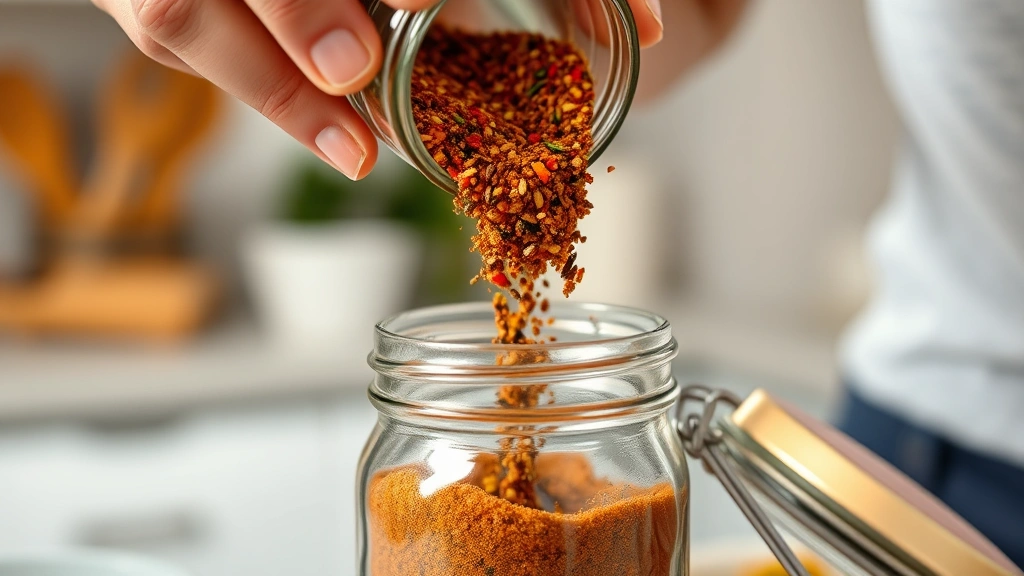
- Transfer the mixture to an airtight glass jar or container with a tight-fitting lid. Label the container with the date and contents for easy identification.
- Let the blend rest for 24-48 hours before using. This resting period allows the spices to meld and develop a more cohesive flavor profile.
- Give the jar a gentle shake before each use to redistribute any settled spices.
This basic recipe serves as your foundation, but don’t hesitate to adjust proportions based on personal preference. Those who enjoy heat should increase cayenne pepper gradually, testing as they go. Those preferring milder seasoning can reduce or eliminate cayenne entirely and use sweet paprika instead of smoked varieties.
Blending and Toasting Techniques
Elevating your chili seasoning recipe involves understanding how different preparation methods impact flavor intensity and complexity. Toasting whole spices before grinding them releases essential oils and deepens their aromatic qualities. If you have access to whole cumin seeds, coriander seeds, and dried oregano, consider toasting these components individually before grinding and combining.
To toast spices properly, place them in a dry skillet over medium heat for 1-2 minutes, stirring constantly. You’ll notice the aroma intensifying dramatically—this indicates the essential oils are activating. Remove from heat immediately when fragrant to prevent burning, which creates bitter, unpleasant flavors. Allow toasted spices to cool completely before grinding in a spice grinder or mortar and pestle.
For a more intense chili seasoning recipe, consider blooming your spices in oil before adding them to dishes. Heat a small amount of neutral oil in a pan and add your chili seasoning blend, stirring constantly for 30-60 seconds. This technique further activates the spices’ flavor compounds and allows them to disperse more evenly throughout your cooking liquid. The resulting infused oil can be drizzled over finished dishes or used as the base for sauces and marinades.
If you prefer a more textured seasoning with visible spice particles, use a mortar and pestle rather than a spice grinder. This method crushes spices rather than pulverizing them, maintaining some texture while still releasing flavors. Many chefs prefer this approach for chili seasoning, as the visible spice pieces add visual appeal and create interesting flavor bursts when eating.
Storage and Preservation Methods
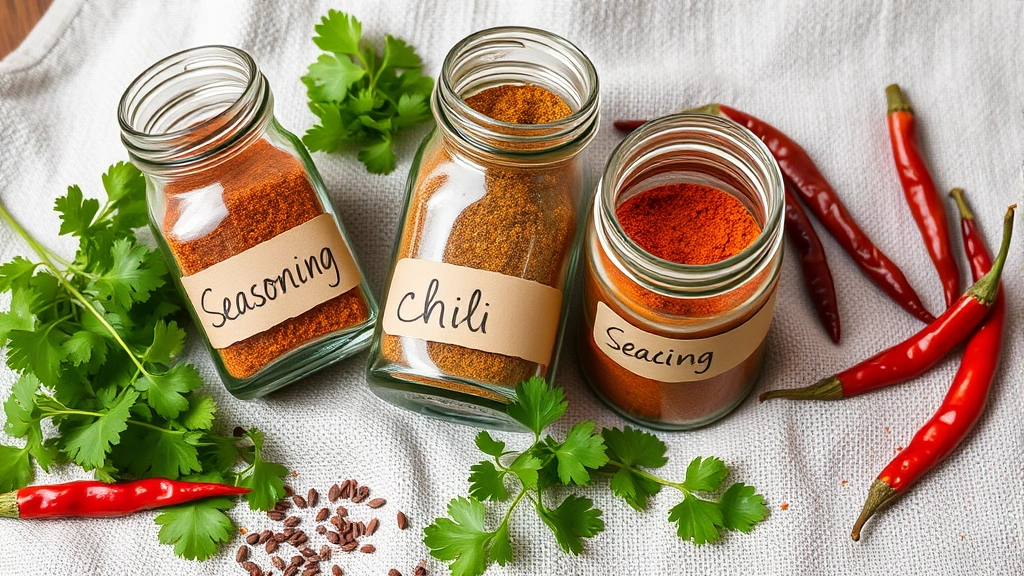
Proper storage ensures your chili seasoning recipe maintains peak freshness and flavor for as long as possible. Glass containers with airtight seals provide the best environment, protecting spices from light exposure, moisture, and air oxidation. Avoid plastic containers, which can absorb spice oils and odors, potentially affecting future uses. Dark glass jars work even better than clear ones, as they provide additional light protection.
Store your chili seasoning in a cool, dark, dry location away from direct sunlight, heat sources, and humidity. Kitchen cabinets away from the stove work well, though many home cooks find that spice racks near cooking areas expose seasonings to too much heat and steam. A pantry shelf or cool cupboard maintains optimal conditions for spice preservation. Learn more about preserving herbs and spices to extend shelf life even further.
Most homemade chili seasoning blends remain fresh and flavorful for 3-4 months when stored properly. After this period, the aromatic compounds begin degrading, resulting in muted, less vibrant flavors. Date your containers upon creation so you know exactly how long they’ve been stored. If you make large batches, consider freezing portions in airtight freezer bags, which can extend freshness for up to 6 months.
To test whether your chili seasoning has lost potency, open the container and smell deeply. Fresh seasoning should smell intensely aromatic and complex. If the aroma seems weak or dusty, it’s time to make a fresh batch. You can also taste a tiny pinch—fresh seasoning should have bold, clear flavors rather than muted or flat tastes.
Moisture is the enemy of dried spices. Never use a damp spoon to scoop seasoning, as this introduces water that promotes clumping and mold growth. Instead, pour the desired amount into a small dish before adding to recipes. This practice protects your entire batch from contamination. If your chili seasoning develops clumps, place the jar in a warm (not hot) oven for 5-10 minutes to dry it out, or add a few grains of uncooked rice to absorb excess moisture.
Creative Applications and Uses
Beyond traditional chili, your homemade seasoning recipe works beautifully across countless dishes. Roasted vegetables transform dramatically when tossed with olive oil and chili seasoning before roasting. Potatoes, bell peppers, zucchini, and carrots all benefit from this flavorful coating. The spices caramelize slightly during roasting, intensifying their flavors and creating irresistible crispy edges.
Seasoned ground meat for tacos, nachos, and taco salads relies on chili seasoning for authentic flavor. Brown your ground beef or turkey with diced onions, then add 2-3 tablespoons of chili seasoning per pound of meat along with a splash of water or broth. Simmer until the liquid reduces and the flavors meld into the meat. This approach yields superior results compared to store-bought taco seasoning packets.
Soups and stews gain incredible depth from chili seasoning additions. Bean soups, vegetable chowders, and tomato-based broths all benefit from a teaspoon or two of this versatile blend. Add seasoning early in the cooking process to allow flavors to develop fully. Start conservatively—you can always add more, but you cannot remove excess seasoning once incorporated.
Egg dishes become special with chili seasoning sprinkled over scrambled eggs, omelets, or breakfast burritos. The warm spices complement eggs’ mild flavor without overwhelming them. Popcorn transforms into an addictive snack when tossed with melted butter and chili seasoning. Roasted nuts coated in this blend make excellent party snacks or salad toppers.
Marinades and rubs for grilled meats benefit enormously from chili seasoning. Mix with oil, vinegar, and garlic to create a marinade for chicken, pork, or beef. For dry rubs, combine chili seasoning with brown sugar and salt to create a sweet-spicy coating that caramelizes beautifully on grilled proteins. Dips and spreads gain complexity from chili seasoning additions—stir into sour cream for a spicy chip dip, or mix with cream cheese for a flavorful appetizer spread.
Flavor Adjustments and Variations
The beauty of creating your own chili seasoning recipe lies in customization possibilities. For Southwestern-inspired versions, increase cinnamon to ½ teaspoon and add ¼ teaspoon ground cloves. This variation works beautifully in chili with chocolate or in Southwestern-style dishes. For Texas-style chili, reduce cumin slightly and increase chili powder, creating a more meat-forward, less complex blend.
For smoky variations, replace regular paprika entirely with smoked paprika for deeper, barbecue-like flavors. Add ¼ teaspoon liquid smoke if you want even more intensity. For spicy versions, increase cayenne pepper gradually, adding up to 1 full teaspoon for serious heat. You can also add ¼ teaspoon chipotle powder for smoky heat. For milder blends, eliminate cayenne pepper entirely and use only sweet paprika.
Herbal variations incorporate fresh or dried herbs into your blend. Add ½ teaspoon dried thyme, ½ teaspoon dried basil, or ¼ teaspoon dried rosemary for Mediterranean influences. For Indian-inspired versions, add ¼ teaspoon turmeric and increase coriander to 1 teaspoon. For Asian-influenced blends, add ¼ teaspoon ground ginger and ¼ teaspoon five-spice powder.
Keep detailed notes when experimenting with variations. Record which adjustments you made and how they affected the final flavor. This documentation helps you recreate successful variations and avoid repeating unsuccessful experiments. Over time, you’ll develop signature versions that become staples in your cooking.
Consider making several small batches with different flavor profiles rather than one large batch. Label each jar clearly with its variation name and date. This approach lets you choose the perfect seasoning for each dish while keeping your options fresh and preventing boredom with a single blend.
FAQ
Can I use fresh spices instead of dried for my chili seasoning recipe?
Fresh spices like garlic, onion, and oregano contain significant moisture that prevents them from blending properly into a dry seasoning mixture. Dried spices are essential for creating shelf-stable chili seasoning. However, you can certainly add fresh garlic, onions, and herbs directly to dishes during cooking for additional flavor layering.
How much chili seasoning should I use per serving?
Most recipes use ½ to 1 tablespoon of chili seasoning per pound of meat or per 4-6 servings of other dishes. Start conservatively and adjust based on your heat tolerance and flavor preferences. It’s easier to add more seasoning than to remove excess, so taste as you go.
Is my homemade chili seasoning spicier than store-bought versions?
Homemade chili seasoning is typically fresher and more flavorful than commercial blends, which means it tastes more intense. The spiciness level depends on your specific recipe and cayenne pepper amount. You control the heat level entirely, making it easy to adjust to your preferences.
Can I make a large batch and store it for months?
Yes, homemade chili seasoning stores well for 3-4 months in airtight containers kept in cool, dark locations. Some people freeze portions in freezer bags to extend freshness up to 6 months. Always store in glass containers with tight-fitting lids to prevent moisture absorption and oxidation.
What’s the difference between chili powder and chili seasoning?
Chili powder is a single spice made from dried chili peppers, while chili seasoning is a blend of multiple spices including chili powder, cumin, garlic, and others. Chili seasoning provides more complex, well-rounded flavors suitable for complete dishes, while chili powder is just one component.
Can I substitute ingredients in my chili seasoning recipe?
Absolutely. If you dislike certain spices, leave them out or replace them with alternatives you enjoy. If you’re out of Mexican oregano, Mediterranean oregano works in a pinch, though the flavor profile shifts slightly. Experimentation is encouraged—make the seasoning your own by adjusting proportions to match your palate.
Does chili seasoning go bad?
Chili seasoning doesn’t spoil like fresh foods, but it does lose potency over time. After 3-4 months, the aromatic compounds begin degrading, resulting in muted flavors. Check your seasoning’s aroma and taste before using older batches. If it smells weak or tastes flat, it’s time to make fresh.
Can I use this seasoning blend in non-chili dishes?
Yes, this versatile blend works wonderfully on roasted vegetables, seasoned meats, in soups, on popcorn, and in countless other applications. The specific spice combination complements many different cuisines and cooking styles. Experiment freely to discover your favorite uses beyond traditional chili.
Creating your own chili seasoning recipe empowers you to control every element of your cooking while saving money compared to purchasing individual spices separately. The investment in quality ingredients pays dividends through superior flavor, freshness, and versatility. Once you’ve experienced the difference homemade seasoning makes, you’ll never return to store-bought blends. Start with the basic recipe, adjust to suit your preferences, and enjoy the remarkable transformation this simple blend brings to your dishes. Your kitchen will smell amazing, and your food will taste restaurant-quality every single time. For more food preservation techniques, explore guides on making homemade preserves and reducing food waste. Consider consulting culinary resources and cooking technique guides for advanced spice blending methods and flavor science.


